The php.ini file is a special file for PHP. It is where you declare values to your PHP settings. The Synology NAS server is already configured with the standard settings for PHP which your website will use by default. Unless you need to change one or more settings, there is no need to create or modify a php. You can change settings in your PHP via Web Station in Script Language Settings (Default PHP) / Edit tab / Core. However, sometimes you will need to access the php.ini file directly without accessing Web Station. Today I will show you where to find the php.ini file on your Synology NAS without Web Station.
STEP 1
Please Support My work by Making a Donation.
STEP 2
Install File Browser using my step by step guide.
STEP 3
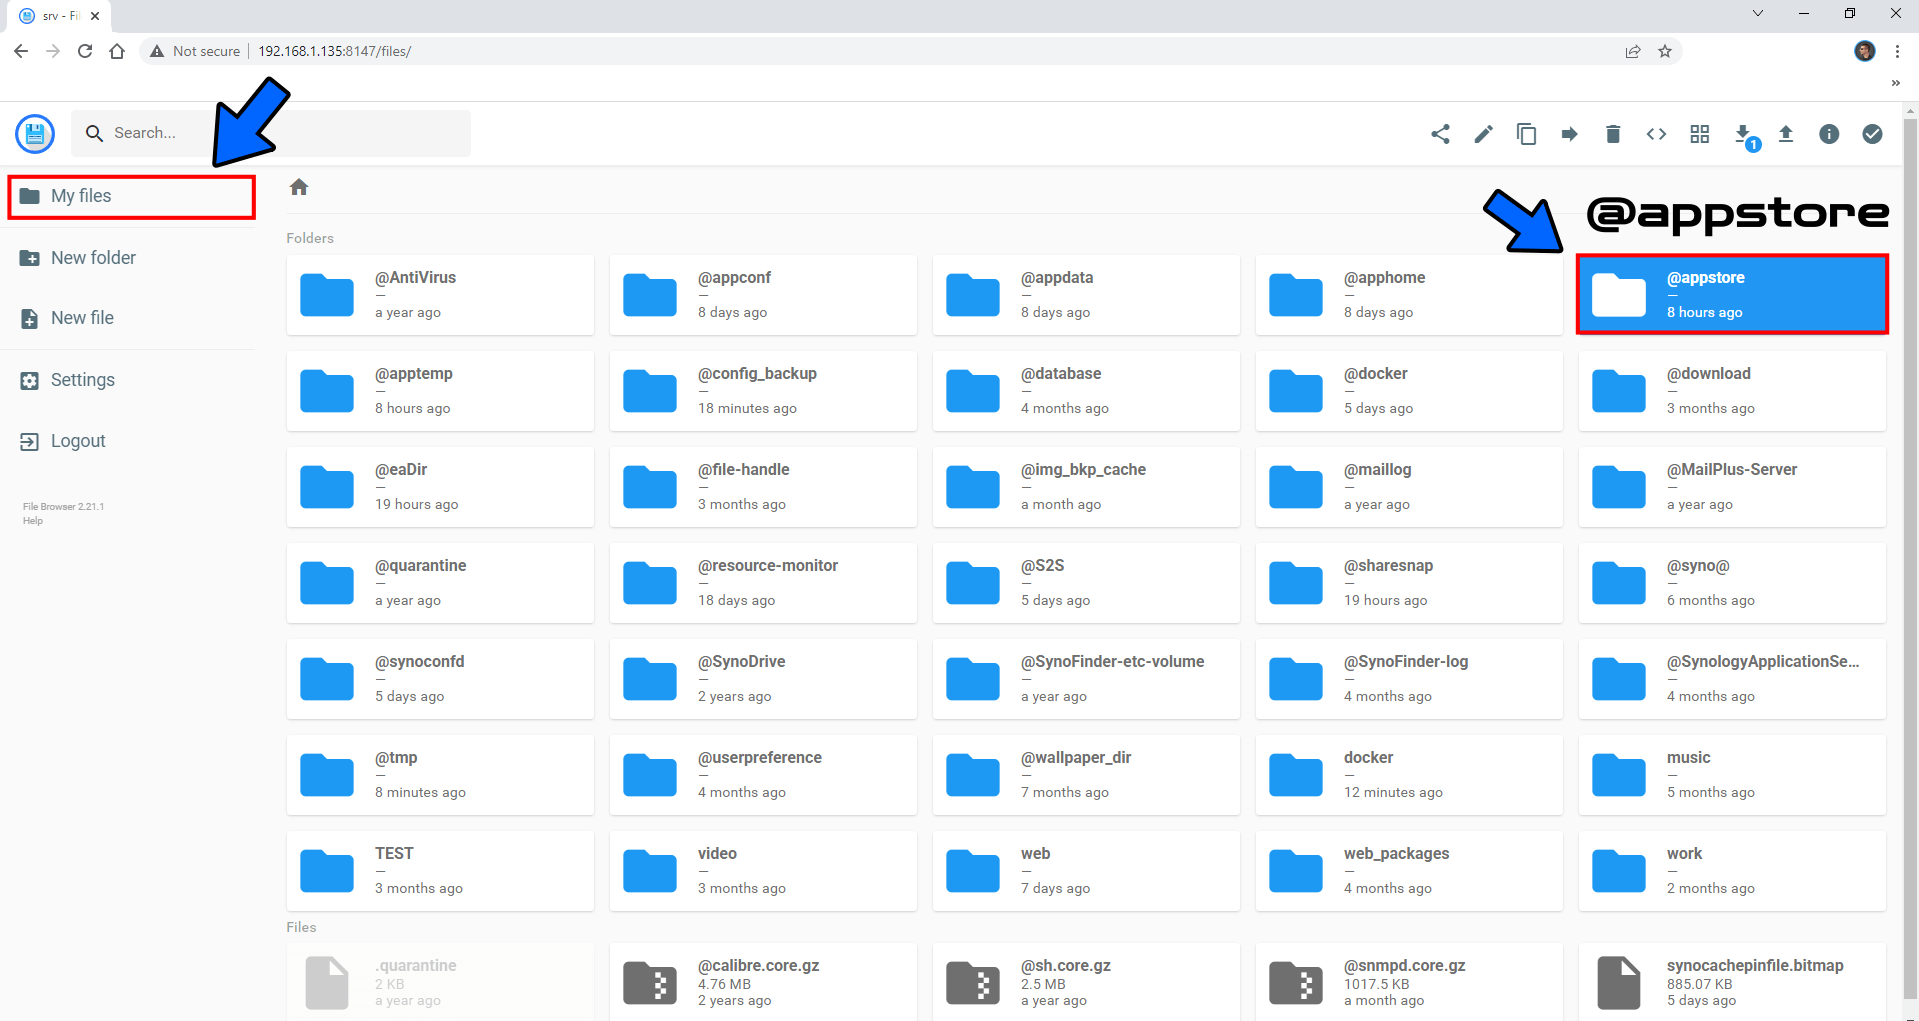
In File Browser click on the @appstore folder. Follow the instructions in the image below.
STEP 4
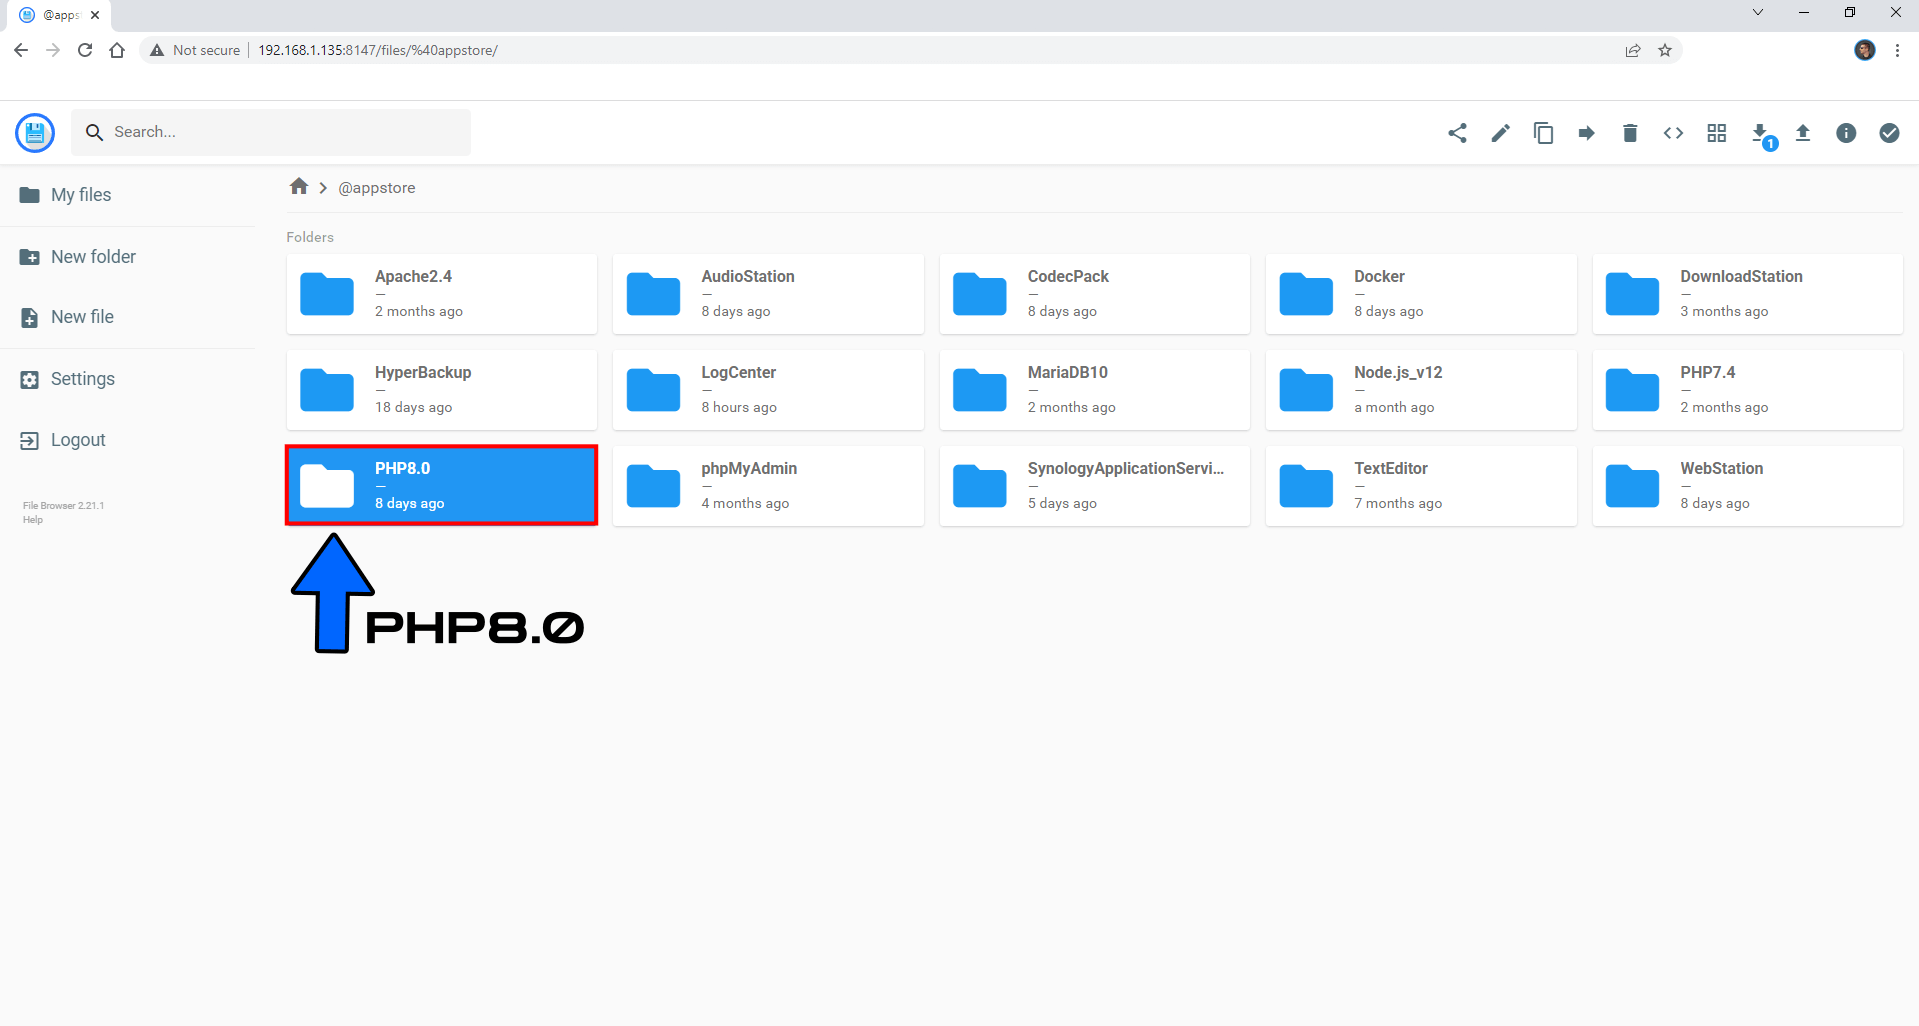
Click on the PHP8.0 folder. Follow the instructions in the image below.
STEP 5
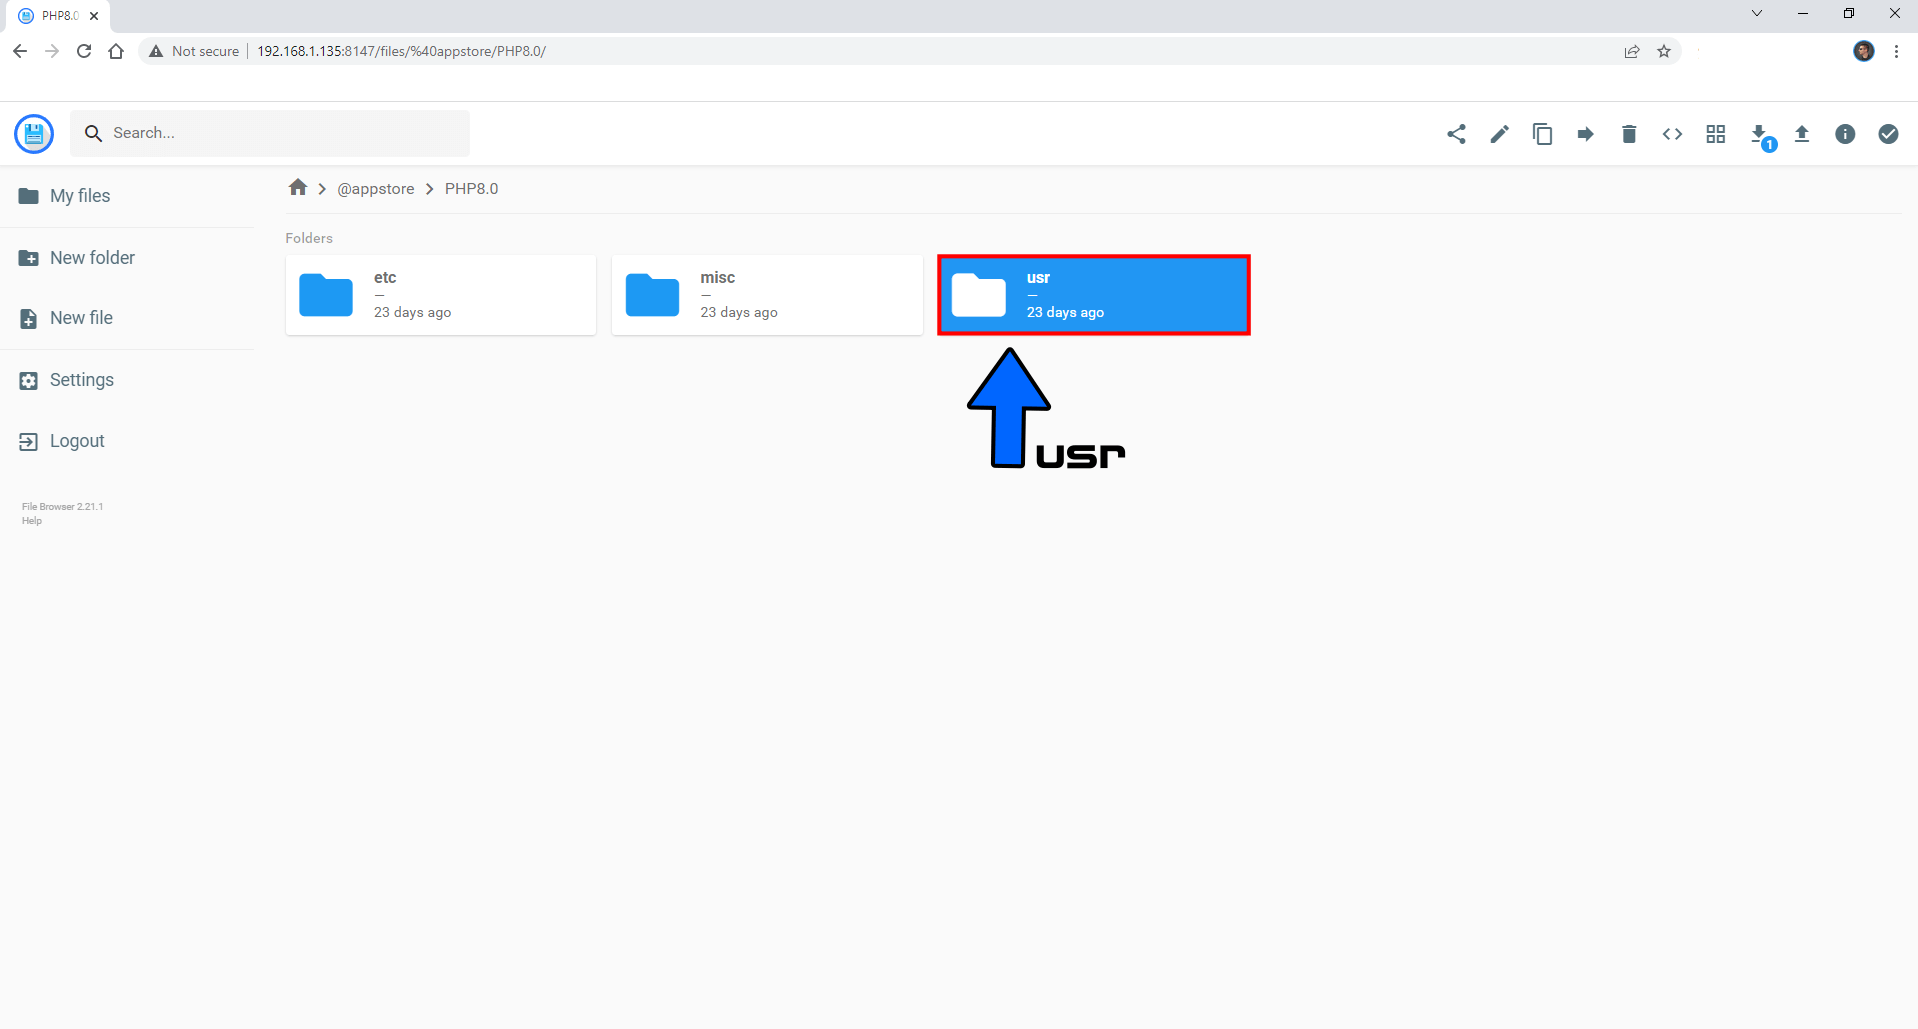
Click on the usr folder. Follow the instructions in the image below.
STEP 6
Click on the local folder. Follow the instructions in the image below.
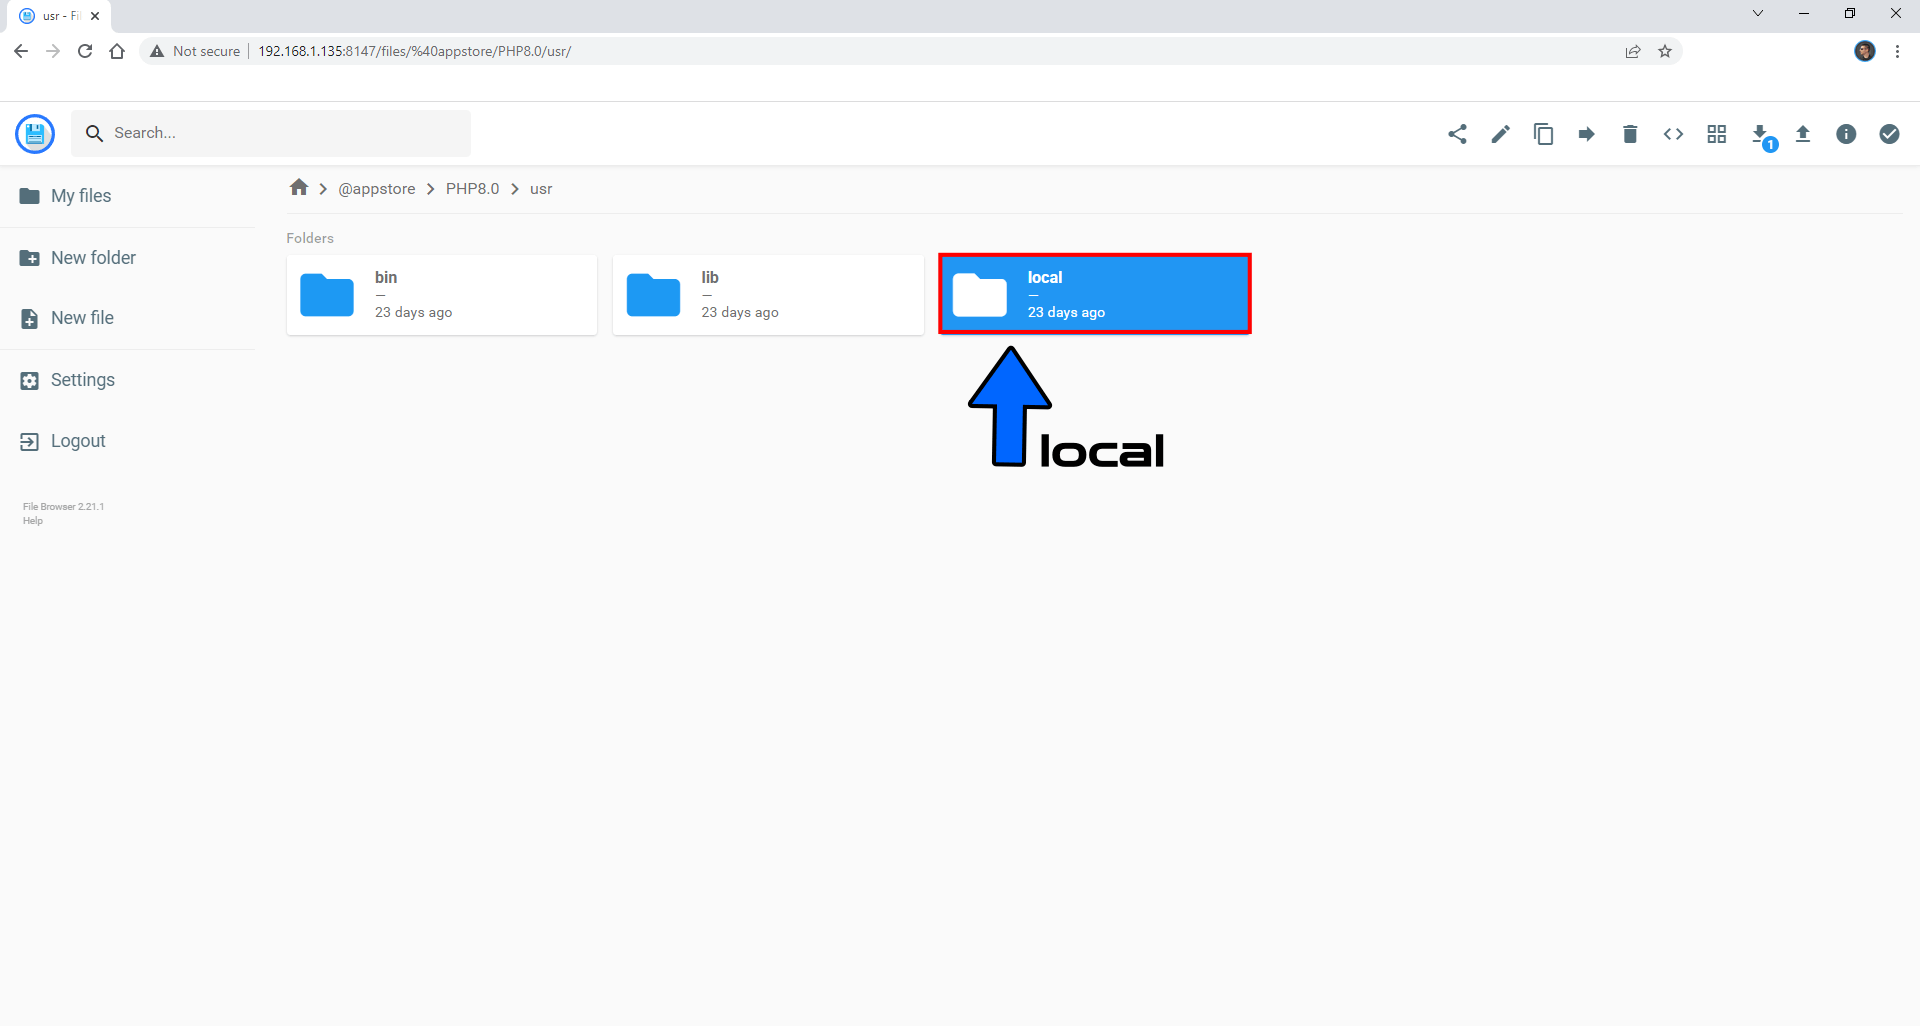
STEP 7
Click on the etc folder. Follow the instructions in the image below.
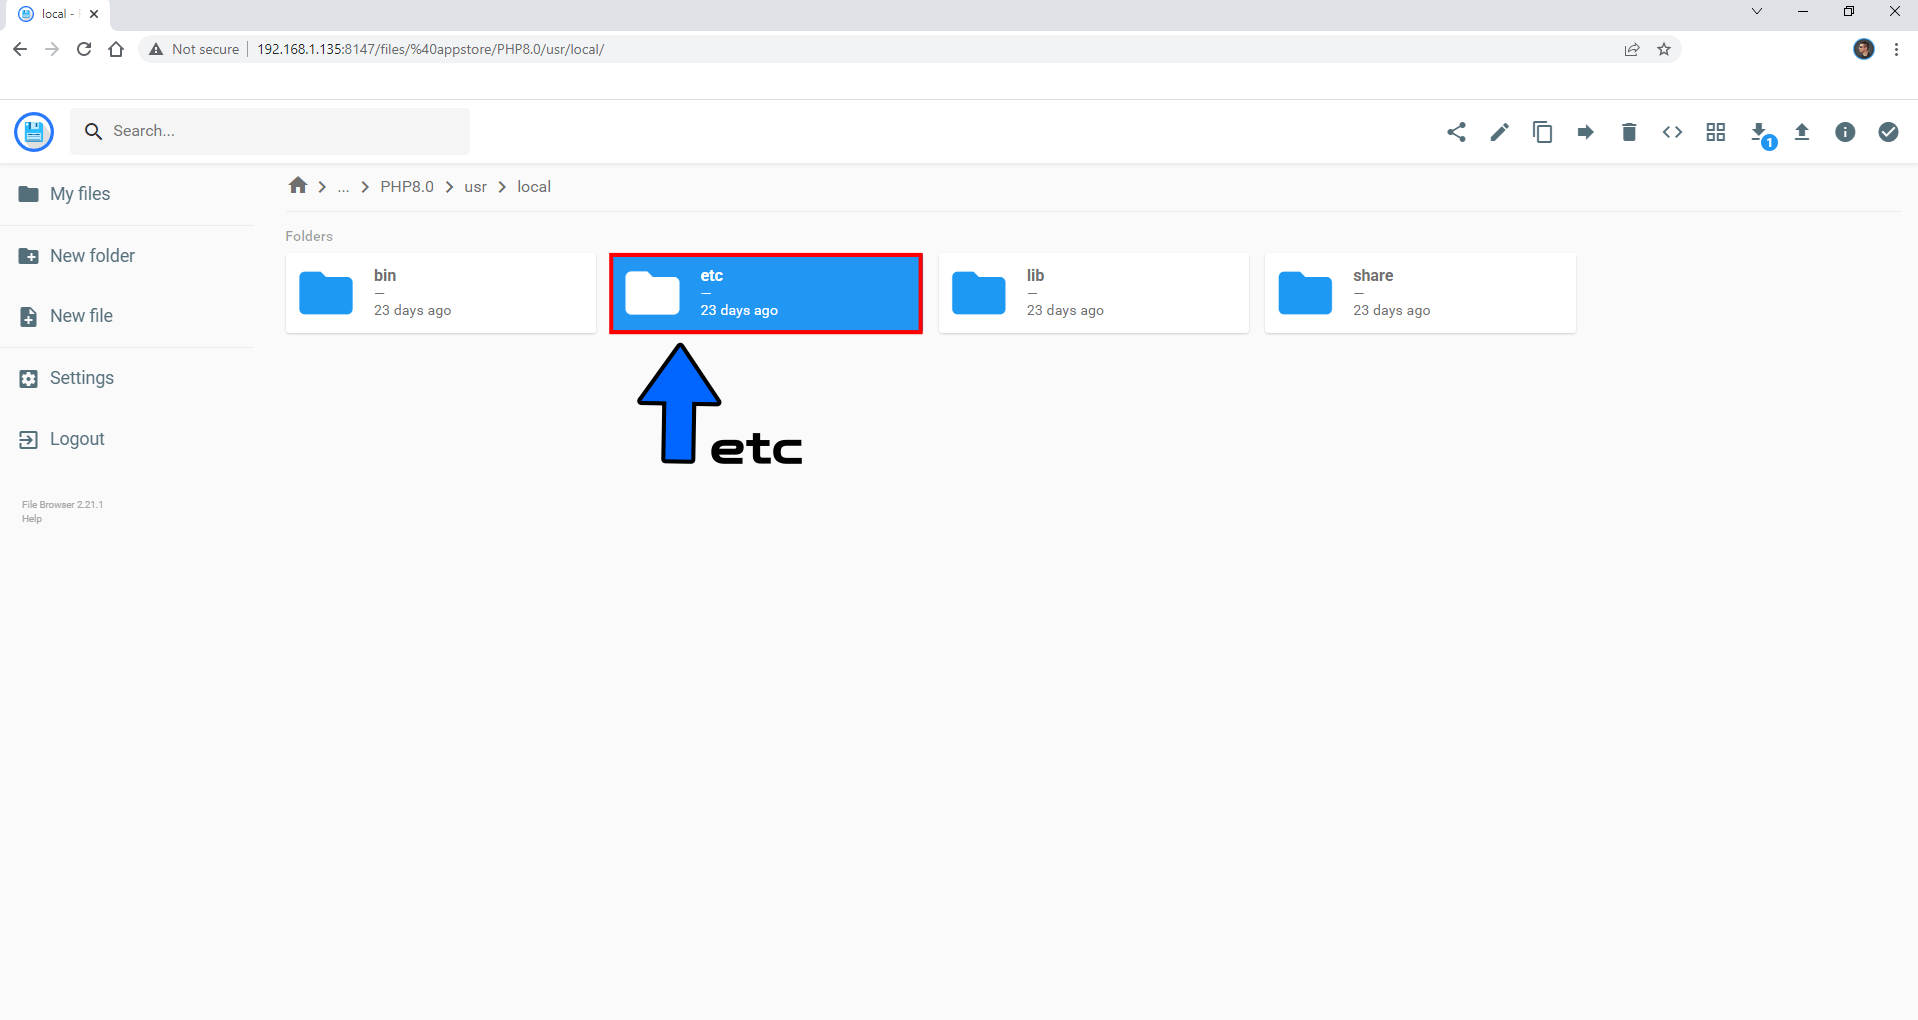
STEP 8
Click on the php80 folder. Follow the instructions in the image below.
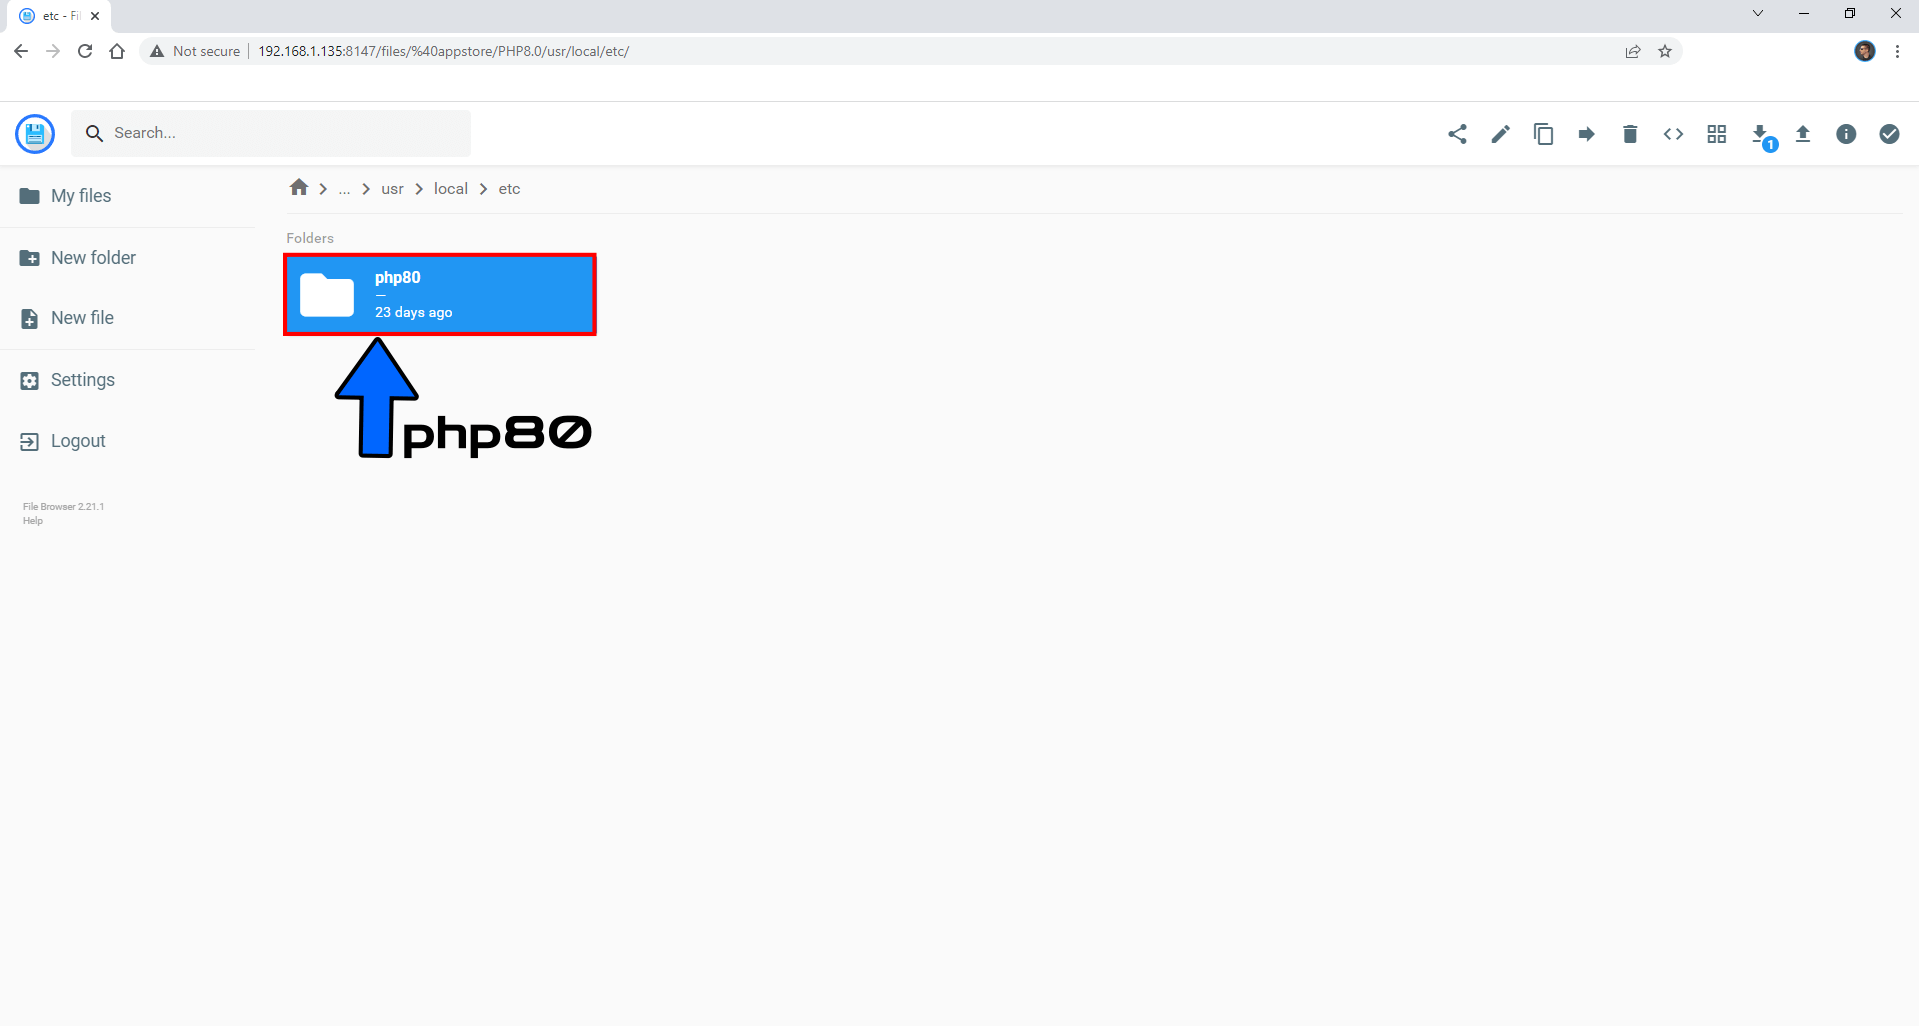
STEP 9
Click on the cli folder. Follow the instructions in the image below.
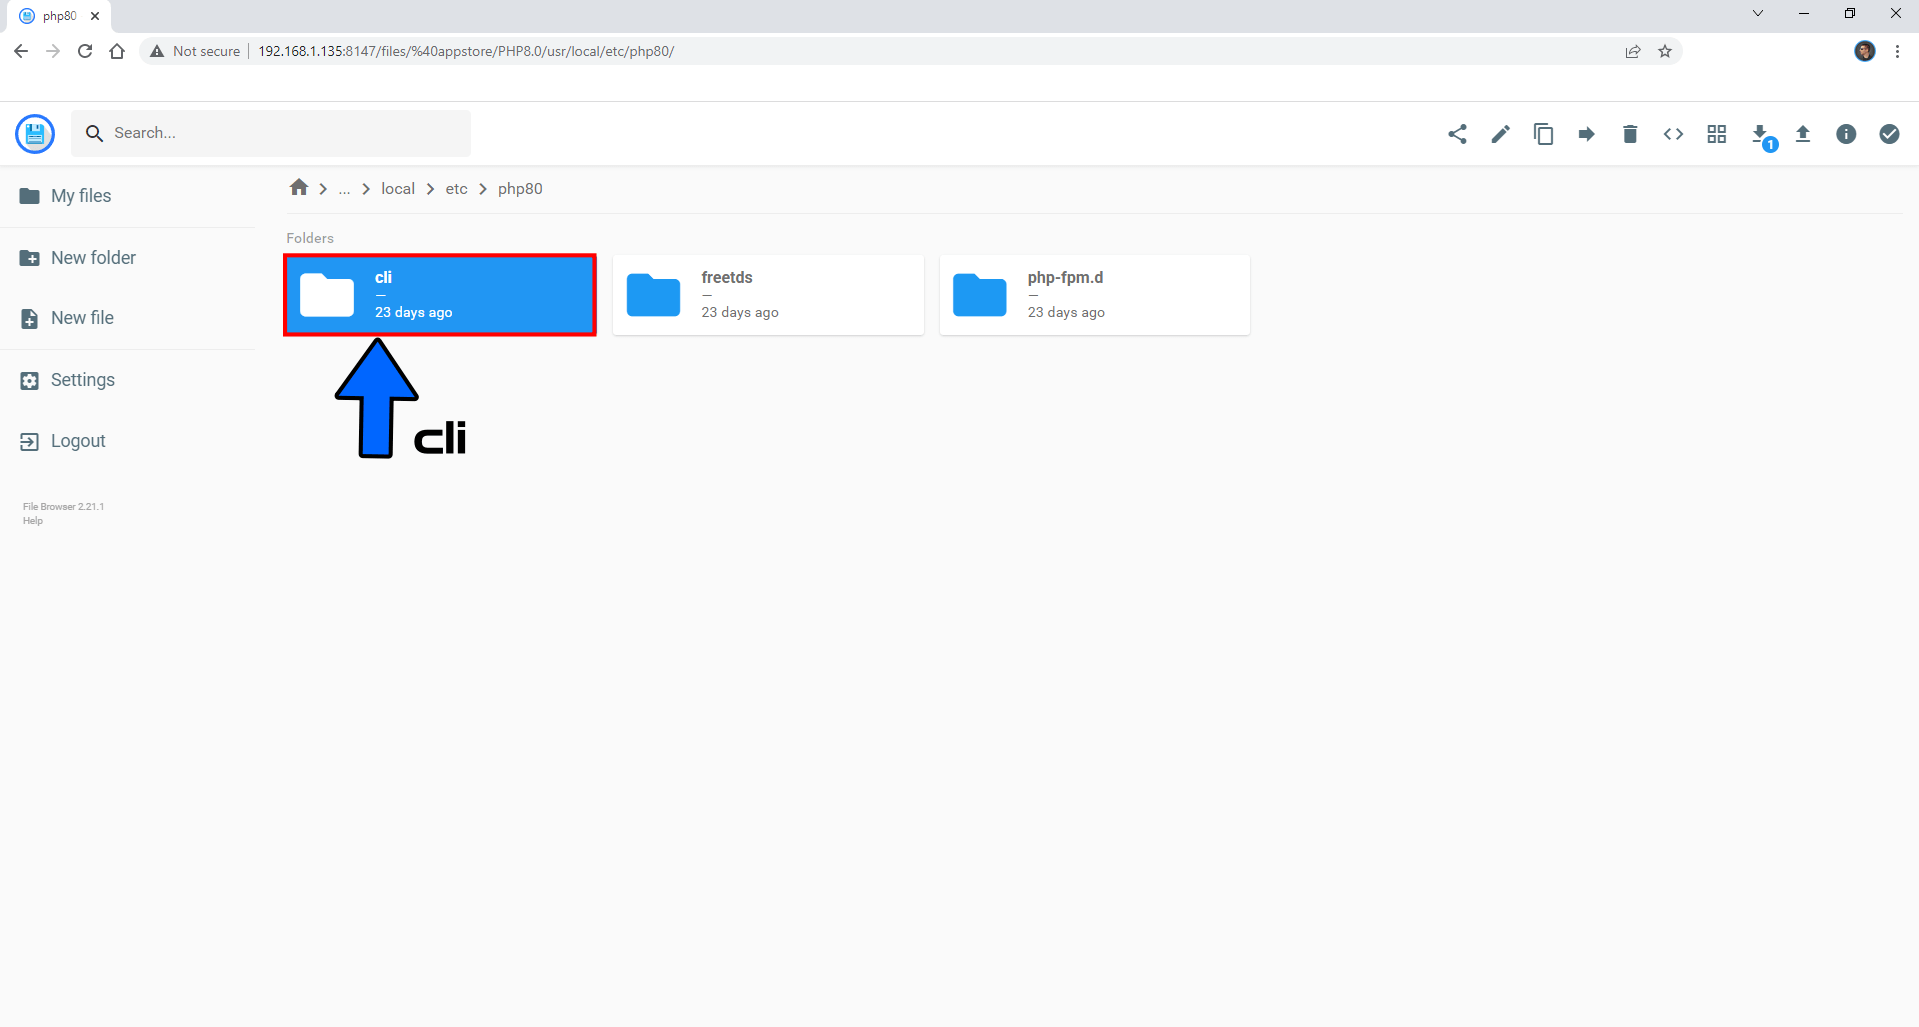
STEP 10
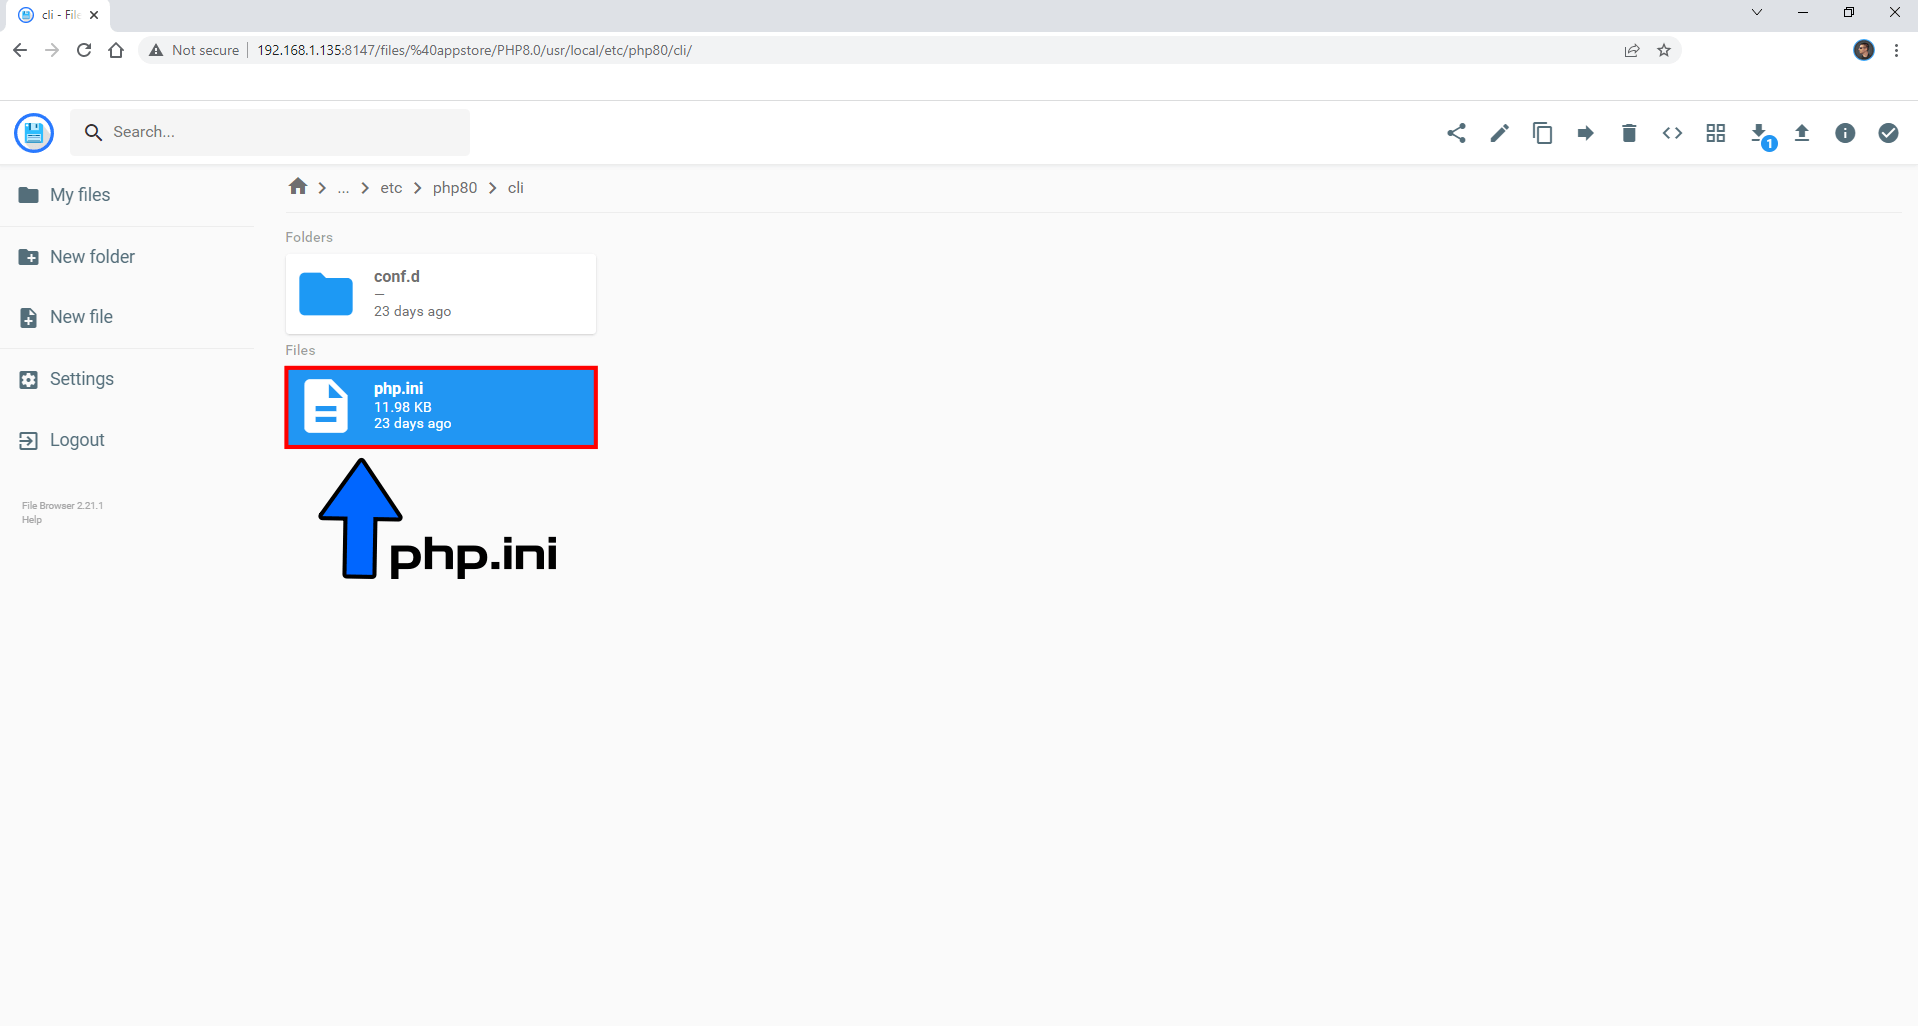
Click on the php.ini file. Follow the instructions in the image below.
STEP 11
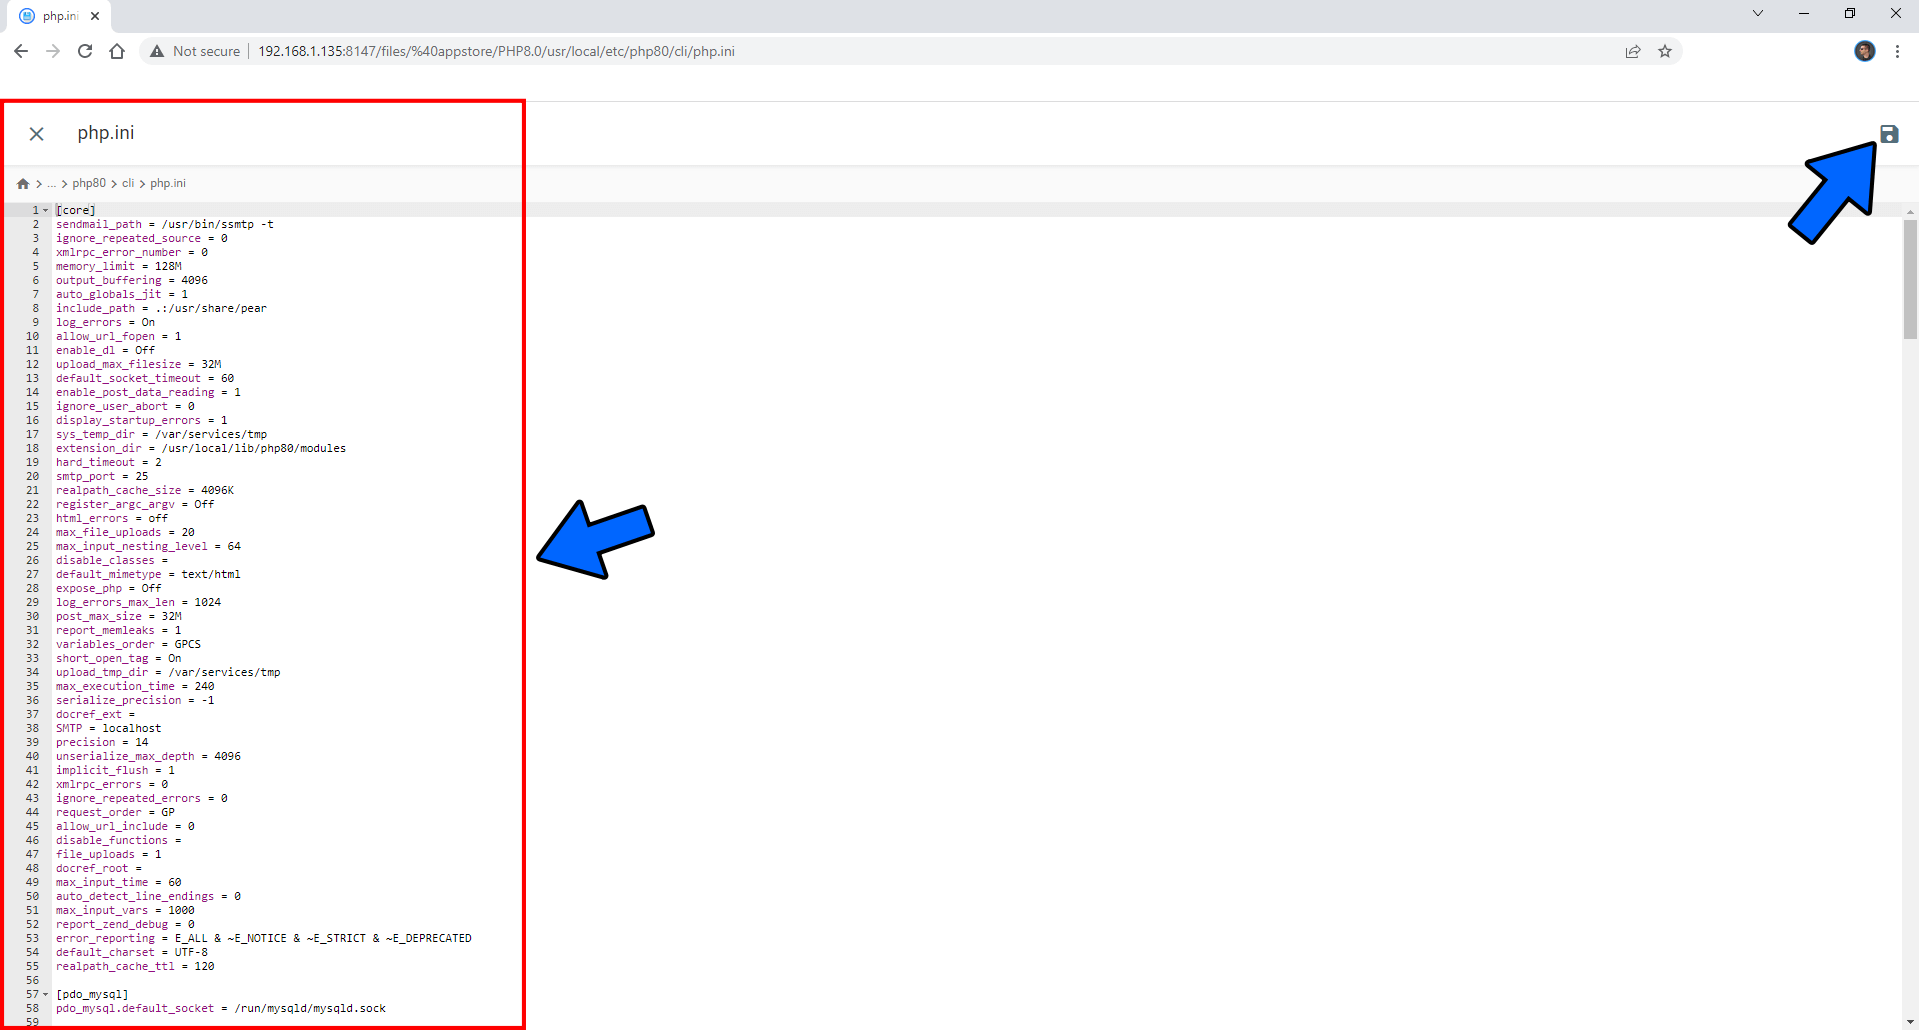
That’s it! Now you can manually change the value for each setting, then click Save at the top right of the page. Follow the instructions in the image below.
Note: You can use the same procedure to find the php.ini file for PHP 8.1, PHP 8.2, PHP 7.4 or PHP 7.3 just by clicking on the correct path at STEP 4.
Note: Remember that, if you make a change to your php.ini file, said change will not be preserved when you update your DSM OS to a new version, or your PHP package. Remember to save a copy of your modified php.ini file to restore your customized settings.
This post was updated on Monday / June 19th, 2023 at 1:10 AM
