If you need to edit a file on your Synology DSM operating system, such as the wp-config.php file on WordPress or other files, you definitely need a text editor. Without a text editor, your Synology will automatically download the file to your PC if you double click on it with your mouse. That means that you will first have to download the file, then edit it on your PC, and then upload the edited file to your NAS. It becomes tiring and counterproductive to perform this operation indefinitely. Fortunately, Synology has thought about this too and given us the Text Editor in Package Center. This Text Editor is truly cutting-edge and allows you to edit any file written in any programming language.
STEP 1
Please Support My work by Making a Donation.
STEP 2
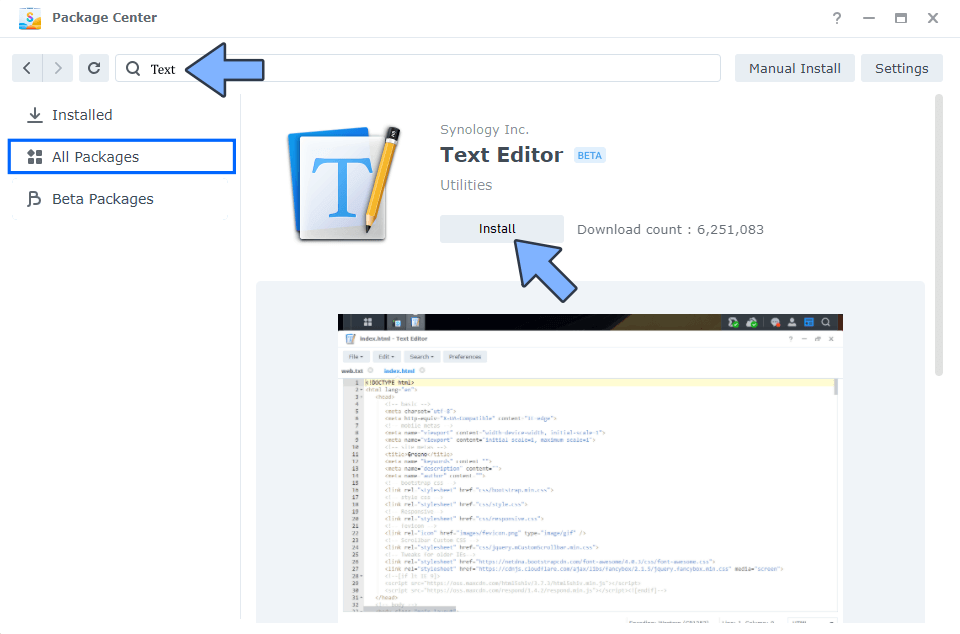
Install Text Editor via Synology “Package Center”.

STEP 3
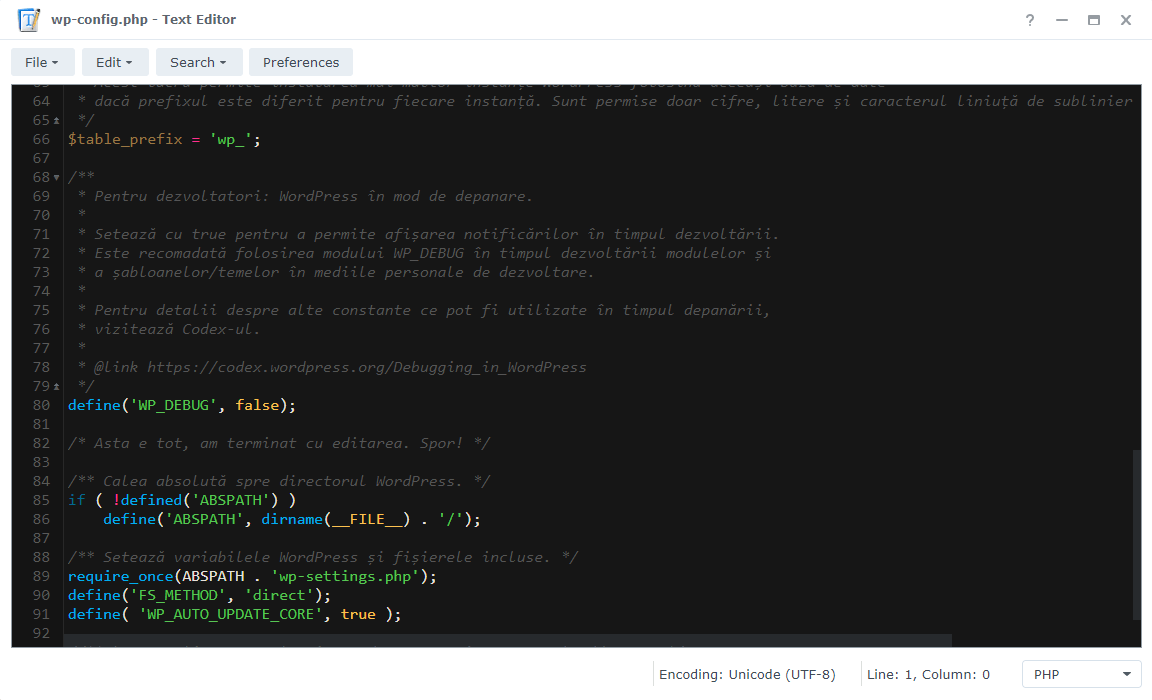
Once you have downloaded and installed the Text Editor from Package Center, editing the wp-config.php file in your WordPress becomes child’s play. Below you can see a screenshot of my wp-config.php file; notice how easy it is to edit it because important parts of the code are colorful which renders them more visible.

STEP 4
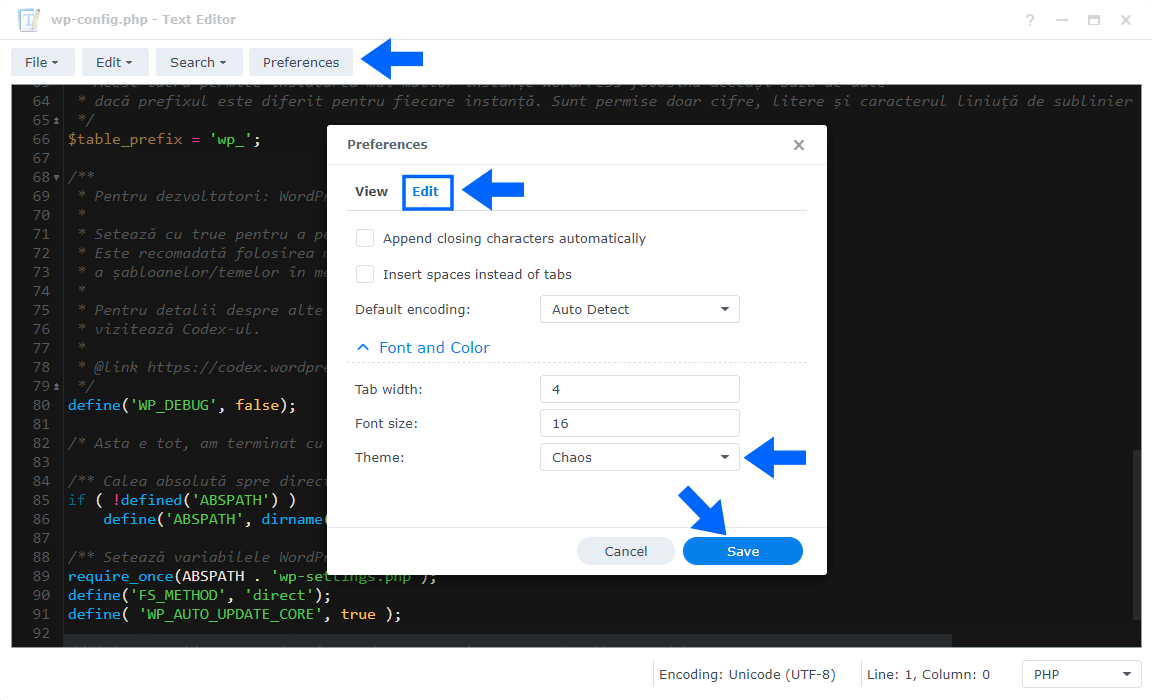
And that’s not all. If you go to Preferences, you get to choose from a collection of themes. I chose the Chaos theme with a very dark background which creates a striking contrast with the colorful lines of code. In Preferences you will find a lot of options to choose from, to activate or deactivate, depending on your preferences. It is also possible to change the Font size which I find extremely useful if you have sight problems. See the image below.

Note: In short, Text Editor is a must have if you use WordPress and have a website hosted at home on your Synology NAS because it allows you to edit text files quickly and efficiently.
This post was updated on Tuesday / October 14th, 2025 at 11:08 PM
