On November 11, 2020, Google announced it will stop offering free unlimited storage for high-quality photos on June 1, 2021. Photos uploaded after that date will be counted towards the 15 GB Drive capabilities. If the account is inactive or exceeds the 15 GB limitation for two years, Google may delete your current photos after issuing a warning. Users will either need to pay a recurring fee or look for an alternative, such as a Synology NAS, if they run out of space.
If you, like me, have been using the Google Photos service to automatically save your photos in its cloud, this guide will certainly be useful to you. Today I’ll teach you how to switch from Google Photos to Synology Photos easily. Keep in mind that this guide is for DSM 7, but you can very well use it to make a backup of your Google Photos.
STEP 1
Please Support My work by Making a Donation.
STEP 2
Click the Google Takeout link below and log into your Google Account.
Note: Google Takeout allows you to export a copy of the content in your Google Account to back it up or use it with a service outside of Google.
STEP 3
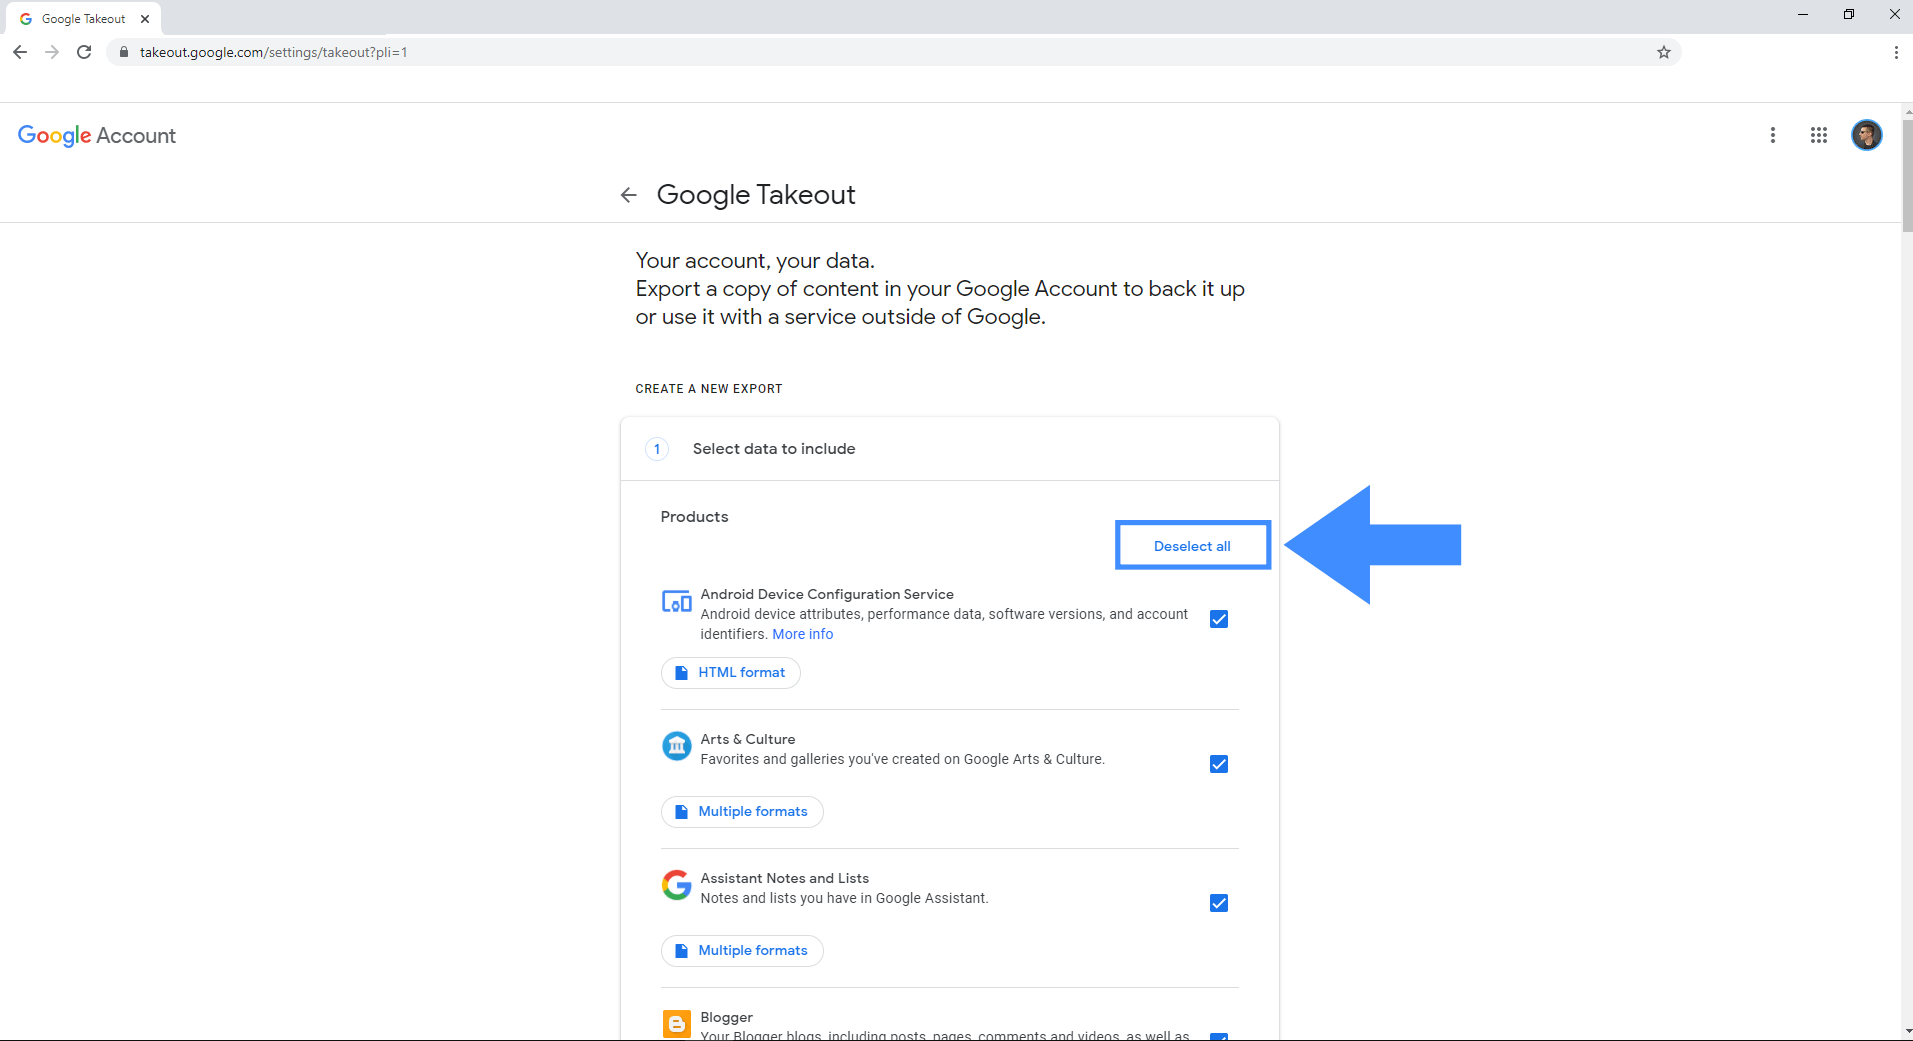
After you click the link above, the following page will open. Next to Products, click “Deselect All“. Follow the instructions in the image below.
STEP 4
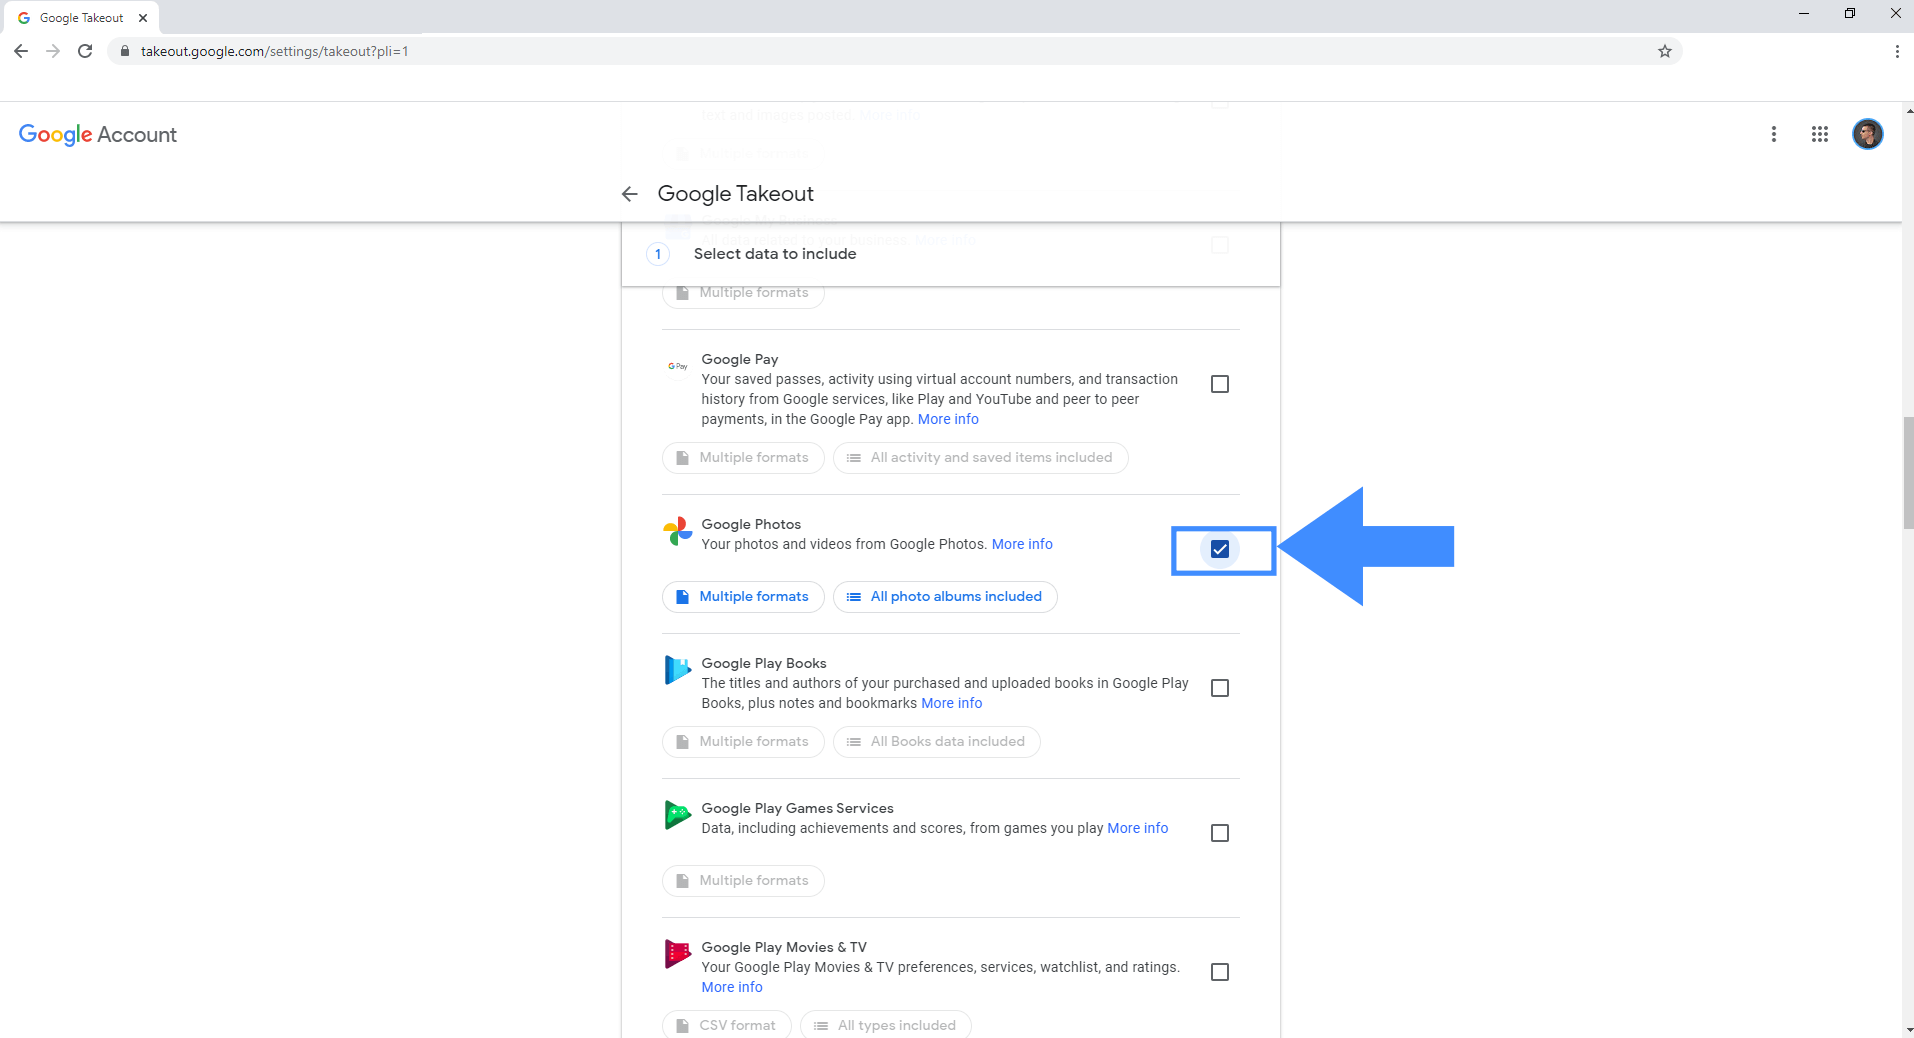
After you click “Deselect All“, scroll down on the page until you find “Google Photos“. Check it. Follow the instructions in the image below.
STEP 5
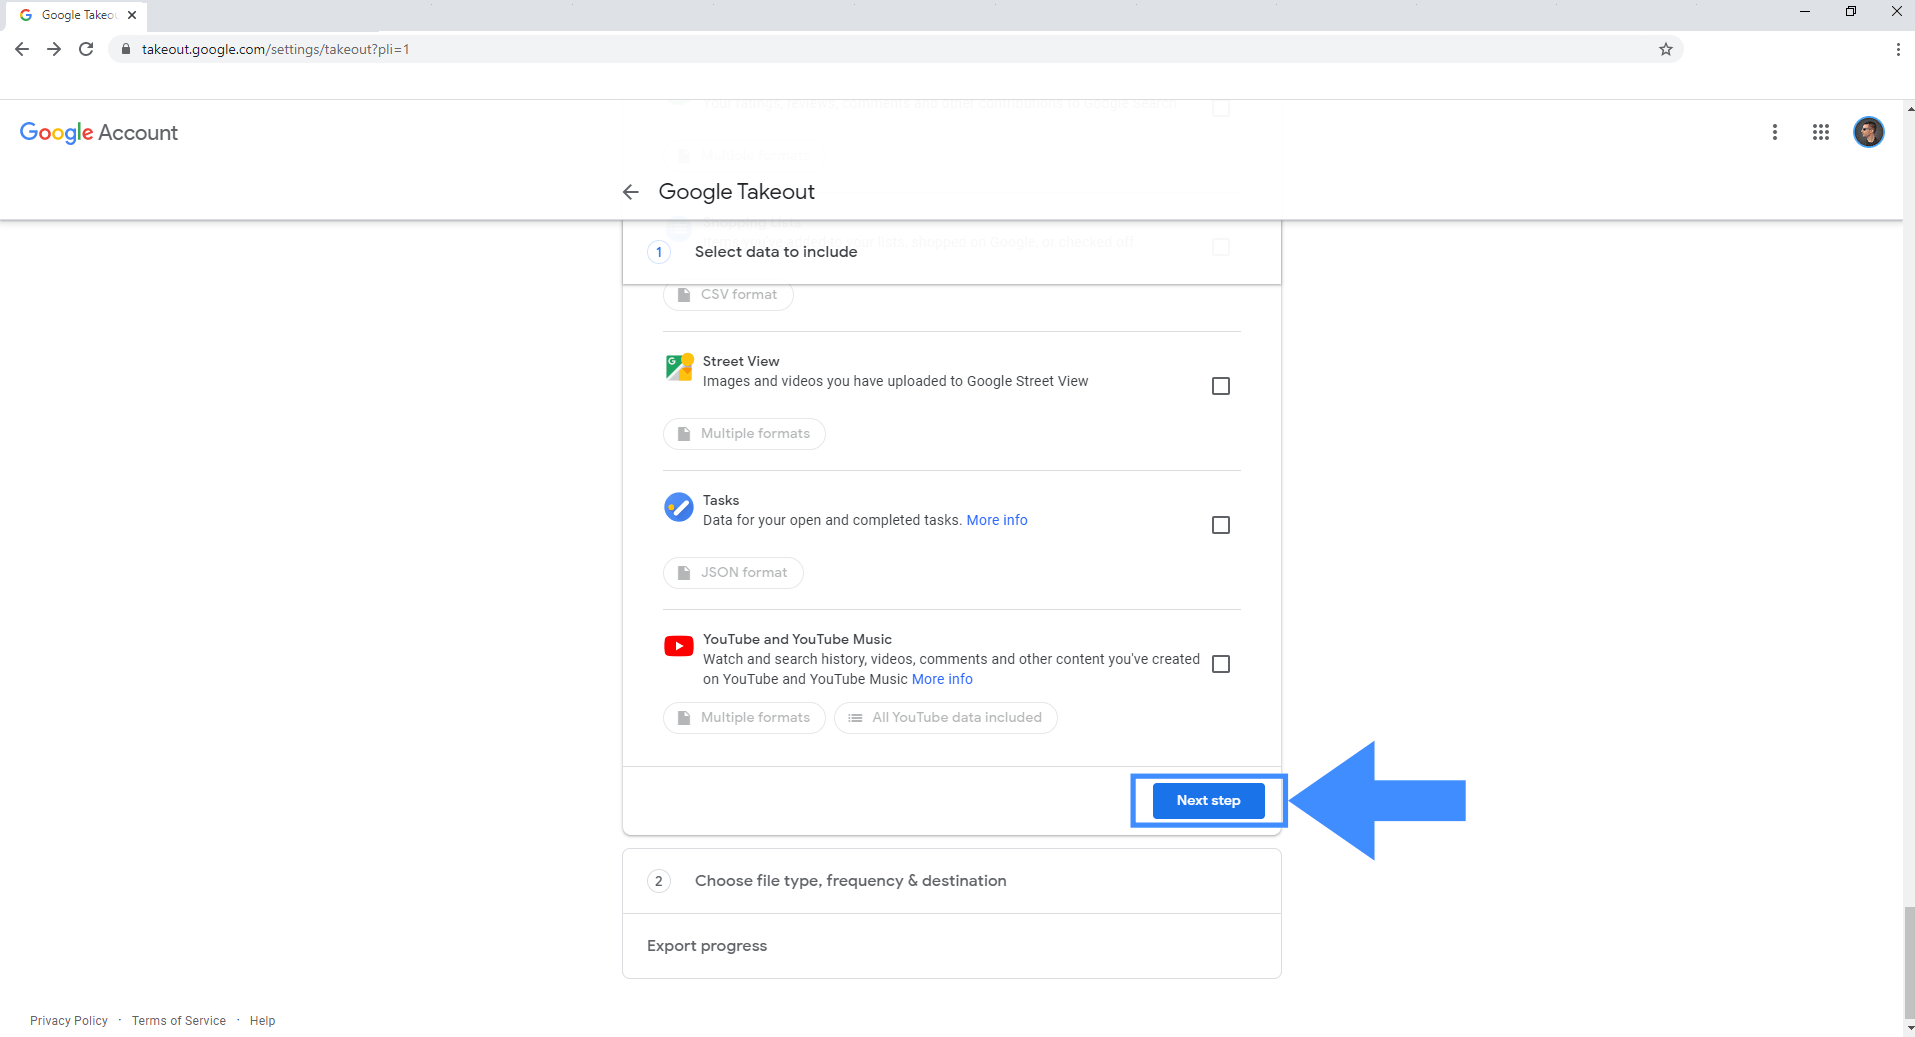
After selecting Google Photos, scroll down until the end of the page, then click Next step. Follow the instructions in the image below.
STEP 6
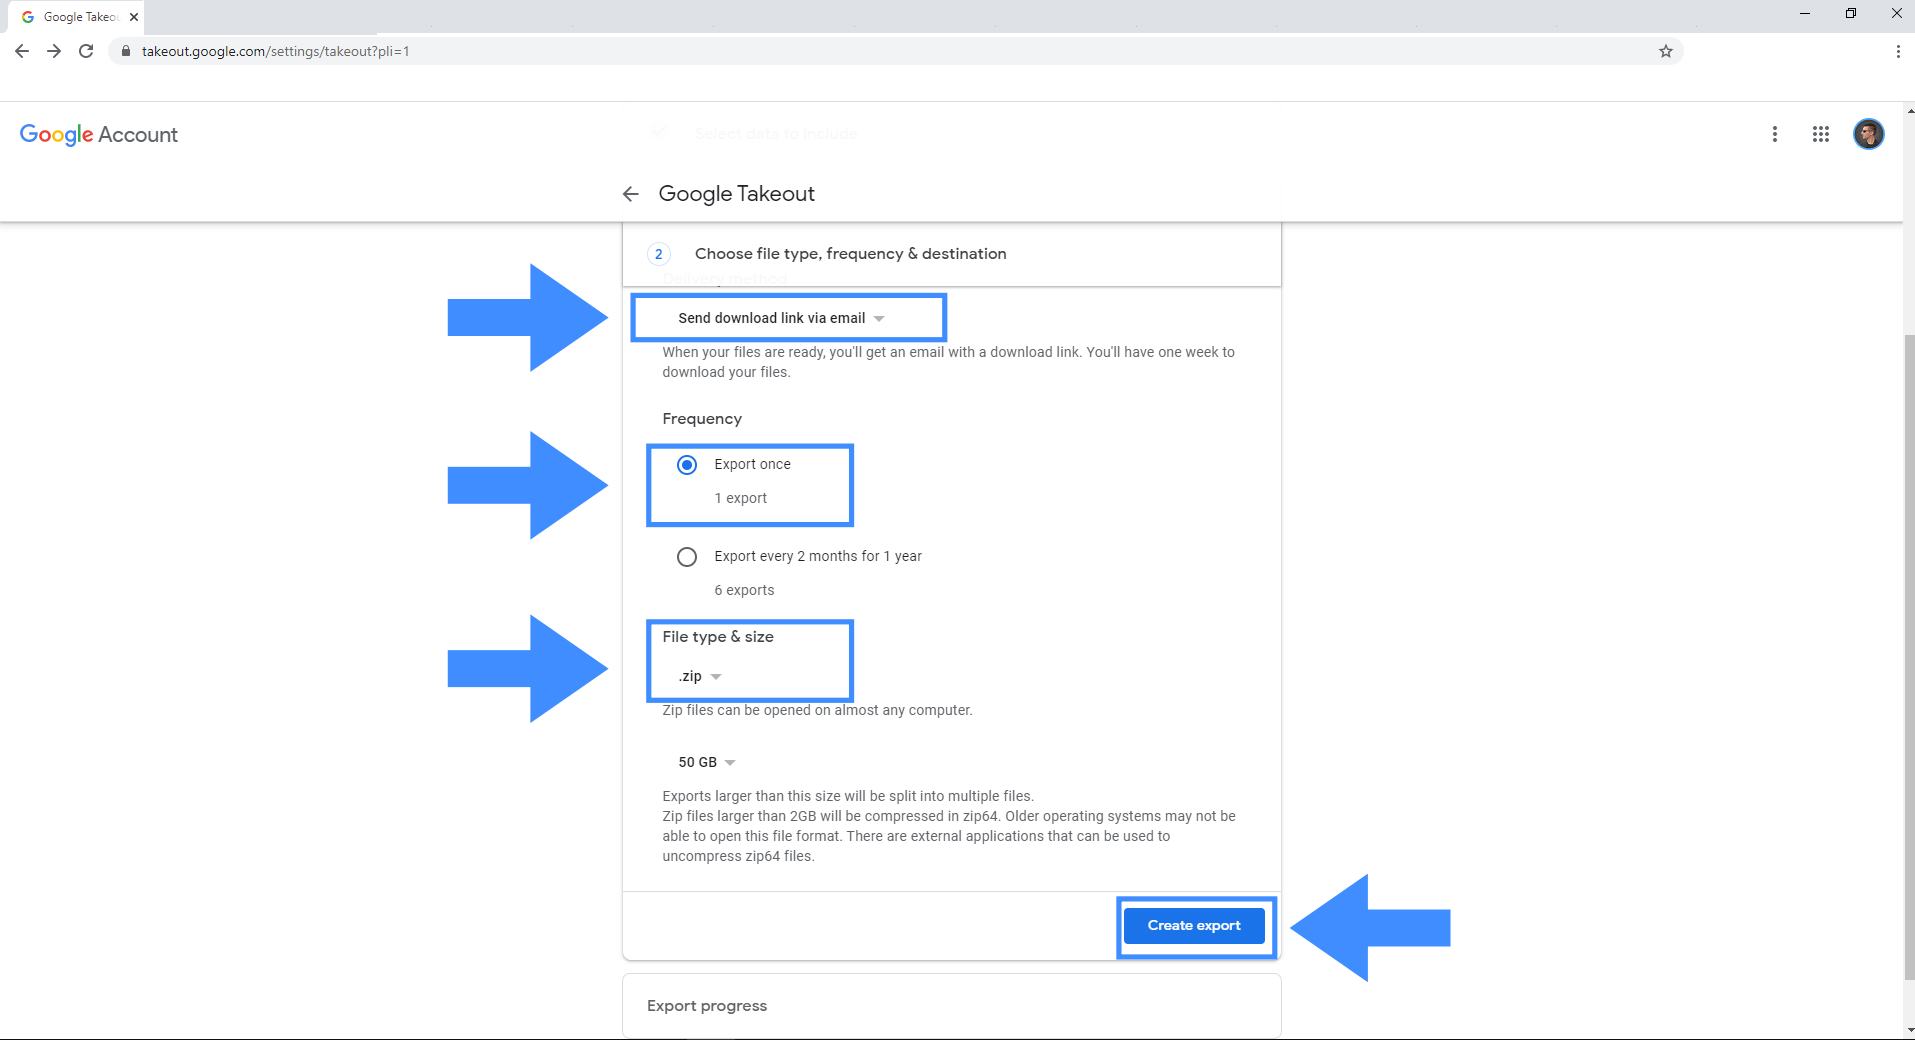
Follow the instructions in the image below and select the following:
- Send download link via email.
- Export once.
- File type & size .zip then 50 GB.
Click Create export.
STEP 7
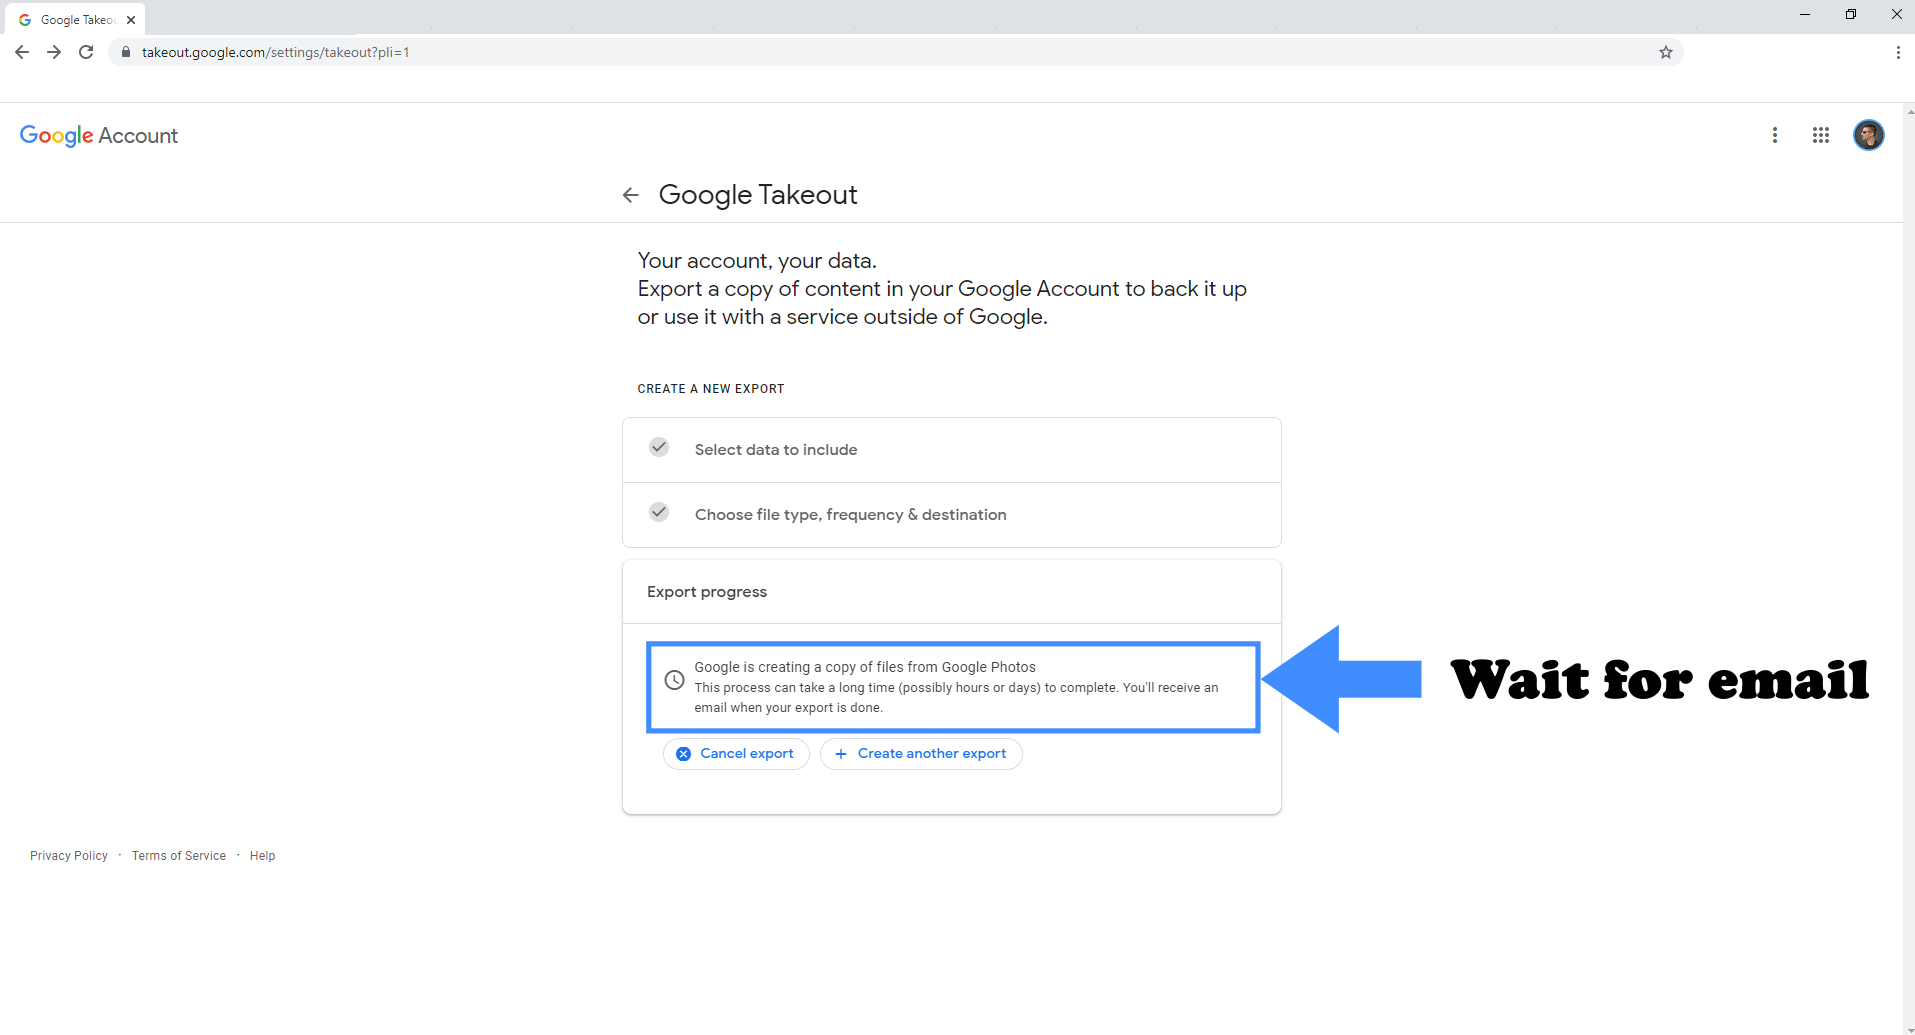
After you click “Create export“, you will receive the following message in the same page: Google is creating a copy of files from Google Photos. This process can take a long time (possibly hours or days) to complete. You’ll receive an email when your export is done. In my case, for 8 GB of files, it took about 8 minutes until my email arrived.
STEP 8
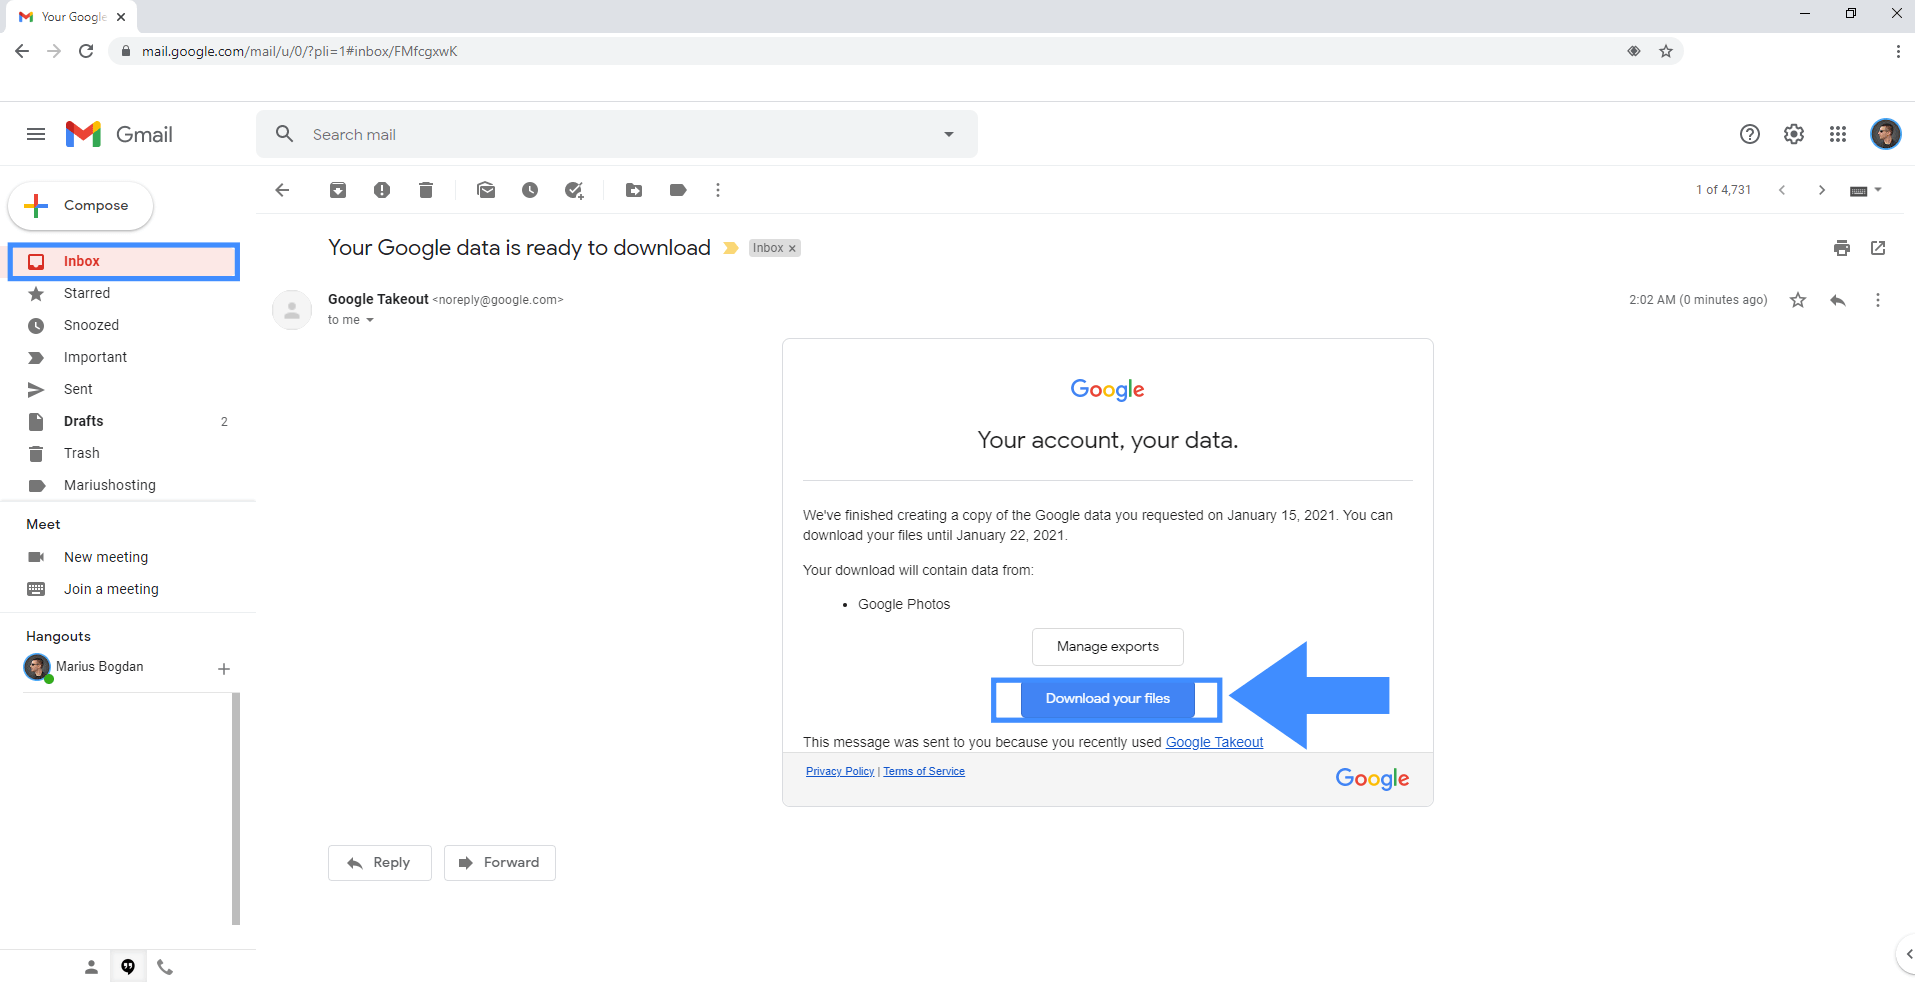
Check your email. You will receive an email from Google Takeout. In the email, click on the link “Download your files“. Follow the instructions in the image below.
Note: If you have a very large volume of Photos, your email may come after a few hours so be on the lookout for it.
STEP 9
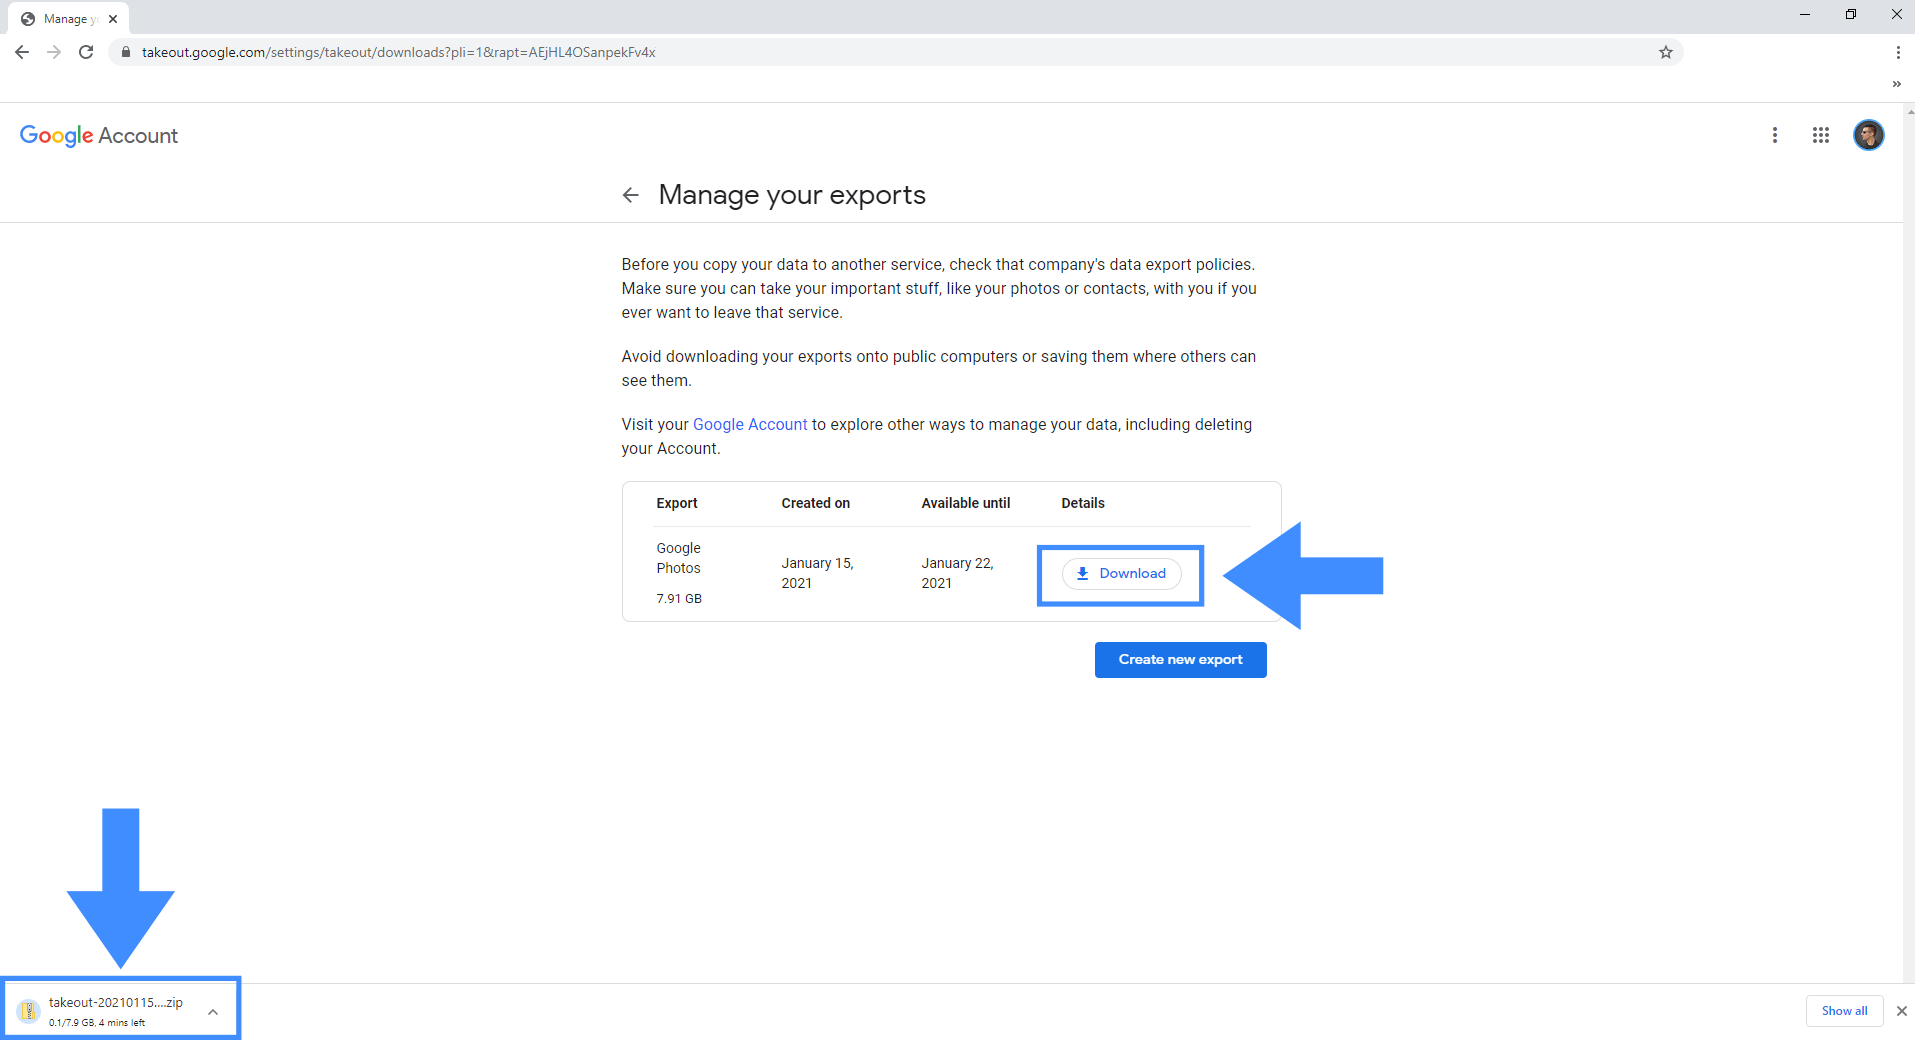
After you click the “Download your files” link in your email, you will be redirected to the Google Takeout page. Click “Download“. Follow the instructions in the image below.
Note: After you click download, your entry Google Photos will be downloaded to your computer in a .zip format.
STEP 10
🟢Please Support My work by Making a Donation. Almost 99,9% of the people that install something using my guides forget to support my work, or just ignore STEP 1. I’ve been very honest about this aspect of my work since the beginning: I don’t run any ADS, I don’t require subscriptions, paid or otherwise, I don’t collect IPs, emails, and I don’t have any referral links from Amazon or other merchants. I also don’t have any POP-UPs or COOKIES. I have repeatedly been told over the years how much I have contributed to the community. It’s something I love doing and have been honest about my passion since the beginning. But I also Need The Community to Support me Back to be able to continue doing this work.
STEP 11
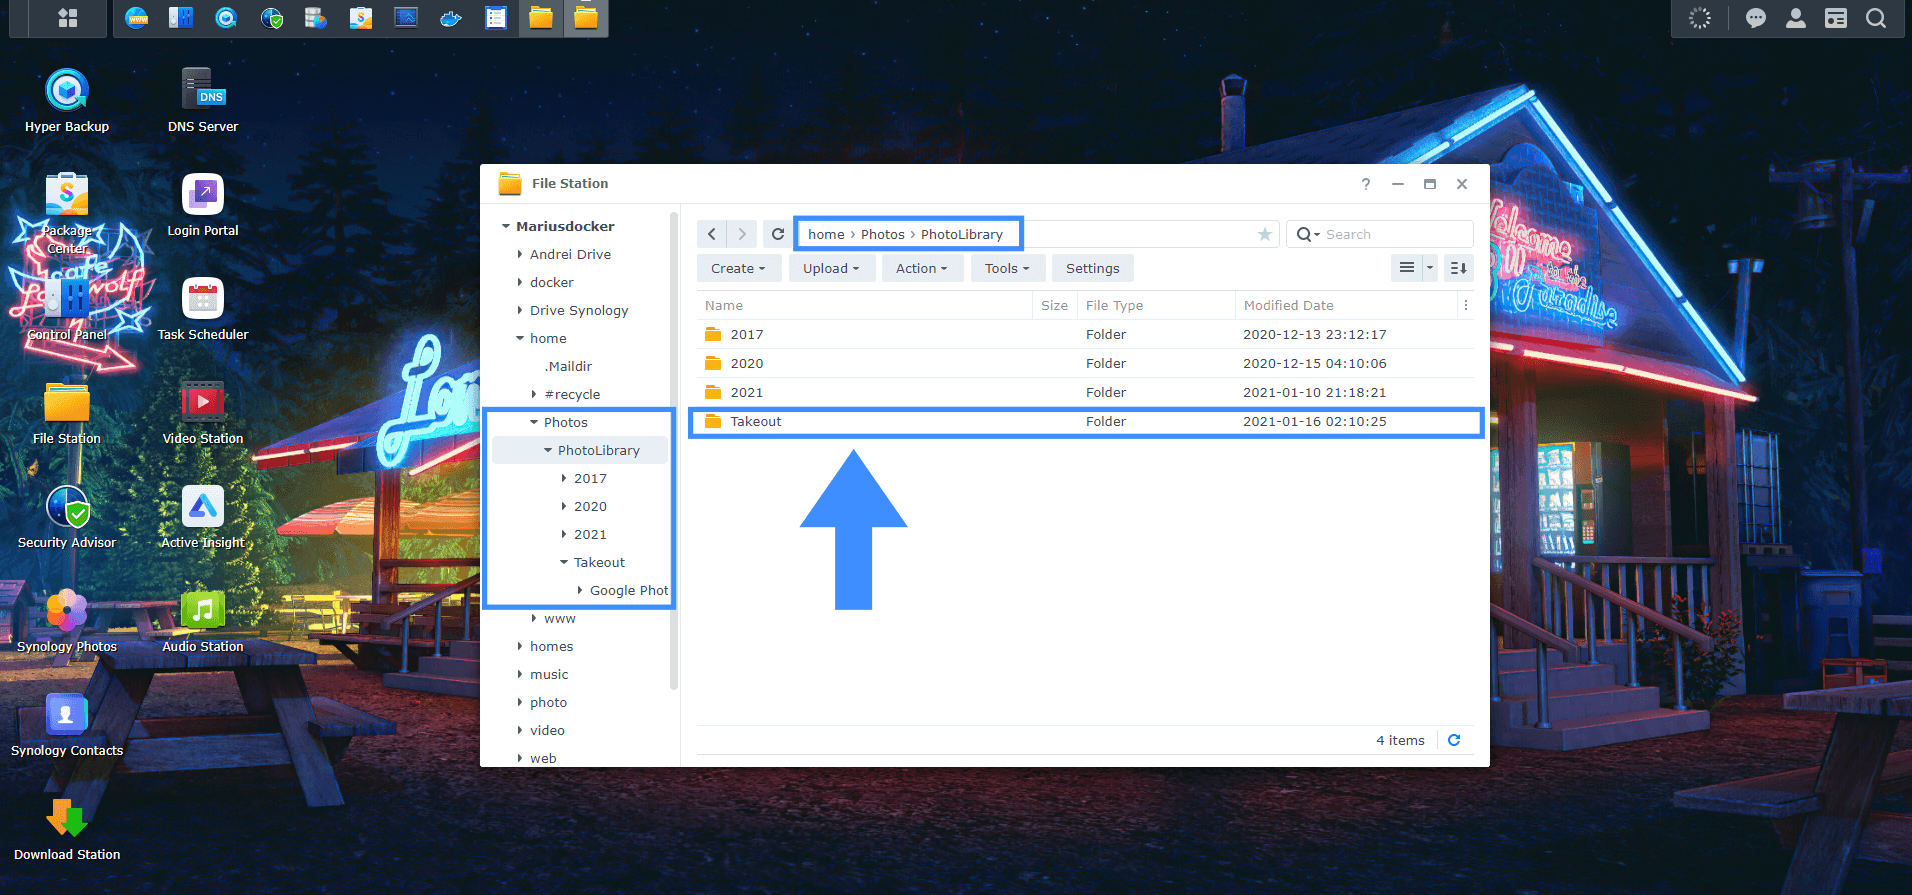
Make sure you have the Synology Photos package installed on your DSM 7 – Synology Photos can be downloaded through Package Center. After the download is complete, unzip your files in Home / Photos / PhotoLibrary using your preferred upload method like Drag and Drop, FTP, Network etc. Follow the instructions in the image below.
STEP 12
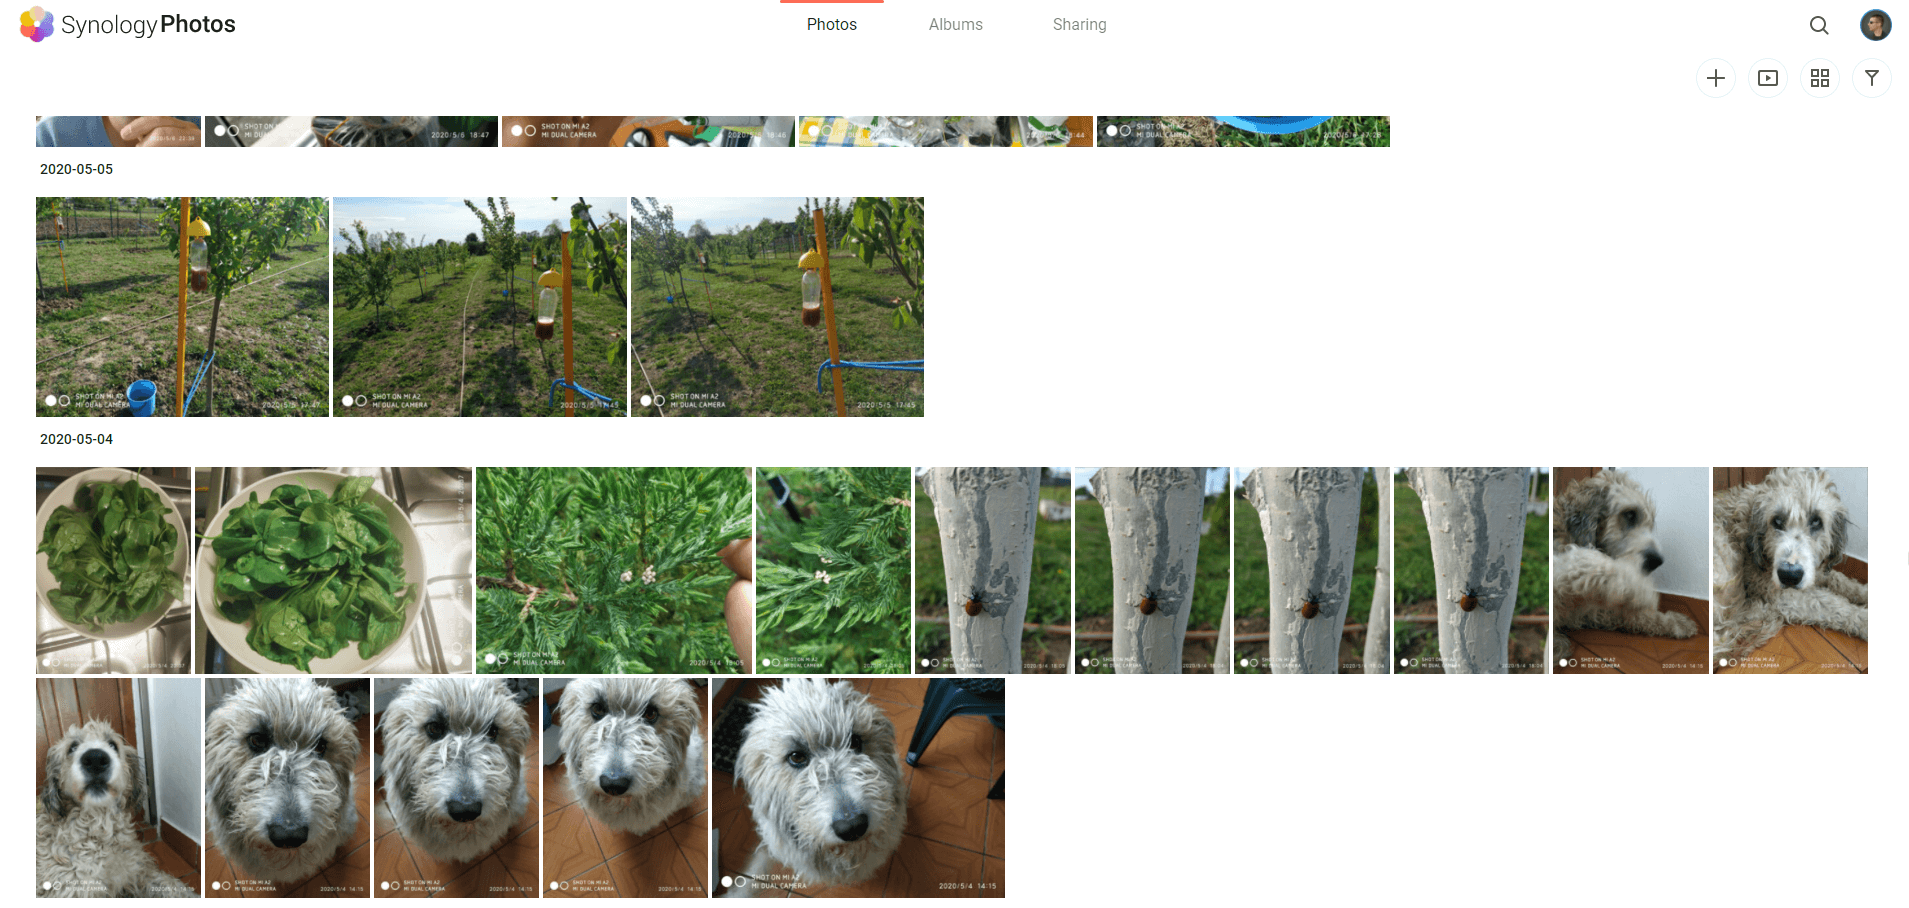
After the indexing is complete, you will be able to see all your photos from Google Photos directly on your Synology Photos.
STEP 13
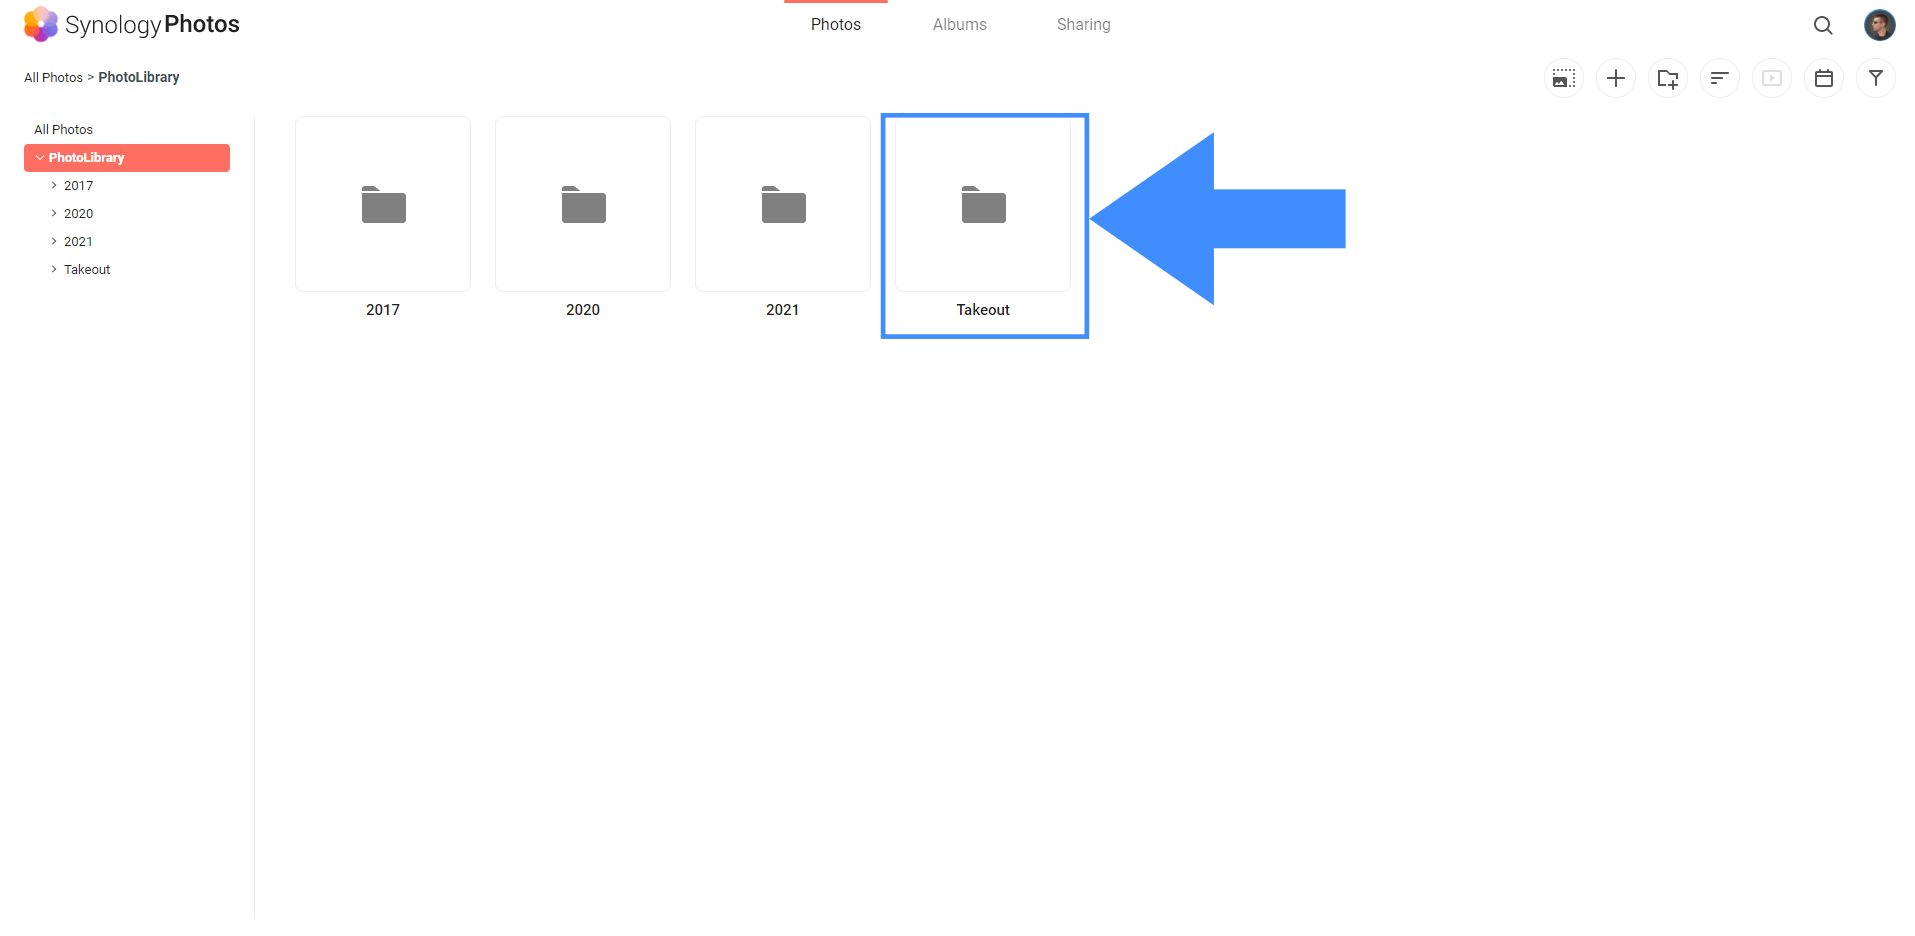
You can also change the viewing method using “Folder” instead of “Preview”.
STEP 14
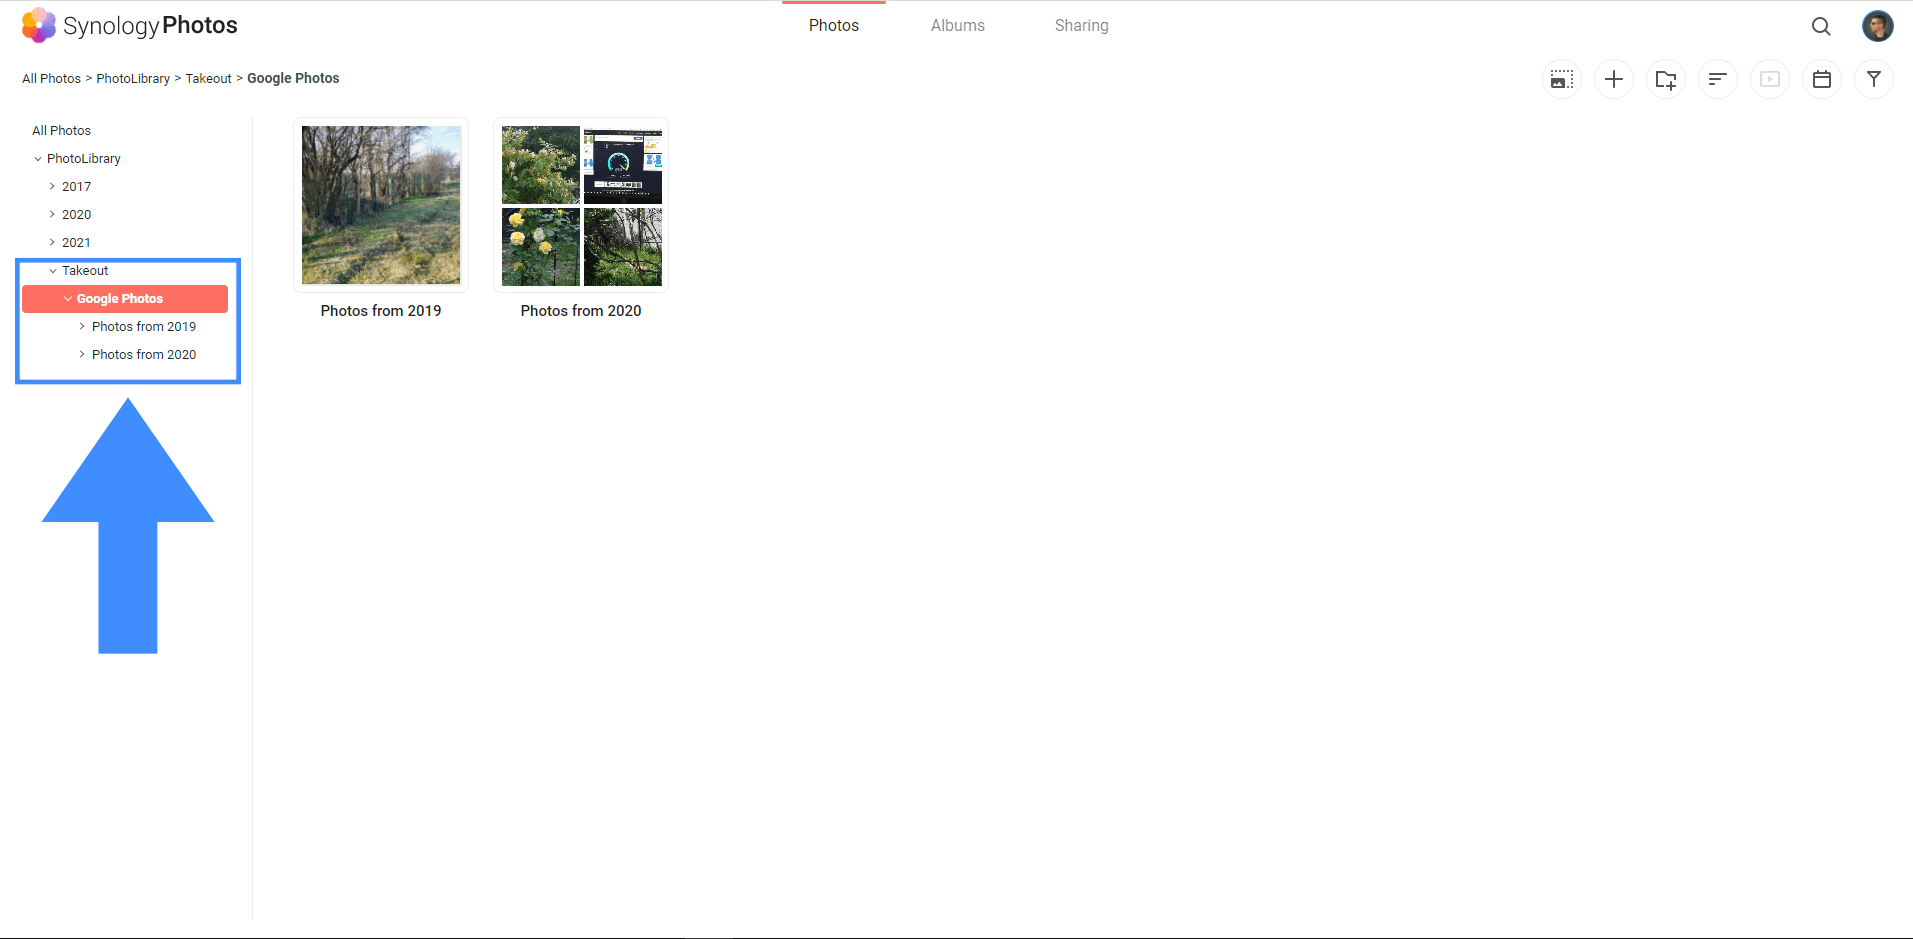
Easy as 123.
STEP 15
Backup on mobile
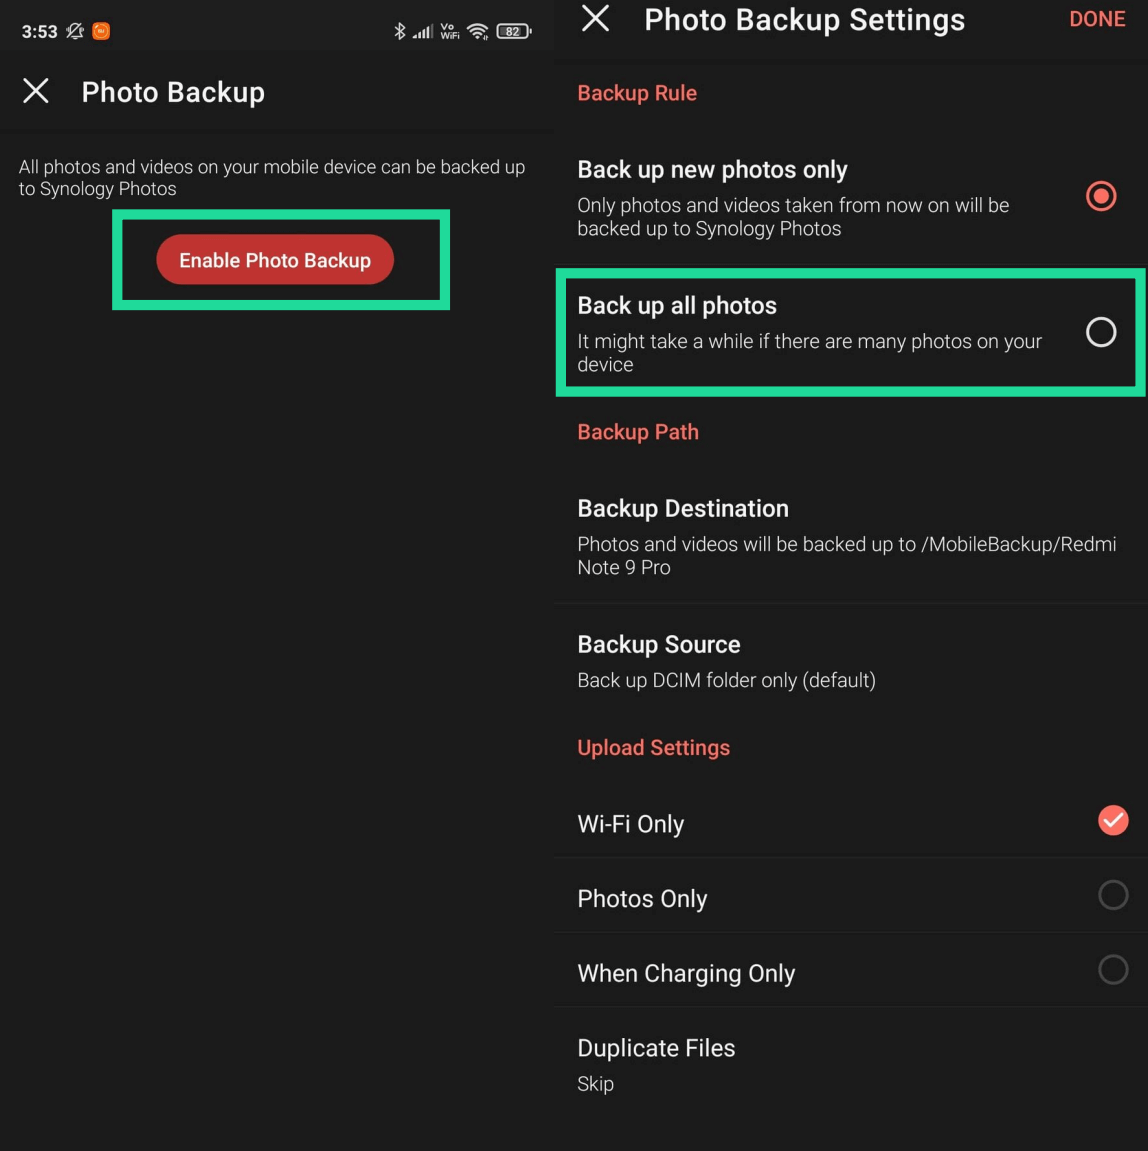
From now on, instead of Google Photos, you can download the Synology Photos app for your mobile phone (Android/iOS). Using the app will allow you to easily back up your entry phone photos, and you can choose to automatically upload all photos you take to your Synology NAS. Depends on your needs and wants.
Note: The Google Takeout link at the top of this article (STEP 2) gives you the option to also download all your files contained not only in Google Photos, but also in services like Google Drive, in .zip format.
Note: By using Synology Photos you will be the sole holder of your photos from now on. Privacy will finally be the norm.
This post was updated on Sunday / August 24th, 2025 at 2:51 PM
