PHP is a lightweight, fast, and open-source language that’s ideal for generating website elements. Did you know that WordPress has a PHP memory limit of 32MB by default? When this limit is reached, WordPress will automatically increase available memory to 40MB without it needing your intervention. If you hit this limit as well, then you’ll get an error message on the front end page and in your PHP logs. In this step by step guide I will show you how to increase your WordPress PHP memory limit.
STEP 1
Please Support My work by Making a Donation.
STEP 2
Install Text Editor on Your Synology NAS. If you already have Text Editor installed on your Synology NAS, skip this STEP.
STEP 3
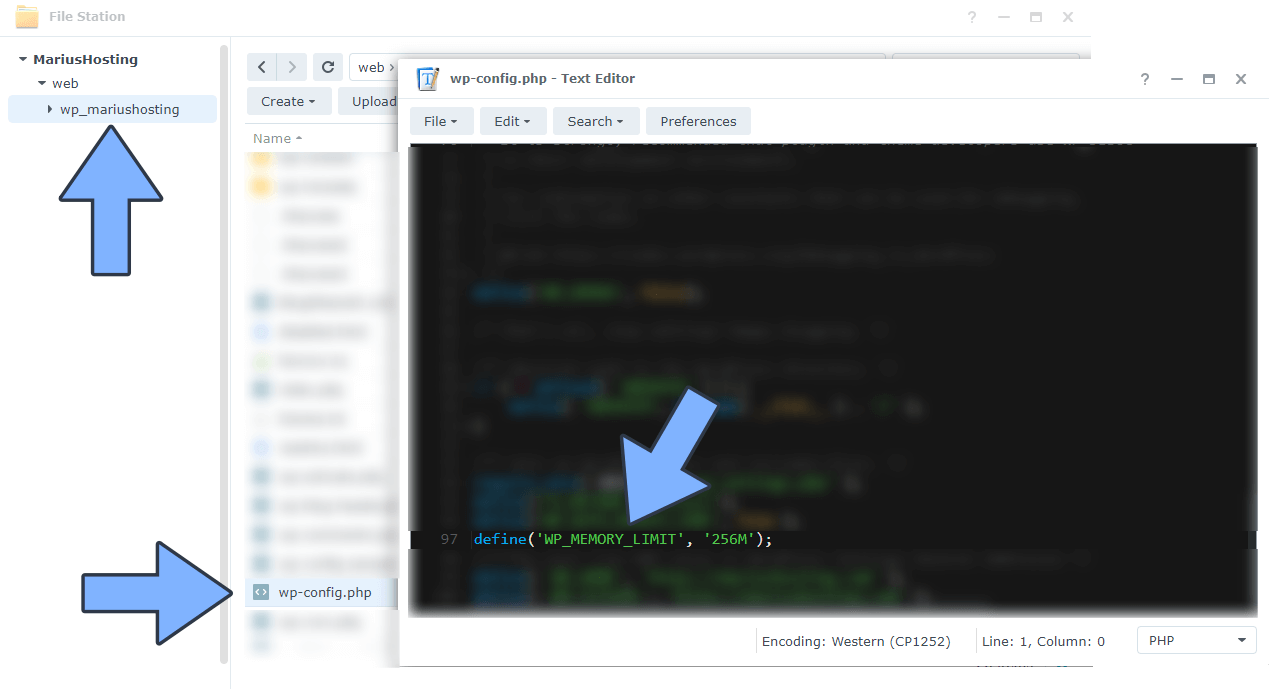
Go to File Station / web then locate your WordPress folder. Search for the wp-config.php file then open it.
STEP 4
Copy / paste the code below in the wp-config.php file just before the line that says ‘That’s all, stop editing! Happy blogging.’ Follow the instructions in the image below.
define( 'WP_MEMORY_LIMIT', '256M' );

STEP 5
Save the wp-config.php file, then wait 2 or 3 minutes before the settings are automatically applied.
Note: The PHP Memory limit in WebStation is different from the WordPress PHP memory limit. You need to follow the steps in this guide to increase your WordPress PHP memory limit.
This post was updated on Sunday / September 25th, 2022 at 4:38 PM
