Do you know that MariaDB is configured by default to handle up to 150 connections? One additional connection is used to operate root access, but, if it’s not used for this purpose, then the maximum number of connections for MariaDB is 151. The number of connections that can be accepted by MariaDB/MySQL is determined by the max_connections variable. Most Linux systems, Synology’s DSM included, are capable of supporting about 500-1000 connections without any issue, according to the official MySQL documentation. One important aspect to note is that each potential connection uses up RAM which means it’s always a good idea to upgrade your Synology NAS RAM if you want to run a big website from home by selfhosting.
The max_allowed_packet is the maximum size of a MySQL network packet that can be read or created by the server. The parameter comes with default, minimum and maximum values that you can change according to your requirements. On a Synology NAS, the max allowed packet size variable in MariaDB is set at a minimum value of 1048576 (1 Megabyte) by default. This can result in errors like the packet size too large error or closed connection error. Because the default value for the max_allowed_packet in MariaDB is set low, you will most likely need to increase the value of your max_allowed_packet on your Synology NAS, which will come with its own set of benefits for your environment.
Below I will teach you how to increase your MariaDB Max connections from 151 to 500 and the Max allowed packet size from 1 Megabyte to 1 Gigabyte.
STEP 1
Please Support My work by Making a Donation.
STEP 2
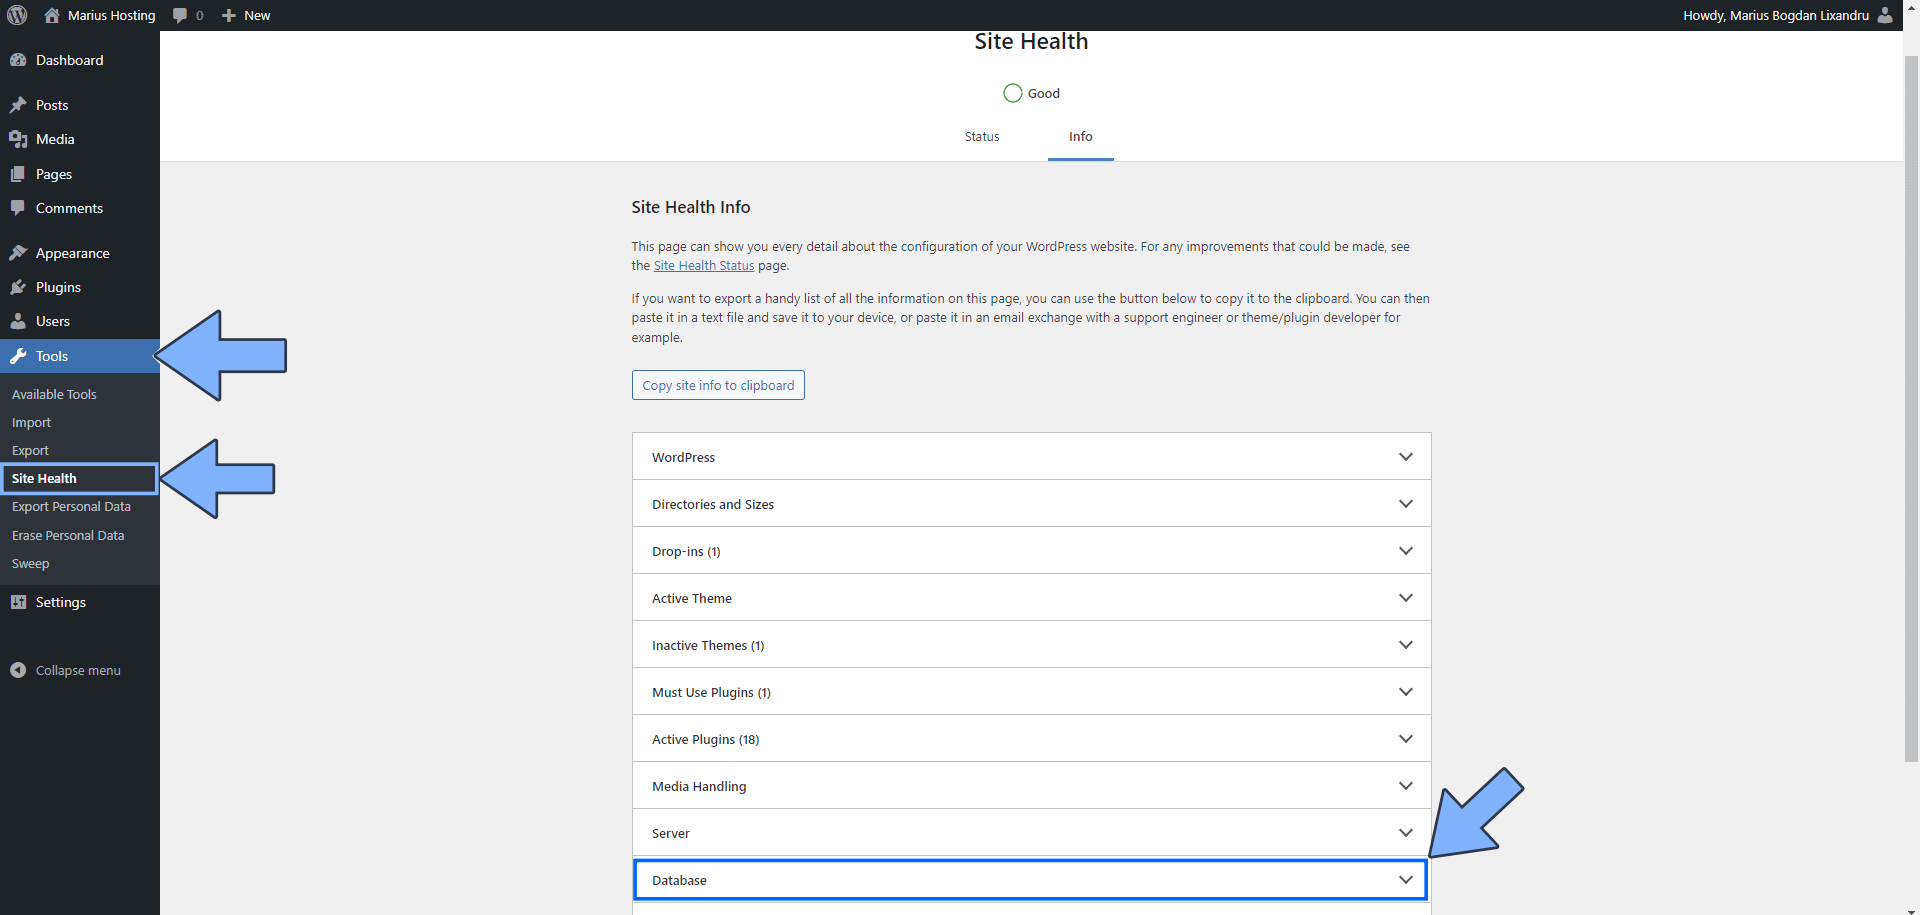
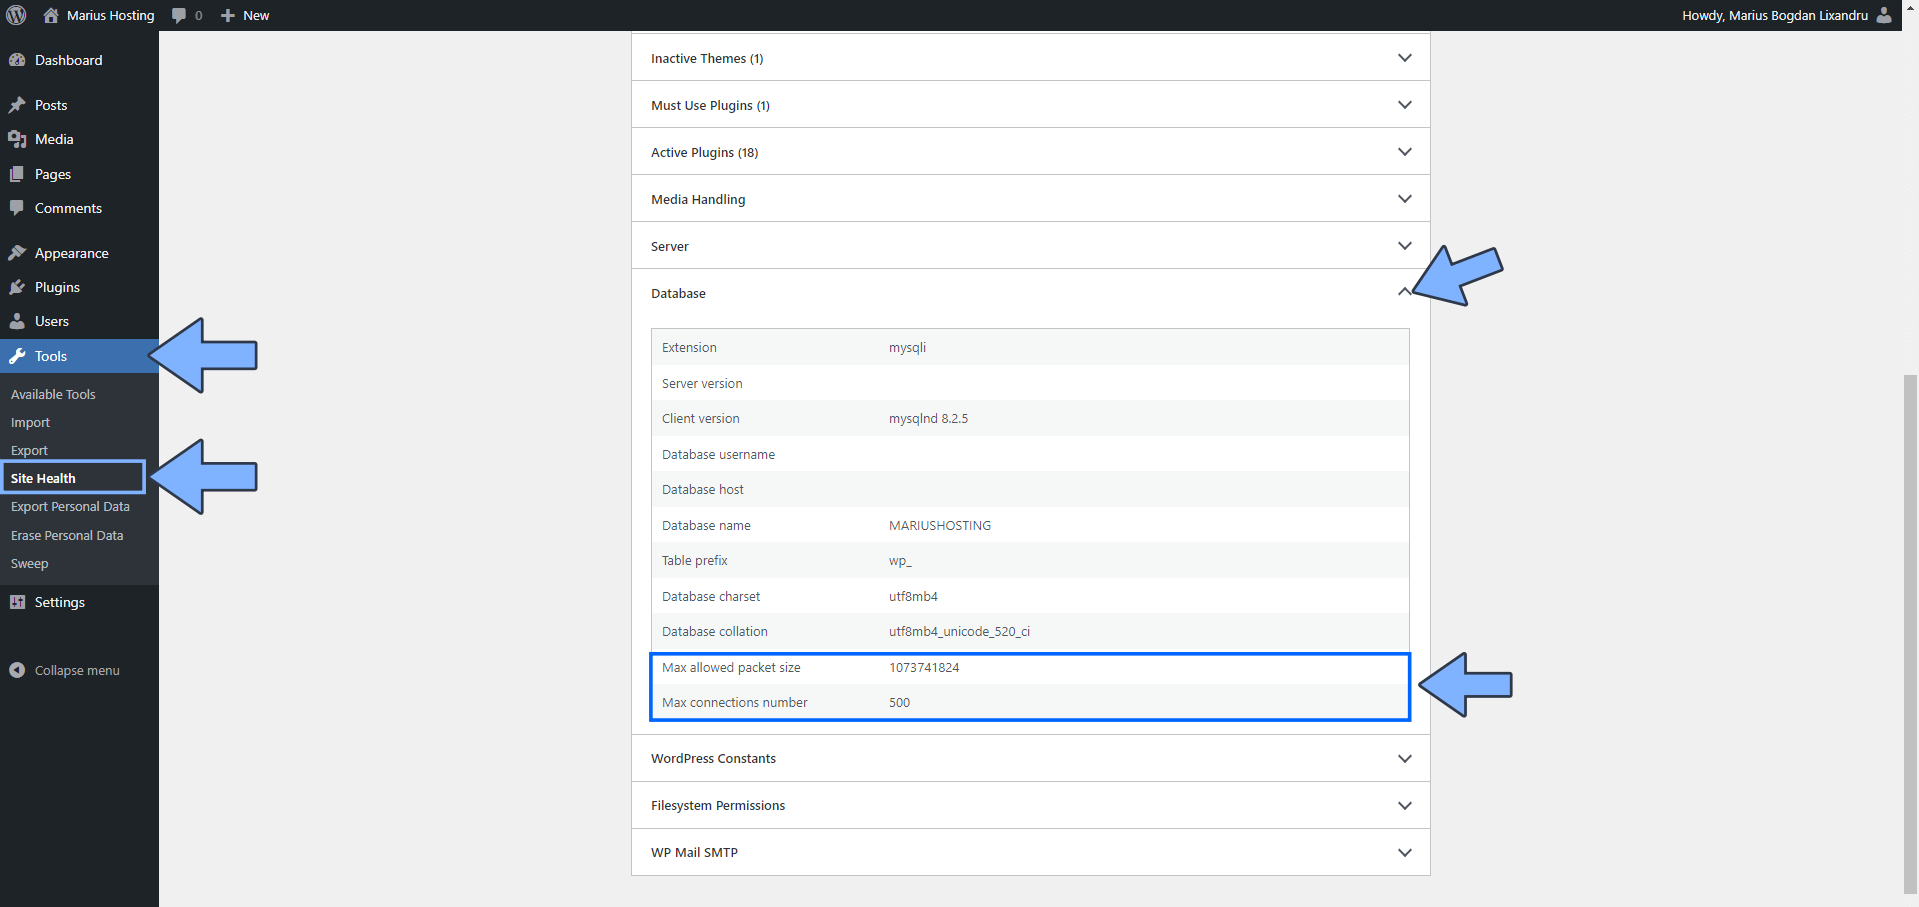
If you have WordPress installed on your Synology NAS, open it. On the left sidebar, under Tools, click on Site Health. Click on the Info tab and look for Database. Click on the Database down arrow to expand the Database information. Follow the instructions in the image below.
STEP 3
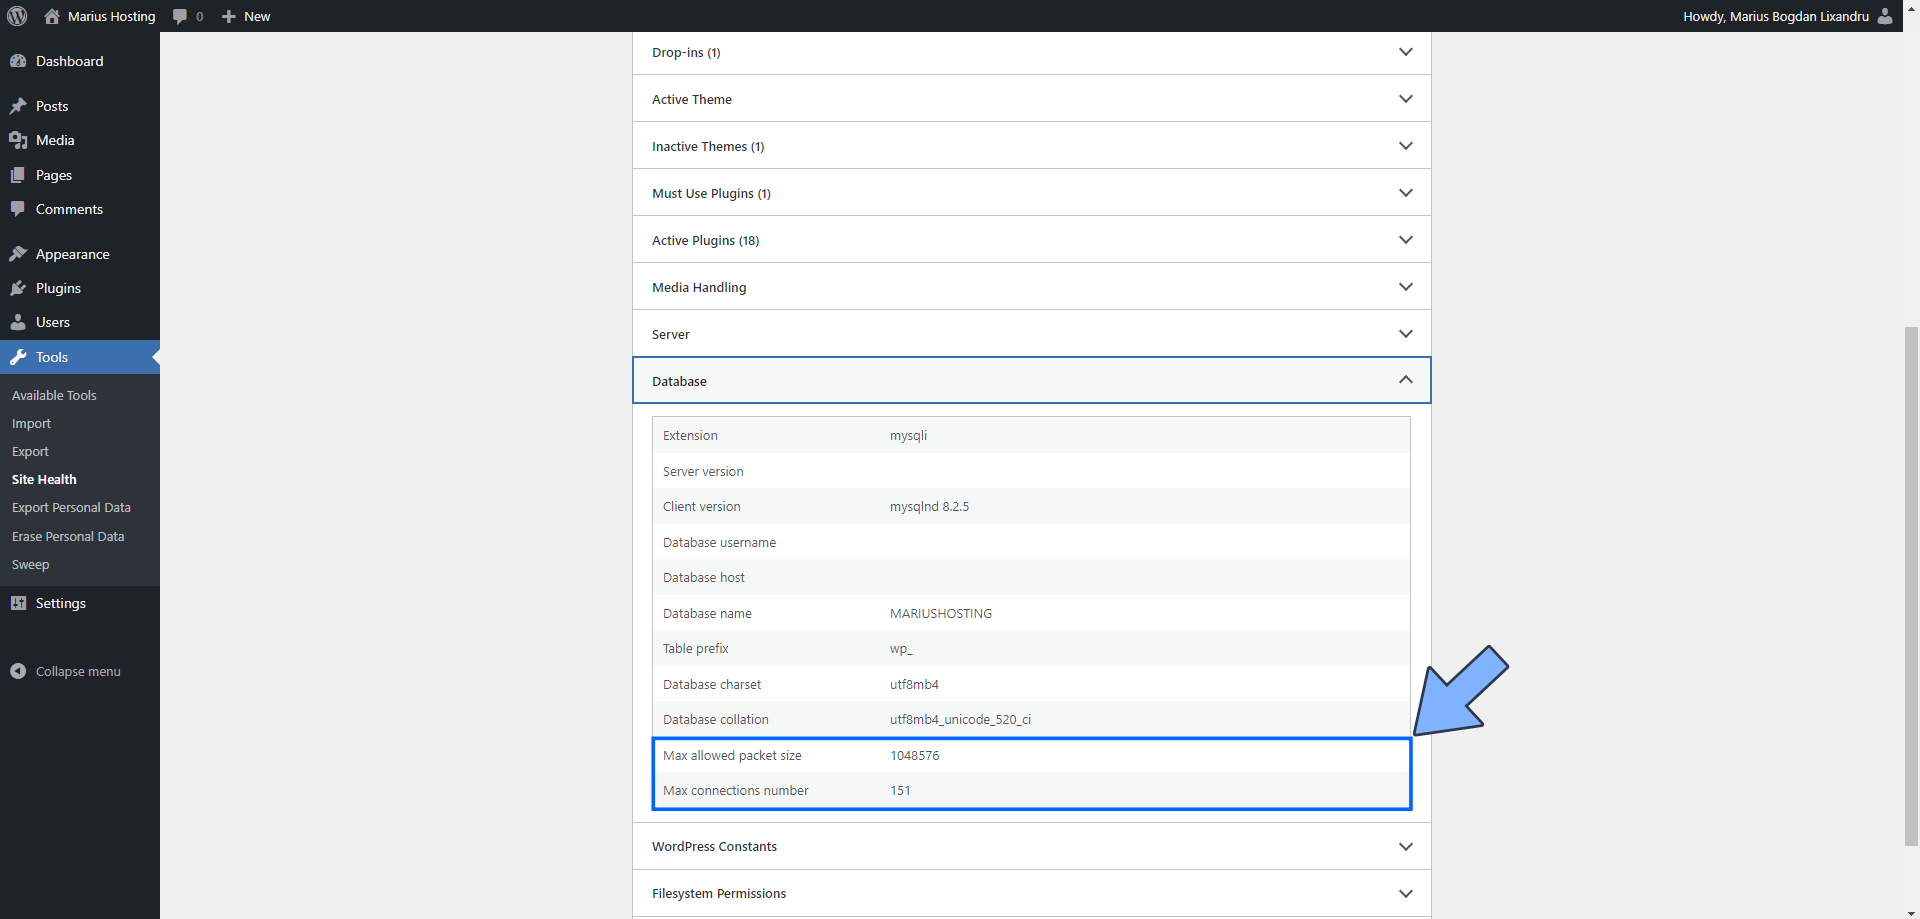
As you can see, the Max allowed packet size is set to 1 Megabyte and the Max connections number is set to 151. Go to the next STEP to find out how to increase these variables.
STEP 4
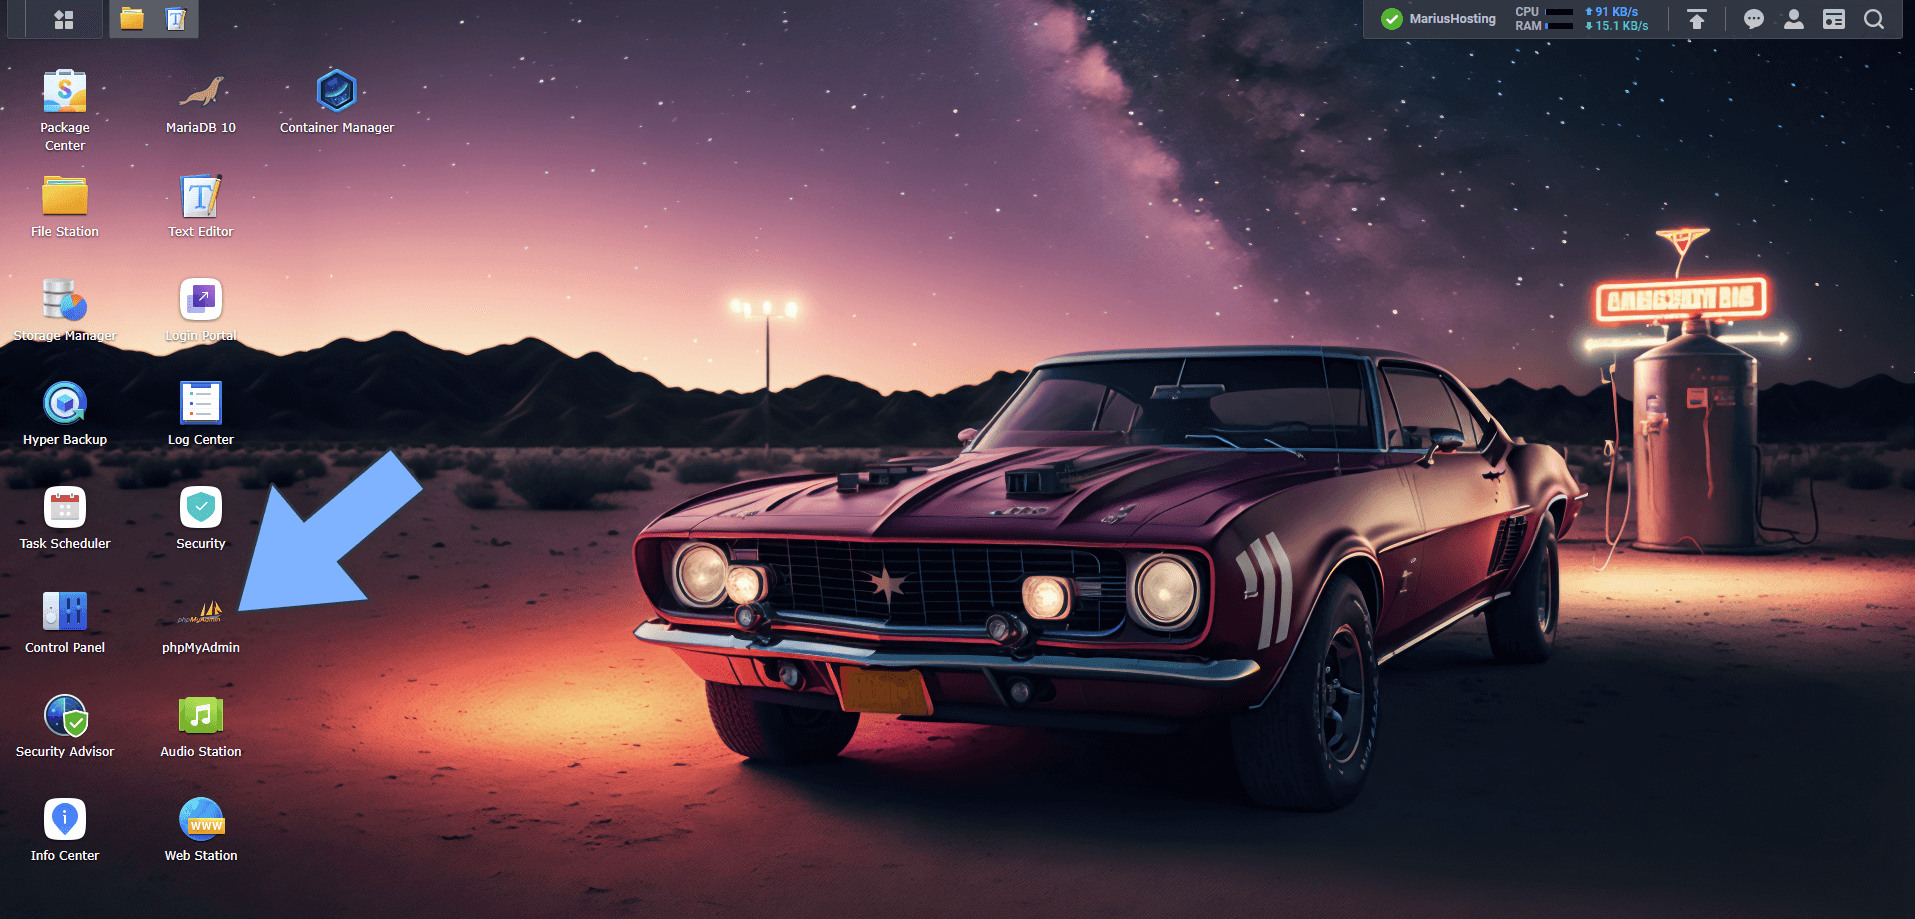
Open phpMyAdmin. Connect using your MariaDB root credentials. Follow the instructions in the image below. Note: If you have installed WordPress via my Docker Guide, you can reach the dockerized phpMyAdmin page easily.
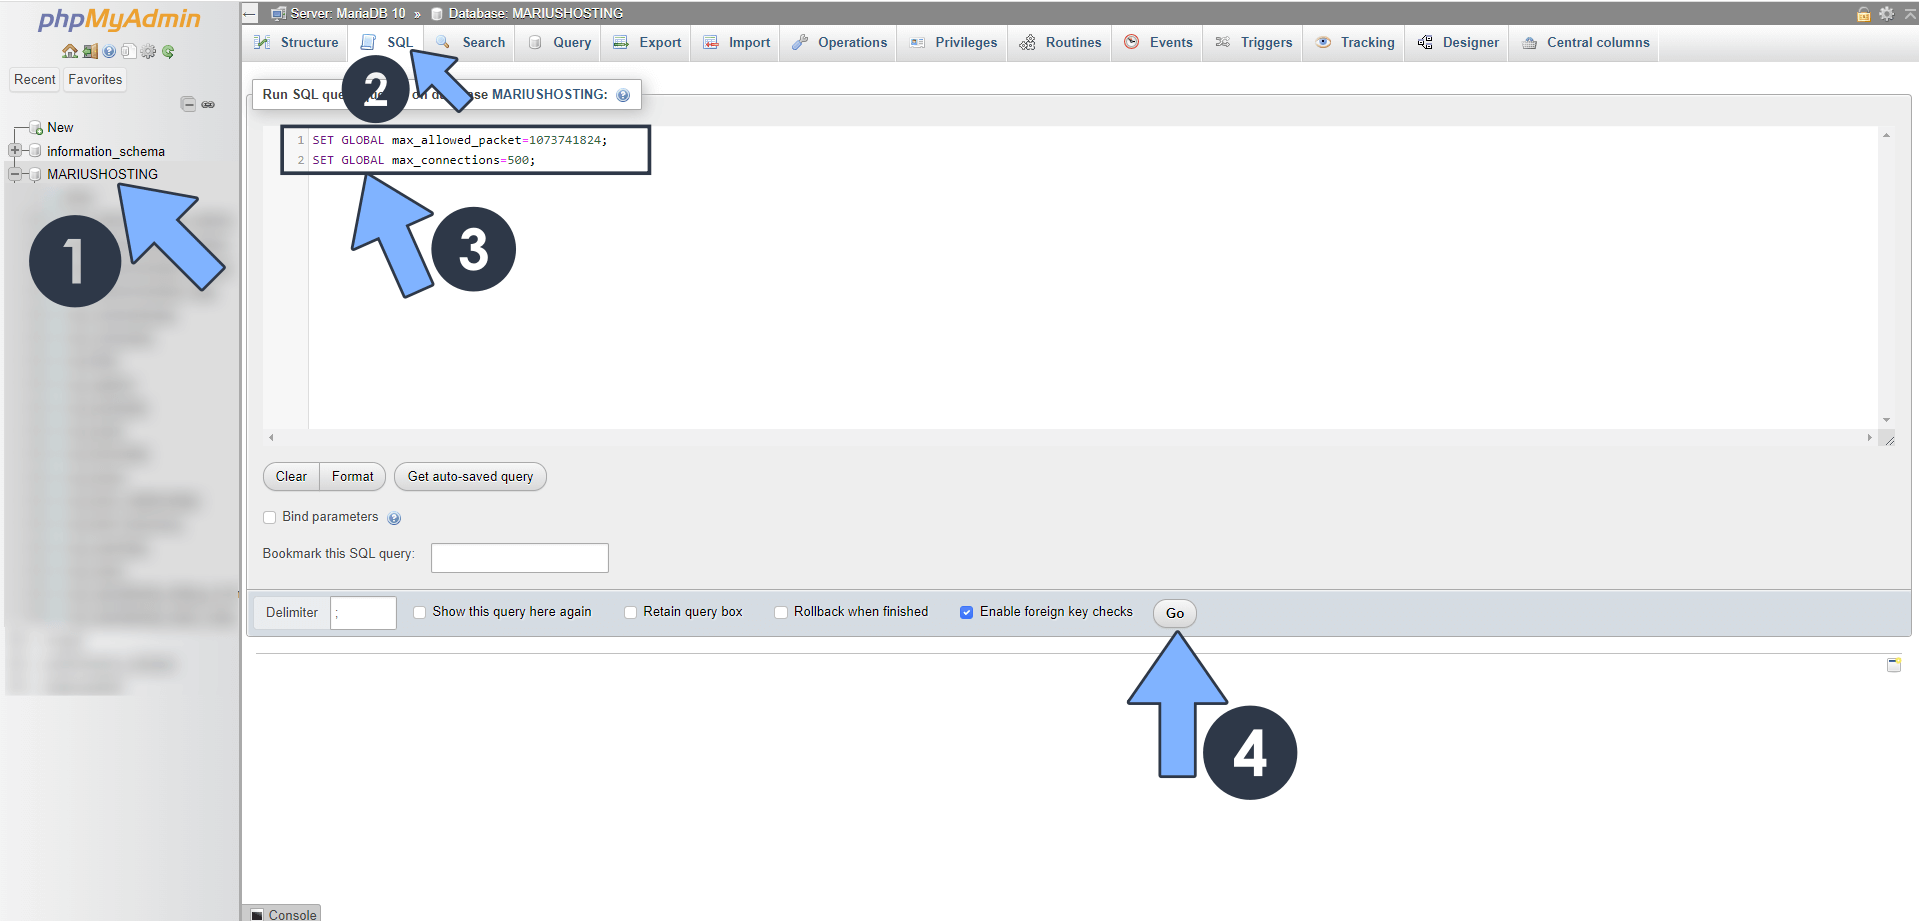
STEP 5
On the left sidebar in phpMyAdmin, click on your database then the SQL tab. Copy the following code below, then paste it in the Run SQL query area. After that, click Go. Follow the instructions in the image below.
SET GLOBAL max_allowed_packet=1073741824;
SET GLOBAL max_connections=500;
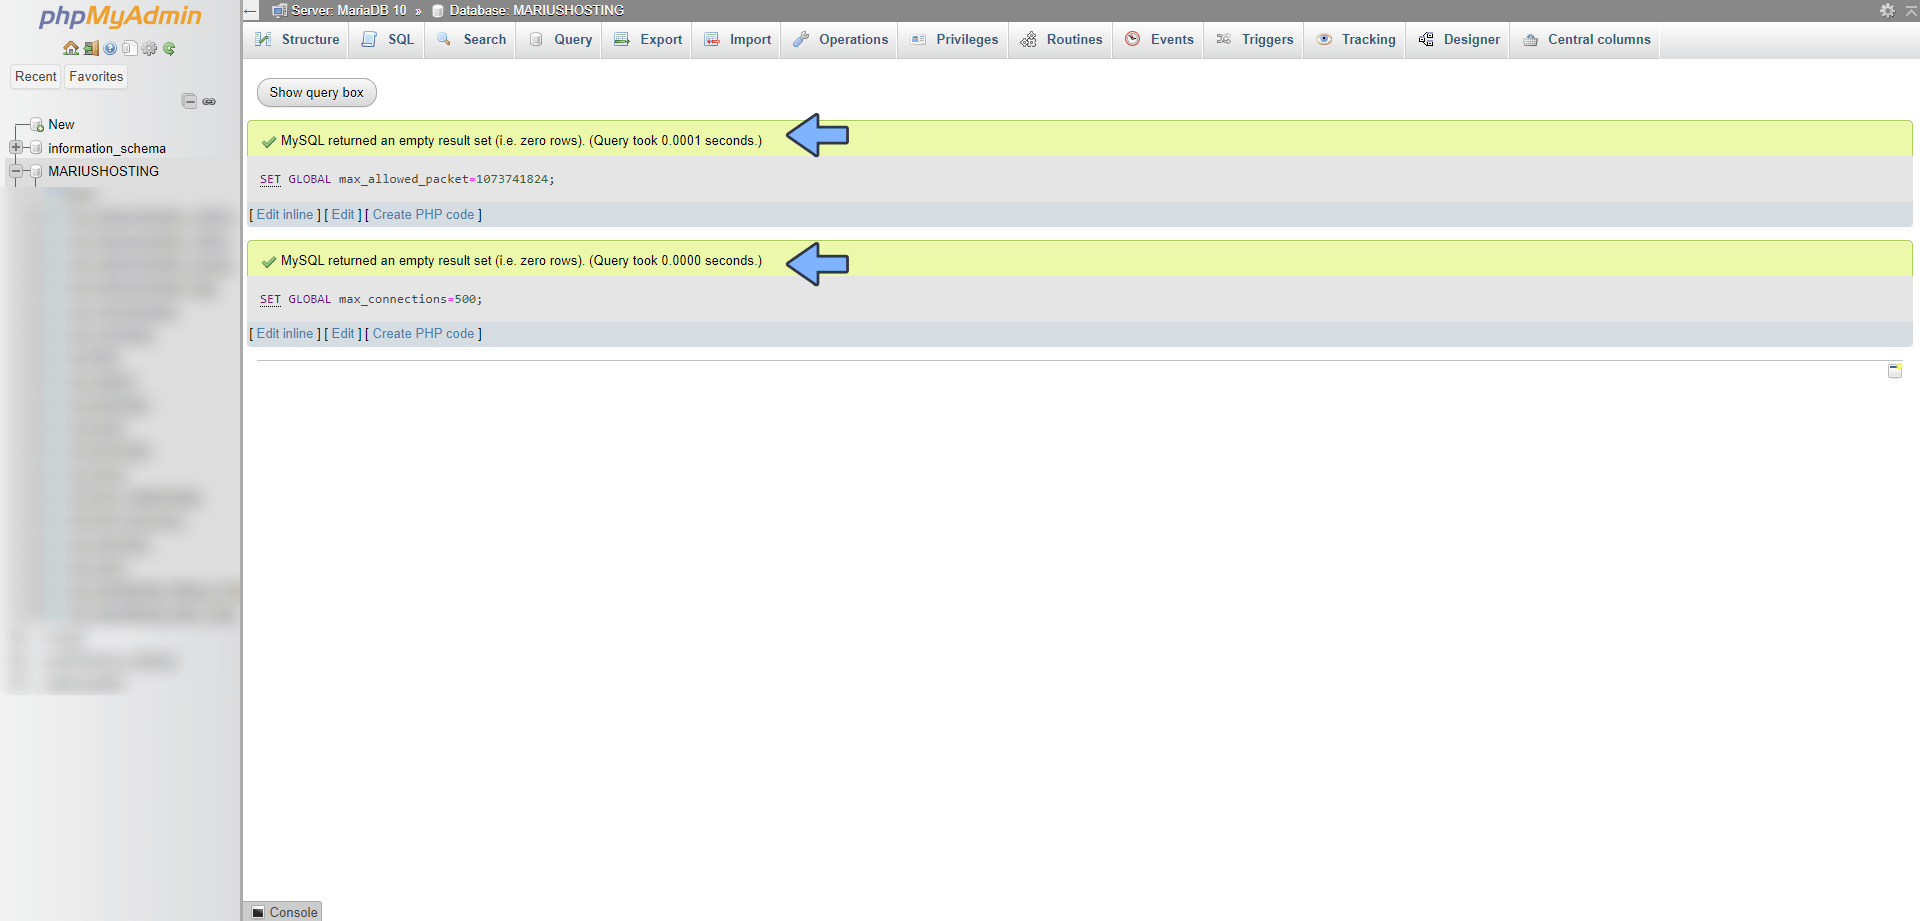
STEP 6
You will get the confirmation of the success of the operation in green. Follow the instructions in the image below.
STEP 7
When you check your Site Health in WordPress, you will see that your MariaDB now has a Max allowed packet size of 1 Gigabyte instead of 1 Megabyte, and the Max connections number has gone up from 151 to 500.
STEP 8
You can also follow my new guide on how to Increase MariaDB Innodb Buffer Pool Size.
Note: Keep in mind that every time you back up your MariaDB package using Hyper Backup, the MariaDB package will be restarted and you will lose these settings above. Also, if you reboot your NAS, you will lose these settings as well. To permanently change the Max allowed packet size and the Max connections number settings, you need to access the my.cnf file in MariaDB using Filebrowser then change these variables inside this file. my.cnf location via Filebrowser: @appstore>MariaDB10>usr>local>mariadb10>etc>mysql>my.cnf. If you don’t know how to do this, just make sure that you have followed STEP 1 at the beginning of this article, then contact me via email and I will tell you how to set these variables as permanent on your Synology NAS.
This post was updated on Thursday / May 30th, 2024 at 2:00 PM