Do you want to update your current Docker Containers on your Synology NAS in a simple and easy way? Well, if you don’t want to use the automation offered by Watchtower and want to update your Containers manually with the latest image, I will teach you how to do this with Portainer.
STEP 1
Please Support My work by Making a Donation.
STEP 2
Attention: Make sure you have installed the latest Portainer version.
STEP 3
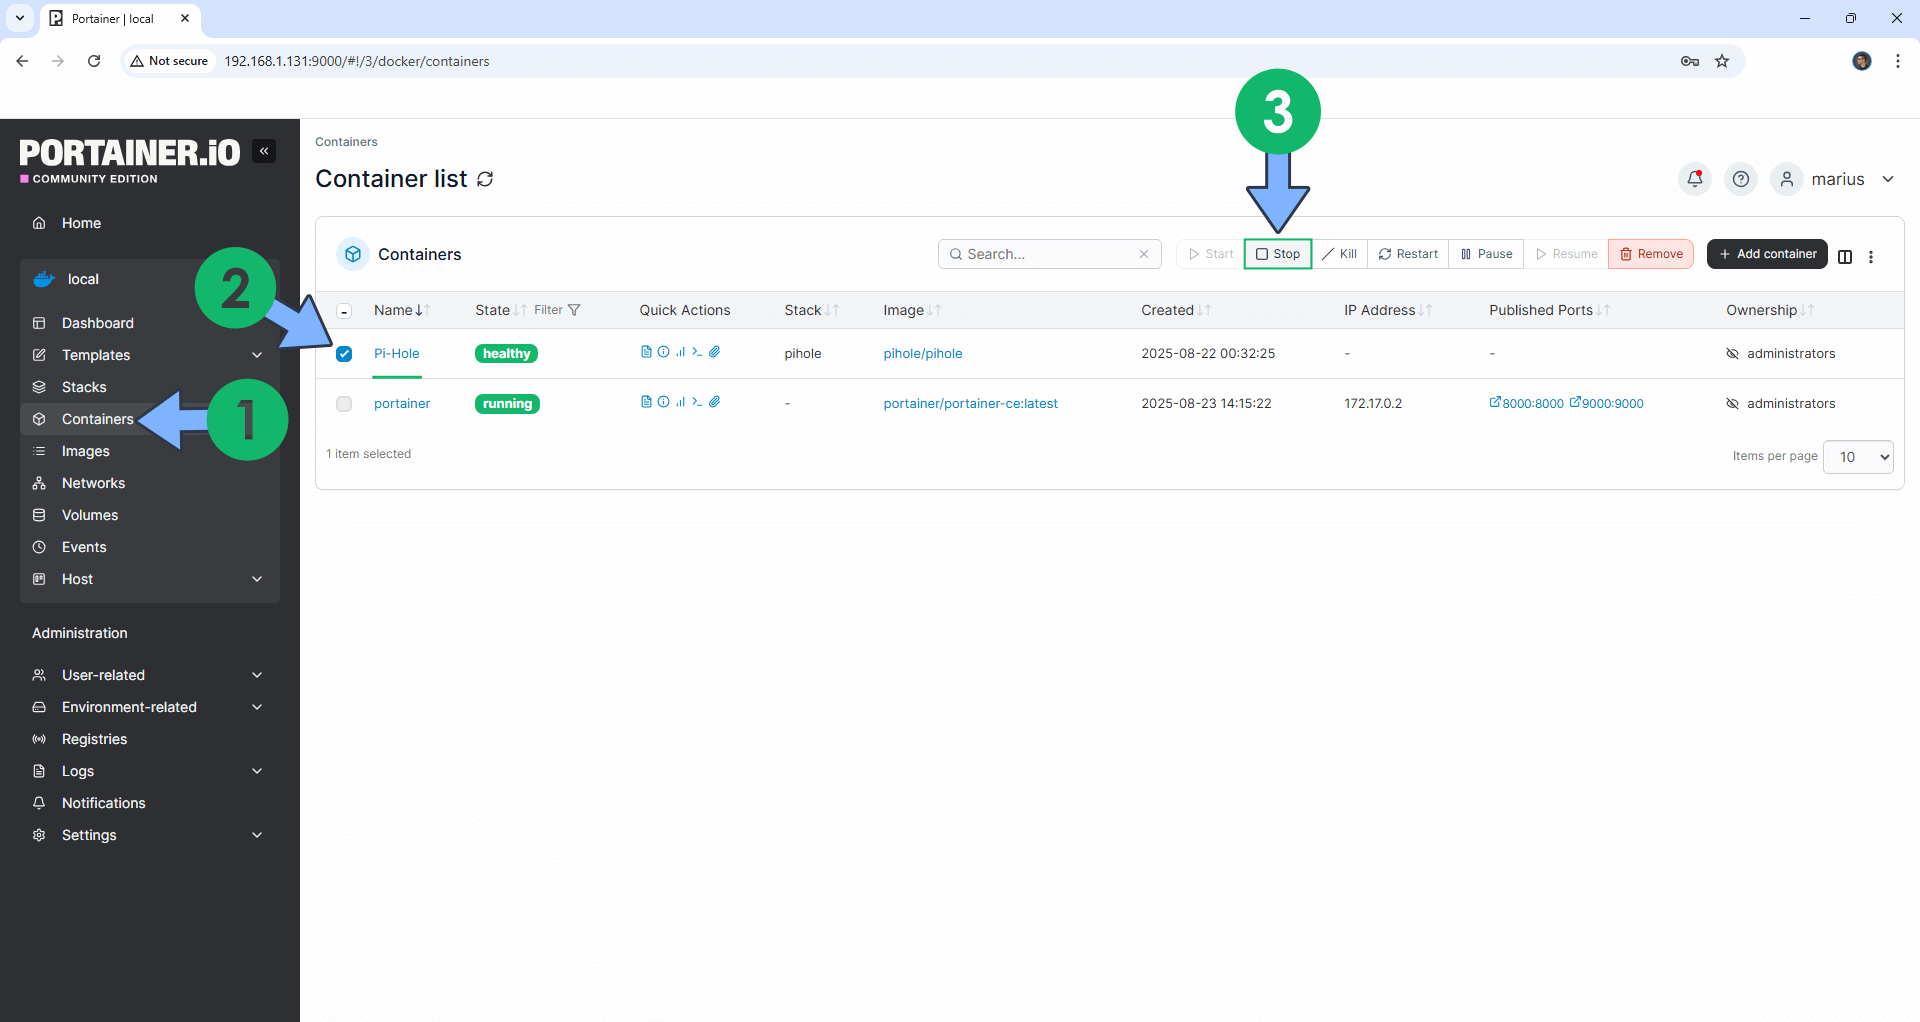
Open Portainer. Select/Check the Container you want to update, then click the Stop button. Follow the instructions in the image below.
STEP 4
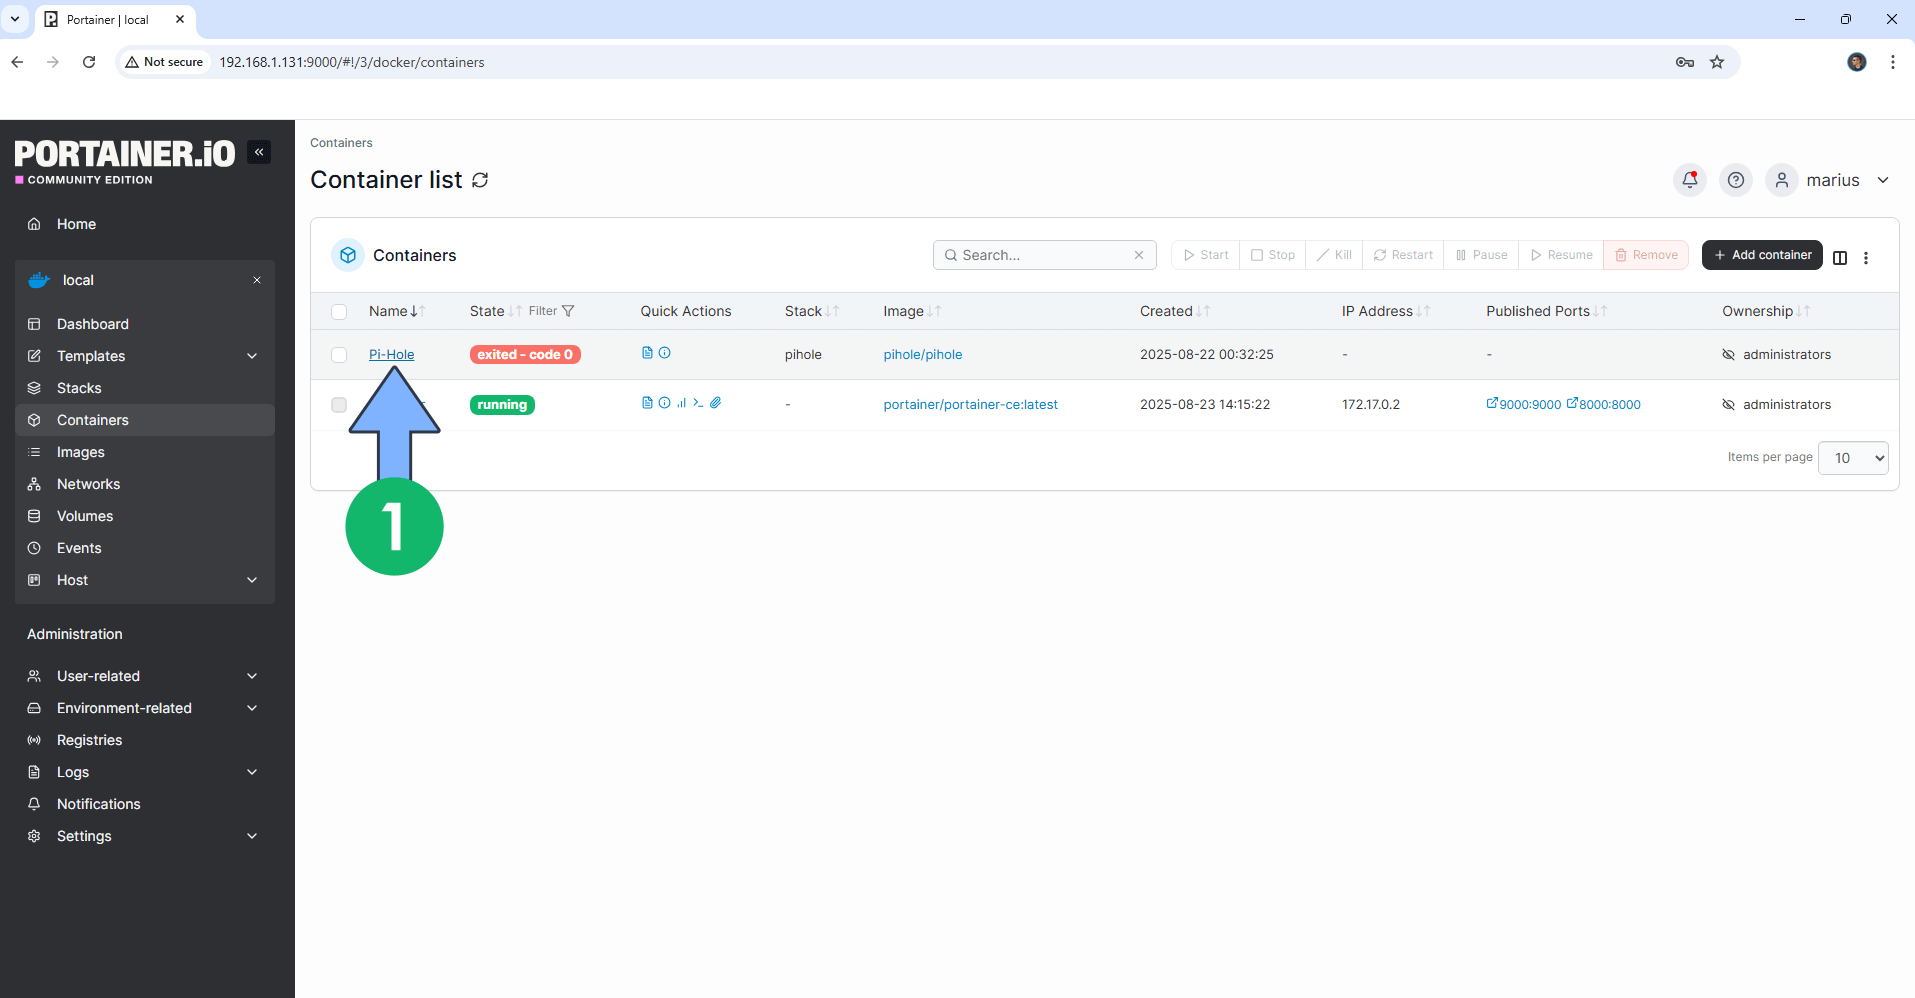
Your Container will be stopped. Click on the Container. Follow the instructions in the image below.
STEP 5
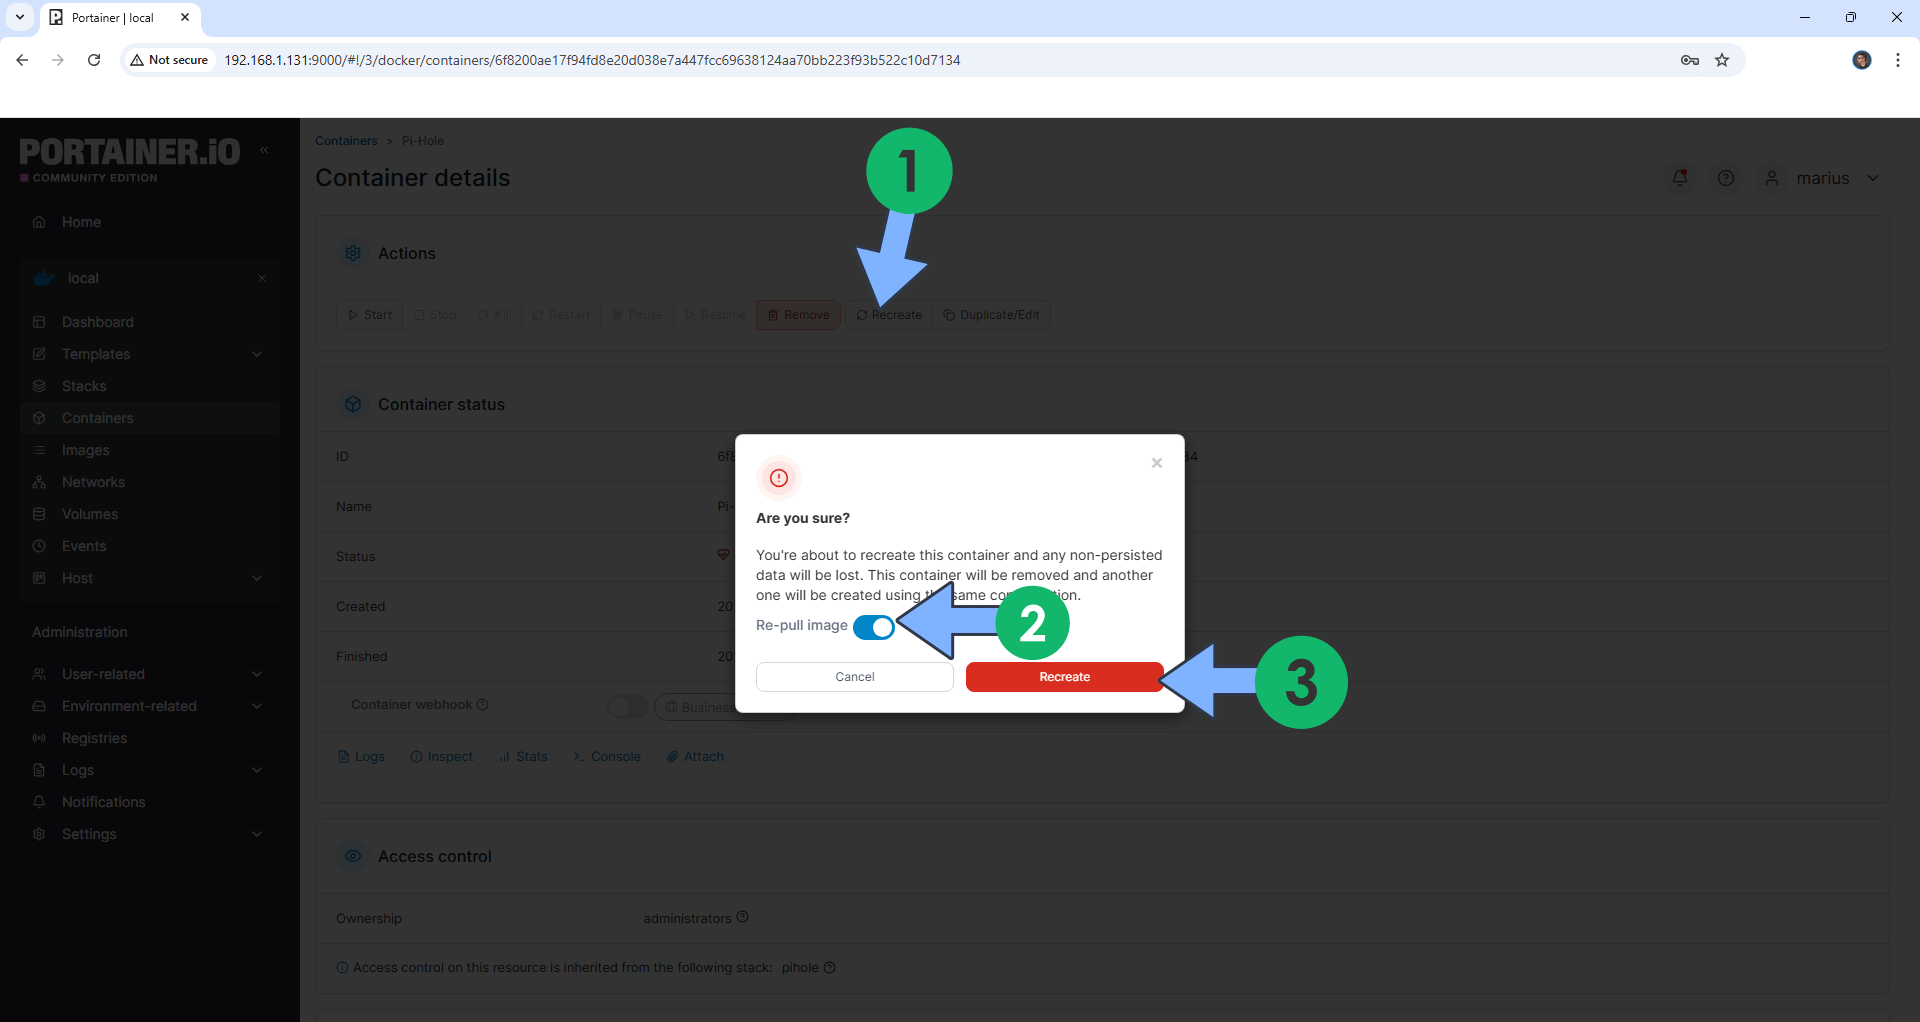
Once you click on the Container, a new page will open. Click the Recreate button. After you click on the Recrate button, a new pop up window will open. Select Re-pull image then click Recreate. Follow the instructions in the image below.
STEP 6
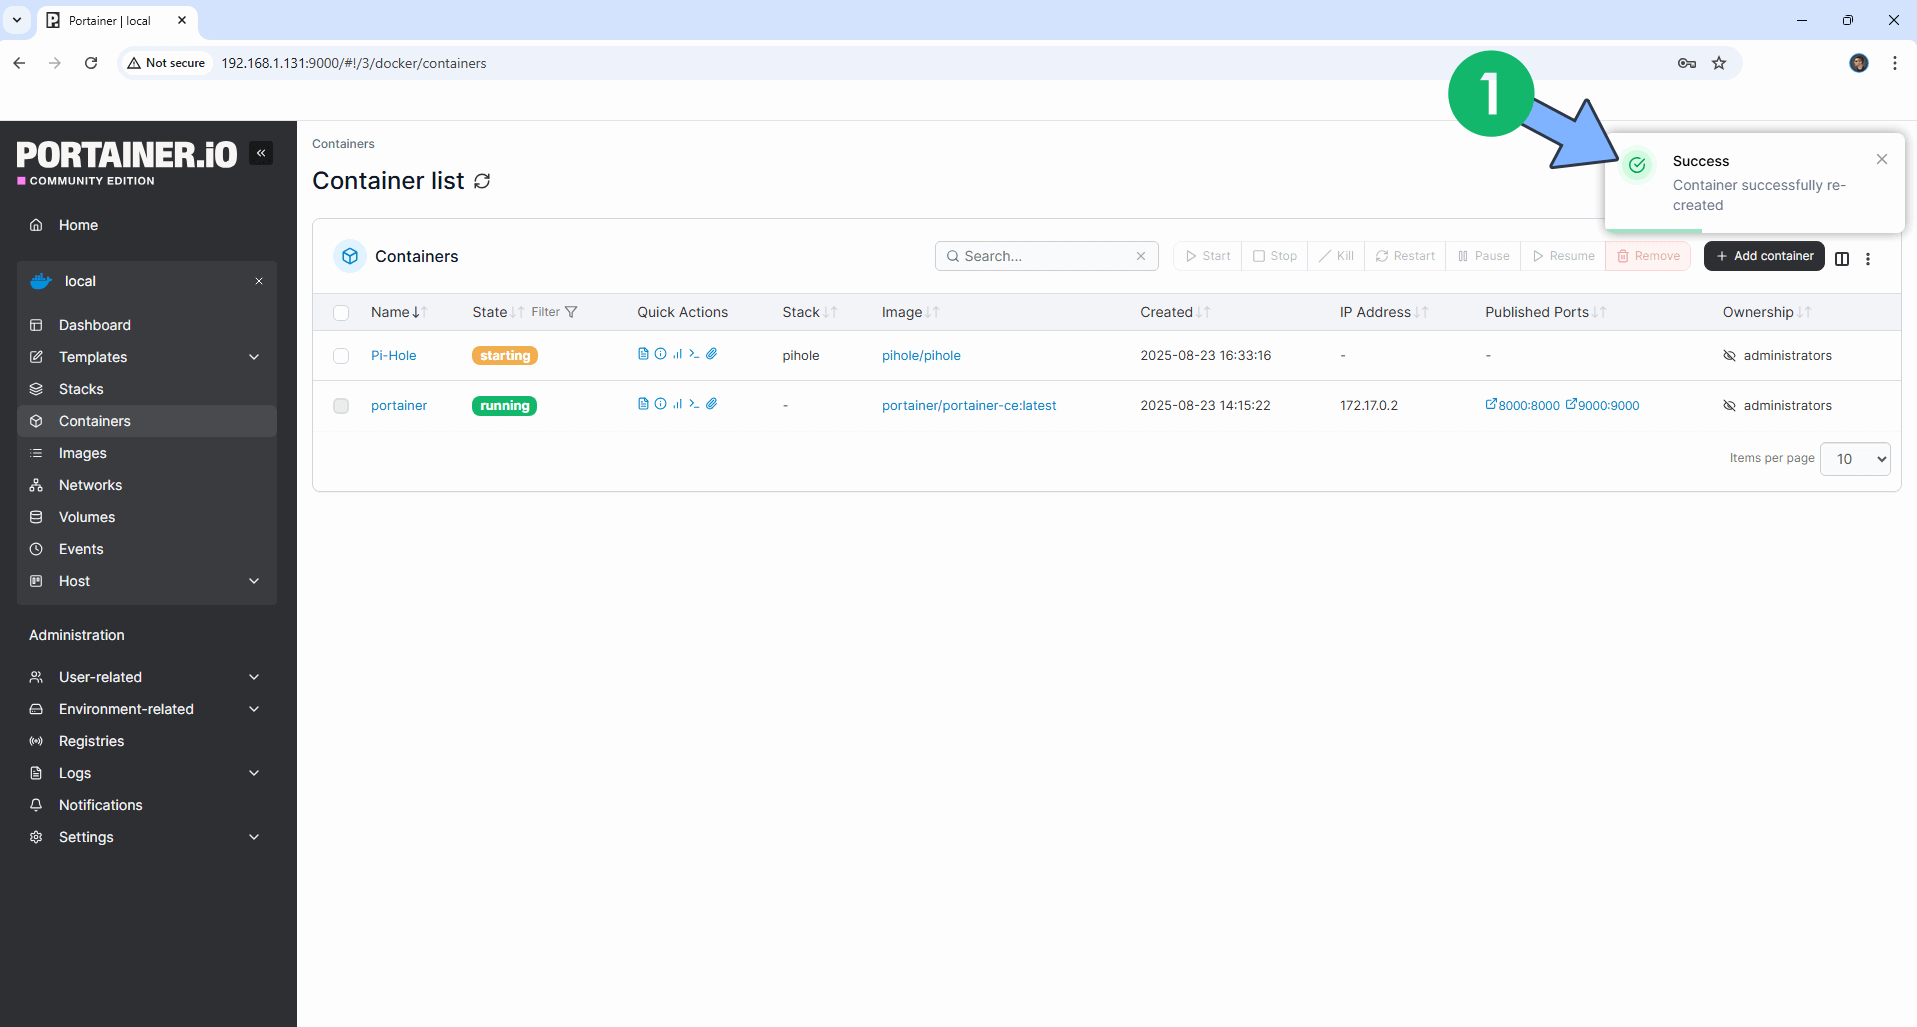
Your Container is now updated with the latest image!
STEP 8
🟢Please Support My work by Making a Donation. Almost 99,9% of the people that install something using my guides forget to support my work, or just ignore STEP 1. I’ve been very honest about this aspect of my work since the beginning: I don’t run any ADS, I don’t require subscriptions, paid or otherwise, I don’t collect IPs, emails, and I don’t have any referral links from Amazon or other merchants. I also don’t have any POP-UPs or COOKIES. I have repeatedly been told over the years how much I have contributed to the community. It’s something I love doing and have been honest about my passion since the beginning. But I also Need The Community to Support me Back to be able to continue doing this work.
📝Note: After you have learned how to update your Containers using Portainer, you will surely be wondering how to update your Portainer Container. To update Portainer to the latest version, follow my step by step guide on How to Update Portainer.
⚠️Warning: Do NOT update any database DB image/container that have the :latest tag.
This post was updated on Sunday / March 29th, 2026 at 2:20 AM