With the Synology MailPus Server package, your Synology NAS can become a mail system that supports SMTP, POP3, and IMAP. User accounts and email messages can be managed and archived on your Synology NAS. This tutorial shows you how to set up your own domain name for inbound and outbound SMTP on Synology MailPlus. Some preparation work is required to get the MailPlus Server running smoothly on your Synology NAS. Before proceeding, please pay special attention to the information below.
Having an external Static IP address is crucial for a mail system. Although it is possible to run a mail system with a dynamic IP address, it is not as reliable as using a static one. I strongly recommend buying a Static IP address from your ISP (Internet Service Provider). If they can’t give you a Static IP, just change your ISP to one who will offer you a Static IP.
STEP 1
Please Support My work by Making a Donation.
STEP 2
Register a personal Domain name using Godaddy to get stable and reliable services.
STEP 3
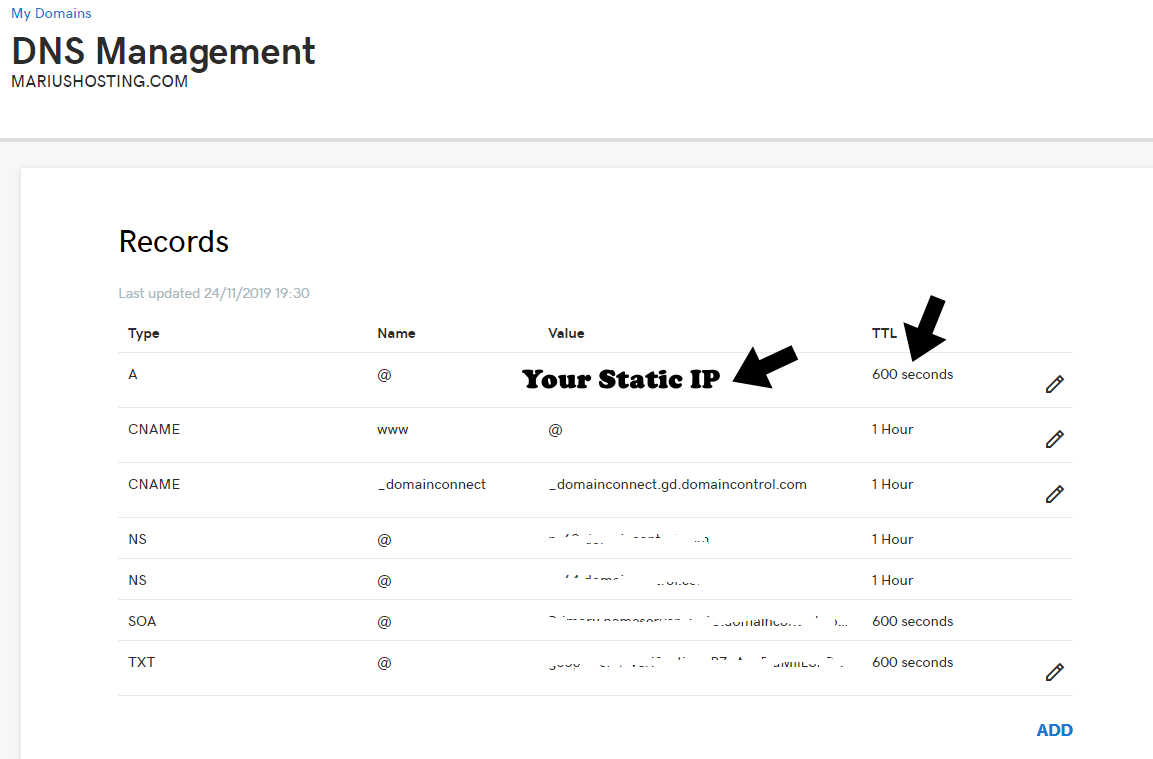
Set up DNS: A domain name is a label that identifies a network domain and functions as a link to the actual numeric IP address of a service node. You have to insert your Fixed IP on the A record. To allow clients to deliver emails to MailPlus Server over the Internet, you will also need to set up the MX record and A record of your Domain Name System (DNS) server. Log into your GoDaddy account, then go to your registered Domains. Follow the instructions in the images below.

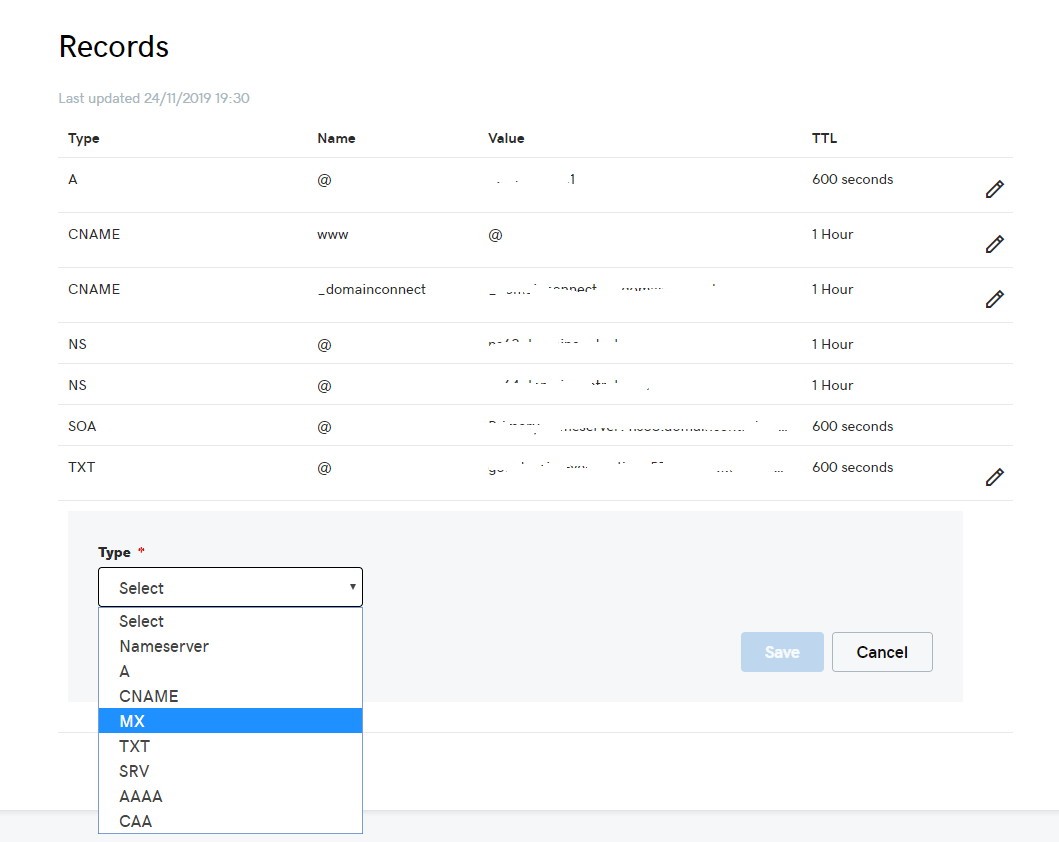
Click on “ADD” (at the bottom right in the image above) to add MX record, which is a type of resource record in the DNS server that points to a domain name. It specifies how Internet email should be routed using Simple Mail Transfer Protocol (SMTP). Each MX record contains a hostname and a preference. A hostname guides emails to arrive at the right destination, while a preference points out the relative priority of various servers.
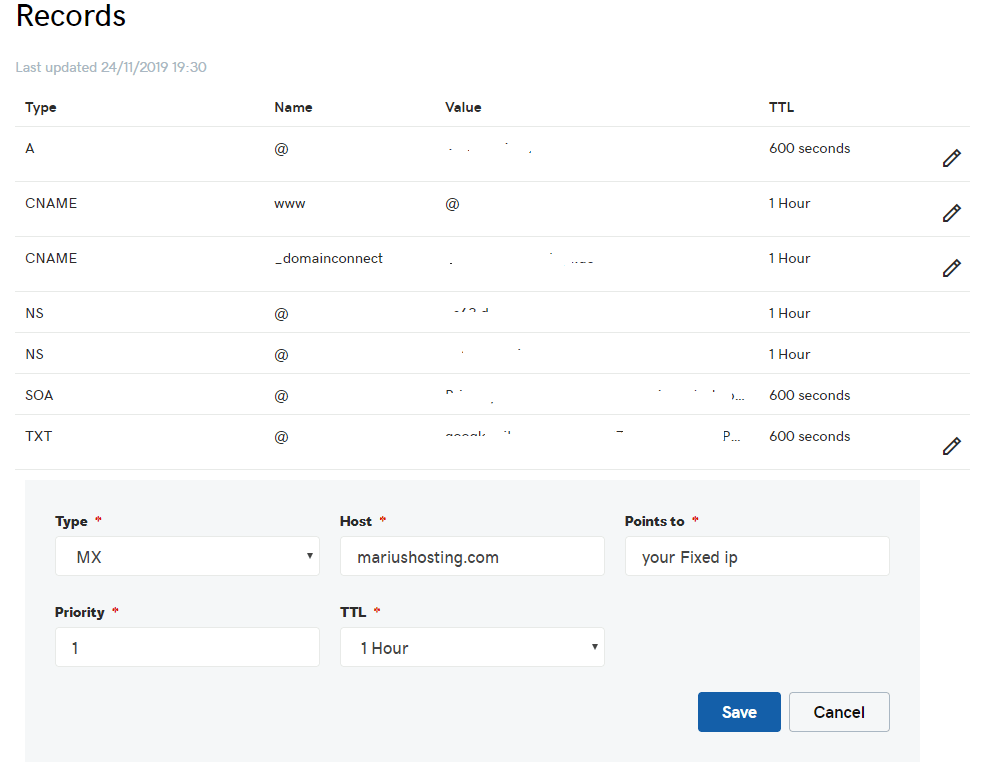
To make sure an email address like “marius@mariushosting.com” works properly, you have to set up the MX record of the domain “mariushosting.com”. In this case, point the MX record to the domain name of your Synology NAS. Settings can be modified from the management console of your registered domain name. For example:
Priority Host Record Points To @ mariushosting.com so you have to insert @ or mariushosting.com in the Host area. On TTL select 600 seconds = the settings will automatically apply in 10 minutes.
STEP 4
Install the MailPlus Package on your Synology NAS. Go to Package Center to search for and install MailPlus Server. When installing MailPlus Server, Package Center will automatically download and install the Perl & Python Module.

STEP 5
Launch MailPlus Server, and choose Create a new mail system (assuming that you are setting up a new mail system), then click Next to continue the setup. Enter the values below for the fields on the next page:
Account type: indicates which types of user account id are allowed to use the services provided by MailPlus Server. Choose Local users.
Network Interface: specifies which LAN IP is used for MailPlus Server.
Mail System Hostname: your registered domain name. The hostname will be part of your email address (the portion after the @ sign). For example, if “yourdomain.com” is entered here, then the email addresses will be like “user@yourdomain.com”.
Volume: defines where MailPlus Server and its data will be stored.
STEP 6
SMTP settings on the MailPlus server. By default, the SMTP protocol runs at port number 25. Open Manager Interface, navigate to SMTP -> General tab and set up the server. The Domain name field is your registered domain name. If your ISP does not block inbound port 25, you can leave the Port field as 25.
STEP 7
Port forwarding. Port forwarding is necessary if the server is running behind a router. Most people forget to activate port forwarding in their router settings. If the ports that point to your Synology device are not opened, all the services you have activated on those specific ports will not work. This is a step overlooked by many, but essential for the perfect functioning of MailPlus Server. All you need to do is give your Synology device permissions on port 25, both TCP-UDP, so that traffic is forwarded to MailPlus Server.
The configurations above are for reference only. You may need to adjust the settings based on your situation. If you have any questions regarding the setup, you can contact me using the contact page.
Note: If you don’t have an UPS to keep your device on at all times, then every time there is a power outage or your Internet is down, all emails sent to you during that time will be lost. This is also the reason why I am not using MailPlus Server with my own domain name right now.
Note: Mailplus Server it’s available only for a plus NAS “+” series.
This post was updated on Sunday / February 9th, 2020 at 9:39 PM