
For one reason or another you may need to completely remove the SSD cache and recreate it again. In DSM 7 the option is well hidden – at first glance, it seems there is no option to remove the SSD cache, but it’s right under our nose. Today I will teach you how to remove the SSD cache and recreate it again.
STEP 1
Please Support My work by Making a Donation.
STEP 2
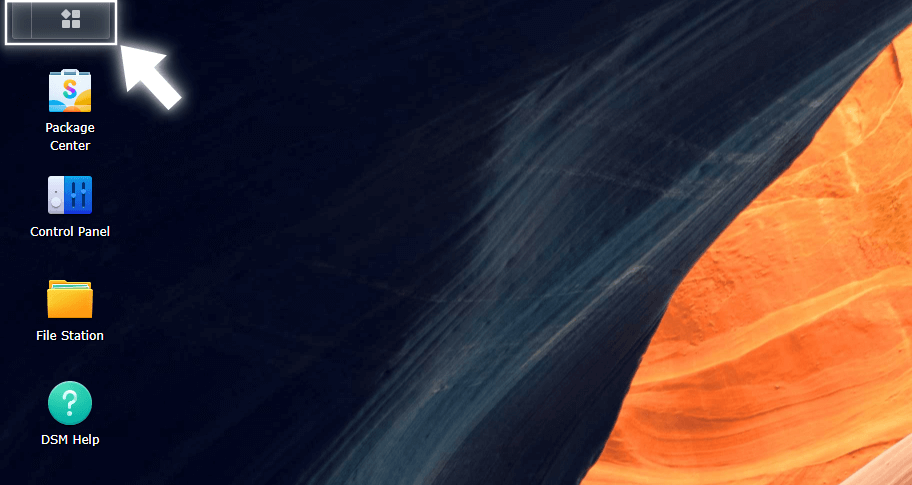
Go to the DSM Main menu. Follow the instructions in the image below.
STEP 3
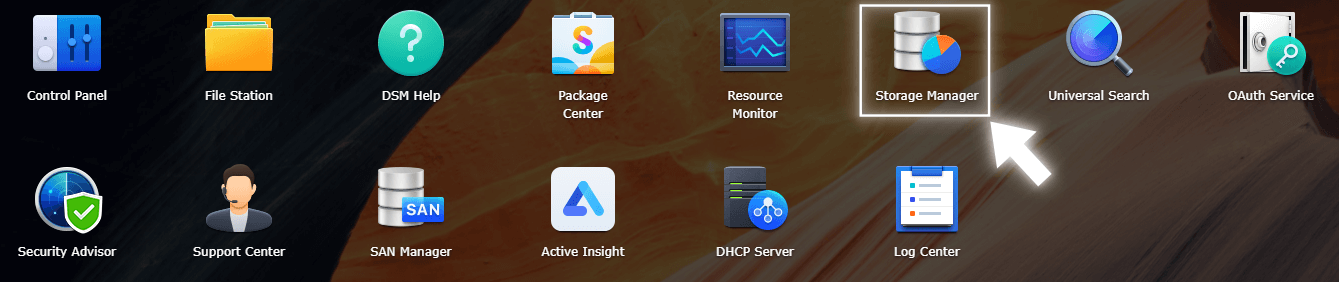
Click on the Storage Manager icon. Follow the instructions in the image below.
STEP 4
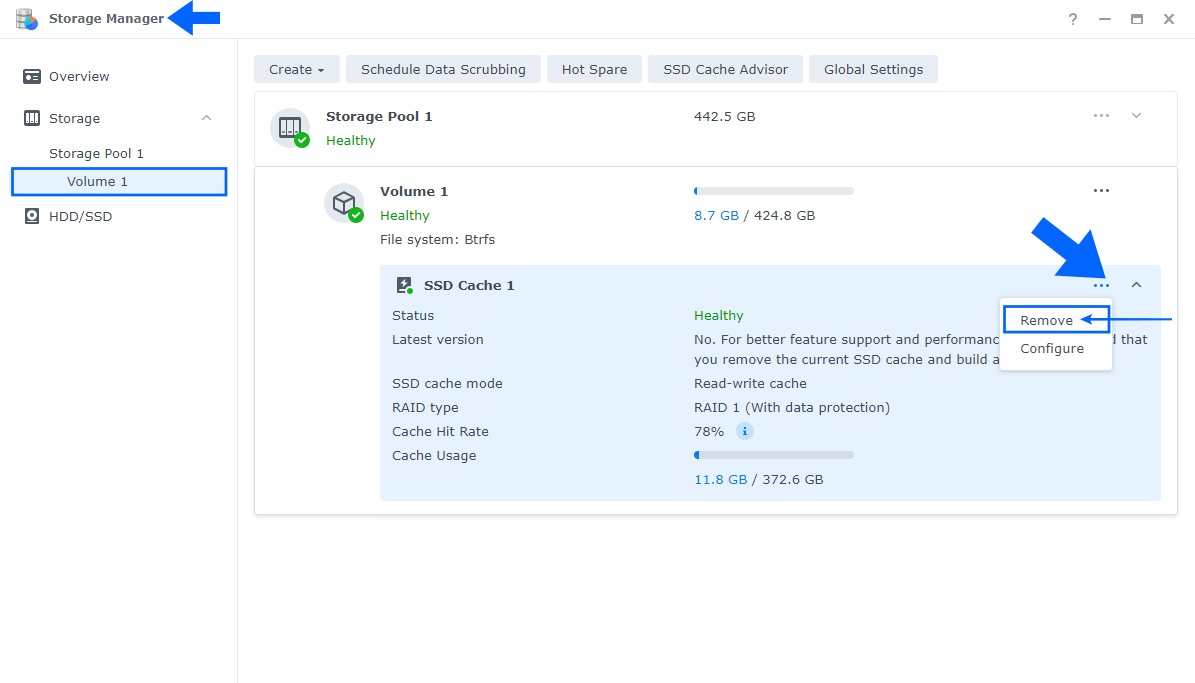
Go to Storage Manager / Storage / Select your Volume, in my case Volume 1, and, on the SSD Cache 1, click the 3 dots at the top right. After that, select the first option “Remove“. Follow the instructions in the image below.
STEP 5
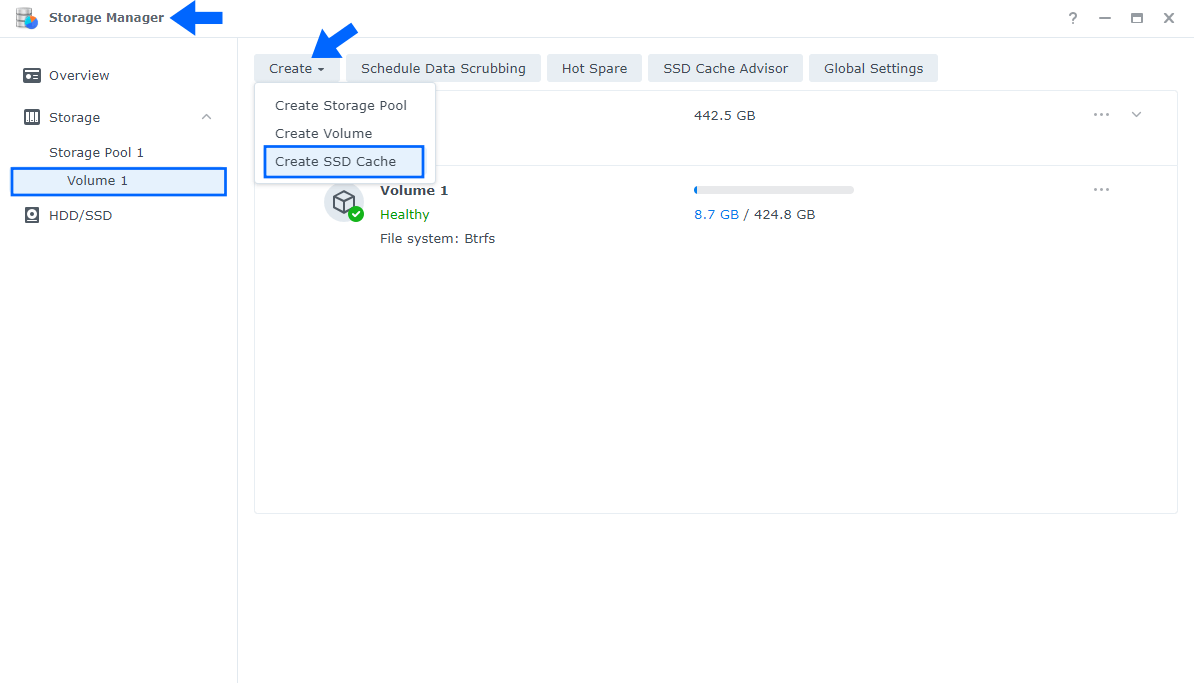
After the SSD cache is removed, you can create it from scratch. Go to Storage Manager / Storage / Select your Volume, in my case Volume 1, and click on the Create tab. From the dropdown menu select Create SSD Cache. Follow the instructions in the image below.
Note: If you can’t remove your SSD Cache you can try to reboot your NAS then try again to follow the steps above.
This post was updated on Wednesday / August 10th, 2022 at 9:23 PM