Homebridge is, as the name suggests, a bridge between HomeKit and other smart home devices. Homebridge is lightweight NodeJS server you can run on your home network that emulates the iOS HomeKit API. Homebridge allows you to integrate with smart home devices that do not support the HomeKit protocol. After installing Homebridge, it remains running and connected to your network, ready to service requests from Siri. In this step by step guide I will show you how to install Homebridge on your Synology NAS through Package Center without Docker. You can also install Homebridge using docker.
STEP 1
Please Support My work by Making a Donation.
STEP 2
Download the latest .spk file for your NAS model from the blue link below. You will find the download file in the (Assets area).
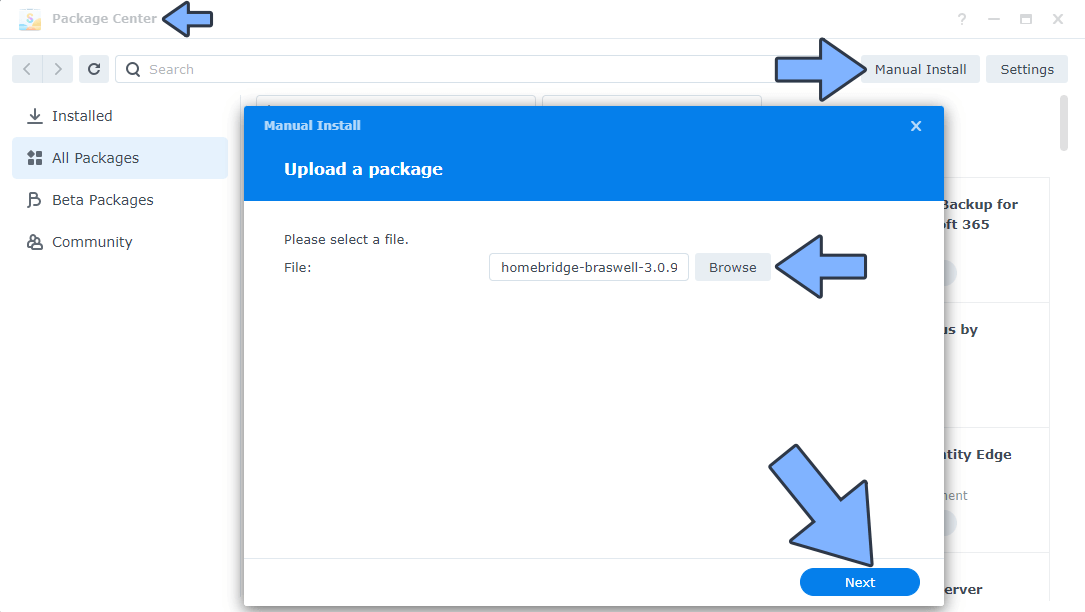
STEP 3
Open Synology Package Center. At the top right, click Manual Install. Upload the homebridge .spk package that you have previously downloaded at STEP 2 then click Next to start the installation process. Follow the instructions in the image below.
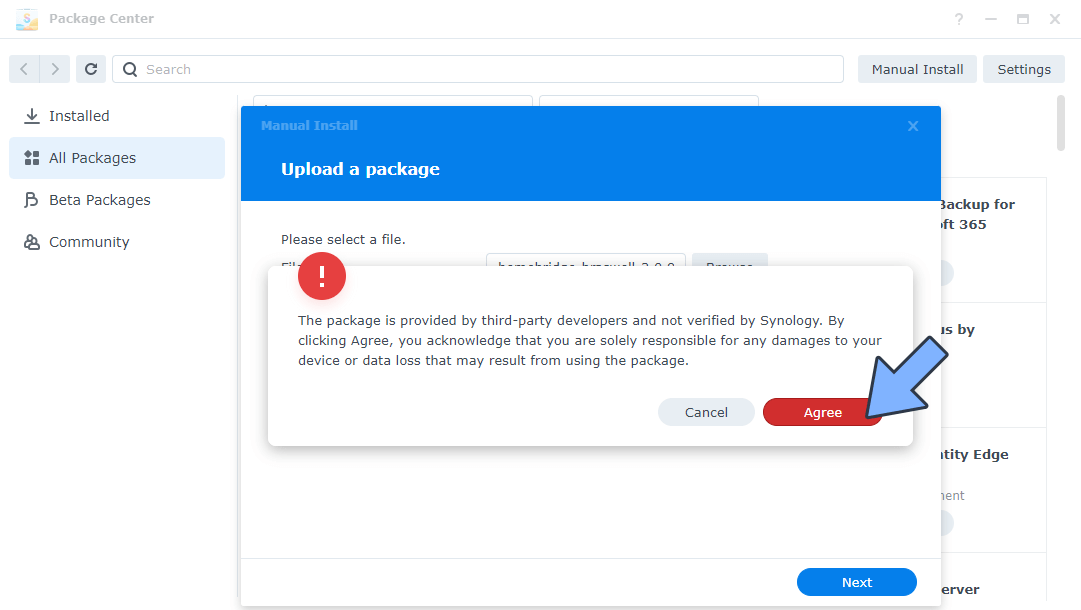
STEP 4
A new Pop-up Warning message will appear. Click Agree. Follow the instructions in the image below.
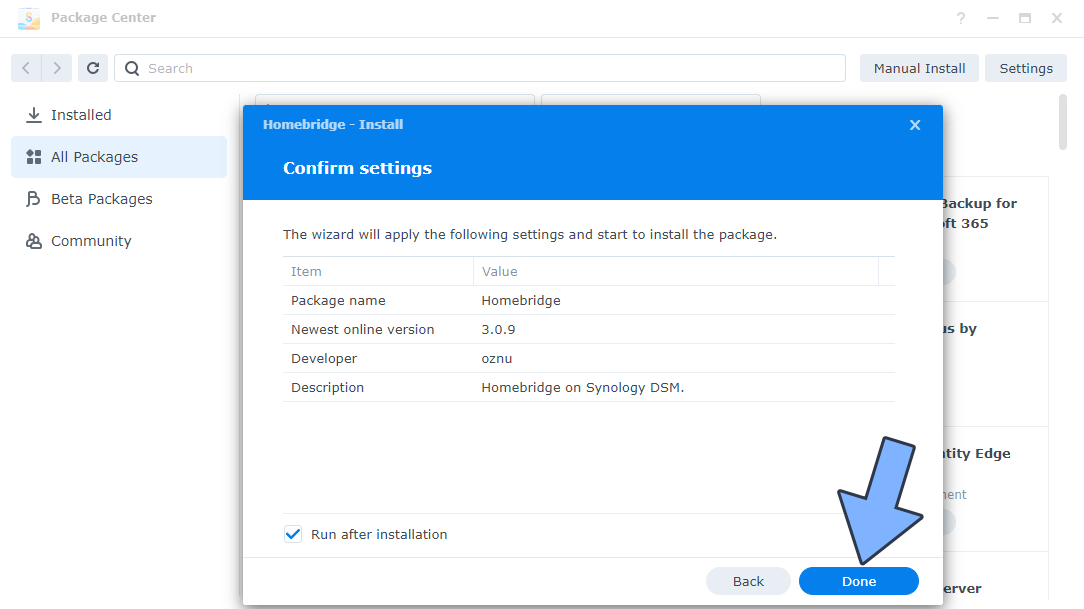
STEP 5
Click Done. Follow the instructions in the image below.
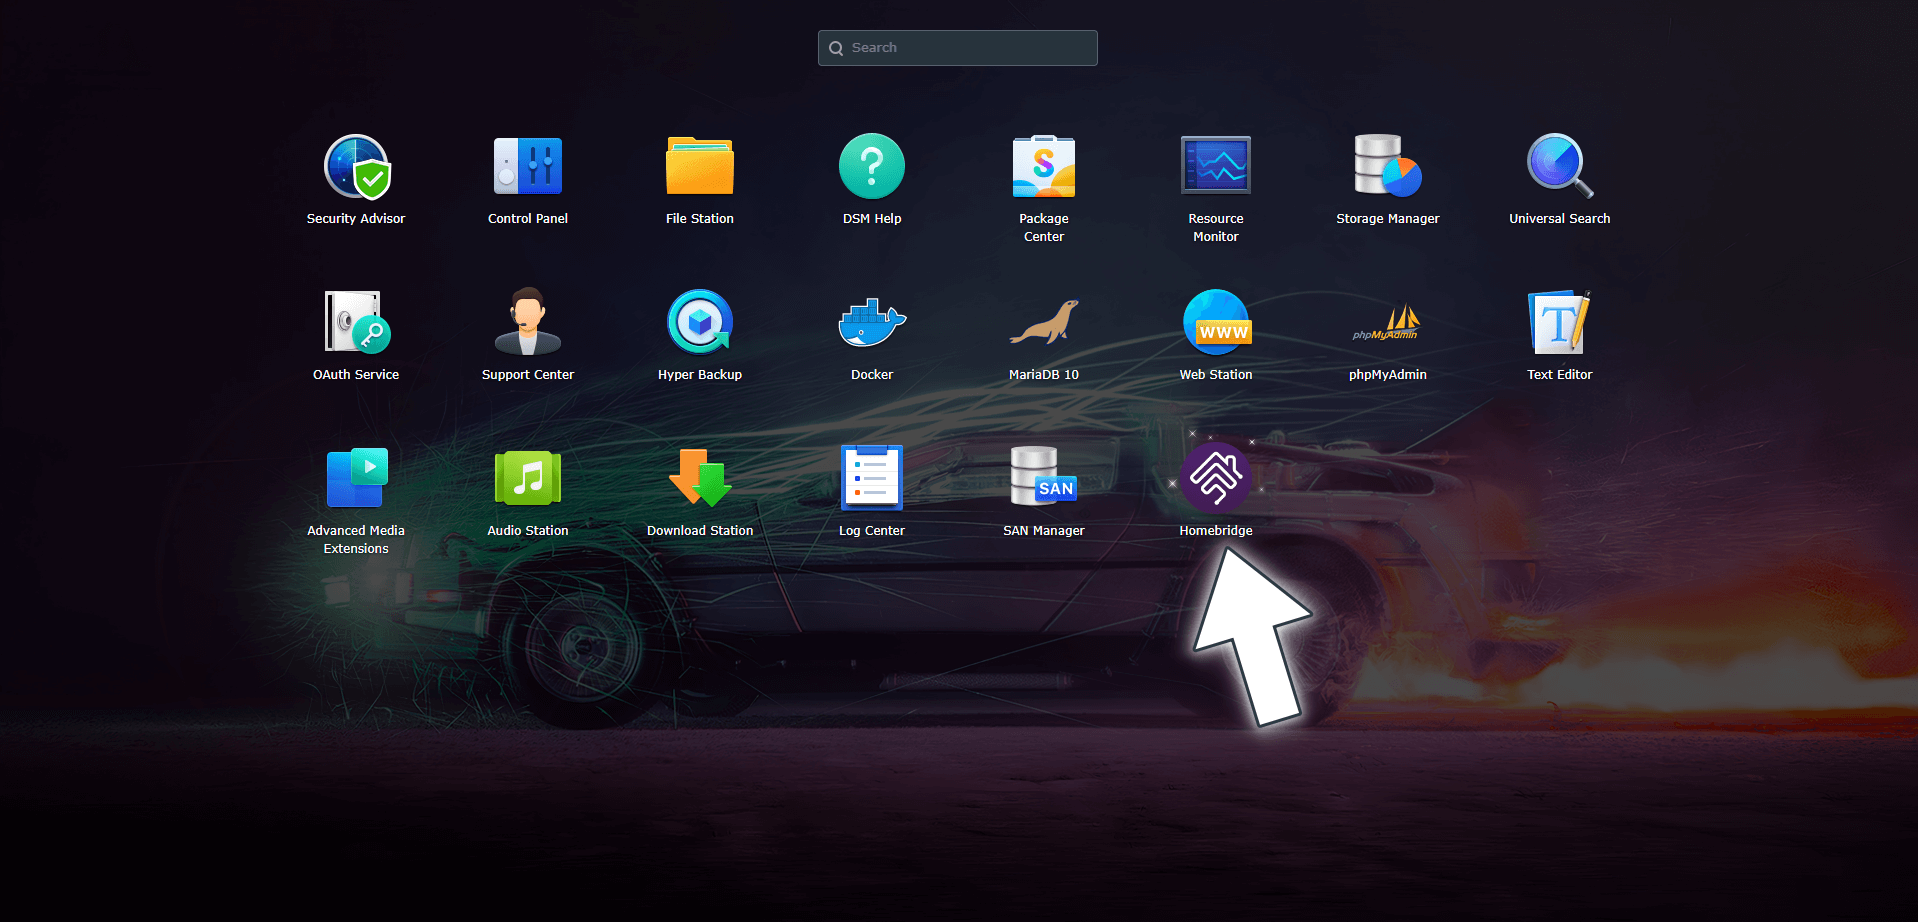
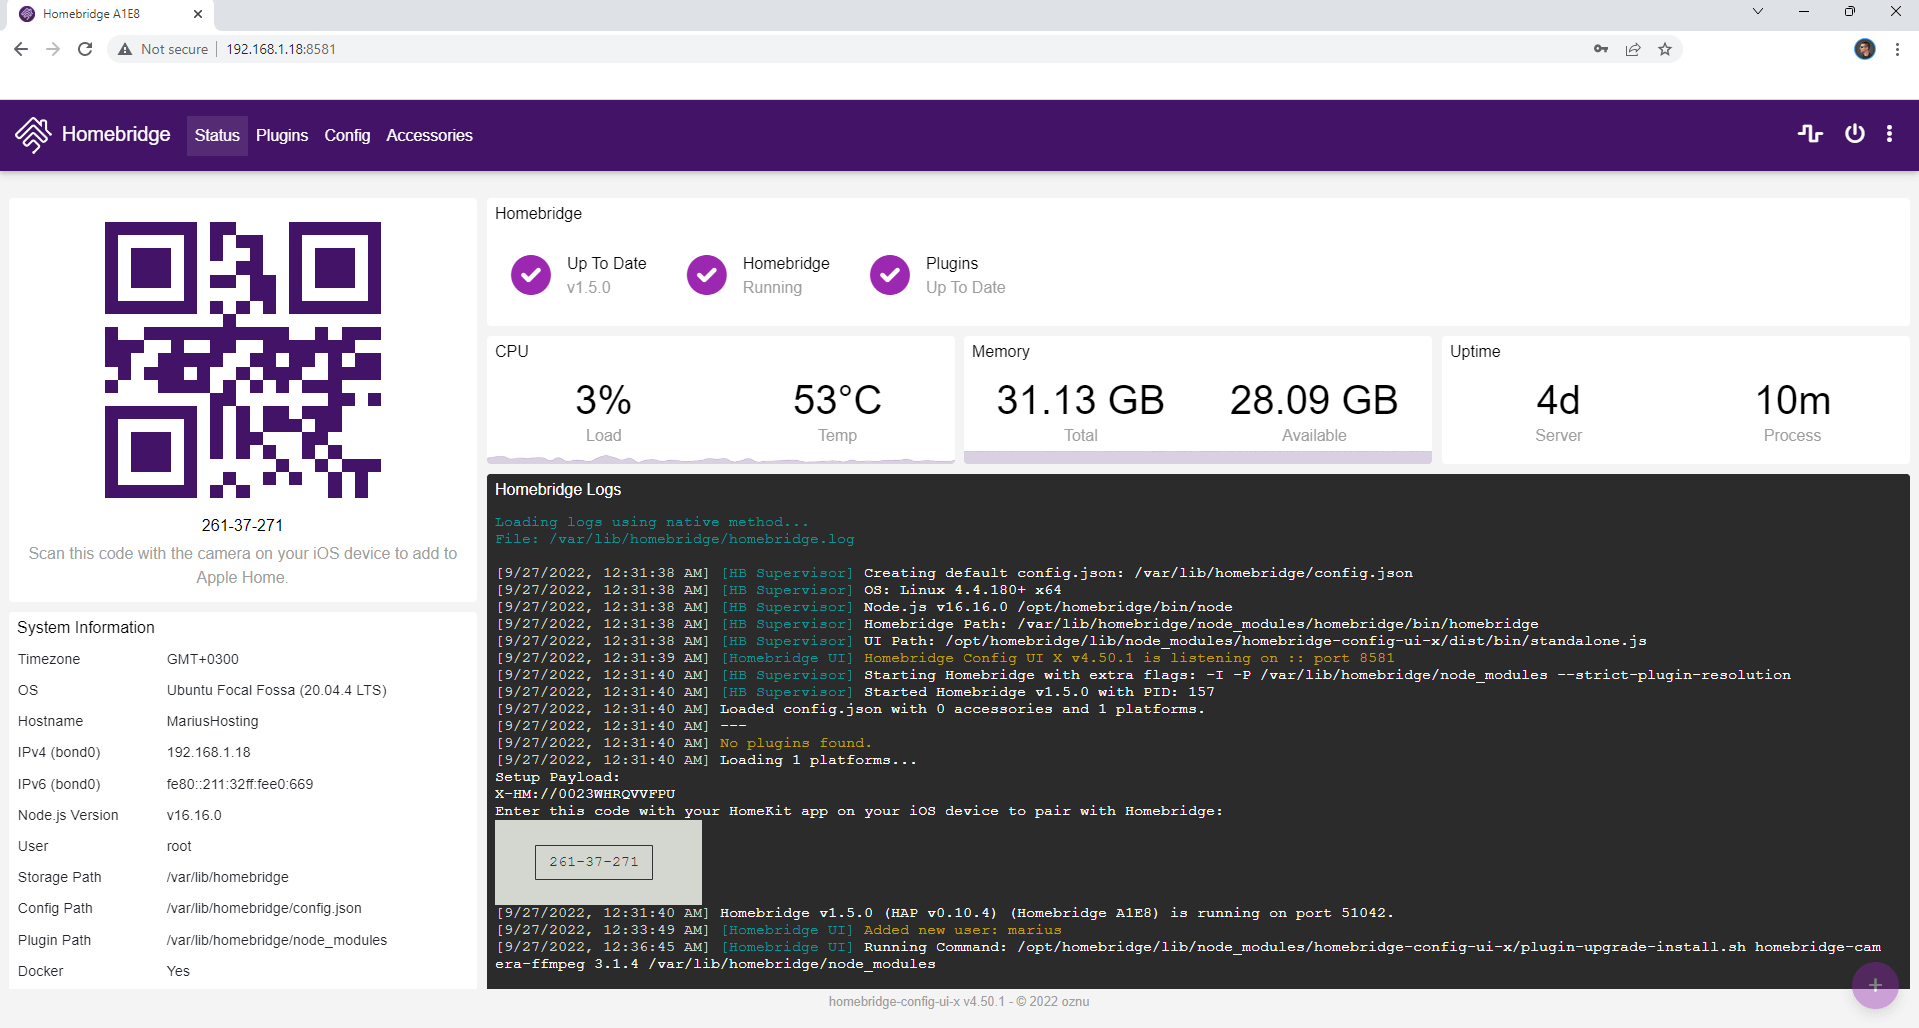
STEP 6
Go to the DSM main menu. You will find the new Homebridge icon. Click on it. Follow the instructions in the image below.
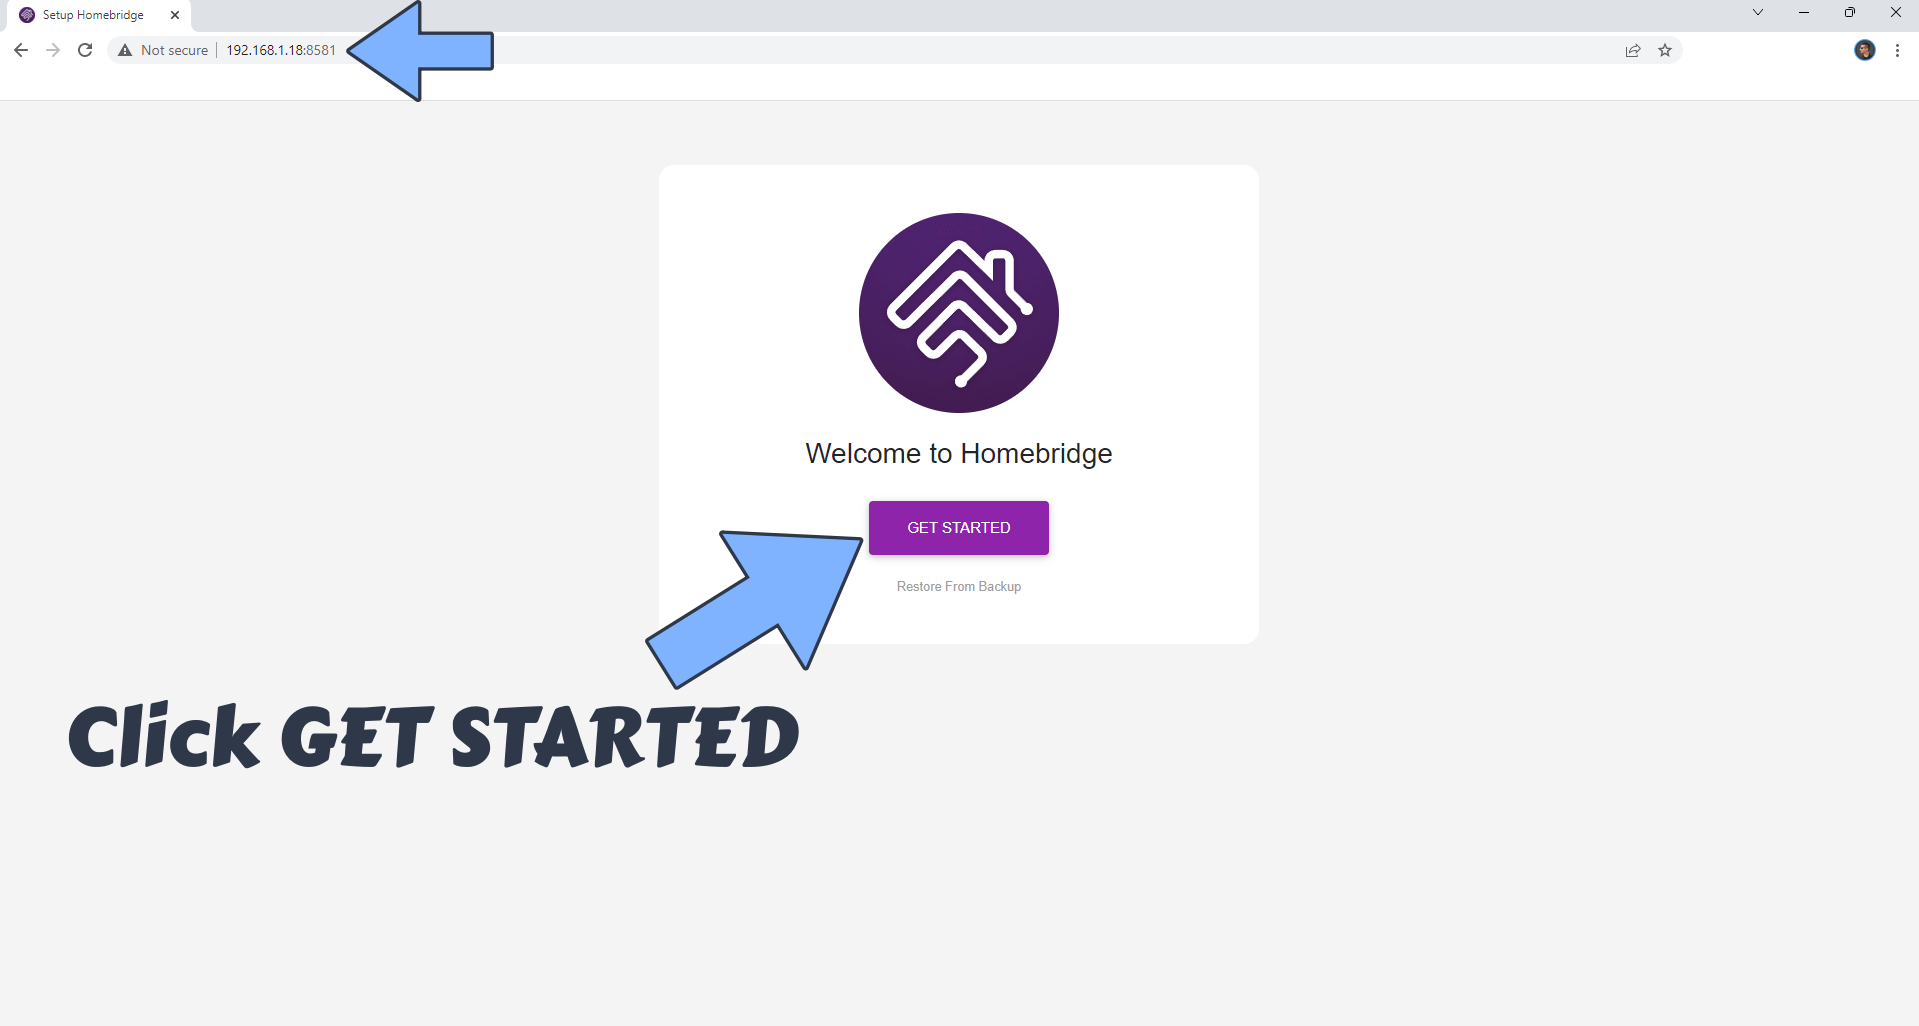
STEP 7
Click GET STARTED. Follow the instructions in the image below.
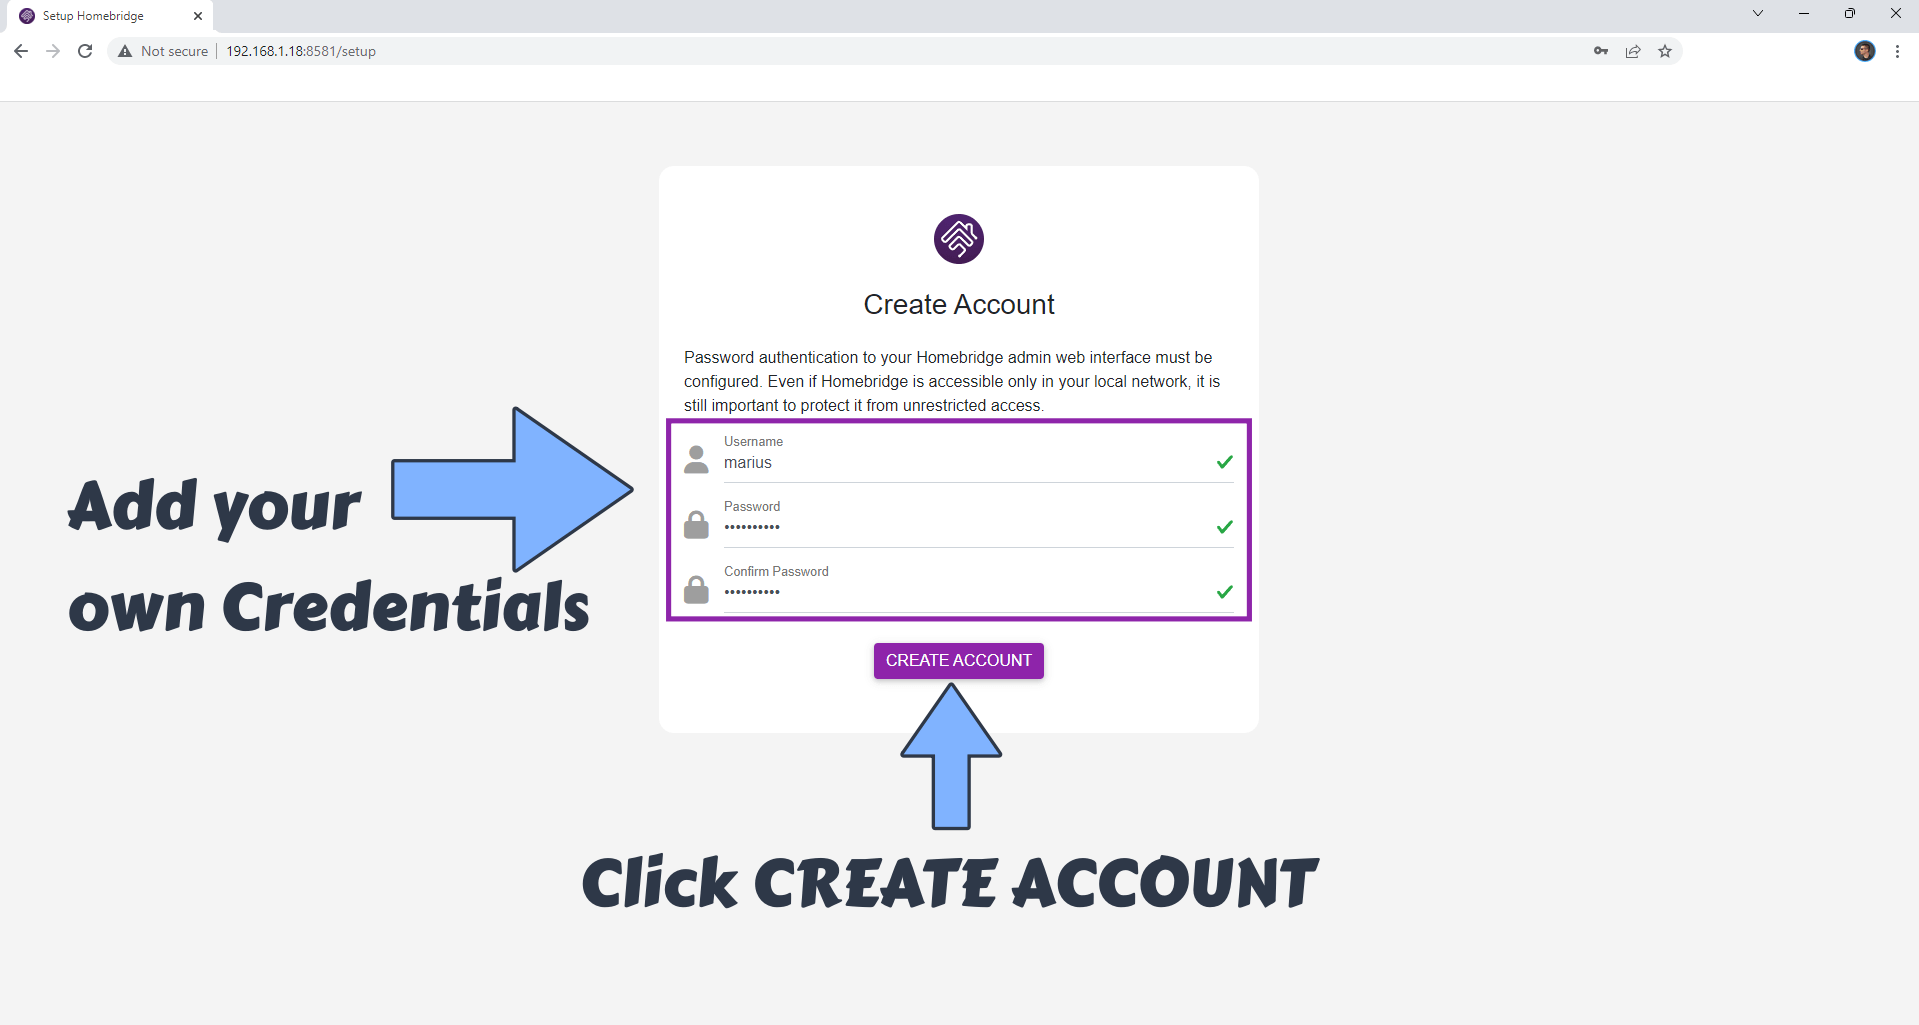
STEP 8
Type in your own credentials (Username and Password) then click CREATE ACCOUNT. Follow the instructions in the image below.
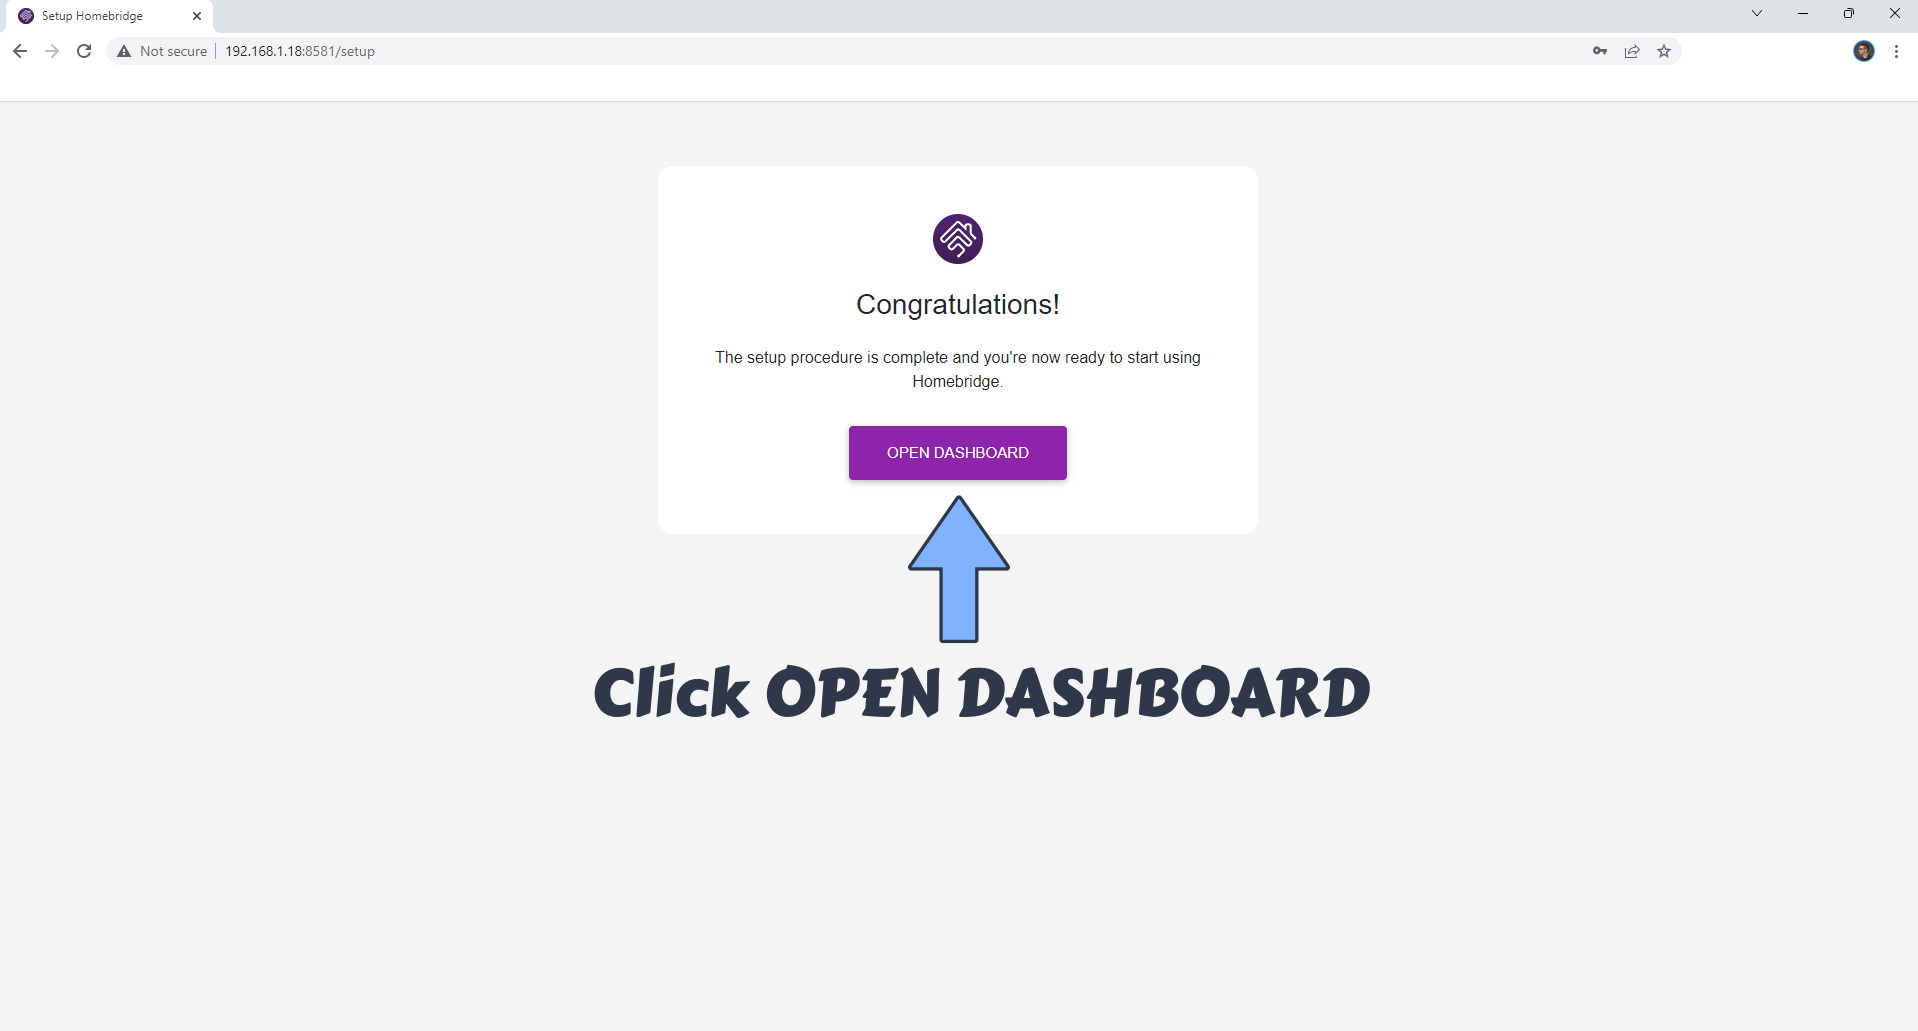
STEP 9
Click OPEN DASHBOARD. Follow the instructions in the image below.
Enjoy Homebridge without Docker!
Note: How to install Homebridge using Docker.
This post was updated on Tuesday / October 21st, 2025 at 11:29 PM