File Browser provides an amazing easy file managing interface within a specified directory and it can be used to upload, delete, preview, rename and edit your files. It allows the creation of multiple users and each user can have its own directory. It can be used as a standalone app or as a middleware. In this step by step guide I will show you how to install File Browser on your Synology NAS through Package Center without Docker. You can also install File Browser using docker.
STEP 1
Please Support My work by Making a Donation.
STEP 2
Add SynoCommunity Packages to Package Center following my easy guide. If you already have SynoCommunity Packages, skip this step.
STEP 3
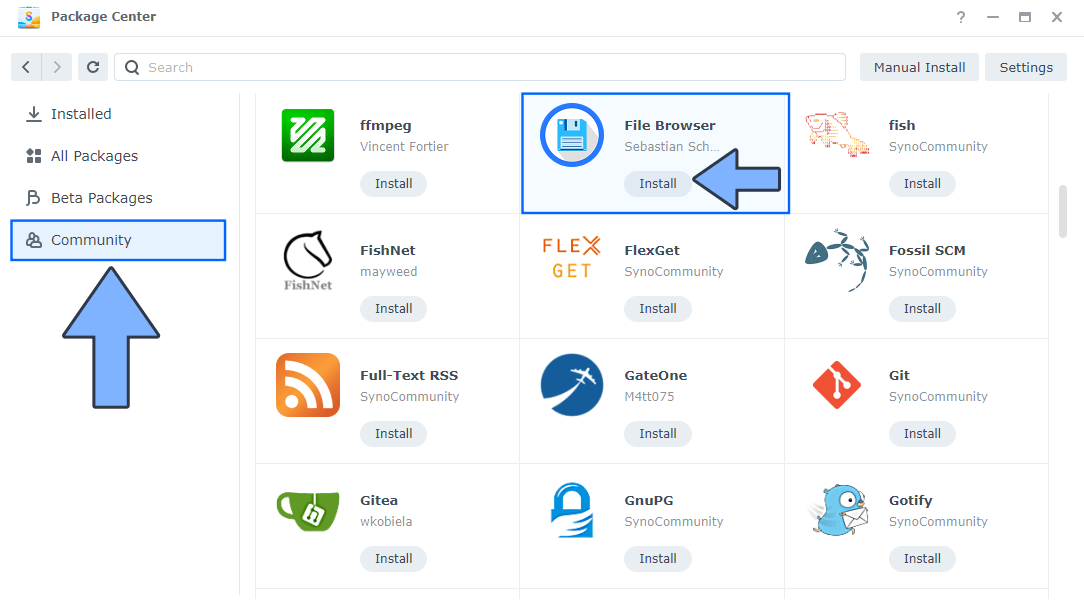
Open Package Center. On the left sidebar, click on Community. Search for File Browser, then click Install. Follow the instructions in the image below.
STEP 4
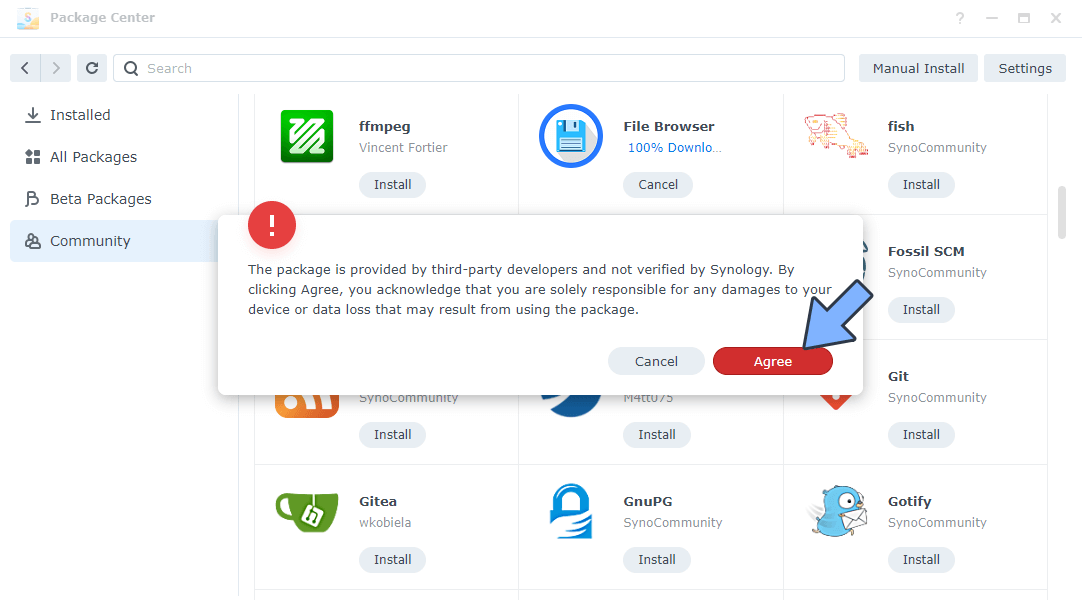
A new Pop-up Warning message will appear. Click Agree. Follow the instructions in the image below.
STEP 5
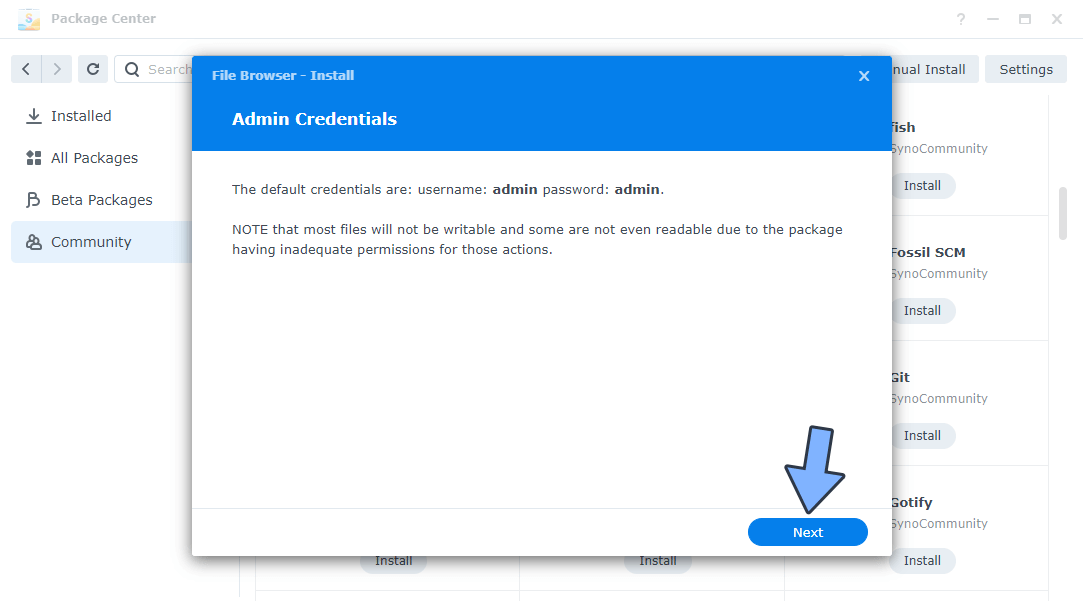
File Browser will remind you of the default credentials. Username is admin and Password is admin. Click Next.
STEP 6
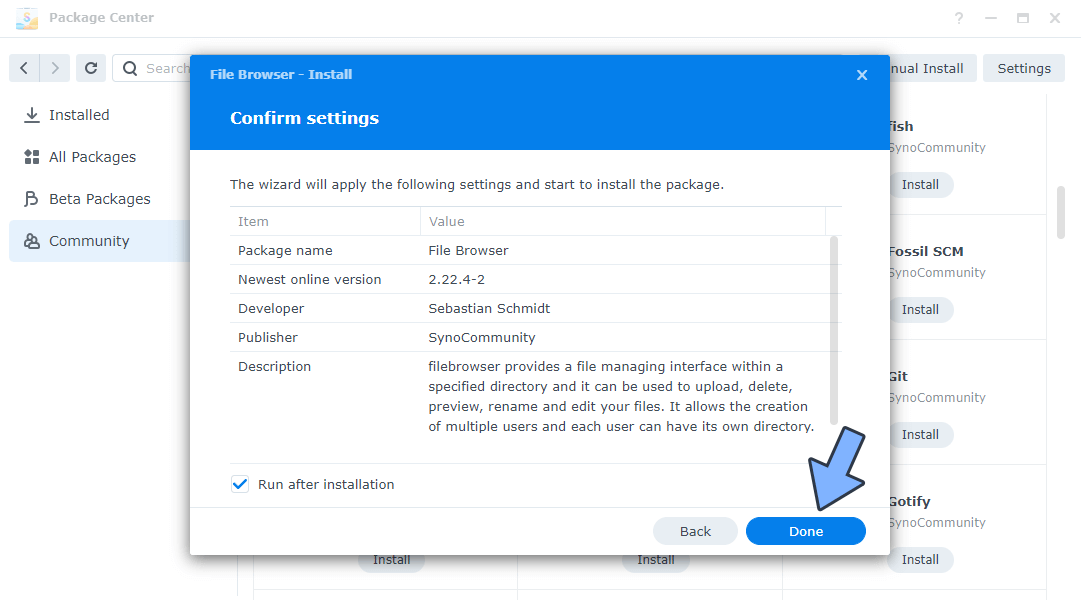
Click Done. Follow the instructions in the image below.
STEP 7
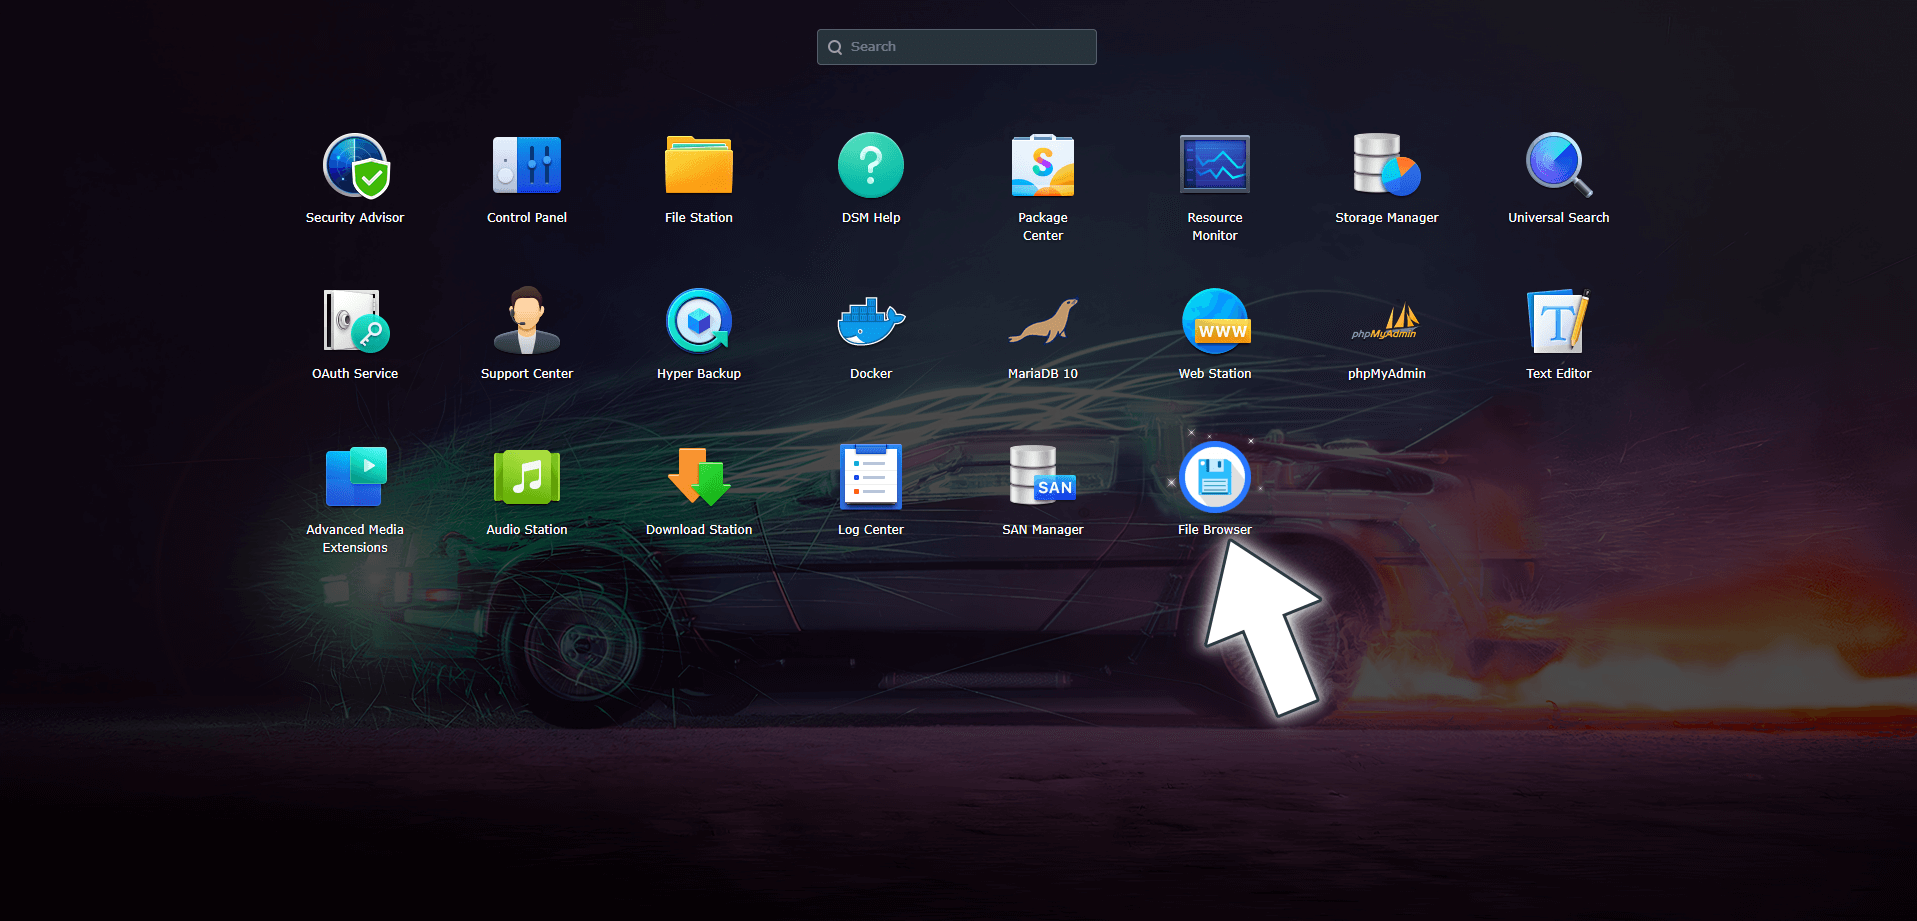
Go to the DSM main menu. You will find the new File Browser icon. Click on it. Follow the instructions in the image below.
STEP 8
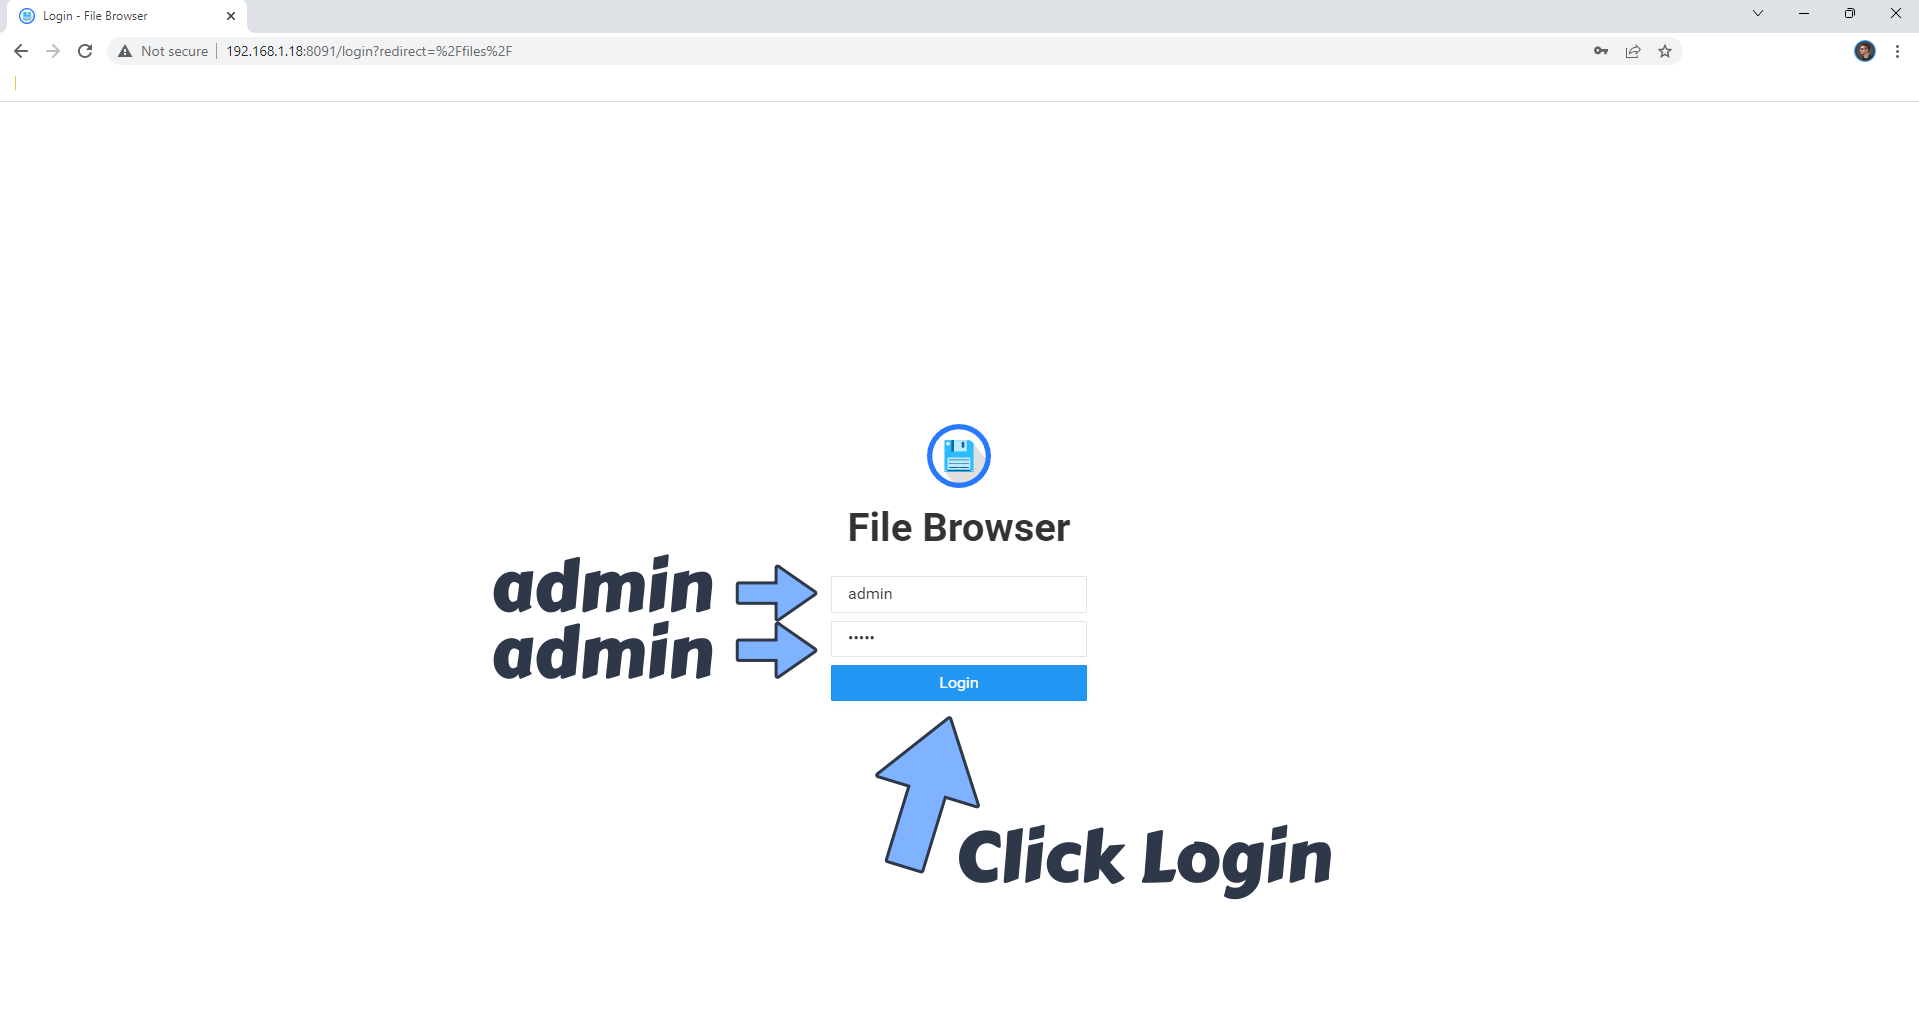
Type in the default username and password, then click Login. Follow the instructions in the image below.
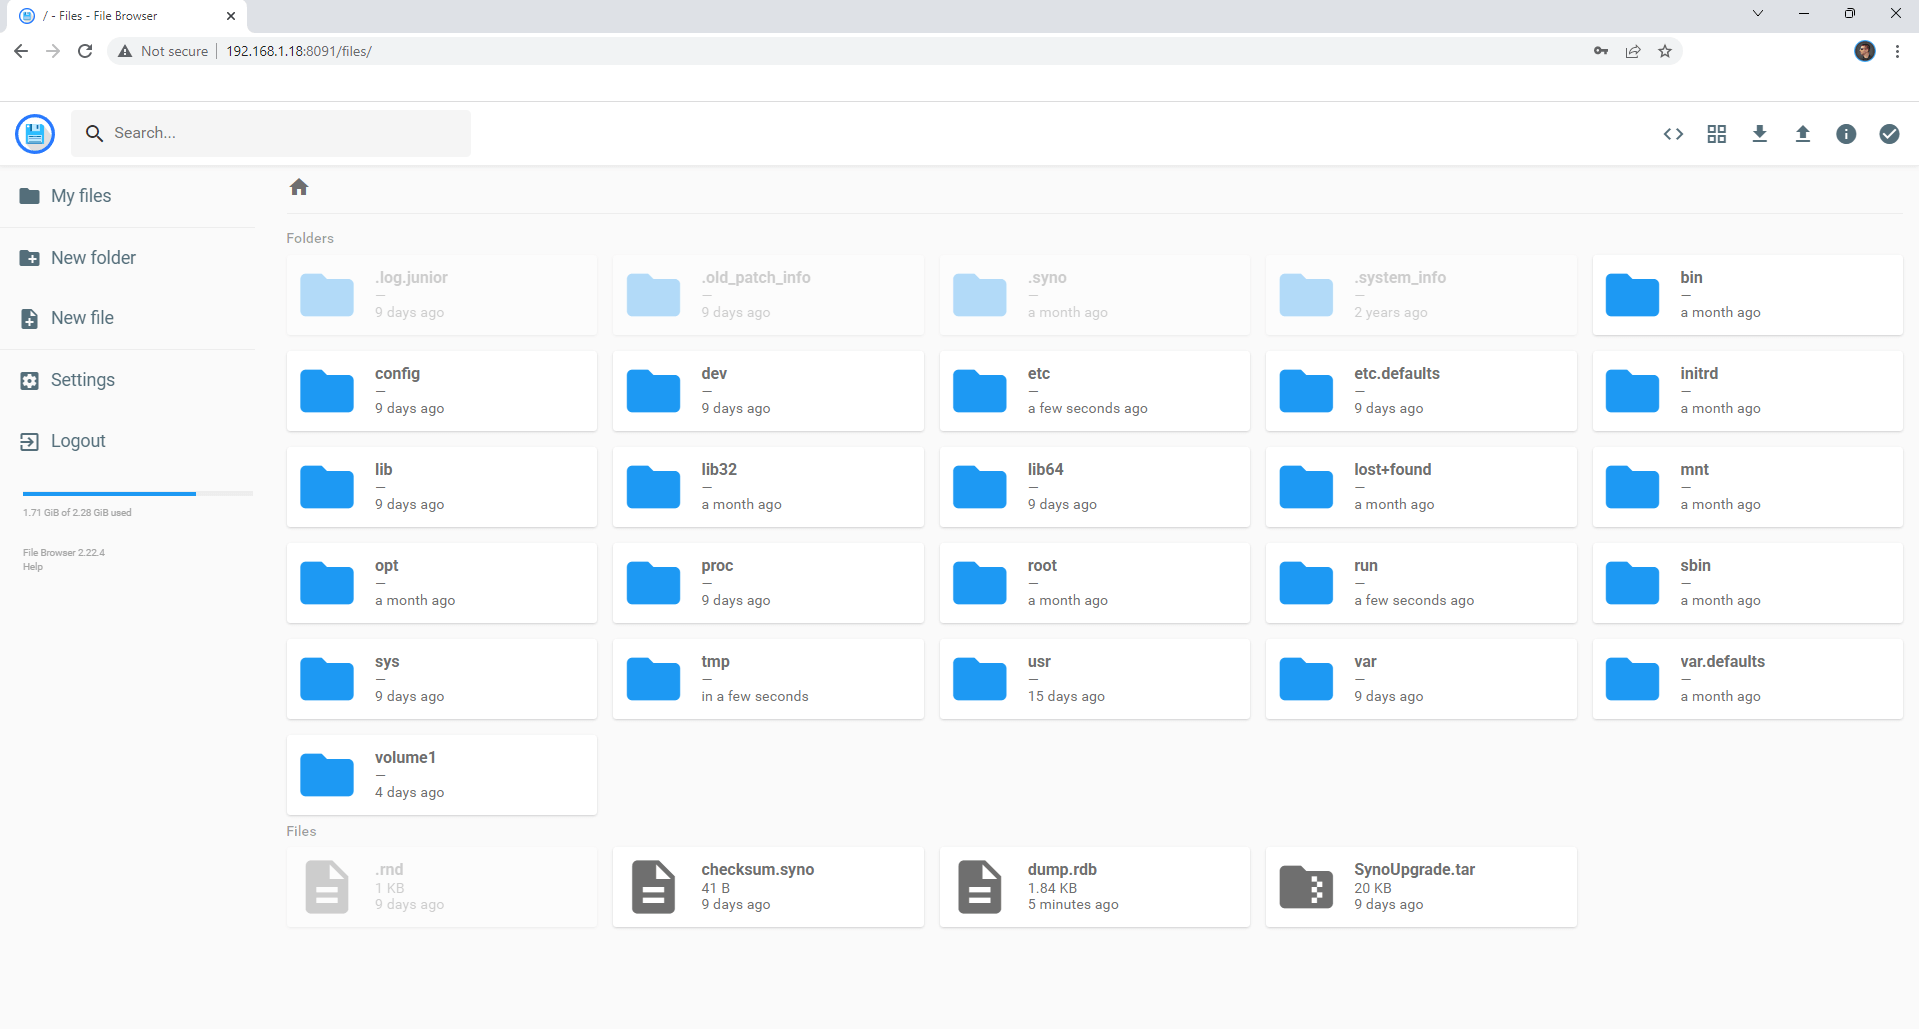
Enjoy File Browser!
If you experience permissions issues, like not being able to see your favorite shared folders, follow the STEPS below to fix it.
STEP A
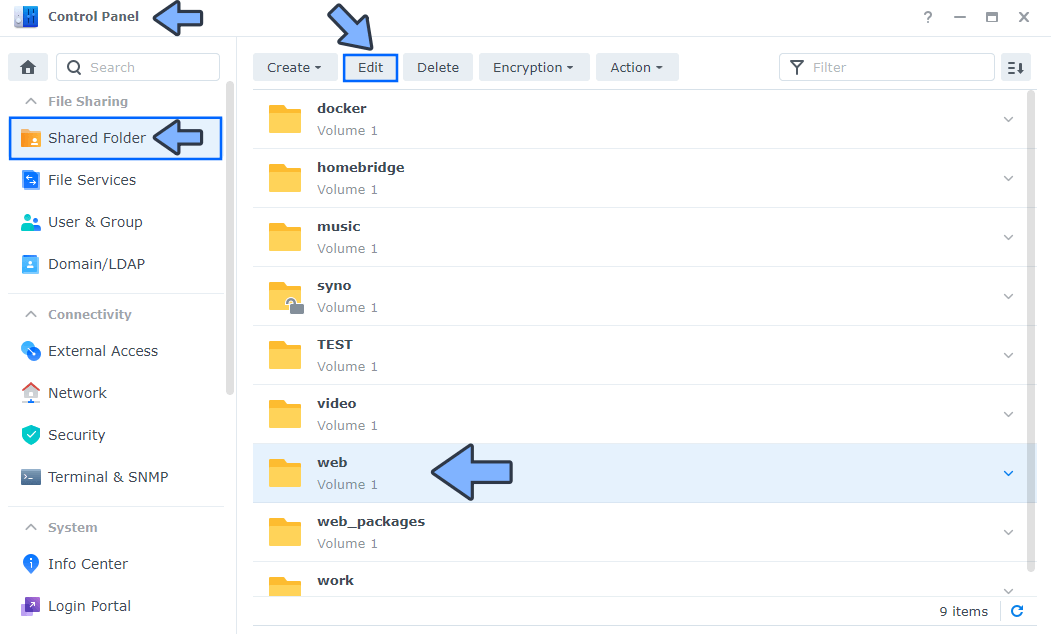
Go to Control Panel / Shared Folder / Select the shared folder to which you want to give read and write permissions, then click the Edit tab. Follow the instructions in the image below.
STEP B
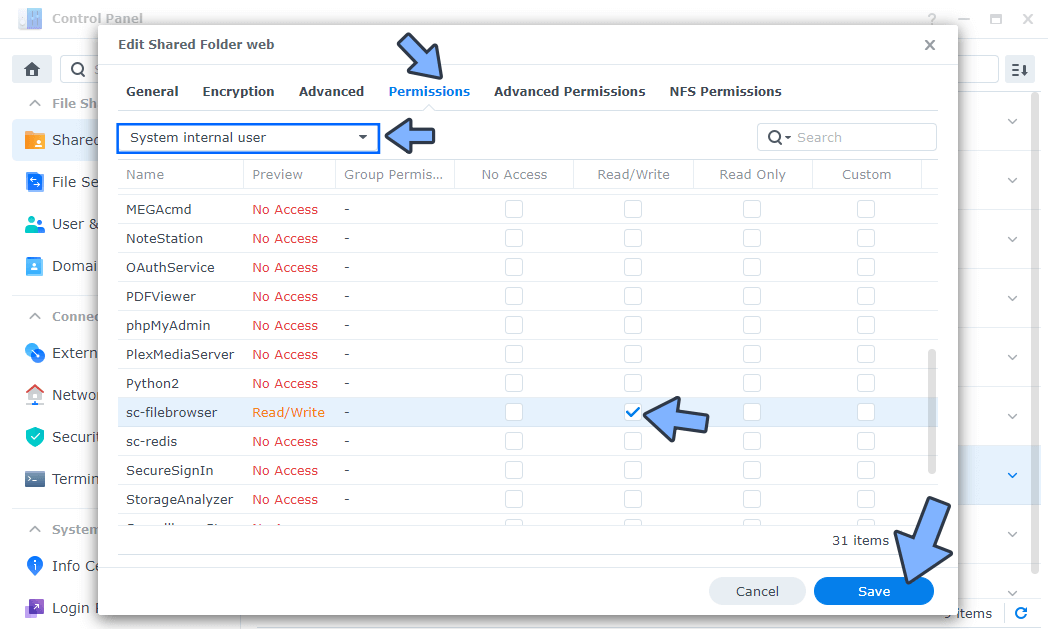
After you click the Edit tab at STEP A, click on the Permissions tab. From the dropdown menu, choose “System internal user“. Select sc-filebrowser then check the Read/Write permissions. Click Save. Follow the instructions in the image below.
STEP C
Repeat the same operation for each shared folder you want to view via File Browser.
Note: Once you install File Browser on your Synology NAS, remember to change the default credentials with your own credentials. You can easily do this by clicking on the File Browser Settings once you are logged in.
Note: How to install File Browser using Docker.
This post was updated on Saturday / August 30th, 2025 at 12:05 AM