
Do you currently own an old DS415+ or DS1515+ Synology NAS? If so, is it still working? Can you still turn it on? A lot of Synology DS415+ users complain that their DS415+ just stopped working one day: it either suddenly died on them or started shutting down or giving out clear signs it was its time. What are these signs, you may ask? Well, for one, the blue Power button light would start flashing (when the NAS is on, the blue Power button light should be a solid blue color, no flashing, no anything!). Also, the STATUS light and drive lights would become solid orange – they are normally green, either solid (STATUS) or flashing (drive lights). The interface wouldn’t load and the NAS would just crash not much longer after rebooting it.
According to recent news, the reason why the DS415+ or the DS1515+ Synology NAS just dies on you is because of a flaw in Intel Atom C2000 chips: a component of the chips degrades which causes the system to stop working. Changing the Resistor restores system functionality.
If this happened to you, then the first thing you’d think was that it’s time to buy a new Synology NAS. But what if there was a way to fix your DS415+? Would you try it?
- A soldering iron (a tool commonly employed in electronics work)
- A Carbon Resistor 100R / 100 ohm Resistor 1/4 watt (this is the piece you’ll need to replace and it costs only about 5 cents)
- A screwdriver (to open the NAS case)
- Long-nose pliers (to remove the old Resistor)
- New motherboard battery
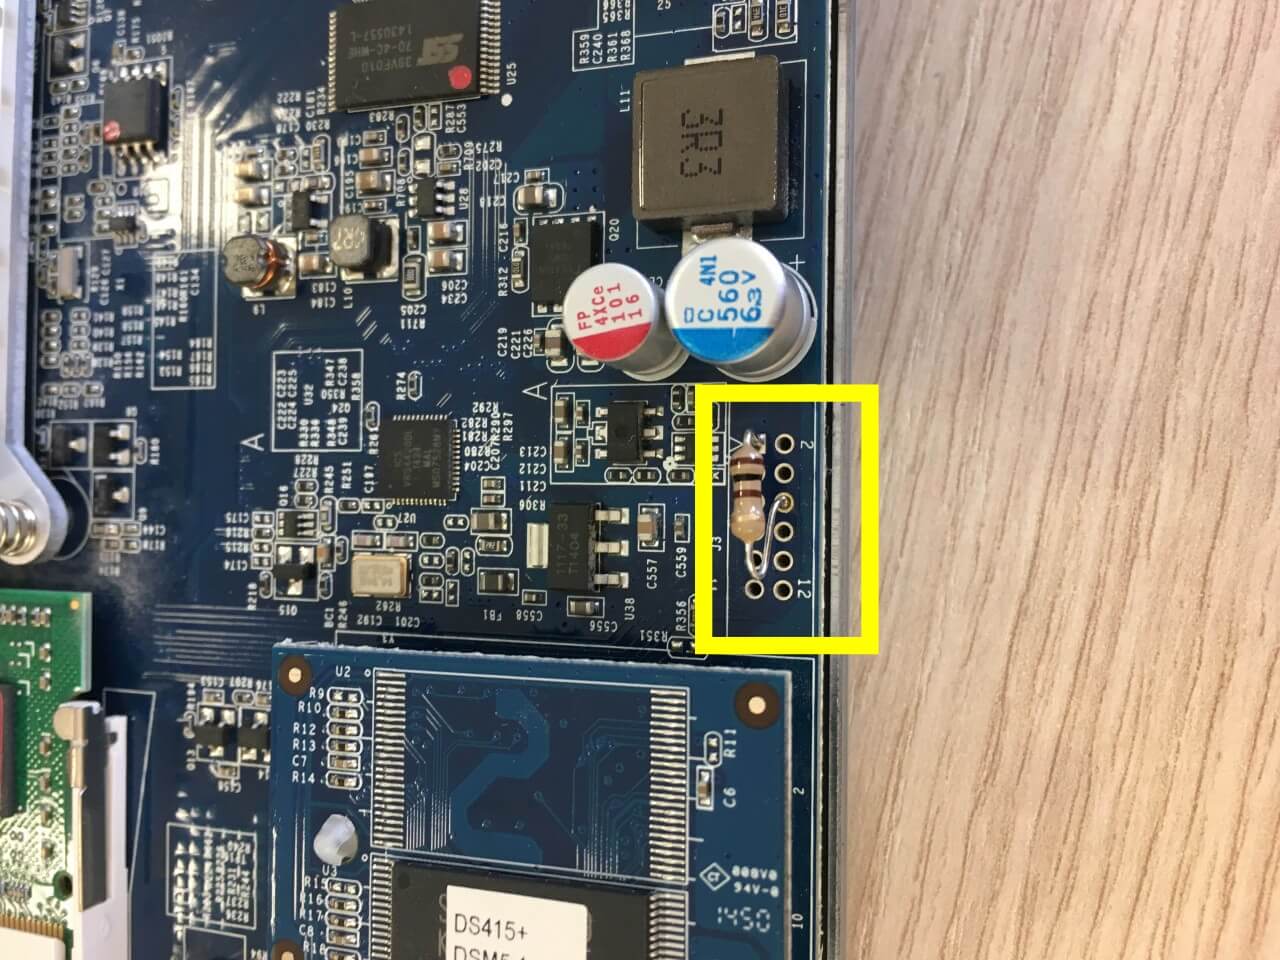
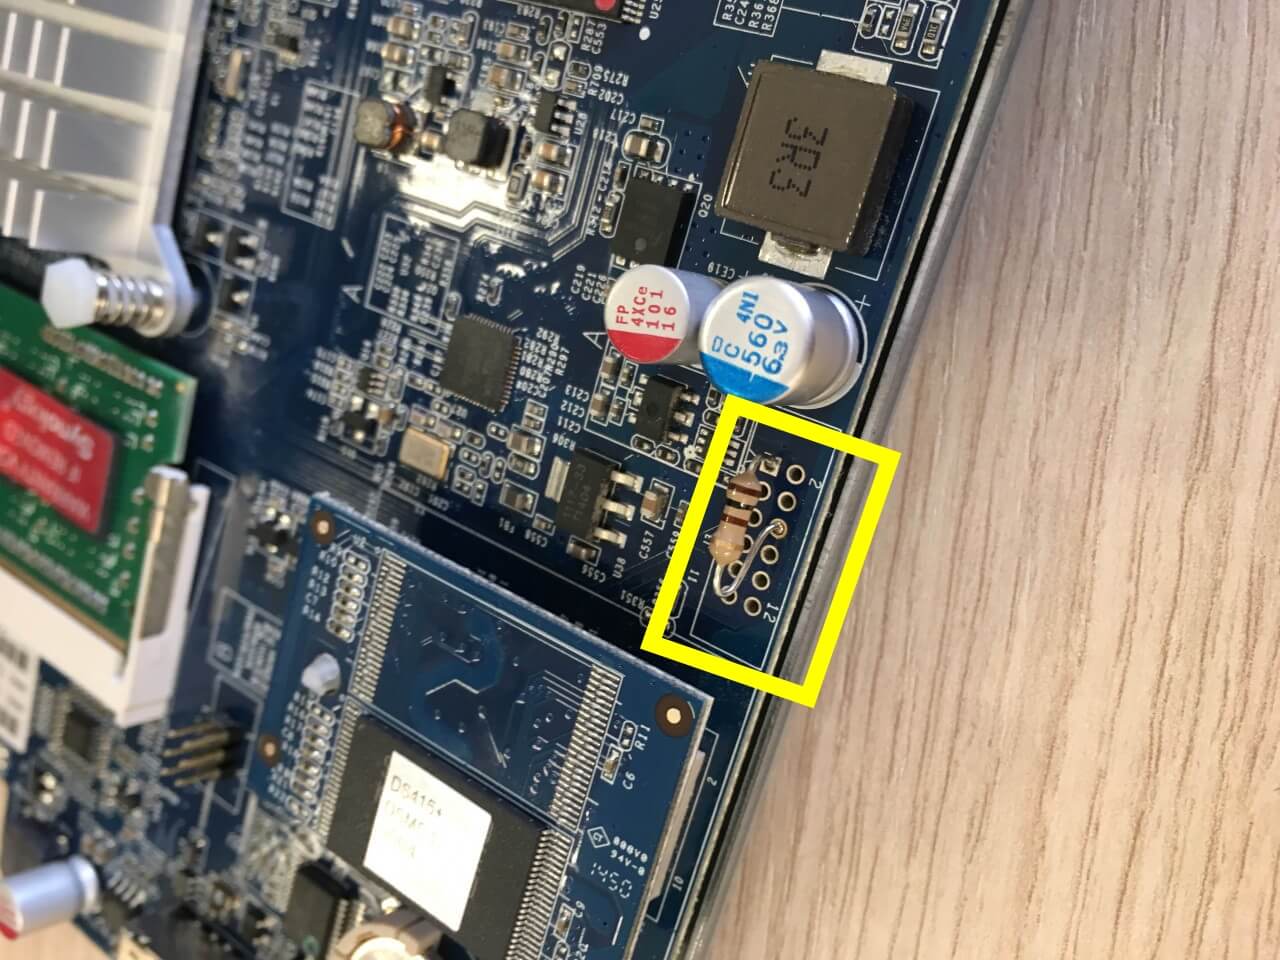
- Look at the images below. Find the yellow rectangle. The piece framed by the yellow rectangle is the Resistor you’ll need to replace.
- Using the screwdriver, open the NAS case and find the Resistor.
- With the help of the long-nose pliers, remove the old Resistor.
- Using the soldering iron, solder the new Resistor in place of the old one.
- At this point, it’s a really good idea to change the battery too.
- Close the case and turn on your DS415+ to see if you did a good job.
Note and Credit: Photos from Synology Community.
This is a simple trick to fix a known DS415+ problem. It’s worth giving a try if your old (read: out of warranty) DS415+ has died. Below you can also see step by step guide on how to solve the resistor problem.
https://www.youtube.com/watch?v=PkZ0249t7SI
This post was updated on Monday / December 19th, 2022 at 1:33 PM