If you have been following mariushosting’s docker guides for your Synology NAS, you have surely wondered how to back up your beloved containers in case one day something goes wrong. In today’s guide I will explain to you how to back up your Docker containers with all of your personal configurations in a simple and comprehensive way.
STEP 1
Please Support My work by Making a Donation.
STEP 2
Create a new Shared Folder and name it Docker Backup.
STEP 3
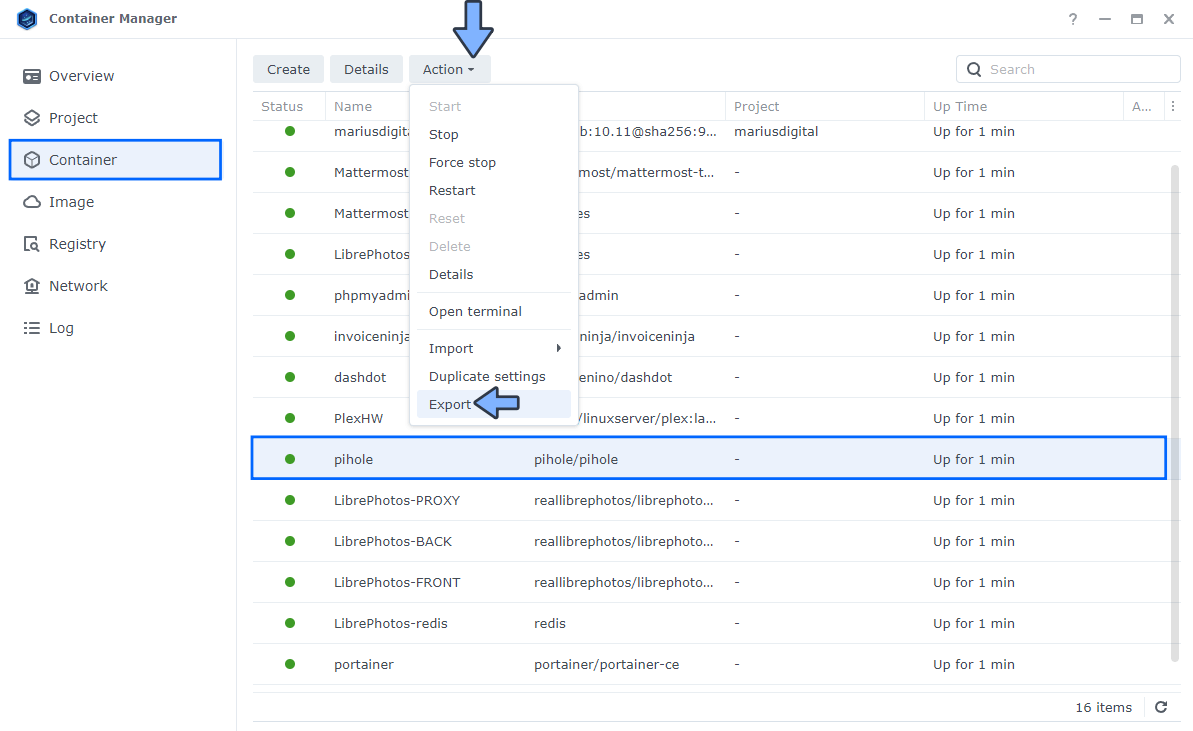
Open your Container Manager package. In the left sidebar click on Container. Select the container you want to Export, then click on the Action tab and, in the dropdown menu, click Export. Follow the instructions in the image below.
STEP 4
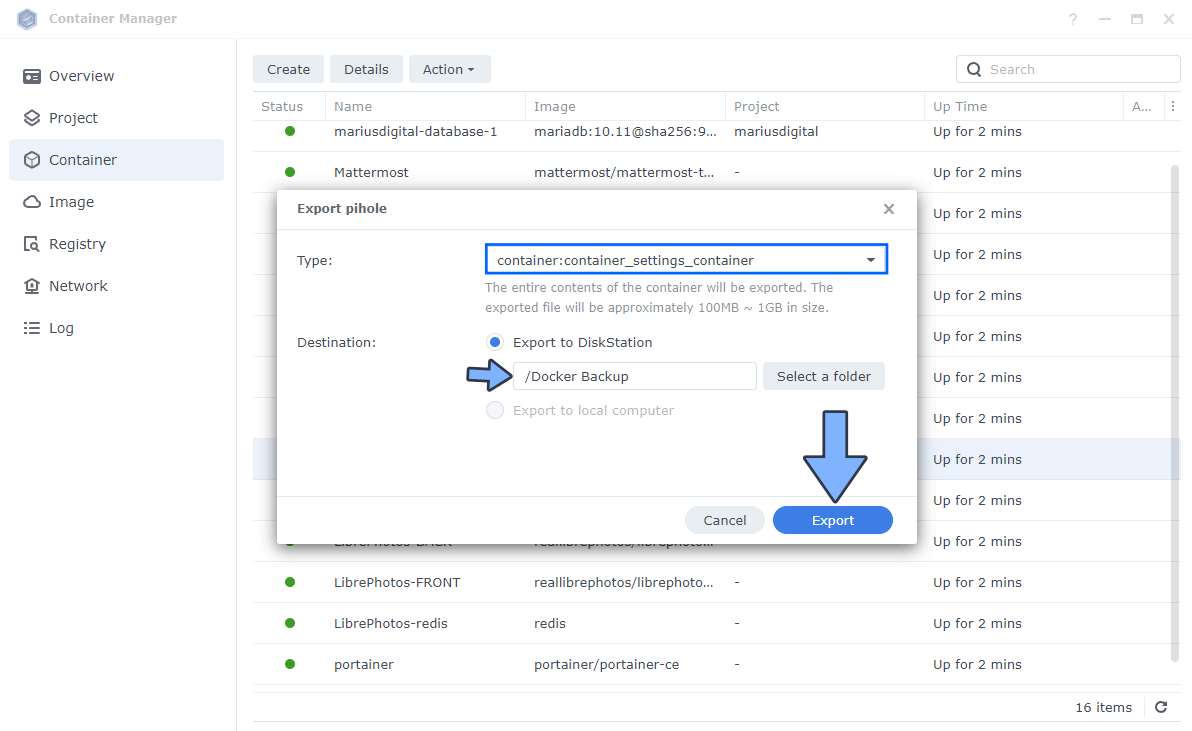
After you click Export, a new pop-up window will open. Select “Export container contents and settings“. Select Export to Diskstation and select the Docker Backup folder that you have previously created at STEP 2. Click Export. I prefer to save my container contents and settings in a Shared Folder on my NAS so I can easily back up everything with the Synology Hyper Backup package. Follow the instructions in the image below.
STEP 5
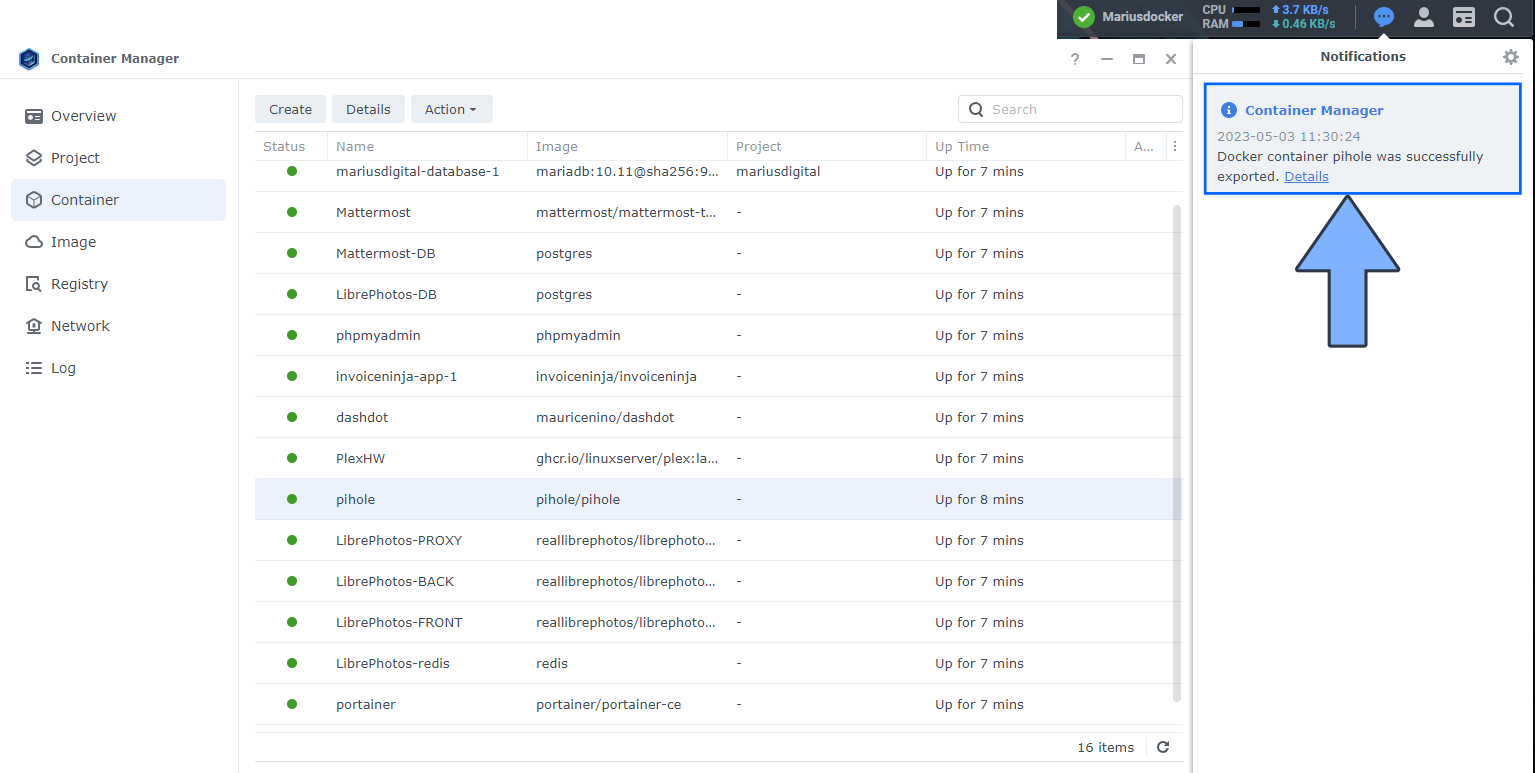
After the export is finished, you will receive a Notification message in your DSM. Note: Exporting a container may take some time depending on your NAS model.
STEP 6
After the export if finished, you will see the container automatically saved in a .txz format in the Docker Backup Shared Folder that you have previously created at STEP 2.
STEP 7
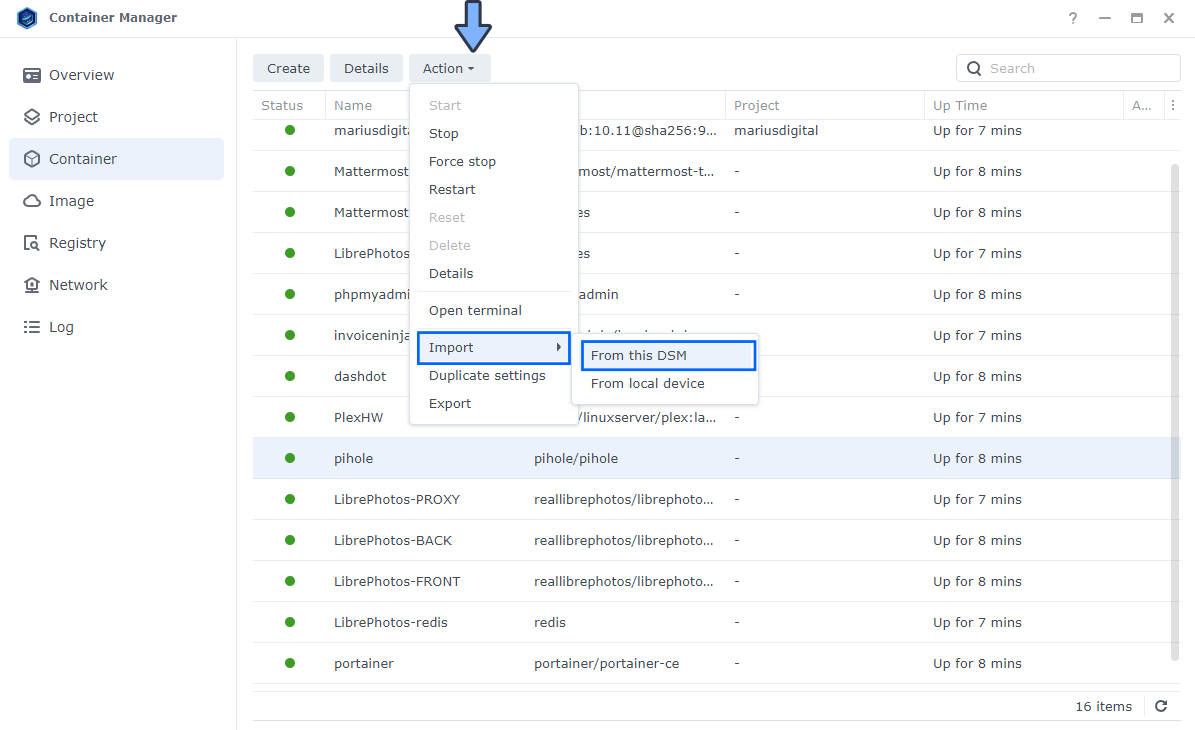
Now, if you lose your container settings, you won’t have to worry anymore because you can import your backup. Open your Container Manager package and, in the left sidebar, click on Container, then select the Action tab / Import / From this DSM or Local Device. Follow the instructions in the image below.
STEP 8
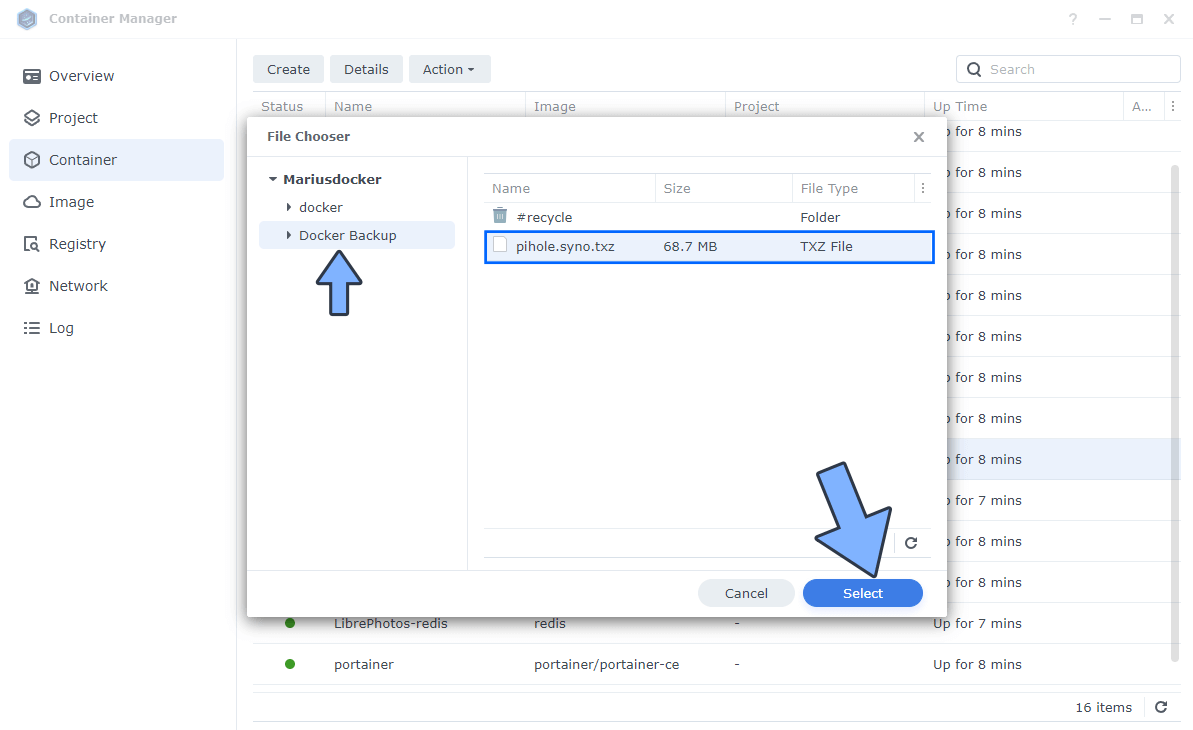
After you click Import, a new pop-up window will open. Select your .txz container from your Docker Backup folder, or upload it from your PC, depending on where you have saved it.
STEP 9
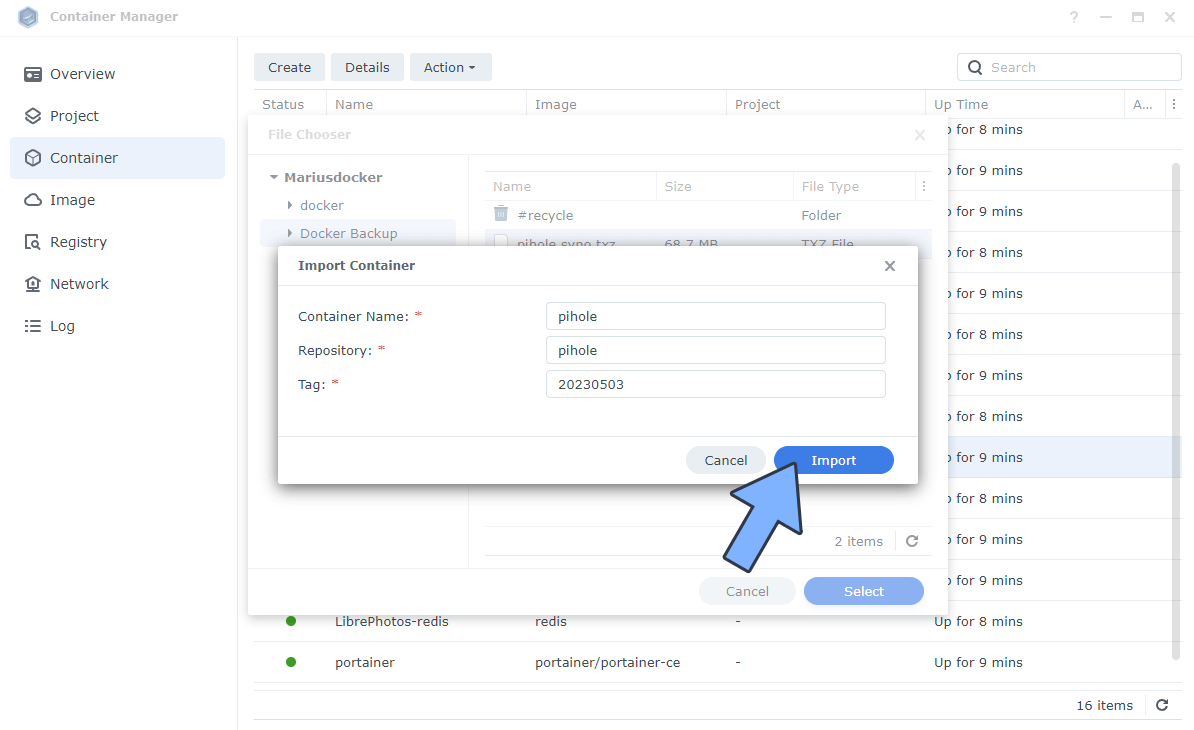
Click Import. Follow the instructions in the image below.
STEP 10
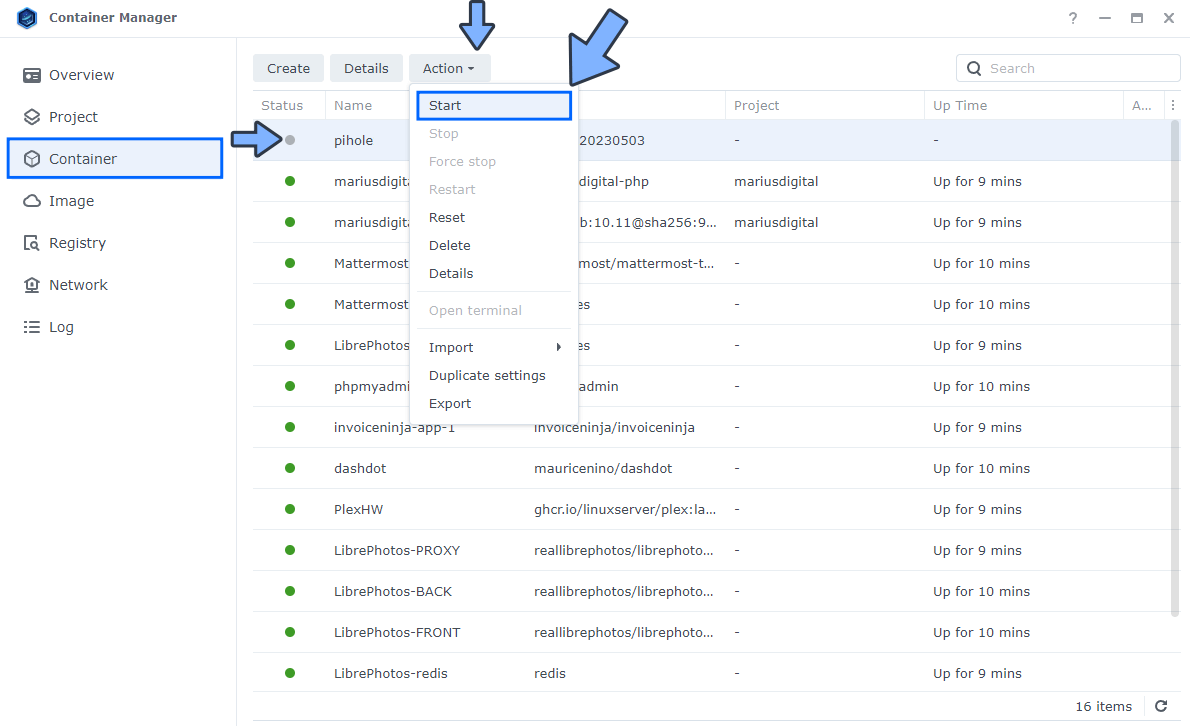
Done! The last thing left to do is to start the container.
STEP 11
Download Synology Hyper Backup from Package Center. Back up the docker Shared Folder in File Station and the Docker Backup folder that you have previously created at STEP 2. So you have to back up a total of 2 Shared Folders.
This post was updated on Wednesday / May 3rd, 2023 at 12:59 PM