
If you happen to experience an issue with DSM 7, and you decide to contact Synology Support Center, they can request a debug.dat file from you in order to troubleshot the issue you are experiencing. A debug.dat file collects “anonymous” information about your operating system and packages logs that may cause problems for you. You may not be able to get the help you’re looking for without sending the debug file to Synology Support Center.
STEP 1
Please Support My Work by Making a Donation.
STEP 2
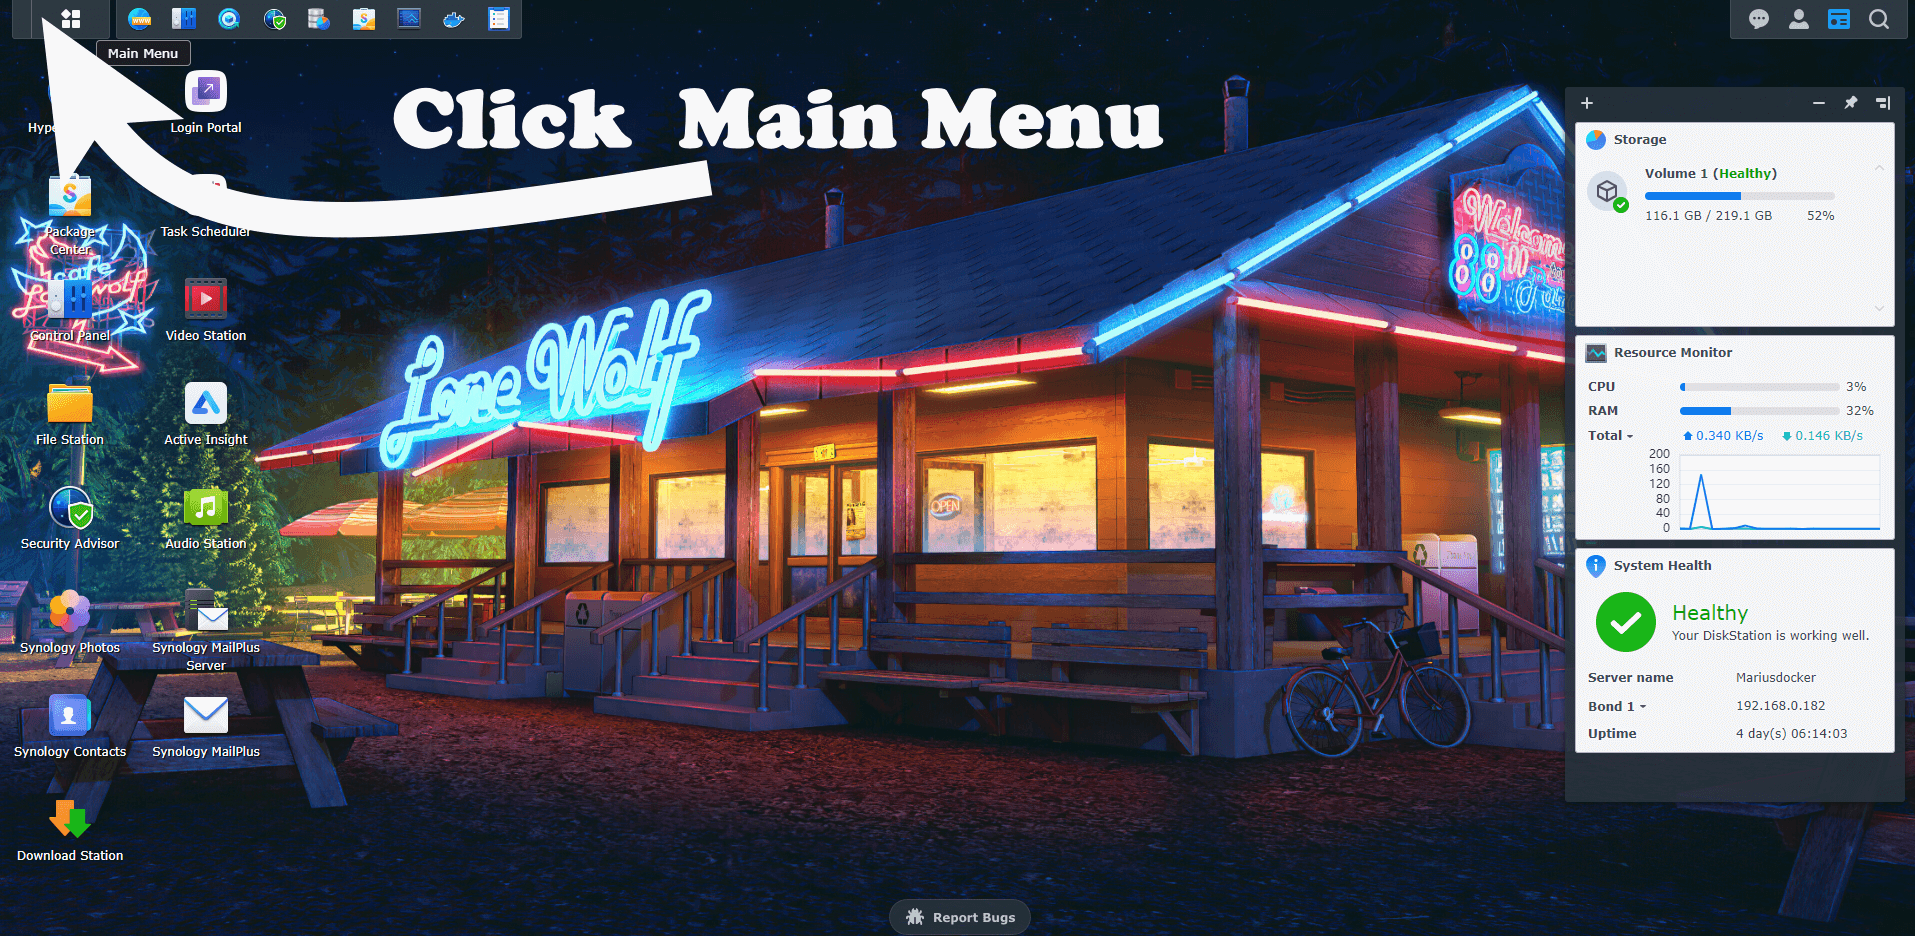
Click on the Main Menu. Follow the instructions in the image below.
STEP 3
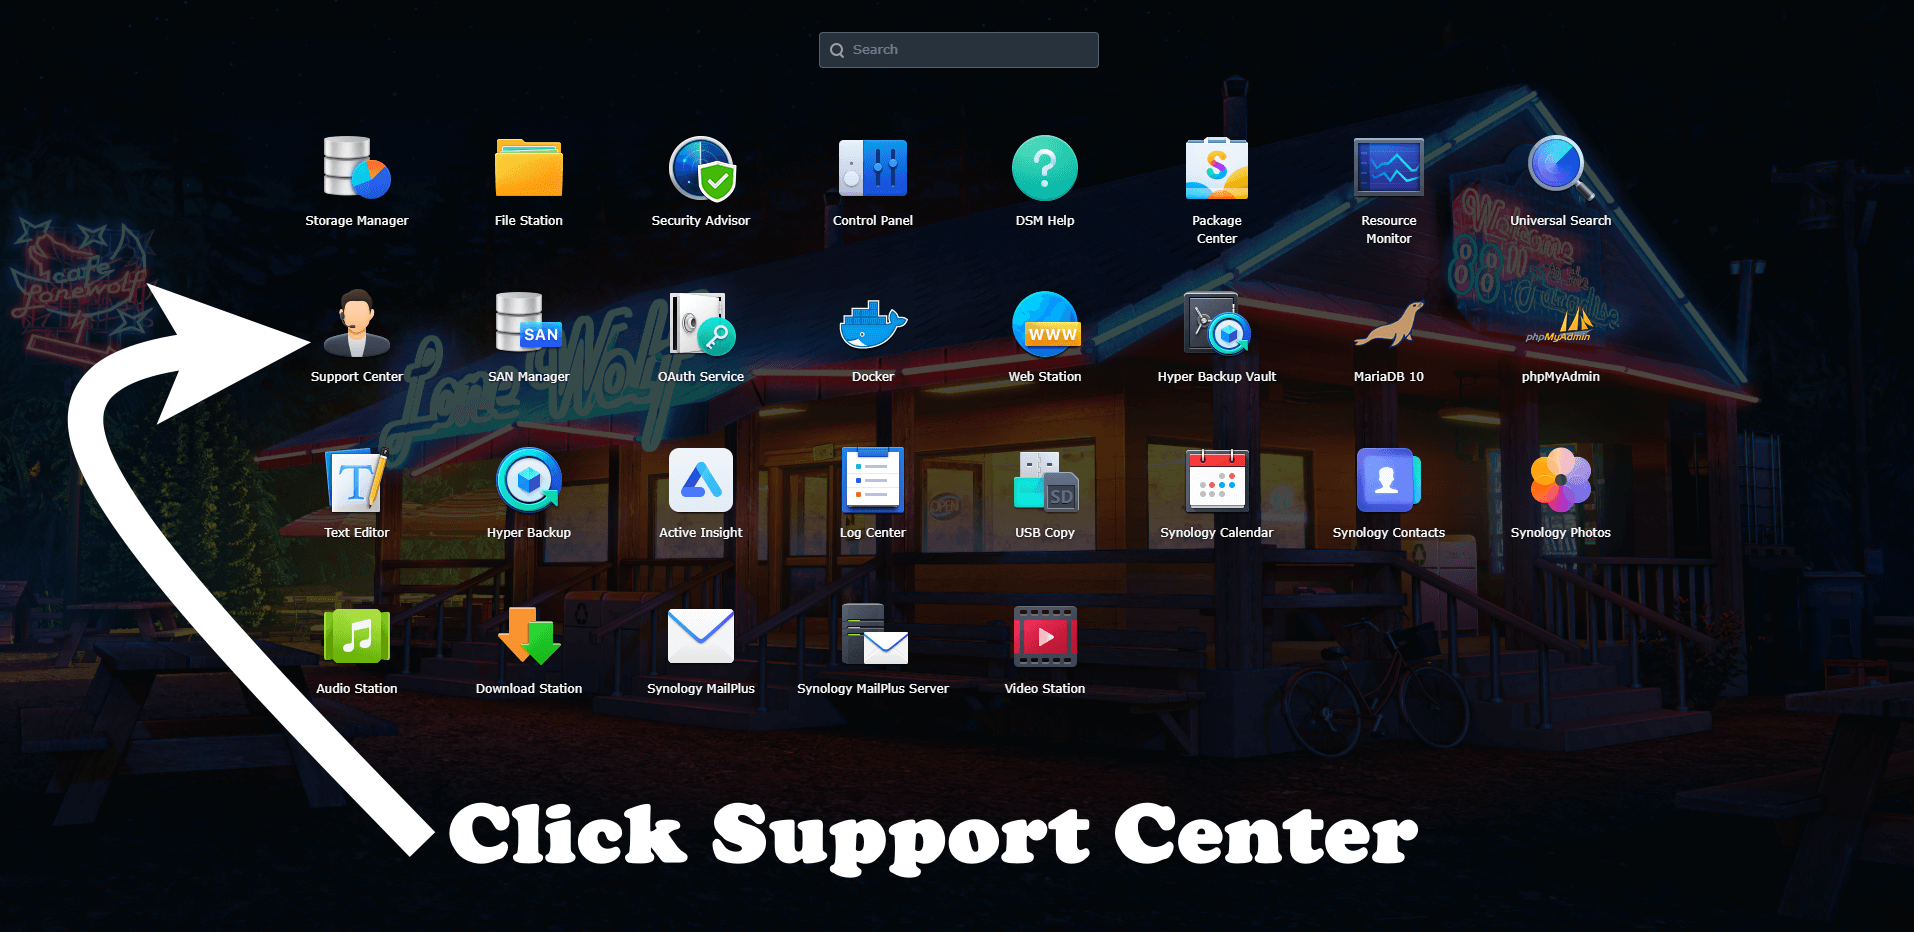
When the menu appears on the screen, click on the “Support Center” icon. Follow the instructions in the image below.
STEP 4
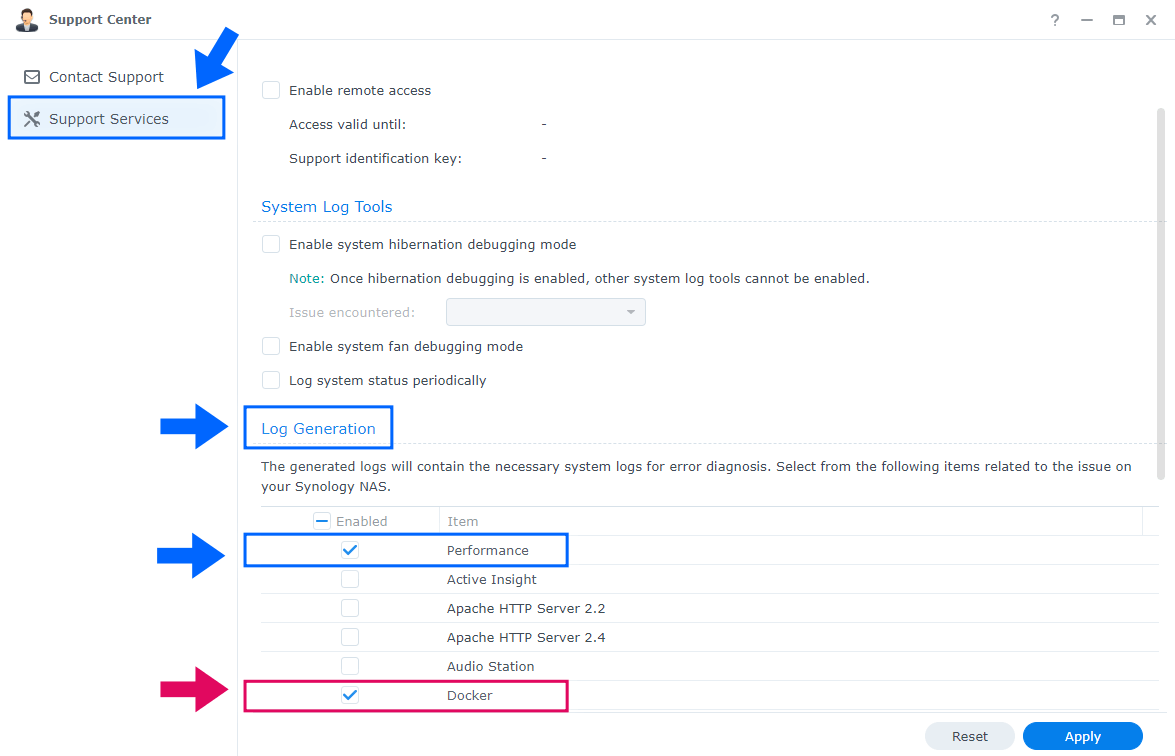
Go to Support Services and search for Log Generation. Select “Performance“. After that, select the package with which you are experiencing problems. In this example below I selected “Docker“.
STEP 5
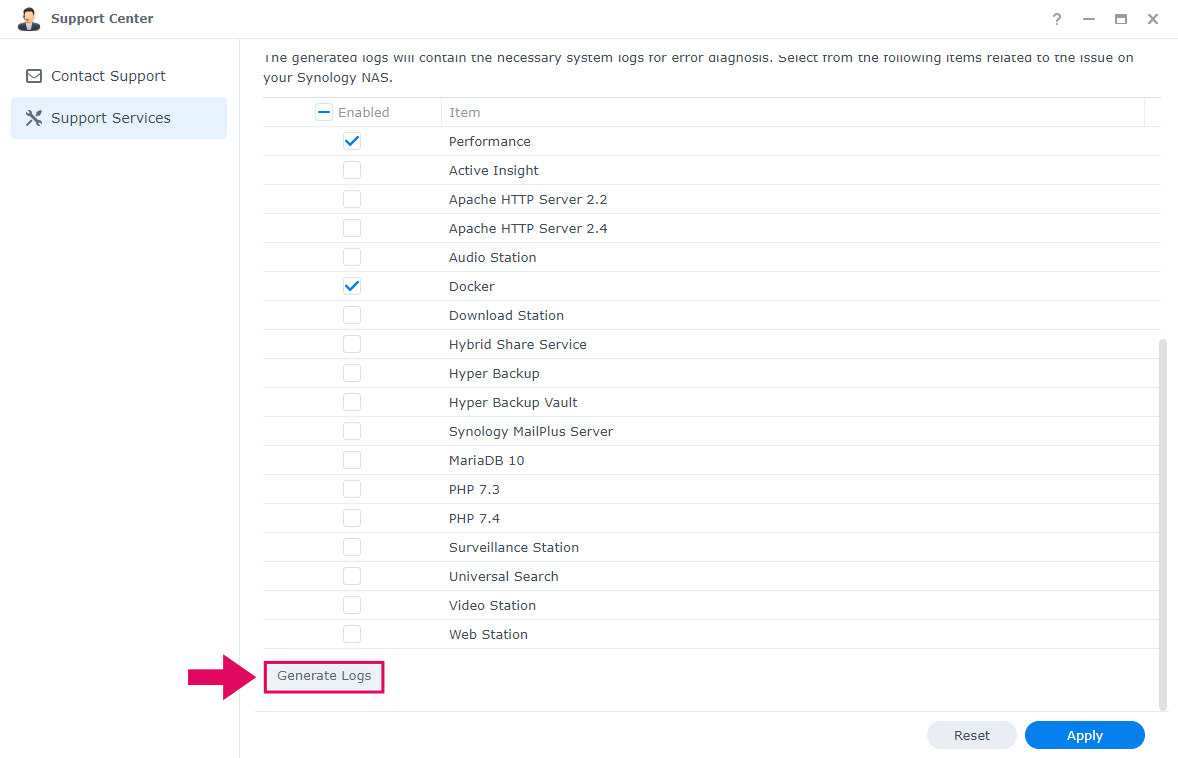
Afterwards, click on “Generate Logs“. If you have issues with other packages as well, just select System and Performance and then the packages that are causing you problems. Follow the instructions in the image below.
STEP 6
Once you click on “Generate Logs”, the debug.dat file will be automatically downloaded in your computer. This may take a few seconds or up to a minute, depending on your system performance.

Note: Once you have the debug.dat file, you can send it to the Synology Support Center team (upload it in your reply).
This post was updated on Wednesday / August 10th, 2022 at 9:14 PM