Did you know that you can connect your DSM to external Cloud Services through File Station? From File Station you can connect to different public Cloud Services such as Box, Dropbox, Google Drive, Microsoft OneDrive and file servers via different protocols such as FTP, STFP, WebDAV and WebDAV HTTPS. This option is particularly useful because it allows you to see the folders of other services directly in your File Station, without necessarily having to use the external service. In short, everything at a glance. You can download, delete, upload files and create folders on your cloud by using File Station. Below you can follow my easy step by step guide on how to achieve this.
STEP 1
Please Support My work by Making a Donation.
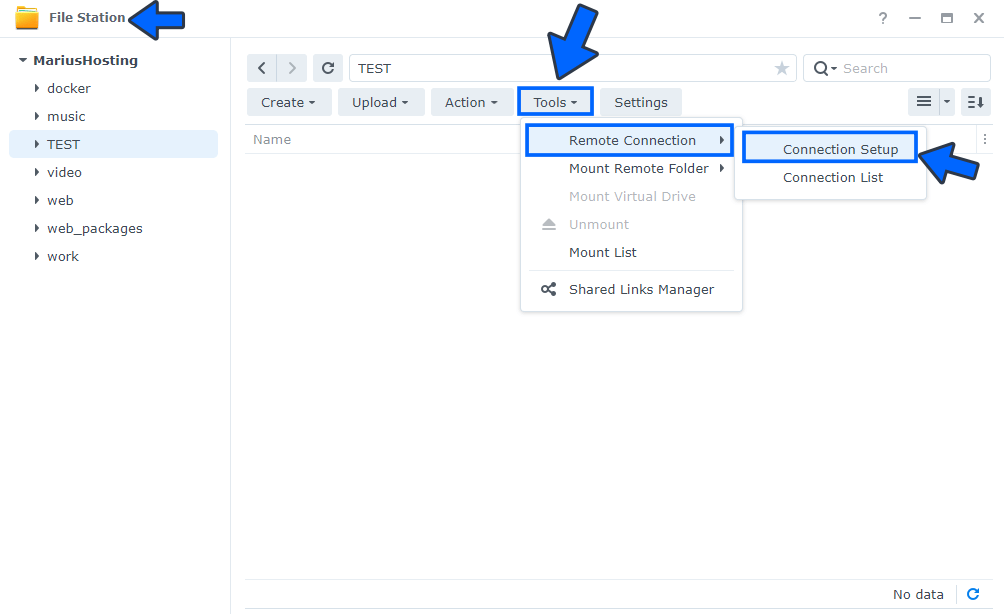
STEP 2
Open File Station / Click the Tools tab. In the dropdown menu select Remote Connection then Connection Setup. Follow the instructions in the image below.
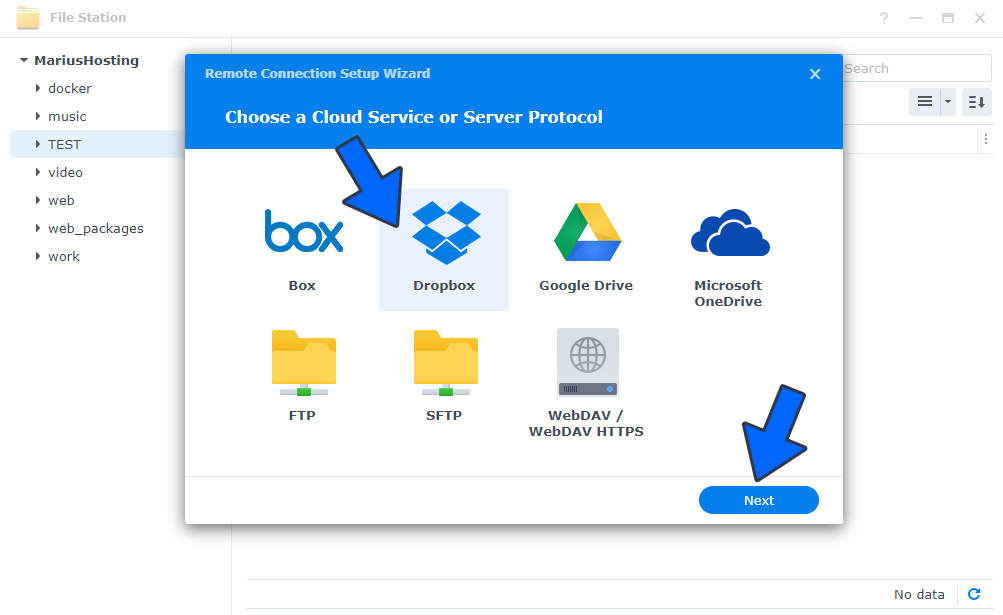
STEP 3
After you click on Connection Setup, a new window will open. Choose a desired Cloud Service or Protocol by clicking one of the icons, then click Next. In my case I chose “Dropbox“. Follow the instructions in the image below.
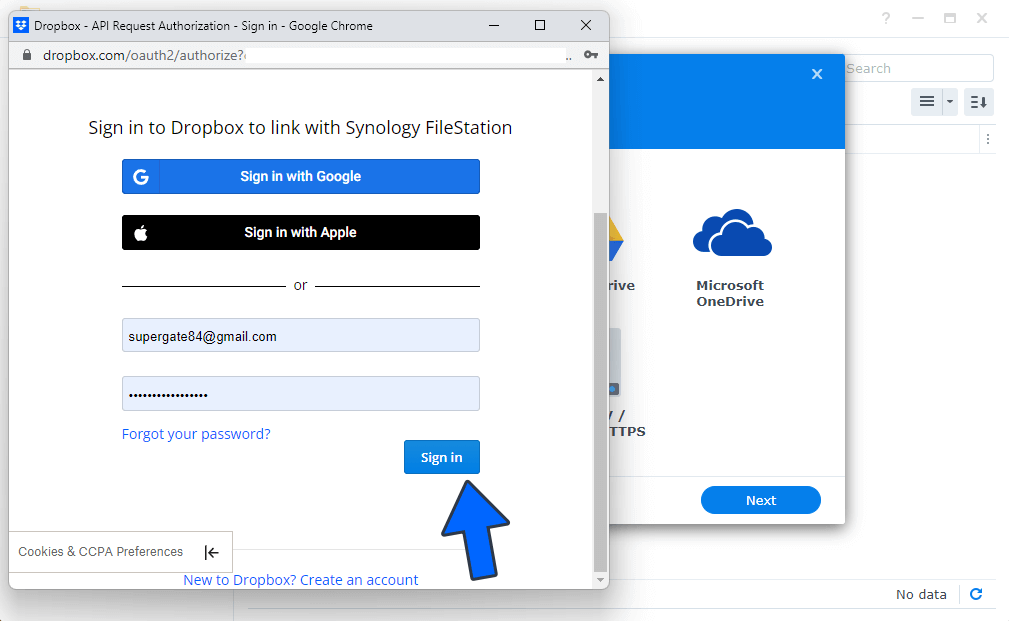
STEP 4
After you click Next on STEP 3, a new pop-up window will open. For Cloud Services like Dropbox follow the wizard’s instructions in the pop-up window then click Sign in. Follow the instructions in the image below.
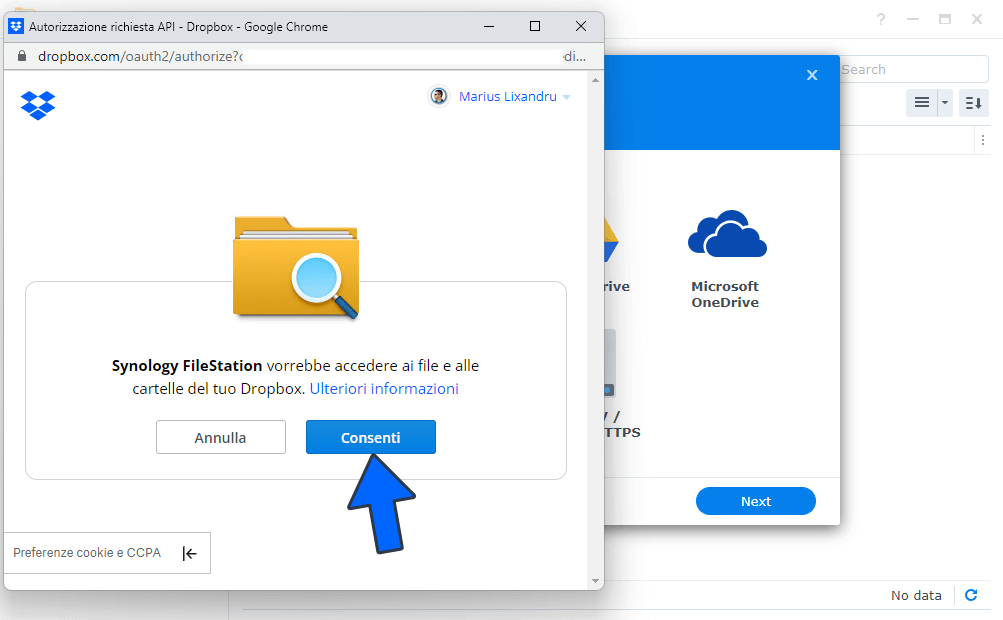
STEP 5
Click Allow Synology File Station. Follow the instructions in the image below.
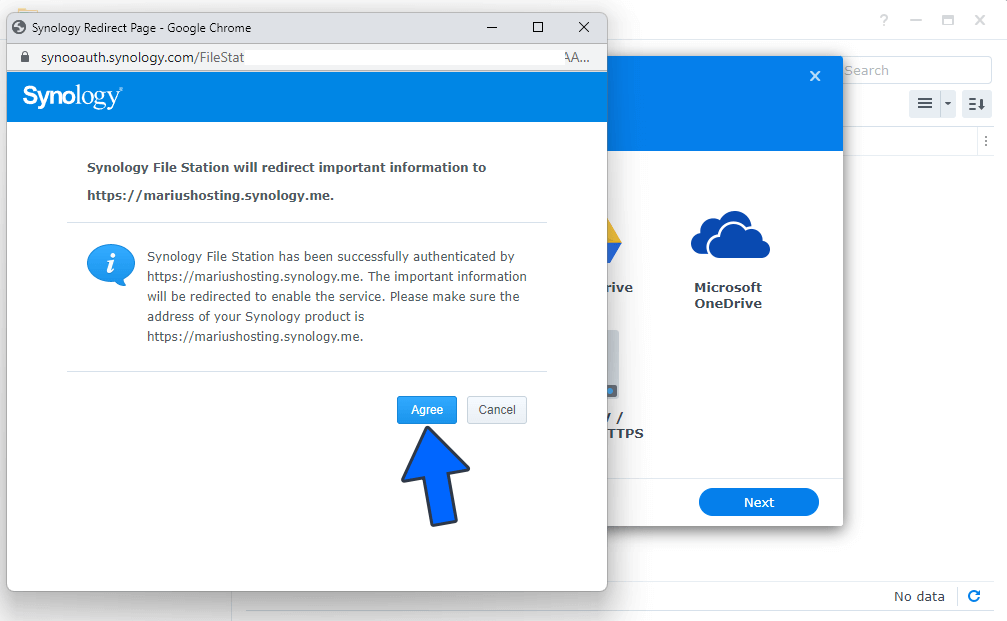
STEP 6
A new pop up window will open. Click Agree. Follow the instructions in the image below.
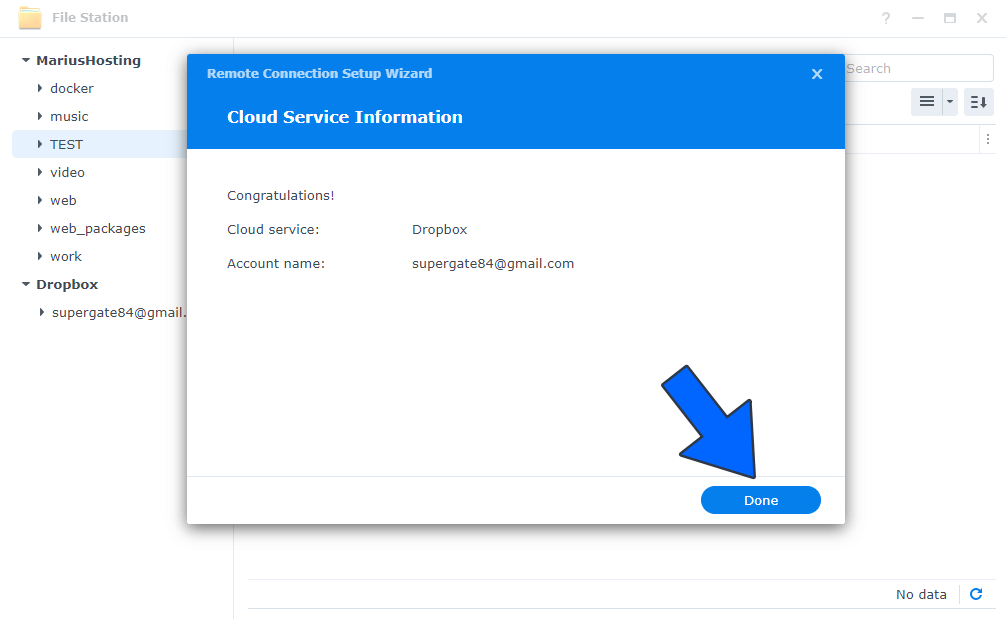
STEP 7
Click Done. Follow the instructions in the image below.
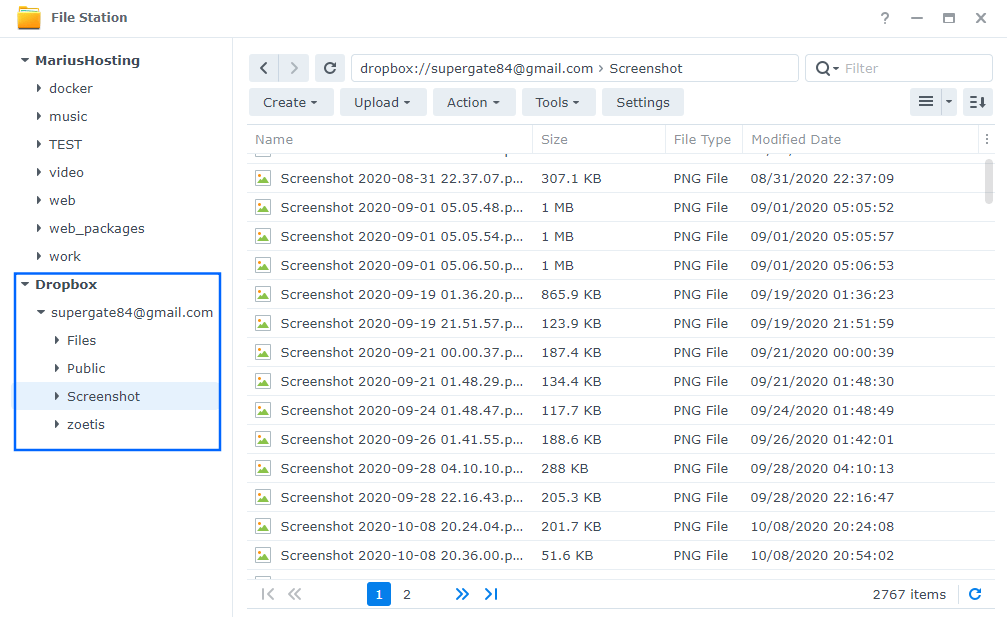
STEP 8
Once the setup is complete, the target Cloud Service, in my case Dropbox, will appear in the left panel of your File Station. Notice in the picture below that all my Dropbox folders are visible in File Station. Awesome, right?
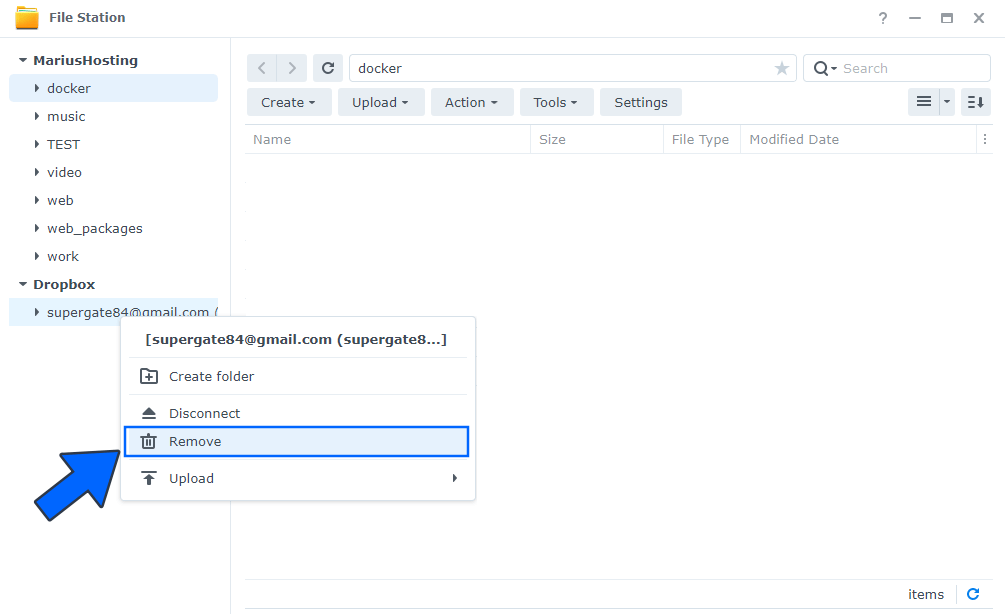
STEP 9
You can remove the Cloud Service you just set up at any time by right-clicking on the service account then “Remove“. Follow the instructions in the image below.
Note: This tool becomes particularly useful if you access your NAS outside your local network. Then you don’t have to worry about logging in from other computers to your Cloud Services, as all goes through your beloved Synology NAS.
This post was updated on Monday / July 31st, 2023 at 8:34 PM