Dash or Dashdot is a modern server dashboard to monitor CPU, STORAGE, RAM, NETWORKS. Homarr on the other hand is a simple and lightweight homepage for your server that helps you easily access all of your services in one place. The thing I like most about Homarr is its speed and simplicity in adding links of your favorite docker apps. So, in today’s article I will show you how to add Dash. monitors to the Homarr dashboard on a Synology NAS device.
STEP 1
Please Support My work by Making a Donation.
STEP 2
Install Homarr Dashboard. Skip this step if you have already installed Homarr on your Synology NAS.
STEP 3
Install Dash. Skip this step if you have already installed Dash. on your Synology NAS.
STEP 4
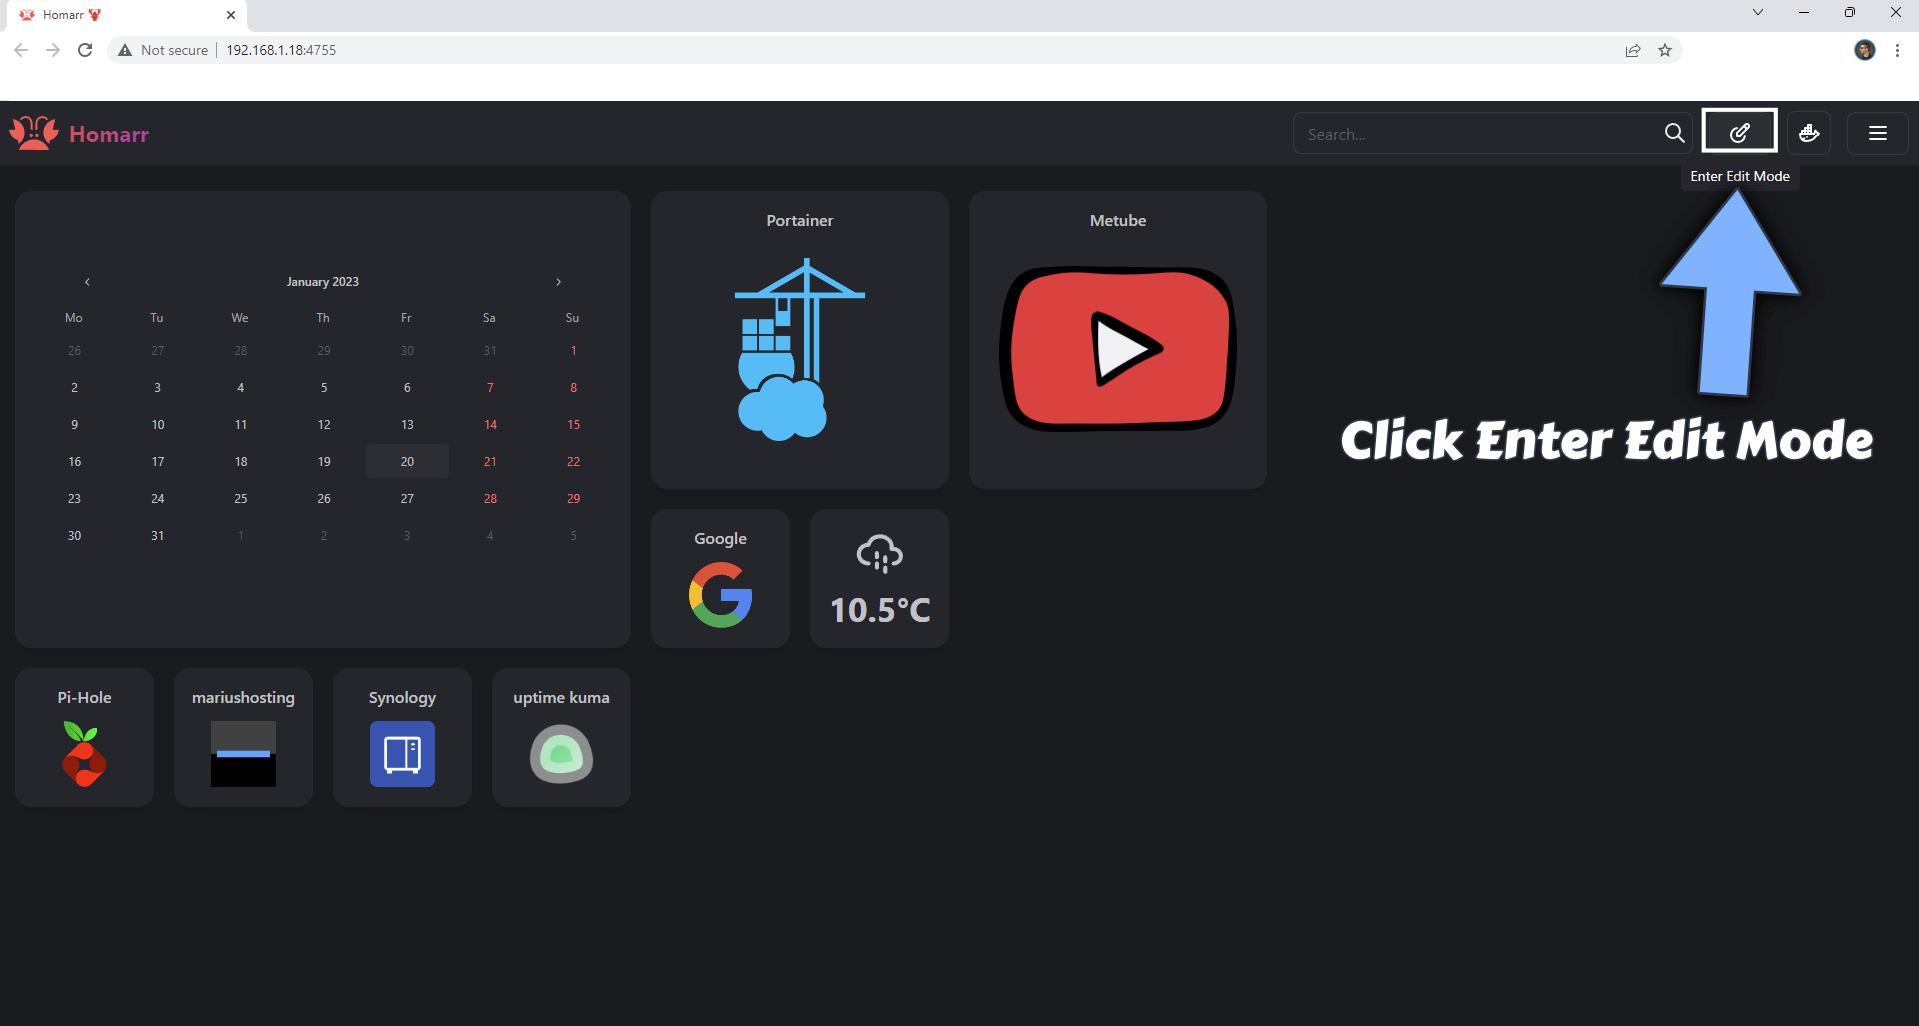
Open your Homarr Dashboard. At the top right of the page click Enter Edit Mode. Follow the instructions in the image below.
STEP 5
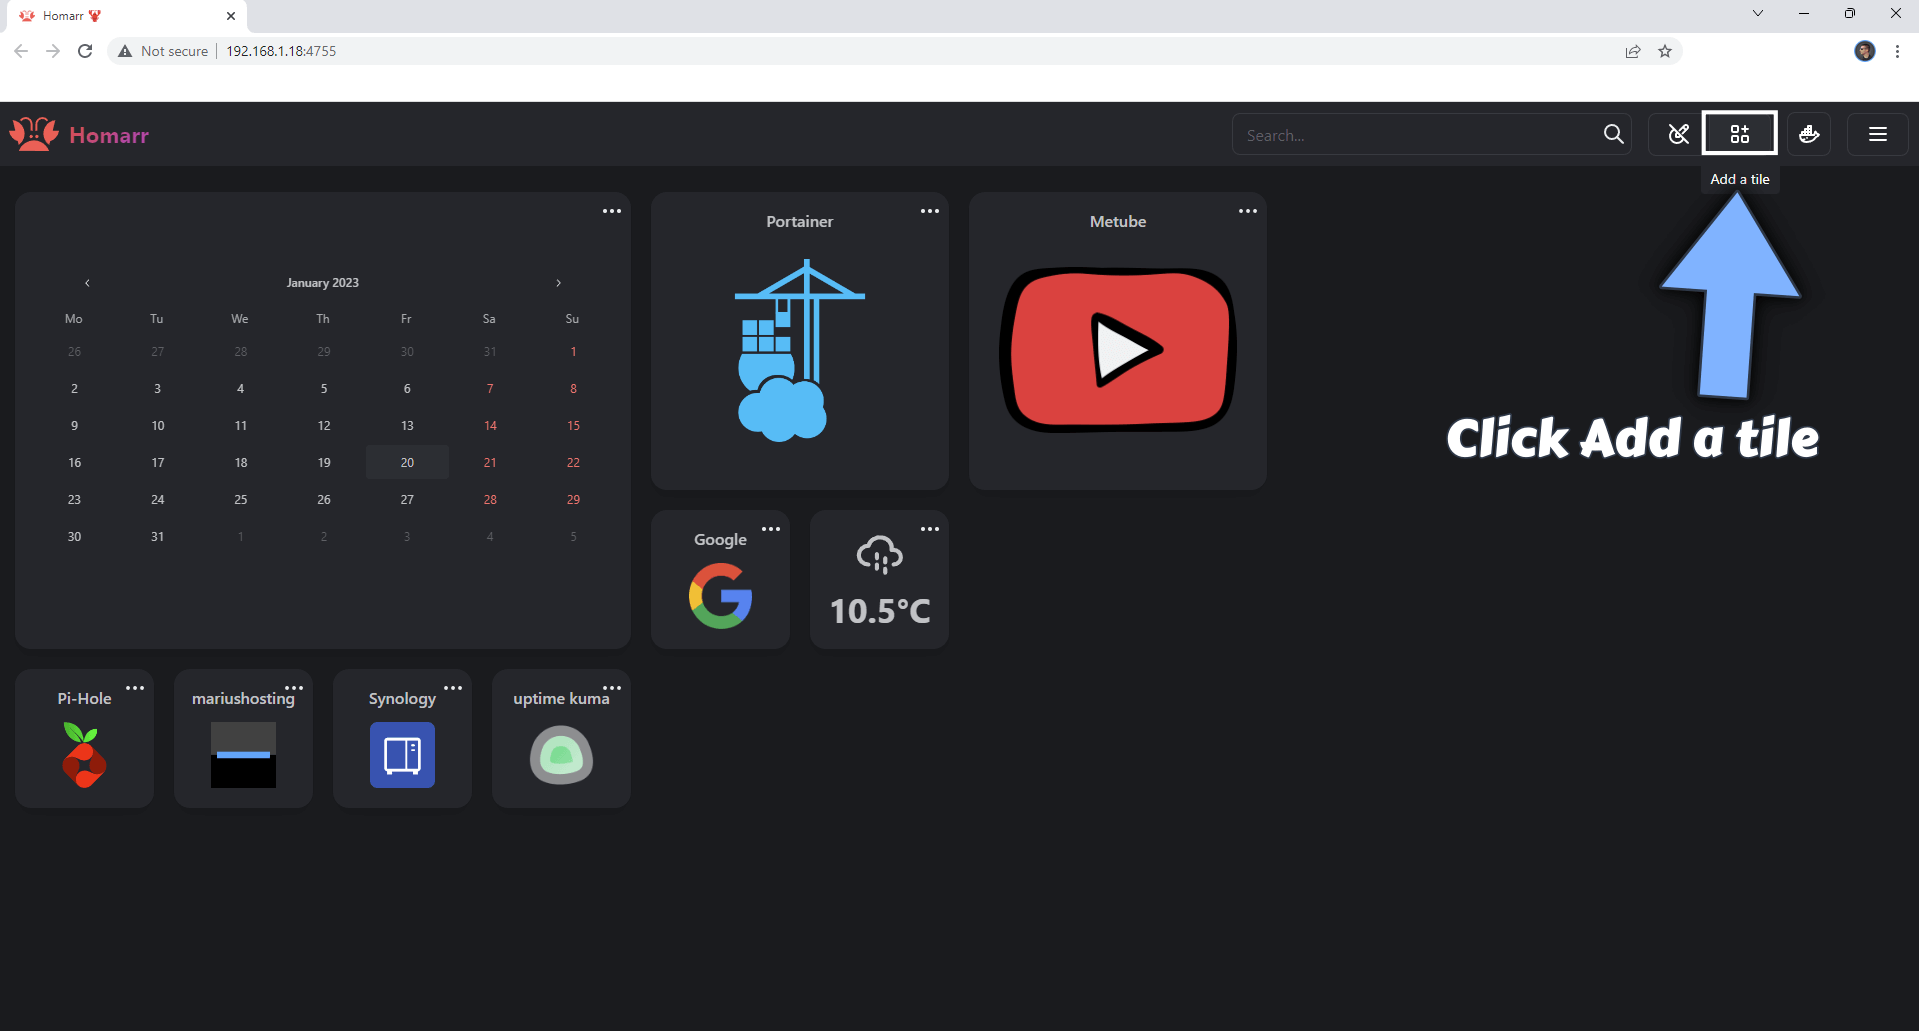
Once you enter in edit mode, click Add a tile. Follow the instructions in the image below.
STEP 6
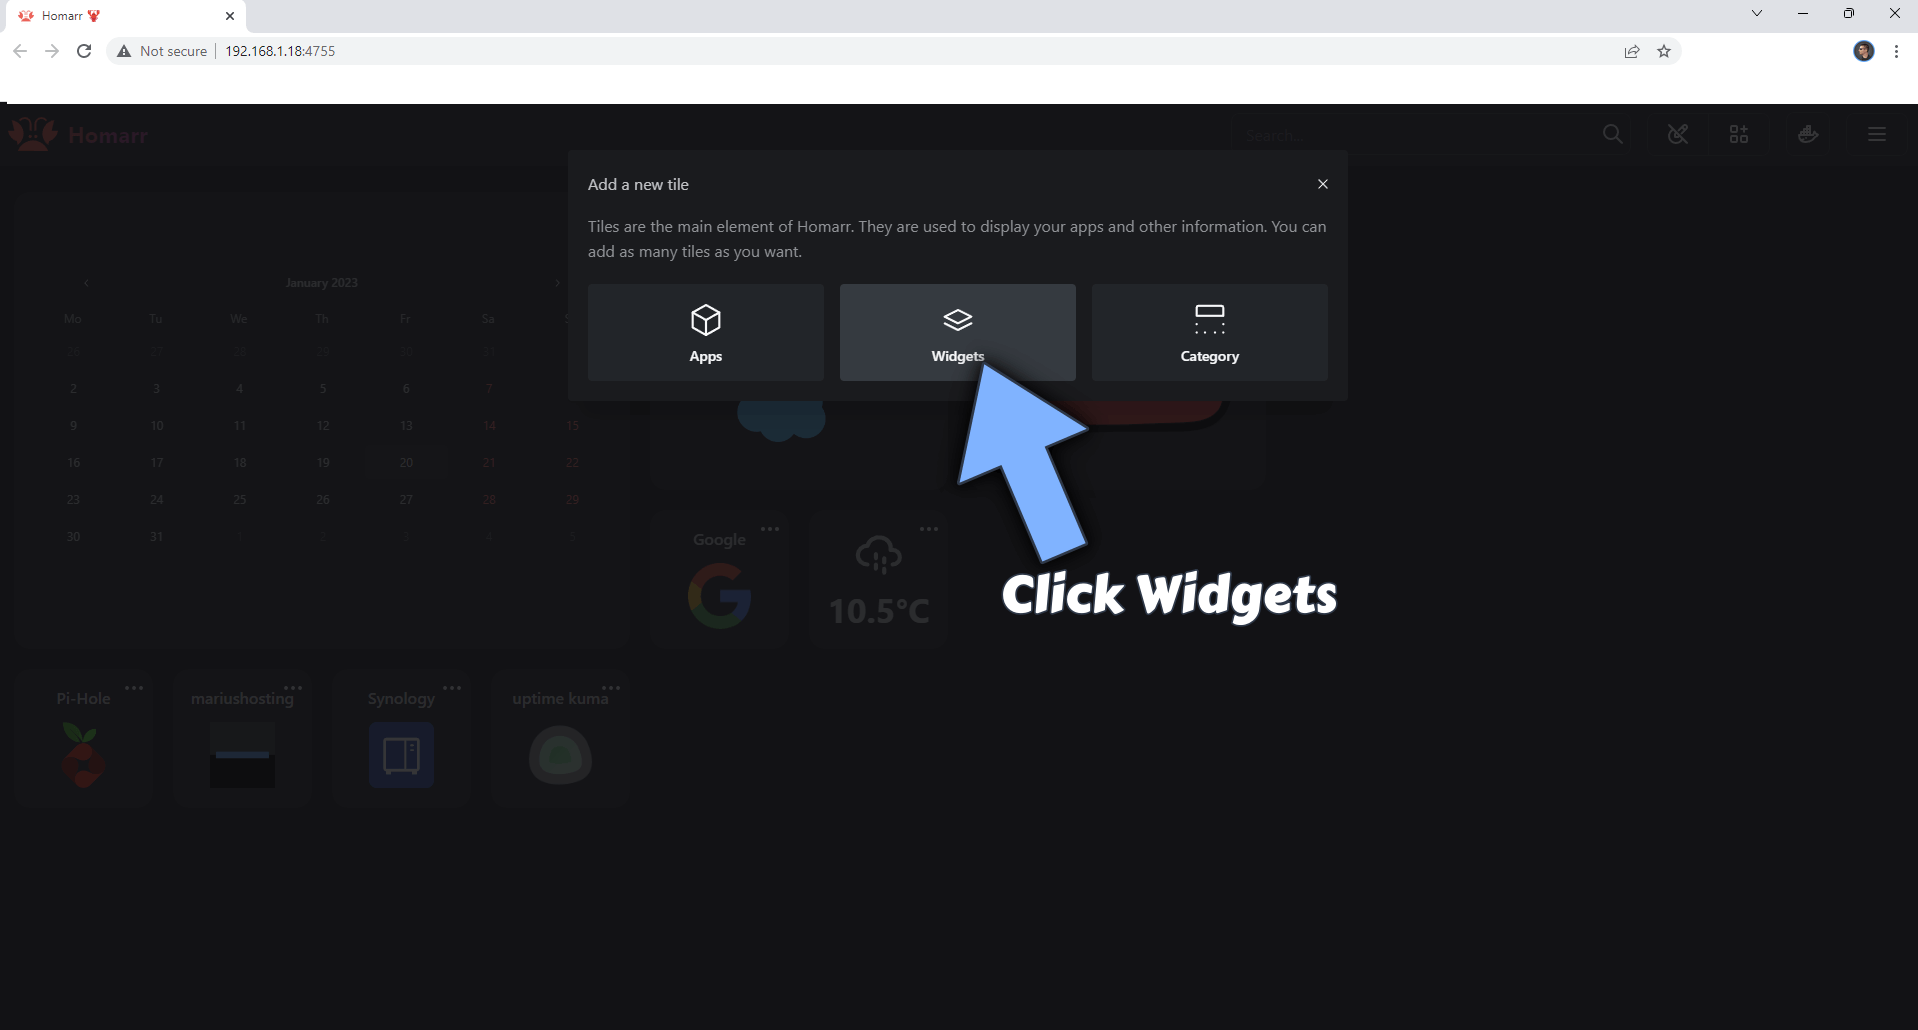
A new pop up window will open. Click Widgets. Follow the instructions in the image below.
STEP 7
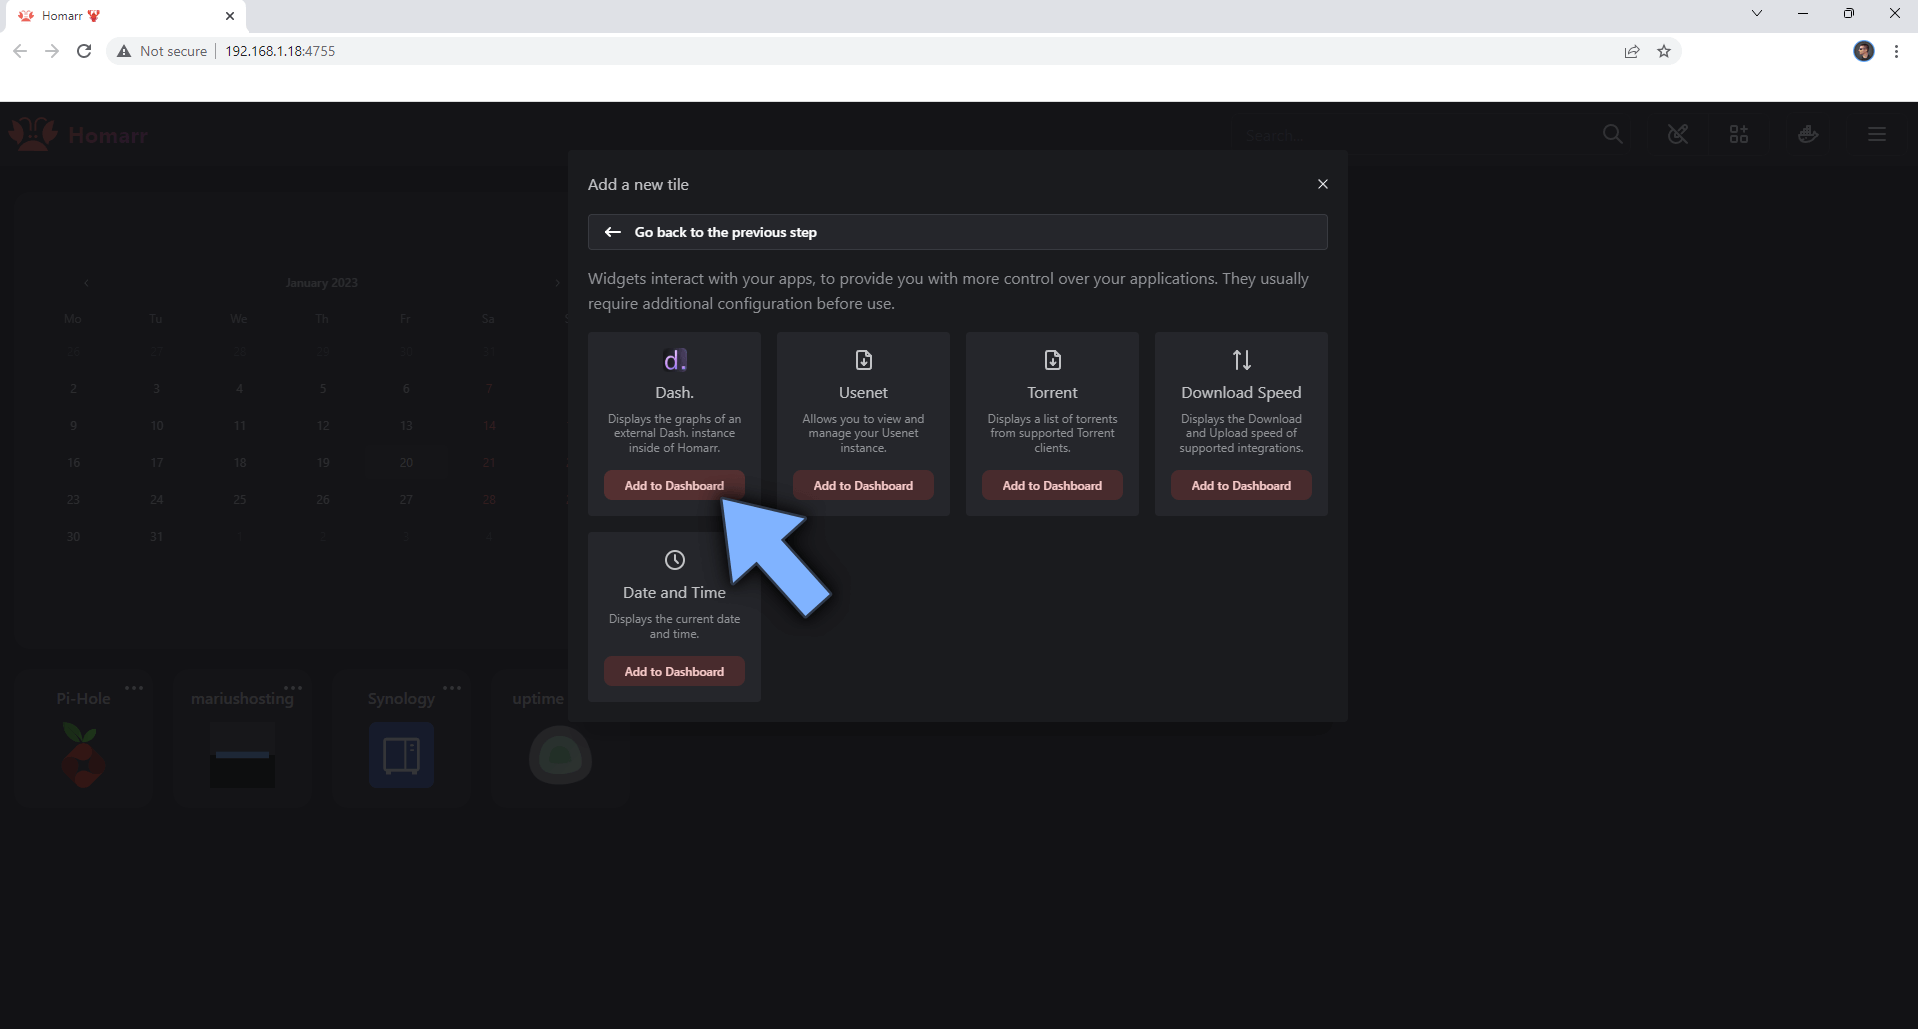
Select Dash then click Add to Dashboard. Follow the instructions in the image below.
STEP 8
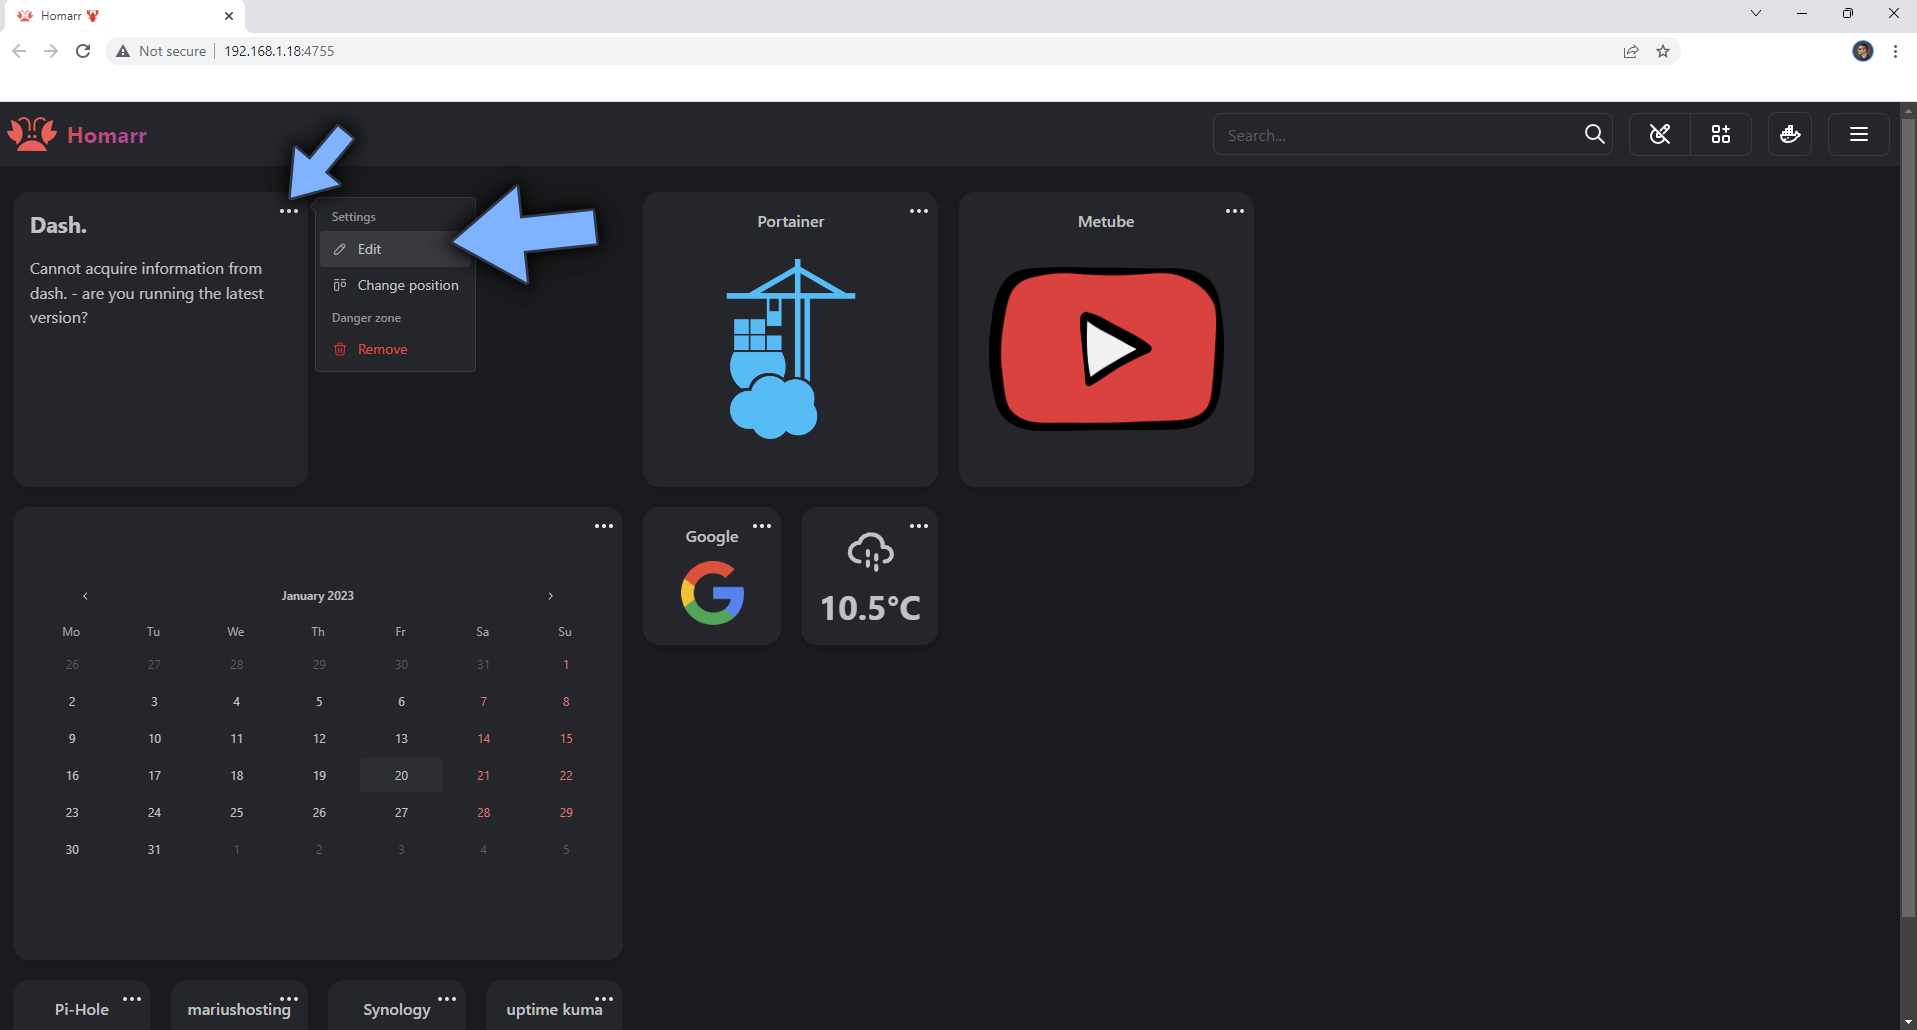
On the Dash Widget, click on the 3 dots, then Edit. Follow the instructions in the image below.
STEP 9
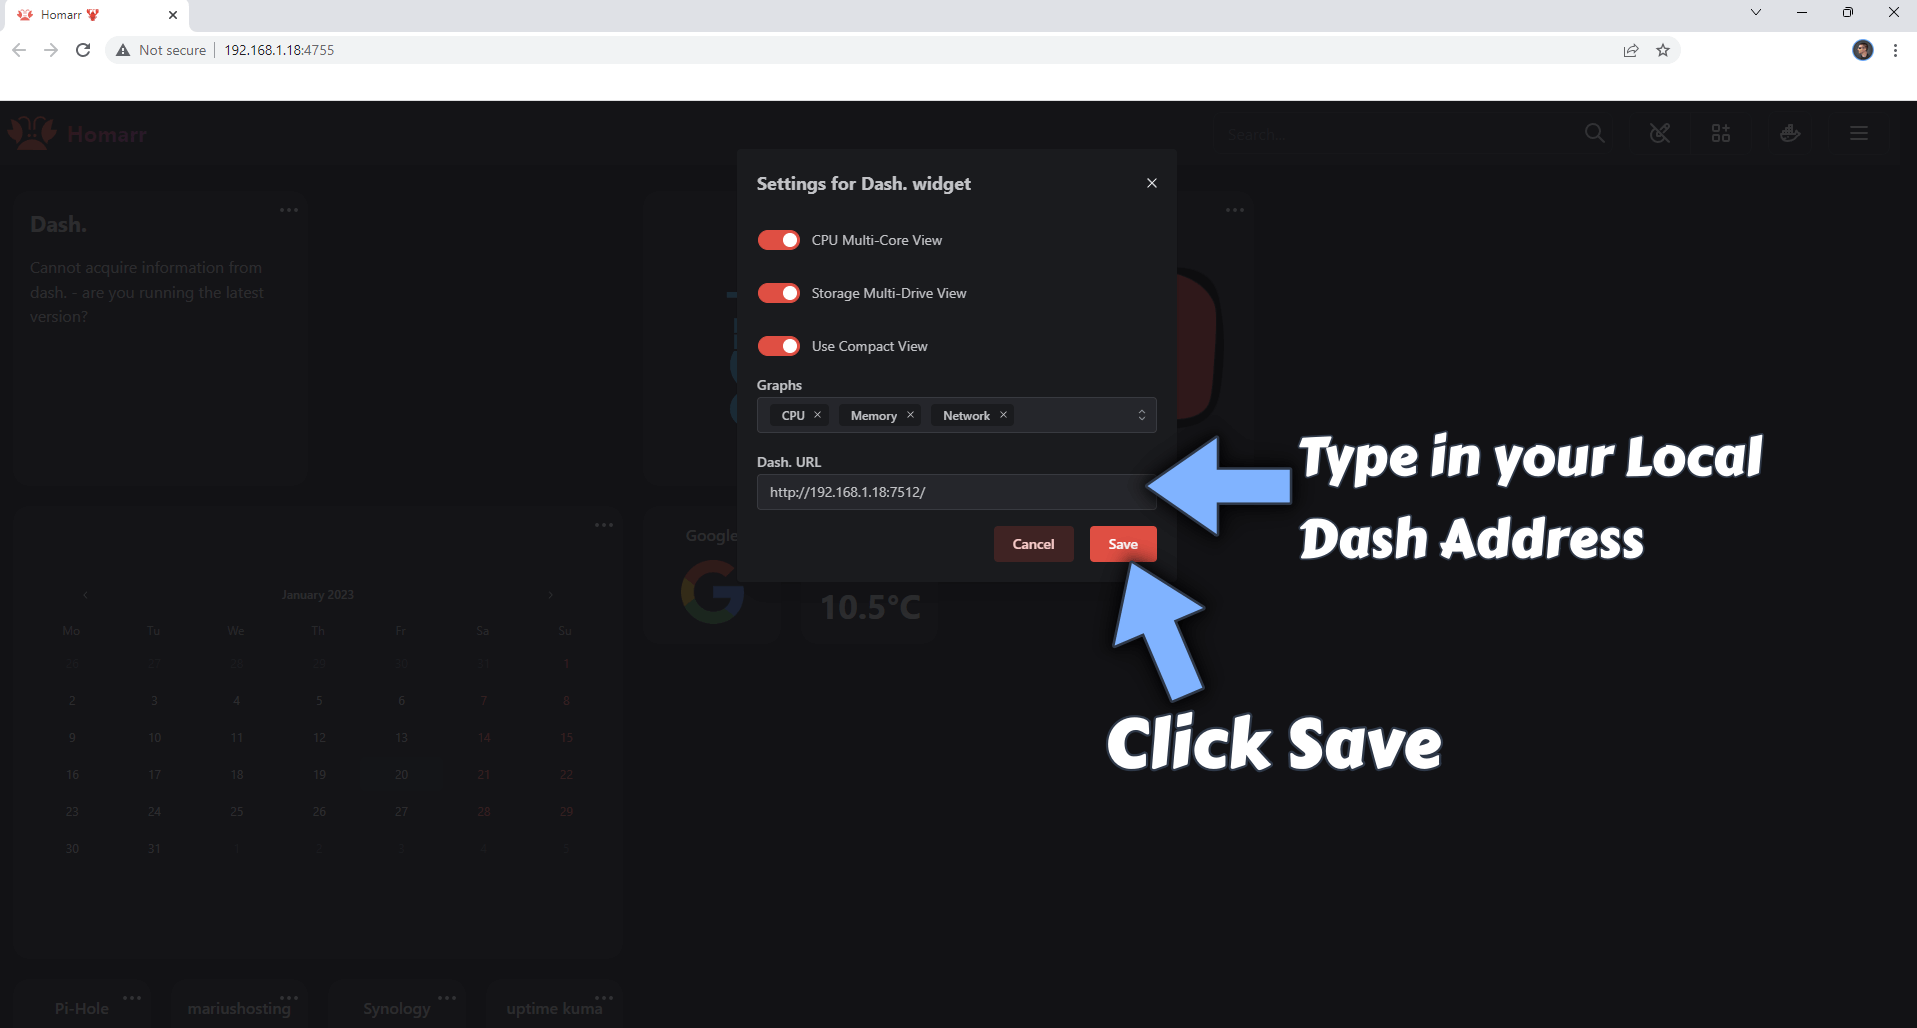
In the Dash URL area type in the address that you have previously created at STEP 10 in the Dash. installation guide. Click Save. Follow the instructions in the image below.
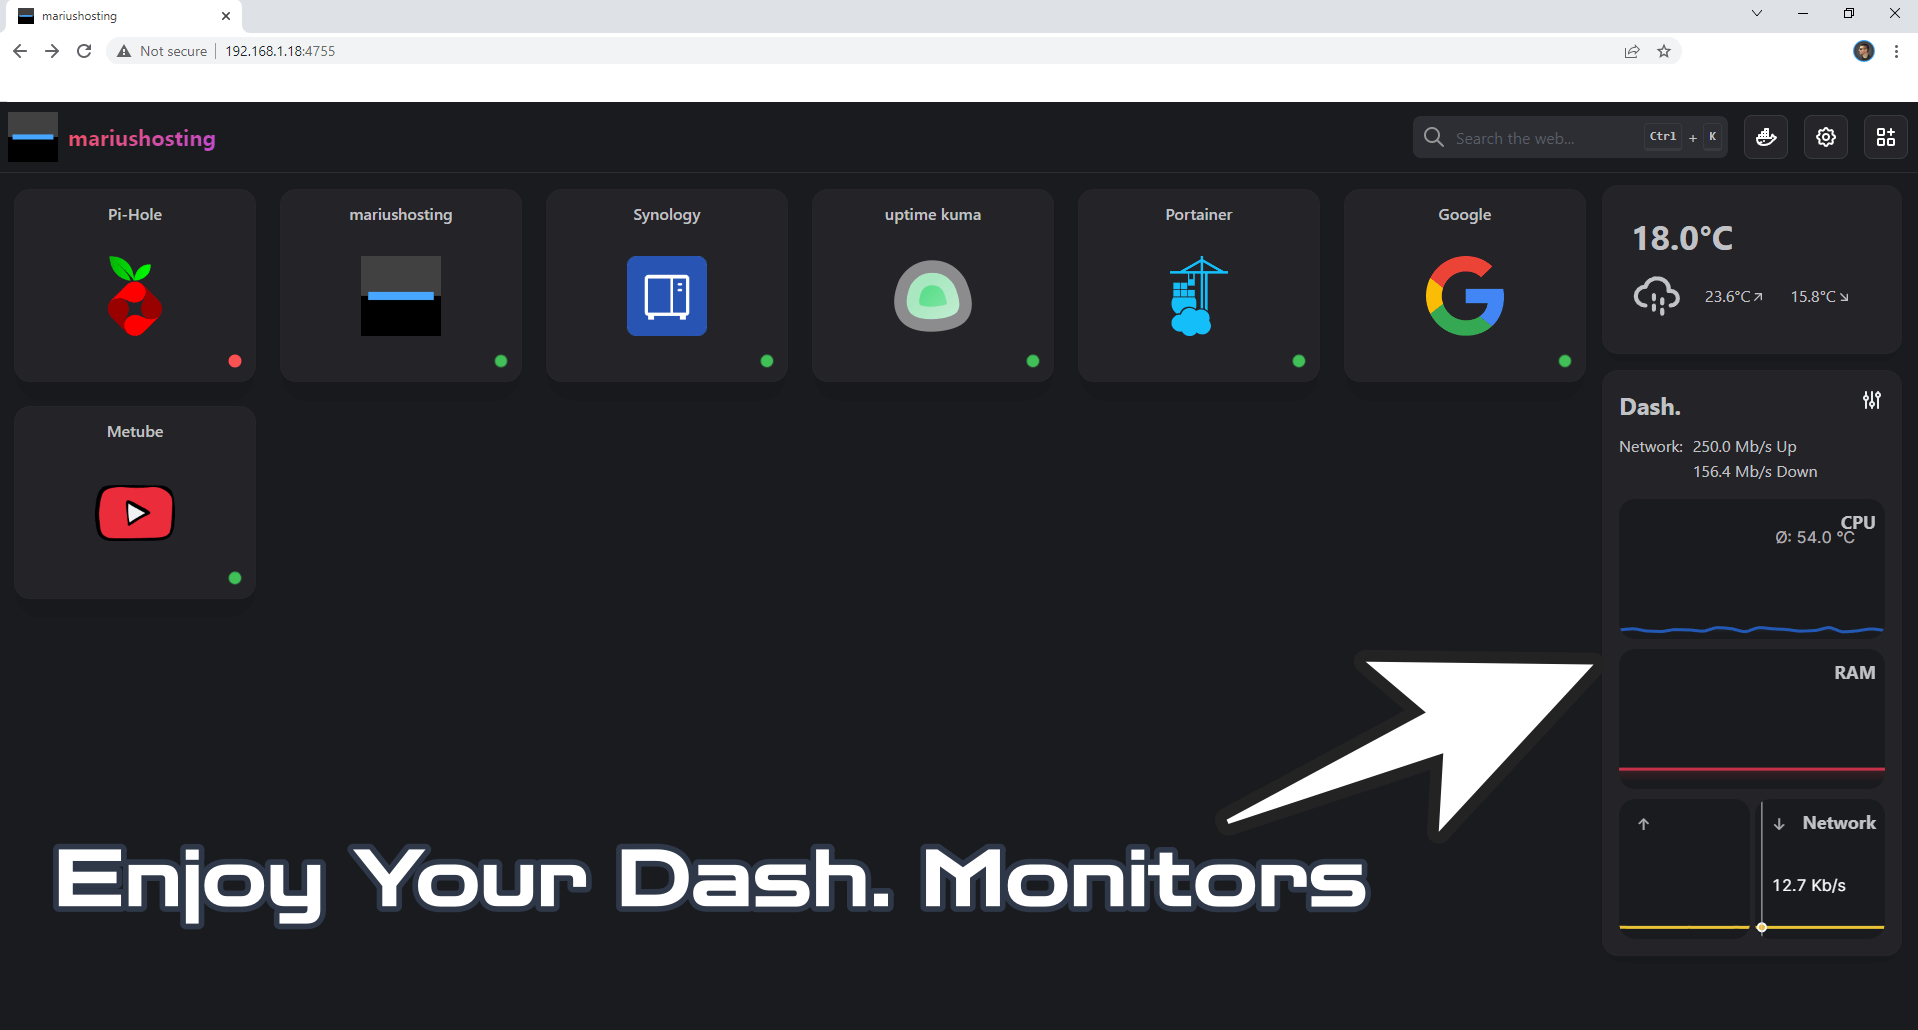
Enjoy your Dash. monitors on your Homarr dashboard!
This post was updated on Friday / January 20th, 2023 at 10:56 PM