Filled with emotion, you have unboxed your new Synology NAS. You’ve prepared your new disks and are trying to install the DSM operating system. But your disks are not recognized or detected… It doesn’t matter whether you have HDD or SSD disks installed because you too might find yourself dealing with this problems. In this article I will teach how to get your Synology NAS to detect the installed disks in an easy step by step guide.
STEP 1
Please Support My work by Making a Donation.
STEP 2
- First of all, make sure your disks are compatible with your Synology NAS by visiting the official Synology list of compatible HDDs/SSDs. If your NAS has an unused drive slot, please first check the Hardware Installation Guide to see if your model supports the drive hot-swap before the next step.
- For the supported NAS model, try to insert the unrecognized/undetected HDD/SSD disk into the unused drive slot to see if other drive slots can recognize the same disk or not.
- For the unsupported NAS model, insert the unrecognized HDD/SSD disk into the unused drive slot after turning off the NAS, and see if other drive slots can recognize the same disk or not.
- If your Synology NAS does not have any unused drive slots, I suggest you connect the HDD/SSD to your desktop computer to see if it is functional and use the manufacturer’s diagnostic tool to check the health status of the hard drive.
STEP 3
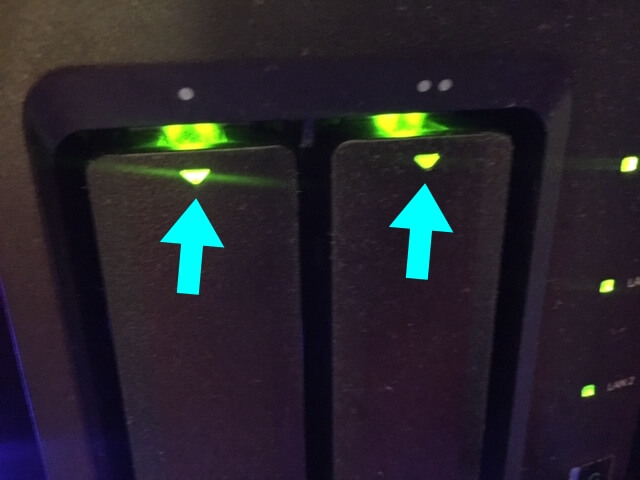
Once you have correctly inserted the disks, check that the green “Triangle” slot LEDs are on. If the green LED lights are off, then go to STEP 3.
STEP 4
Carefully check the power supply. It seems trivial, but many people mistake the router power supply for their Synology power supply. During a cable cleanup, many people accidentally swap the router power supply for the Synology NAS power supply, or vice-versa. The router only needs .5 amps to run and is fine with the larger supply (3 amps, I think). But the Synology device doesn’t have enough power to run the disks, only the unit itself. Putting the power supplies in order can fix it all.
STEP 5
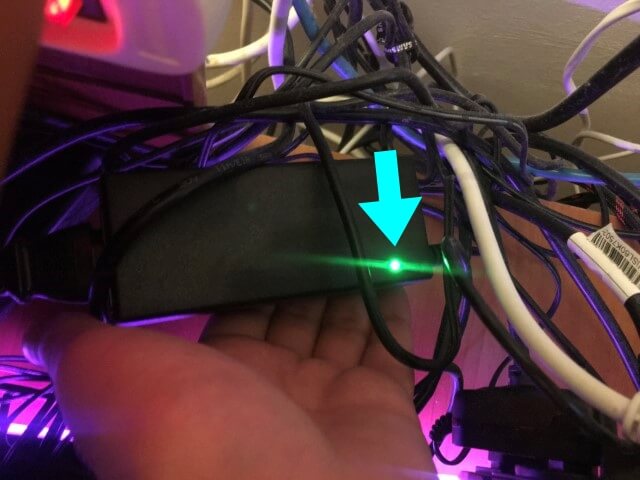
Check that the green “LED” light on your Synology power supply is on. If the LED light is off, check if the power supply is correctly connected. If the power supply is correctly connected and LED light is still off, then the power supply might be faulty. I have a nice concoction of cables, right? 🙂
STEP 6
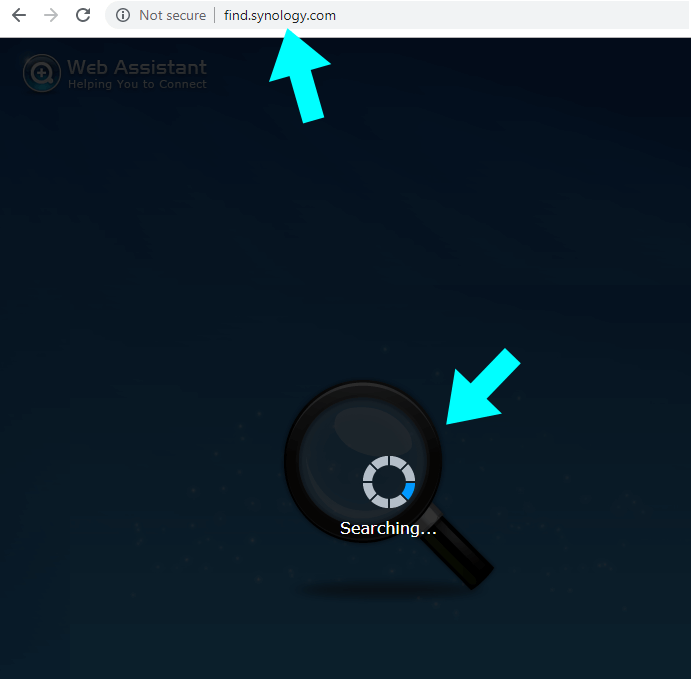
Make sure you are connected to the Internet, then open your browser and, in the search box, type find.synology.com
A page will open and automatically search for your Synology NAS and guide you step by step through the installation process of the DSM operating system.
STEP 7
If step 5 failed to install the DSM operating system, try to scan your local LAN and find your Synology device IP, then go to the browser and, in the search box, type http://yoursynologyip:5000
This will start the DSM installation on your Synology device. In the example I provided you with, instead of “yoursynologyip”, write your Synology IP. It should look something like this: http://192.0.0.110:5000
STEP 8
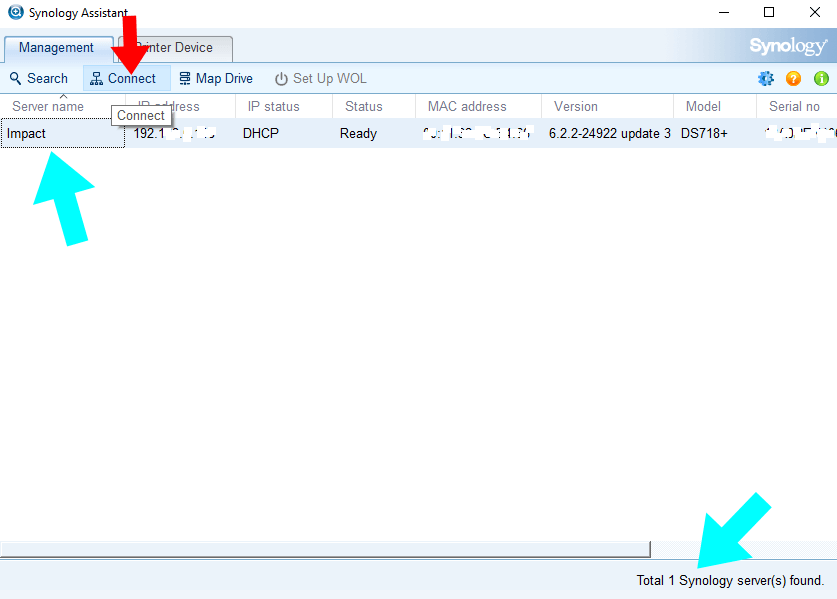
From Synology Download Center, install “Synology Assistant” for desktop. This Package works with different OS like Linux, Windows, Mac. After the application finishes scanning your DHCP, and finds your Synology, just click “Connect” to install your latest DSM operating system.
STEP 9
Install the “DS Finder” application on your mobile phone to find your Synology NAS device on the LAN (DS Finder is both for Android and Apple iOS). The DS Finder application works like Web Assistant, but it’s a mobile version.
Note: In this article you will not only find out why your HDDs/SSDs are not detected/recognized, but also a simple step by step guide on how to install the DSM operating system on your new disks.
Note: If the disks are not detected, they are likely not compatible with your Synology NAS. If the problem persists and the disks aren’t recognized by your Synology NAS device, your Synology motherboard or disks are probably faulty, and you need to contact your local reseller for warranty.
This post was updated on Monday / September 12th, 2022 at 9:32 AM