On October 8, 2025, Synology released a new DSM version called DSM 7.3-81180. Below I will guide you step by step through the process of installing the new DSM 7.3-81180. This update fixes multiple security vulnerabilities. DSM 7.3 no longer supports Node.js v14, Node.js v16, PHP7.3, PHP7.4, PHP8.0. To ensure compatibility, the following packages will be automatically or must be manually updated to compatible versions: Active Backup for Business, Active Backup for Google Workspace, Active Backup for Microsoft 365, Advanced Media Extensions, Antivirus by McAfee, Antivirus Essential, Cloud Sync, Container Manager, Download Station, File Station, Hyper Backup, Hyper Backup Vault, Log Center, Media Server, Note Station, PACS, Presto File Server, Snapshot Replication, Storage Analyzer, Surveillance Station 9.2.0 or earlier versions, Synology Chat Server, Synology Drive, Synology Mail Server, Synology MailPlus Server, Synology Photos, Universal Search, Web Station. Synology is going to support third party drives again in DSM 7.3 as revealed in my articles. Don’t forget: you heard it from Marius first. Synology: Third-Party Hard Drives Will Be Officially Supported Again In The Future – Synology: Next DSM Update Will Be 8.0, 7.3 or 7.2.3
Container Manager “Docker engine” is still at the outdated version 24.0.2 so no news here yet.
Synology is currently collaborating with hard drive manufacturers to expand the list of certified hard drive compatibility, offering users more reliable options. Additionally, DiskStation Plus, Value, and J series models launched in 2025 will support installing and creating third-party hard drive storage pools¹ when running DSM 7.3, providing users with greater flexibility.
STEP 1
Manually Download DSM 7.3-81180 by following the blue link below. From the official Synology Archive, download 7.3-81180 for your NAS model.
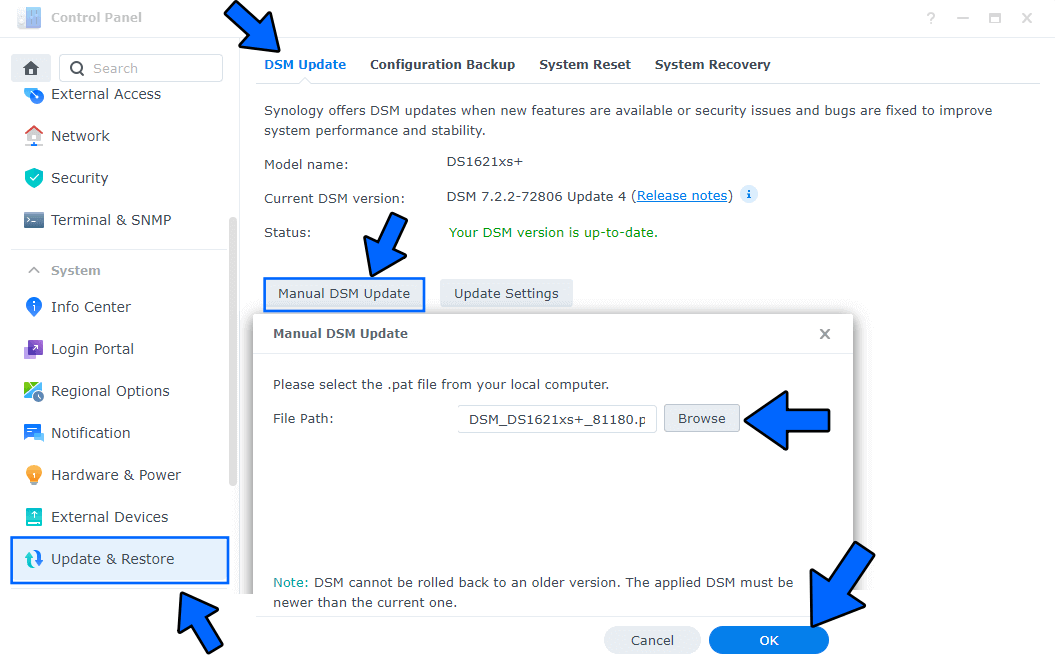
STEP 2
Go to Control Panel / Update & Restore then click on Manual DSM Update. Select the file you have previously downloaded at STEP 1 then click OK. Follow the instructions in the image below.
STEP 3
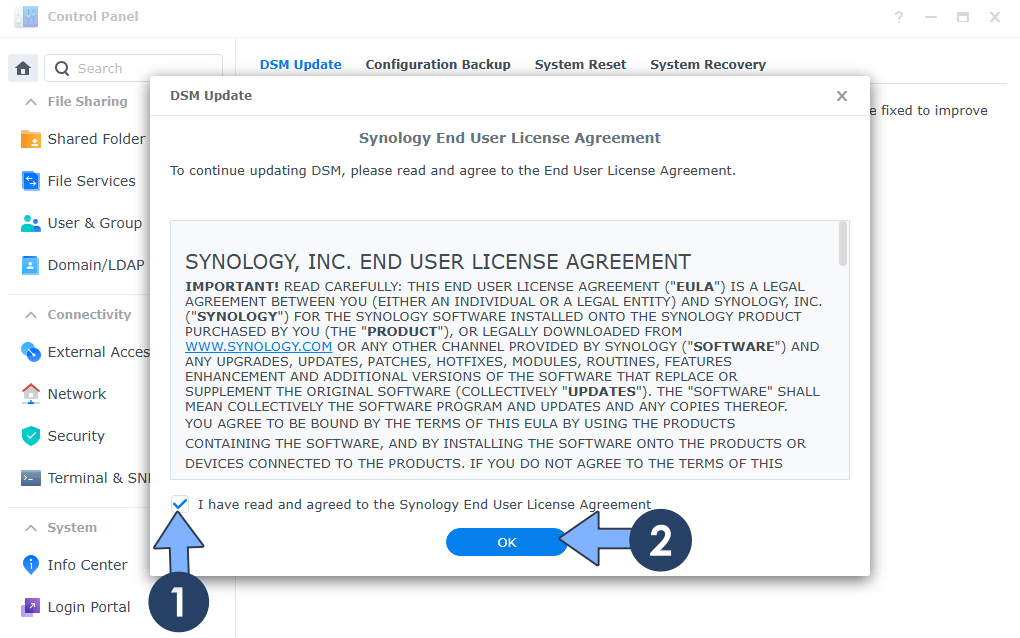
Agree with Synology End User License. Click OK. Follow the instructions in the image below.
STEP 4
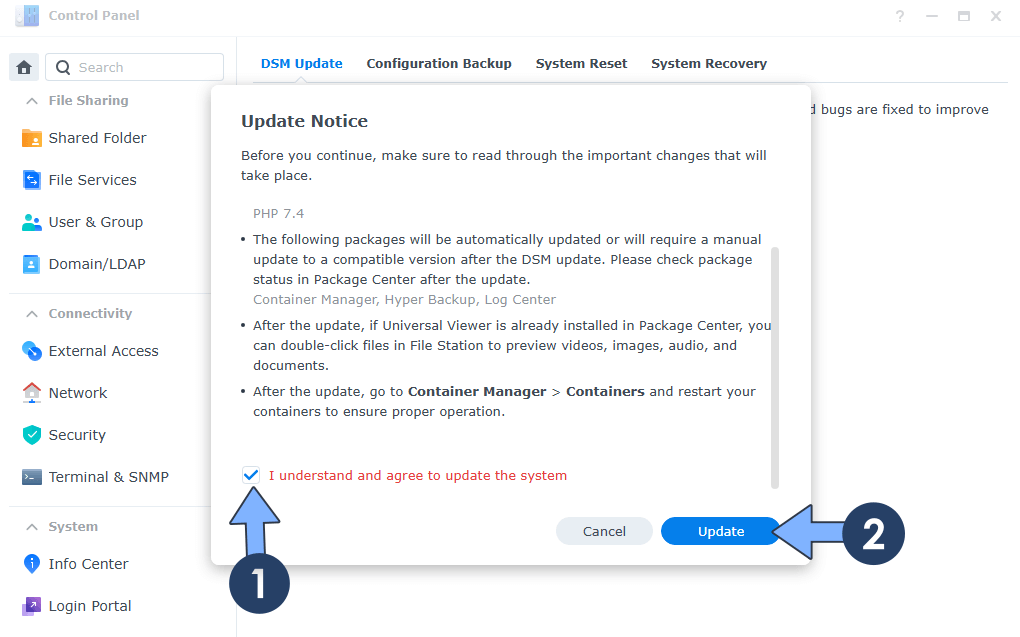
Select I understand and agree to update the system. Click Update. Follow the instructions in the image below.
STEP 5
A new pop up window will open. Click OK. Follow the instructions in the image below.
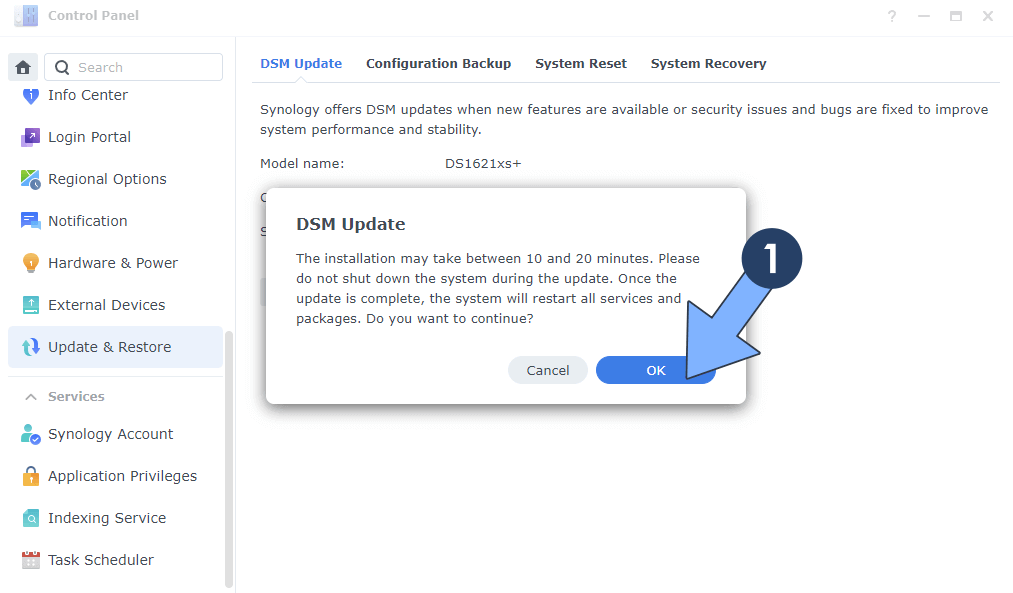
STEP 6
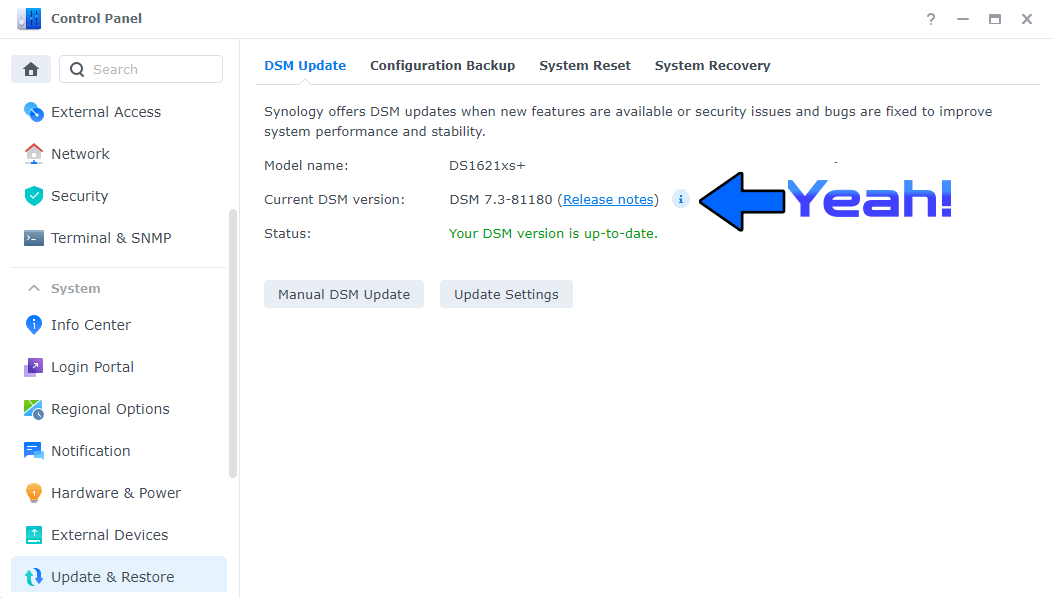
After approximately 5 minutes your new DSM 7.3-81180 will be installed on your Synology NAS device.
This post was updated on Wednesday / October 8th, 2025 at 9:15 AM