On August 2, 2022, Synology released a new DSM version called DSM 7.1-42661 Update 4 which fixes an issue where users might not be able to sign in to their Gmail account when configuring the sender at Control Panel / Notification / Email Update 4 also fixes an issue where, after restarting DSM, certain packages might fail to function properly if users have Synology High Availability installed. This update is mandatory for all users. Below I will guide you step by step through the process of installing the new DSM 7.1-42661 Update 4.
STEP 1
Manually Download DSM 7.1-42661 UPDATE 4 for your NAS model by following the blue link below. Note: To install this new DSM version make sure you already have DSM 7.1-42661 Final Release installed on your NAS device.
STEP 2
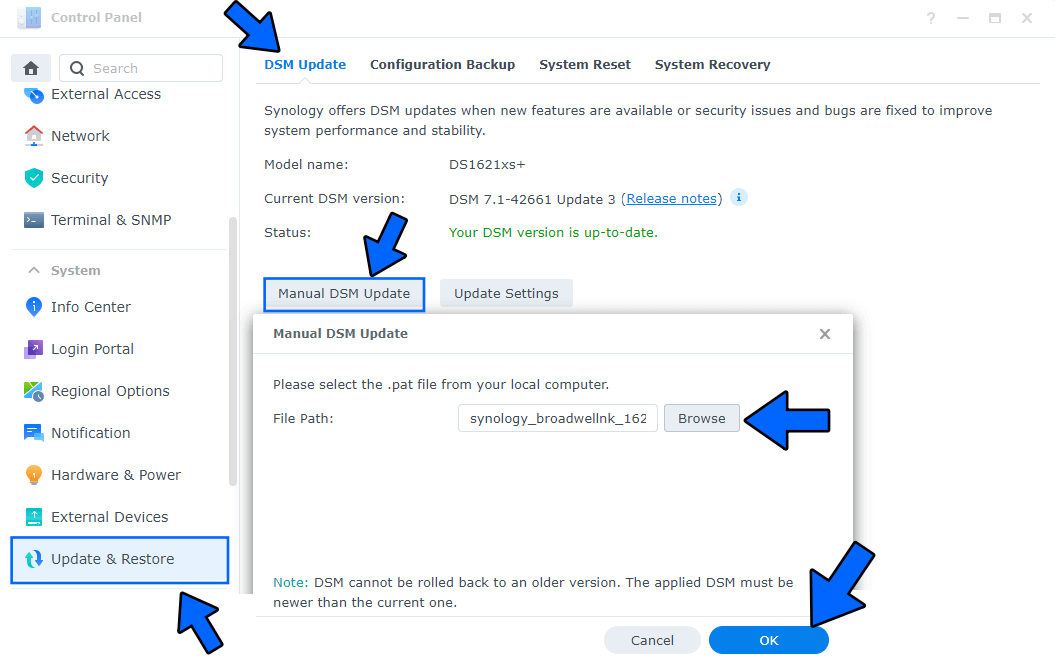
Go to Control Panel / Update & Restore then click on Manual DSM Update. Select the file you have previously downloaded at STEP 1 then click OK. Follow the instructions in the image below.

Note: If the file you have previously downloaded at STEP 1 is not recognized, try to download the .pat file for your NAS from the Synology Download Center website.
STEP 3
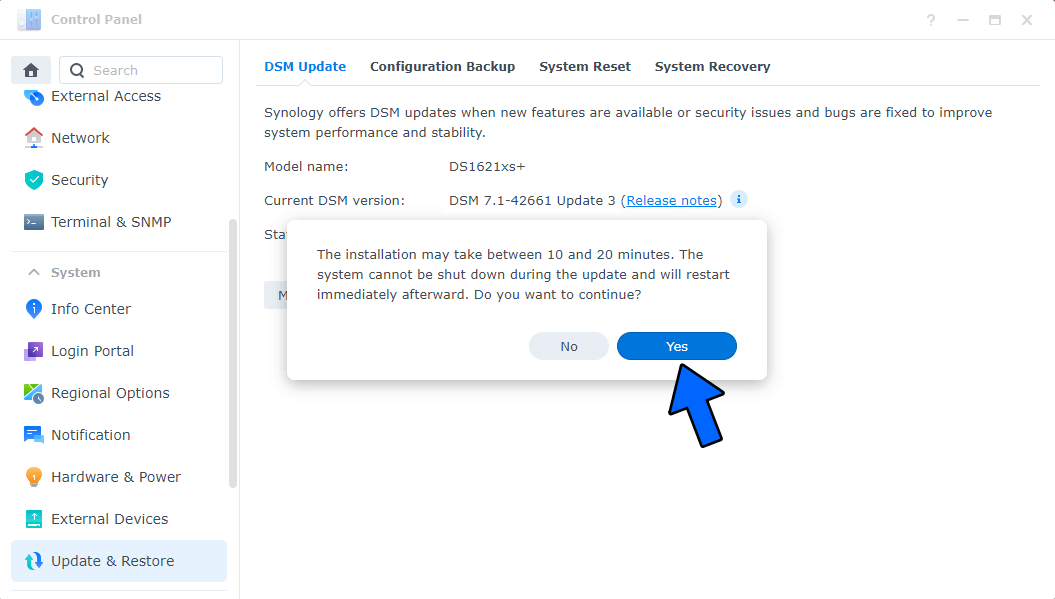
After you click OK at STEP 2, a new pop up window will open. Click Yes. Follow the instructions in the image below.

STEP 4
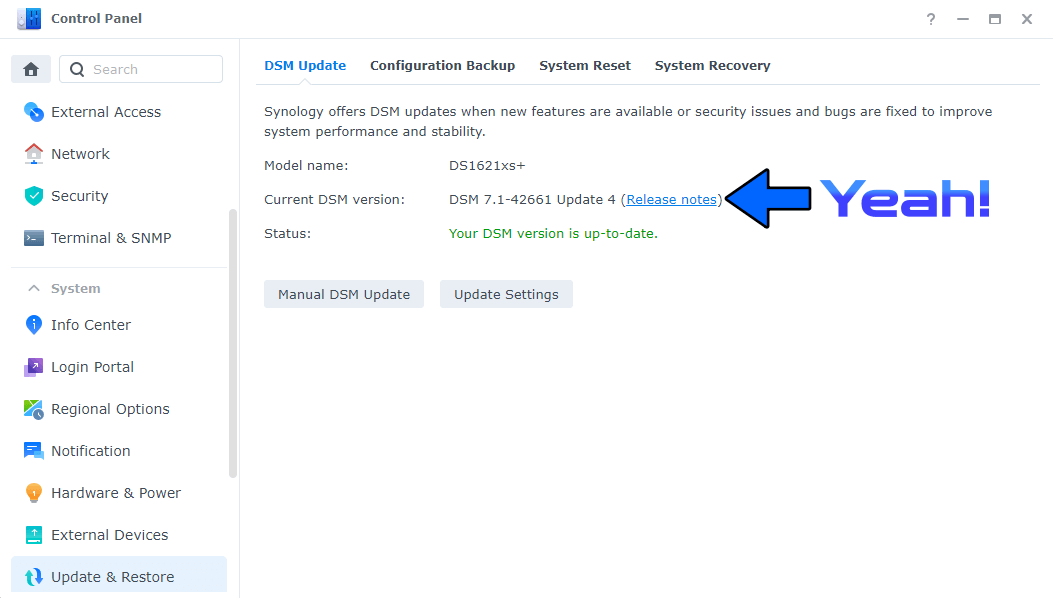
After approximately 5 minutes your new DSM 7.1-42661 UPDATE 4 will be correctly installed on your Synology NAS device.

This post was updated on Wednesday / August 10th, 2022 at 10:00 PM
