
Starting July 5, 2023, thanks to the new Synology Hyper Backup 4.1.0 version, you can back up your entire NAS system in a few simple and easy steps. The function is already available for all Synology users that download the new Hyper Backup 4.1.0 package. I have not encountered any kind of problem during my system backup, and my NAS has been completely backed-up to another NAS successfully.
To do this, you will need two Synology NAS devices: one for Hyper Backup and one for Hyper Backup Vault. Basically you will be installing the Hyper Backup package on one NAS and the Hyper Backup Vault package on the other NAS. The Synology NAS with the Hyper Backup package will be where you will run the back up process, while the Synology NAS with the Hyper Backup Vault package will become the backup destination.
💡What is Hyper Backup? Hyper Backup helps you back up data and LUNs, and retains multiple data backup versions to keep important information handy and easy to track. Hyper Backup also makes restoring data and LUNs simple and straightforward.
💡What is Hyper Backup Vault? Hyper Backup Vault allows another Synology server to perform backups to this Synology NAS via Hyper Backup. Hyper Backup Vault also provides the overview of all the backup targets on this Synology NAS.
STEP 1
Please Support My work by Making a Donation.
STEP 2
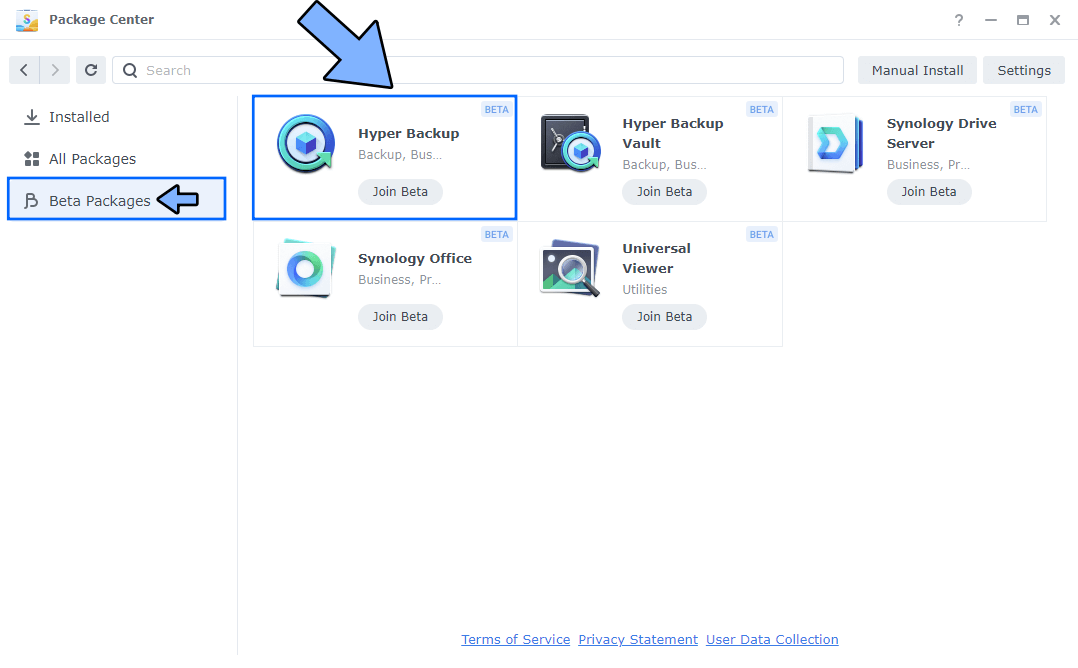
On the NAS you want to back up, go to Package Center. On the left sidebar, click Beta Packages. Click Join Beta to install the new Hyper Backup. Follow the instructions in the image below.
STEP 3
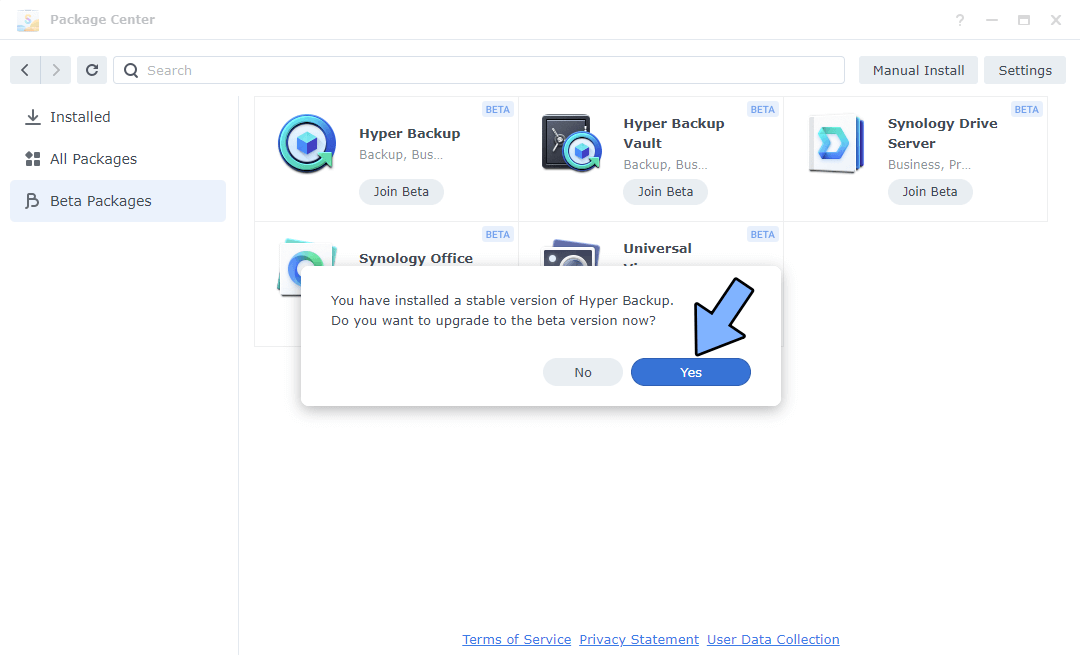
A new pop up window will open. Click Yes. Follow the instructions in the image below.
STEP 4
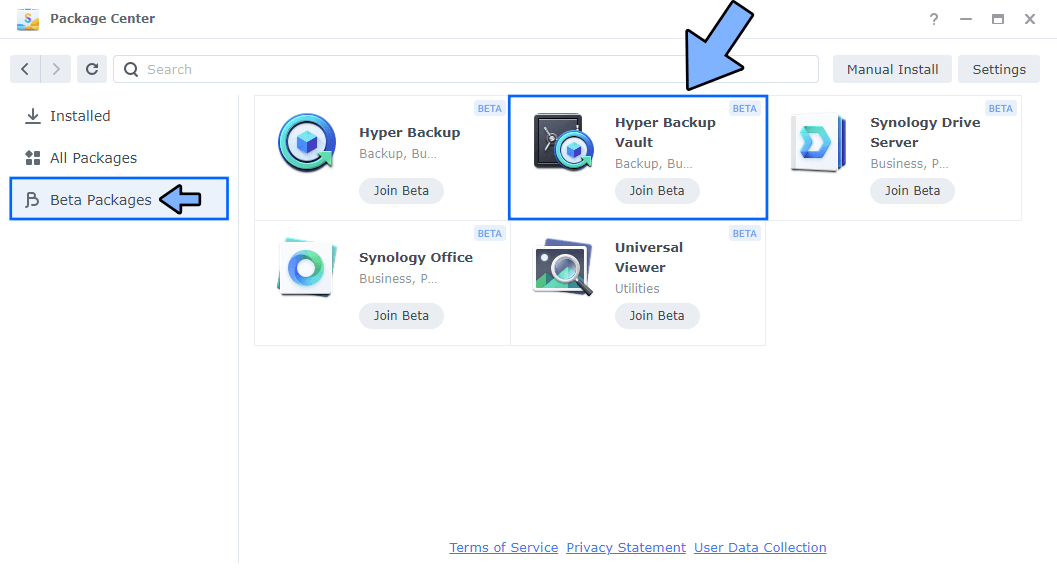
On the NAS you want to receive the backup, go to Package Center. On the left sidebar, click Beta Packages. Click Join Beta to install the new Hyper Backup Vault. Follow the instructions in the image below. Note: Hyper Backup Vault allows another Synology server to perform backups to this Synology NAS via Hyper Backup. Hyper Backup Vault also provides the overview of all the backup targets on this Synology NAS.
STEP 5
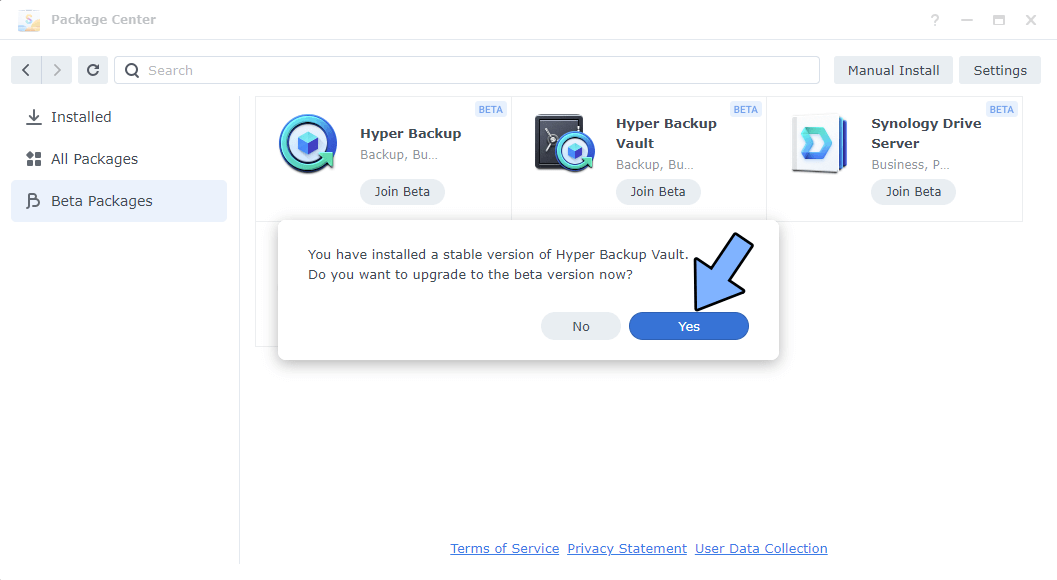
A new pop up window will open. Click Yes. Follow the instructions in the image below.
STEP 6
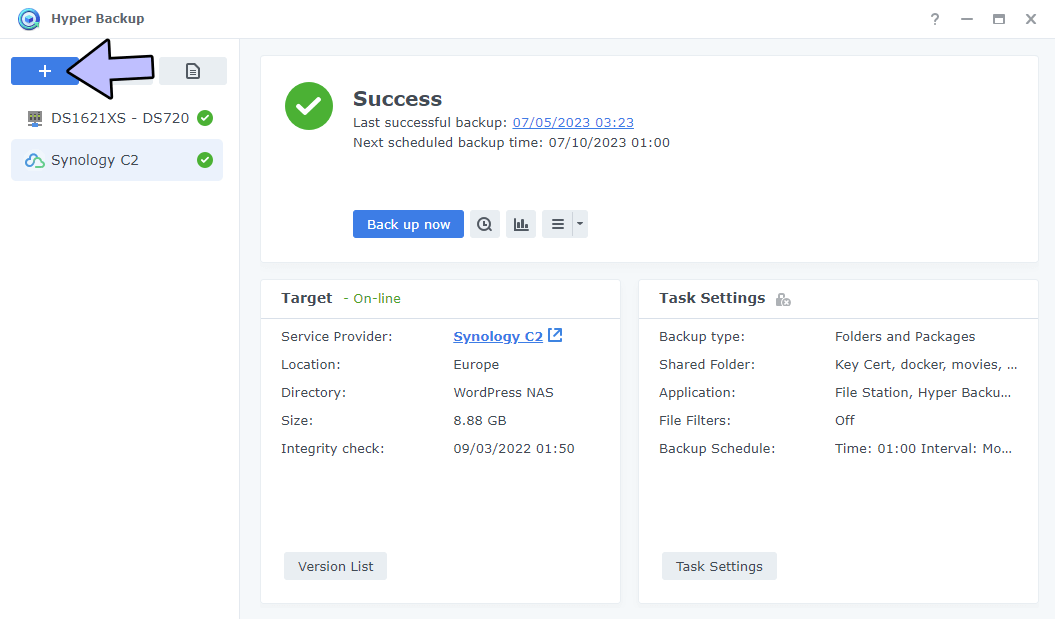
Open the Hyper Backup package on the NAS you want to back up. Click on the plus+ blue button on the left. Follow the instructions in the image below.
STEP 7
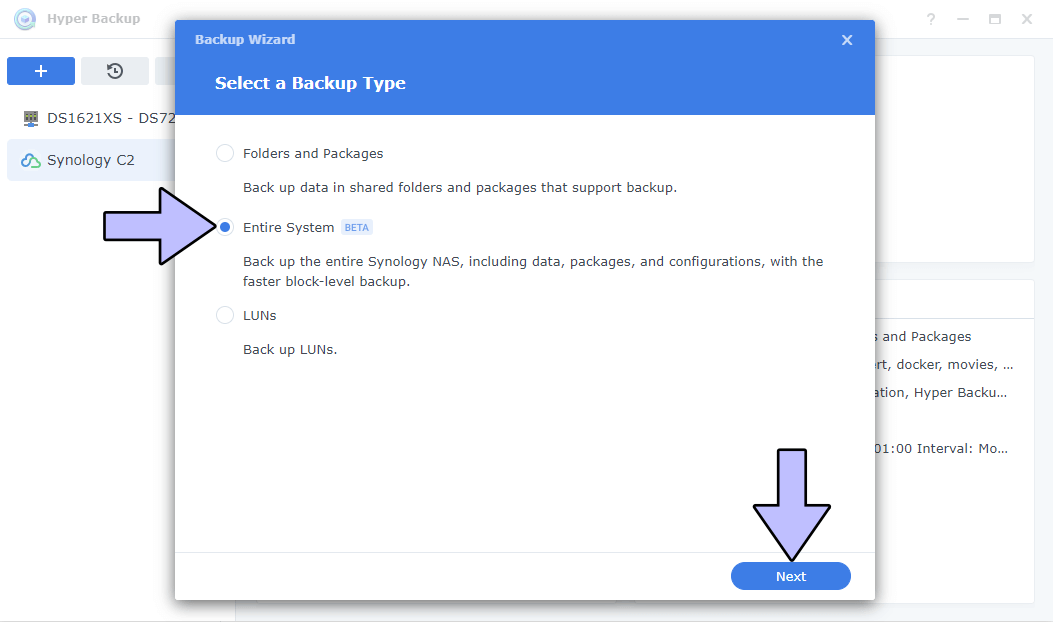
A new pop up window will open. Select Entire System then click Next. Follow the instructions in the image below.
STEP 8
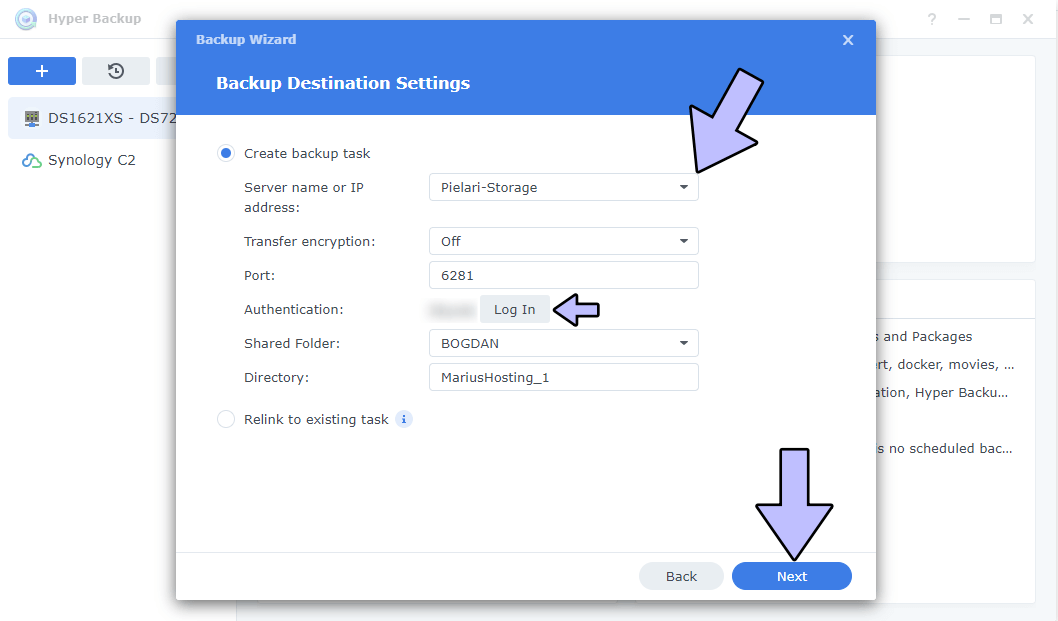
Select the NAS unit where you have previously installed Hyper Backup Vault at STEP 4. Authenticate, then select a shared folder on this NAS. Click Next. Follow the instructions in the image below.
STEP 9
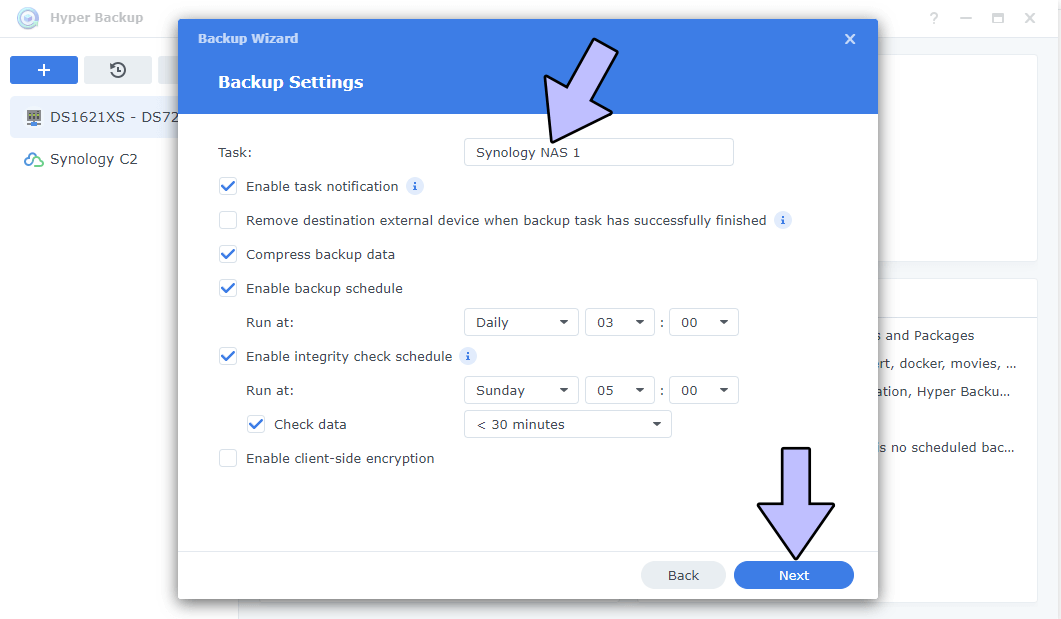
Give a name to the Backup Task, then select your schedule preferences. Click Next. Follow the instructions in the image below.
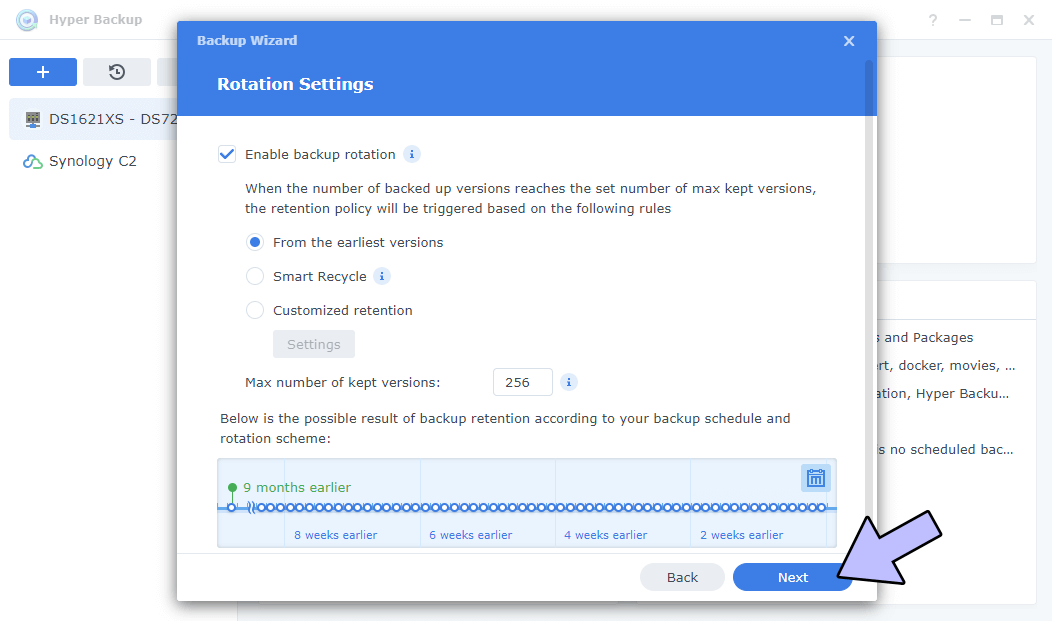
STEP 10
Enable backup rotation, or not; this option depends on your preference. Click Next. Follow the instructions in the image below.
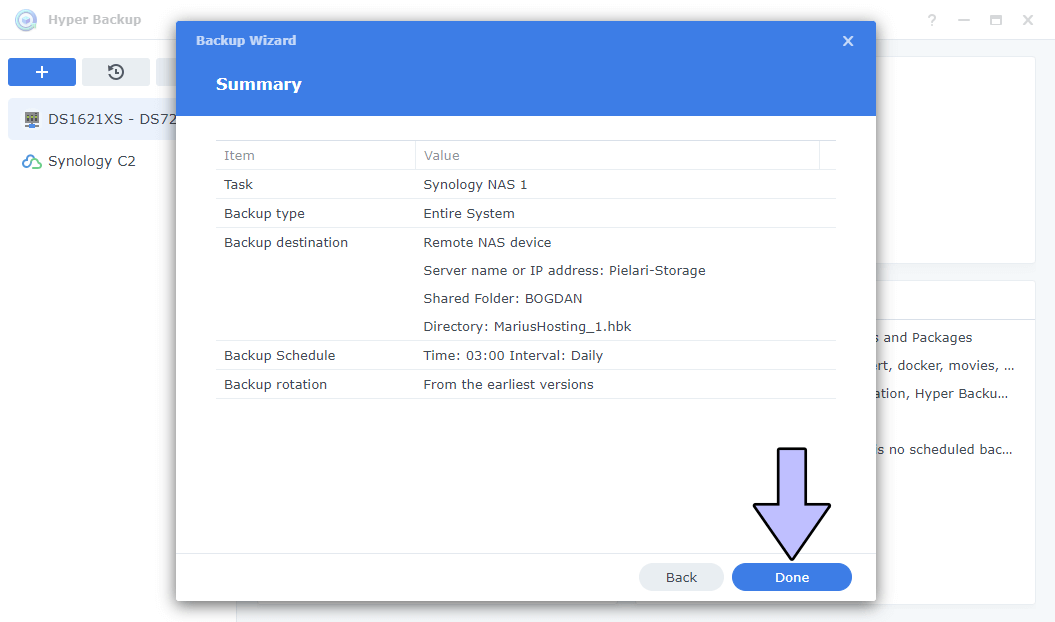
STEP 11
Review your preferences, then click Done if everything looks ok. Follow the instructions in the image below.
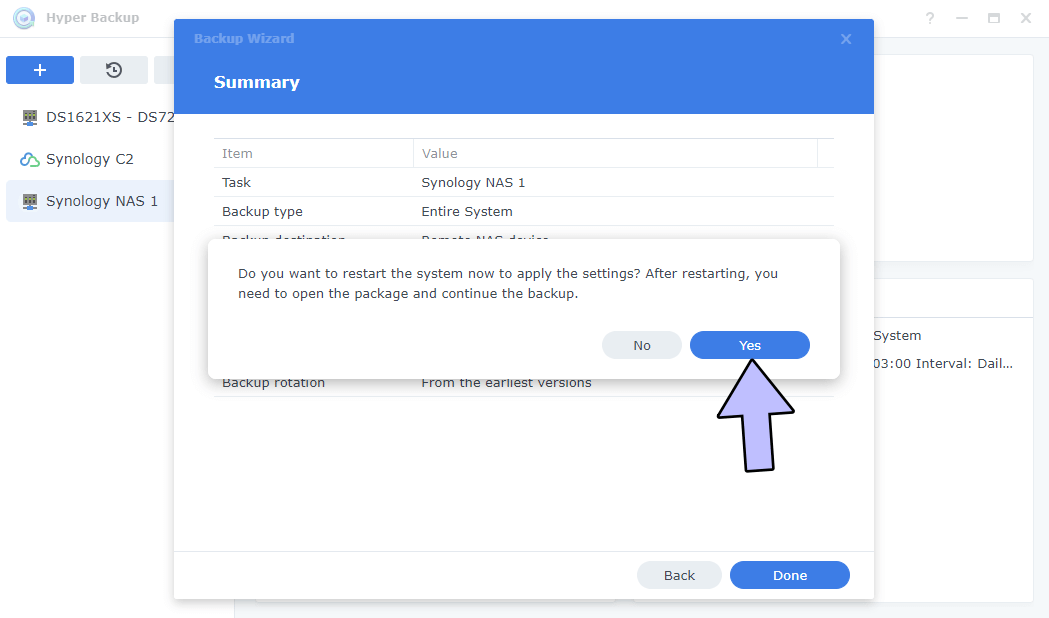
STEP 12
After you click Done at STEP 11, a new pop up window will open. The message in the pop up will say to restart your NAS to apply the settings. Click Yes. Follow the instructions in the image below. Note: The NAS restart is mandatory only the first time you set up the entire NAS System backup task.
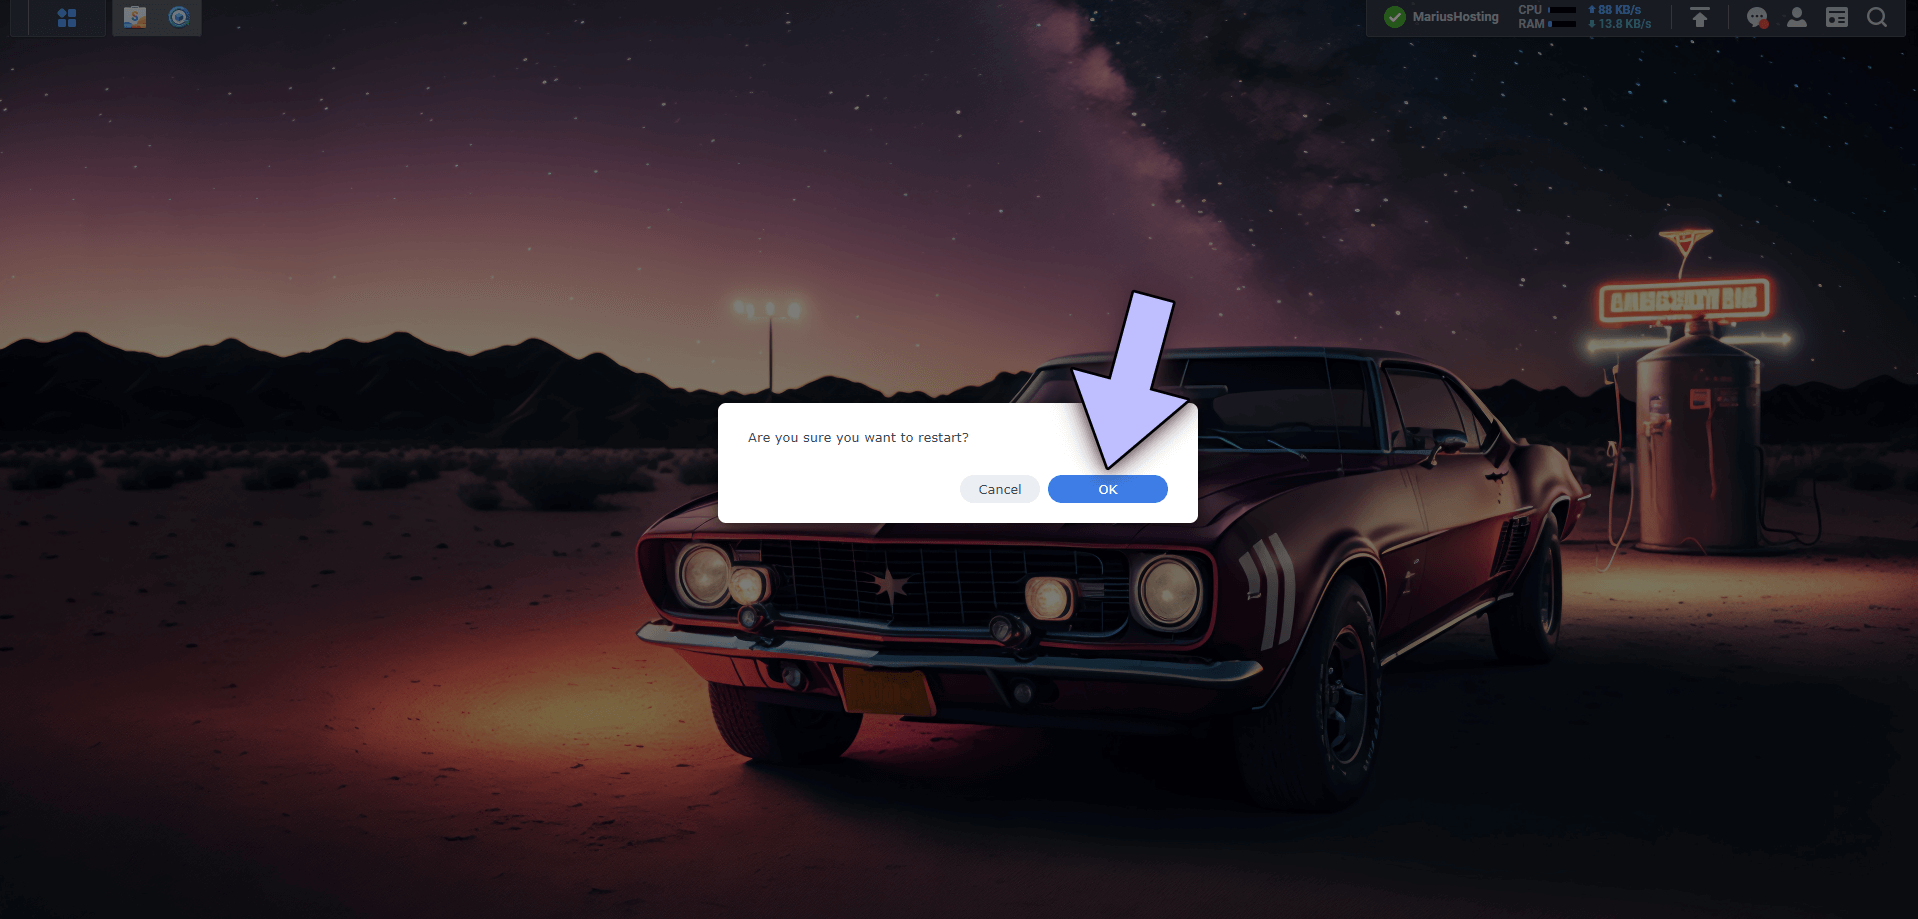
STEP 13
A new pop up window will open. Click OK. Follow the instructions in the image below.
STEP 14
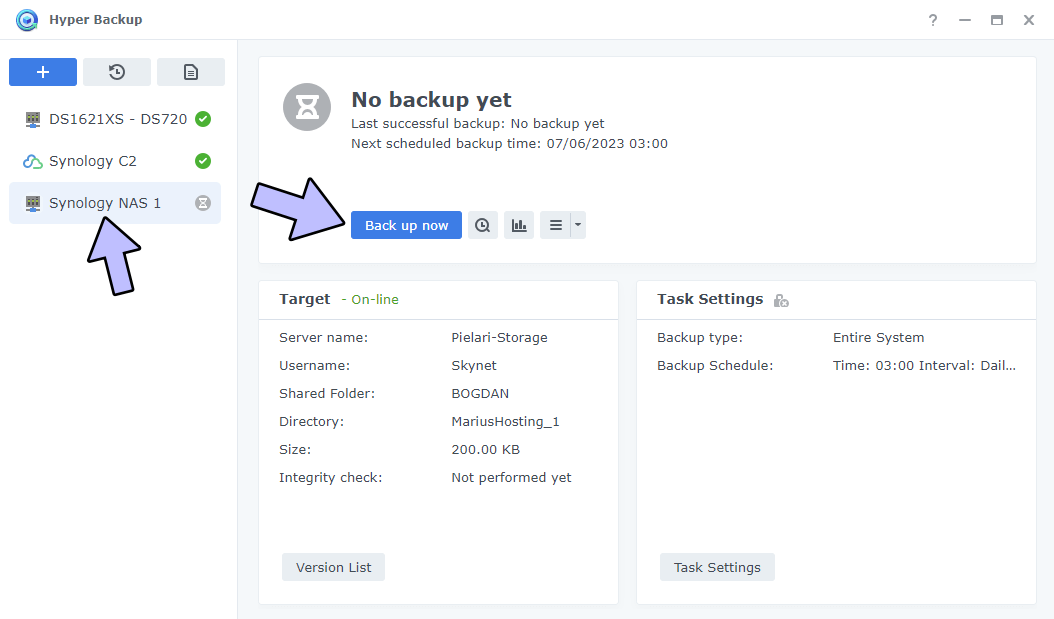
Once your NAS is restarted, open Hyper Backup. Select your Entire NAS Back up Task, then click Back up now. Follow the instructions in the image below.
STEP 15
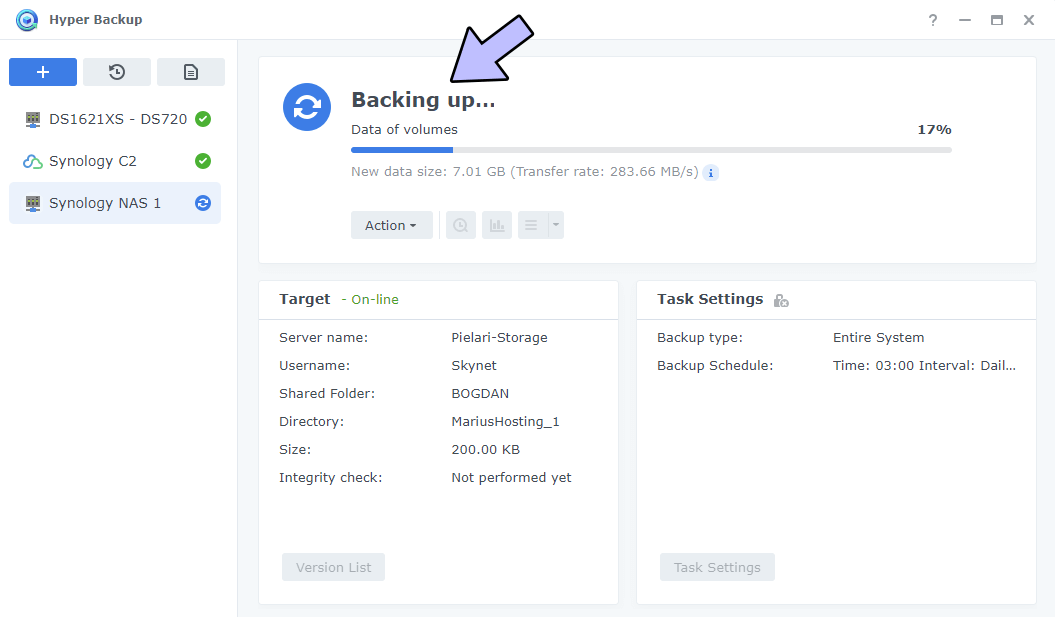
Your Entire NAS System back up will start.
STEP 16
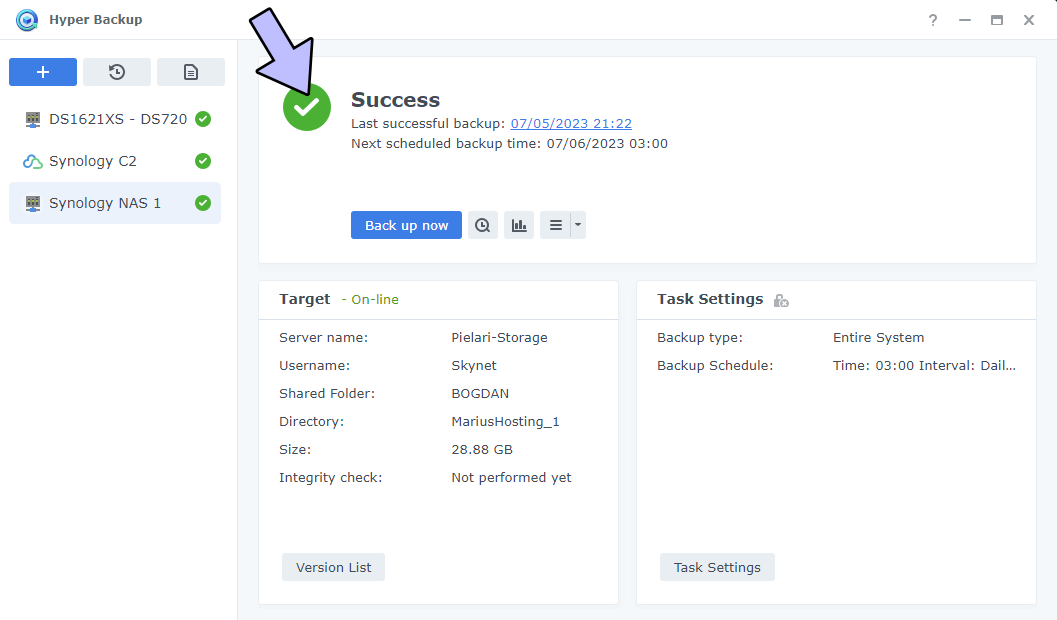
Once the Entire NAS backup task is finished, you will see a Success message in Hyper Backup.
STEP 17
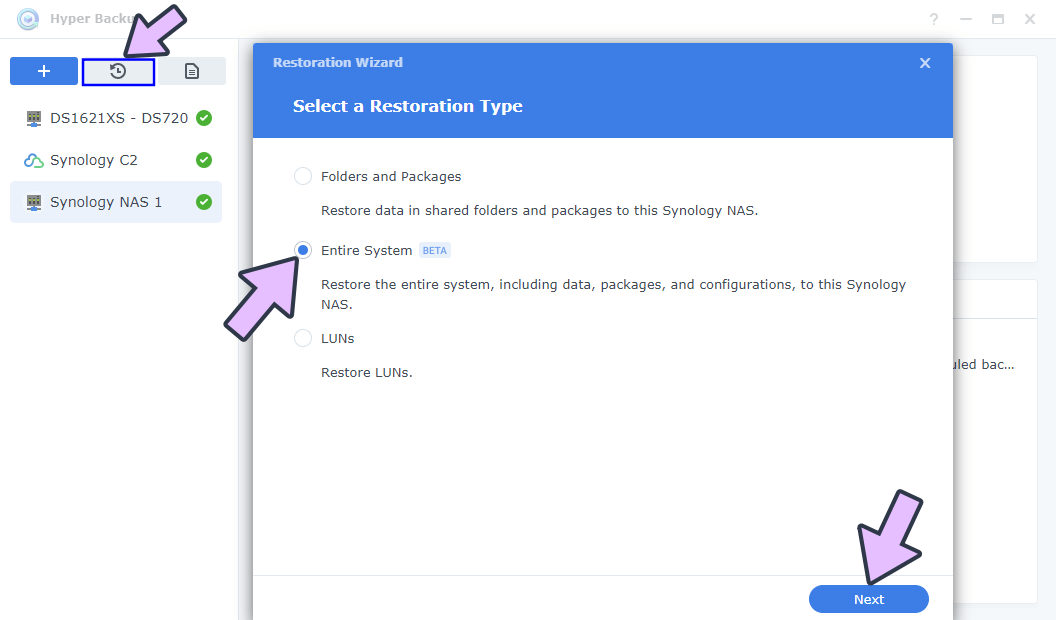
When you need to perform a complete restore of your NAS system, the operation will be super easy. Open Hyper Backup. On the left sidebar, click the restore icon then select Entire System. Click Next to start your entire NAS system restoration. Follow the instructions in the image below.
This post was updated on Tuesday / August 15th, 2023 at 11:16 PM