Are you lazy? That’s fine. Don’t have a budget for a Synology NAS right now? That’s fine too. Is your current Synology NAS part of the models that do not support Docker? No problem! If you have always dreamed of using the docker images guides you find on mariushosting, today I’m coming to you with an easy solution to run them. Its name is PikaPods, a fantastic inexpensive hosting service for your docker applications.
STEP 1
Please Support My work by Making a Donation.
STEP 2
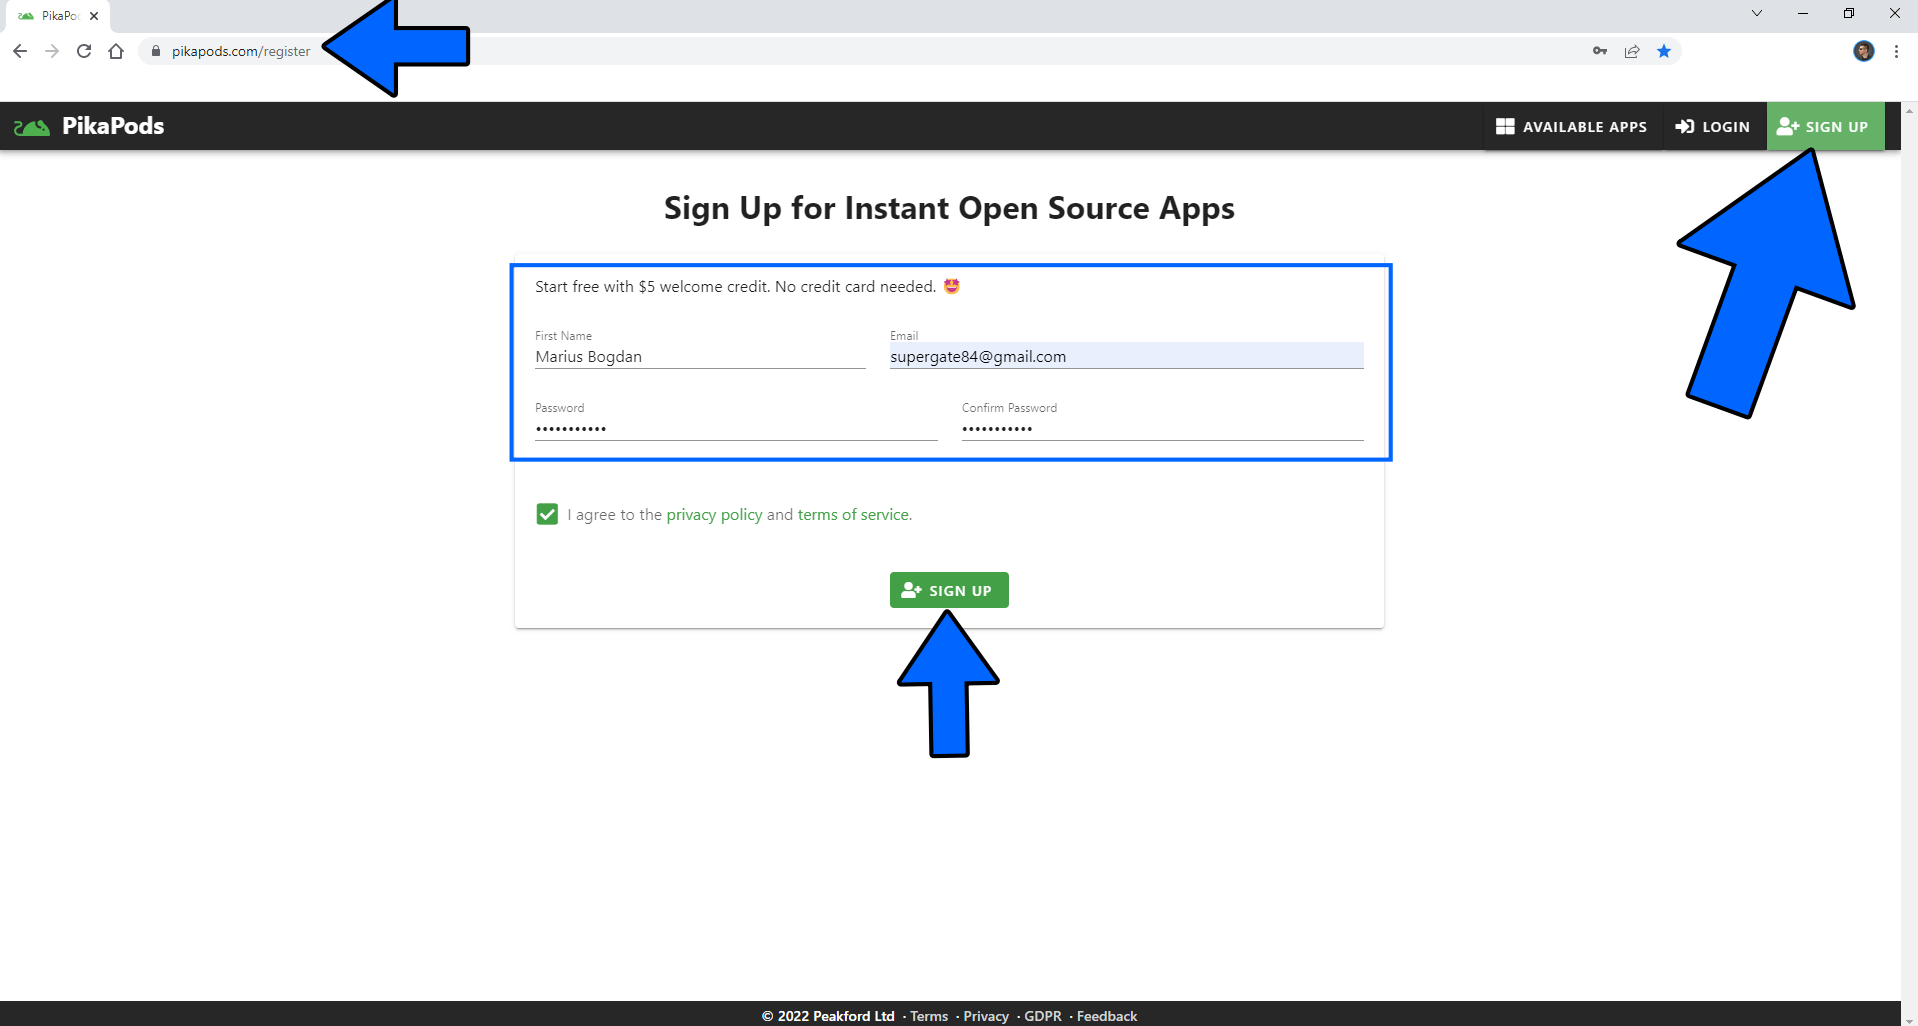
Access PikaPods then click SIGN UP. Add your First Name, Email and Password. Follow the instructions in the image below.
STEP 3
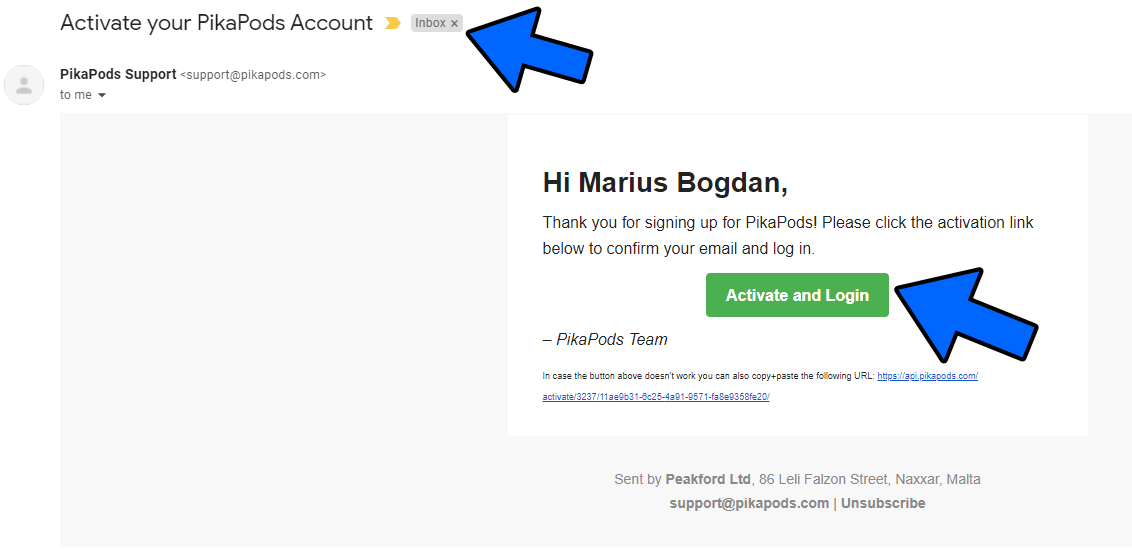
Wait a few seconds until you receive an email from PikaPods. Click Activate and Login. Follow the instructions in the image below.
STEP 4
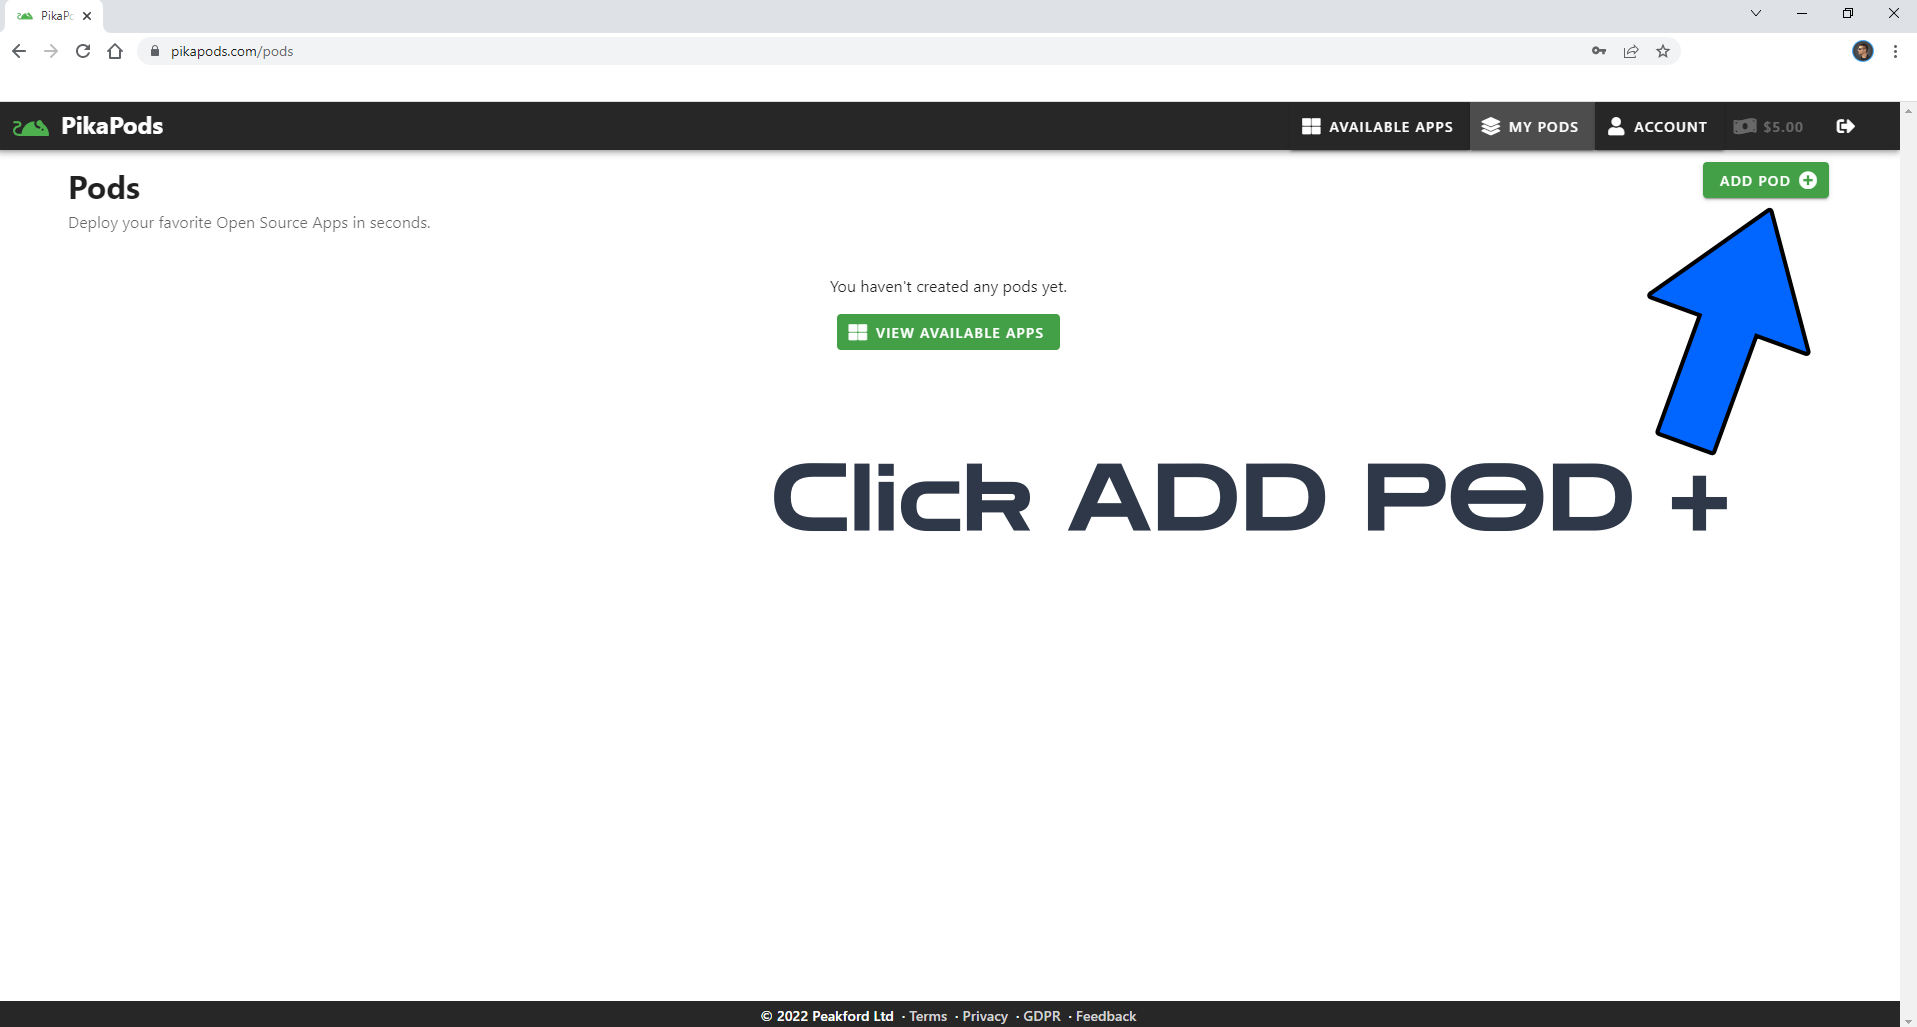
Once you activate your account you will have $5 worth of free credit to test the service. Click ADD POD. Follow the instructions in the image below.
STEP 5
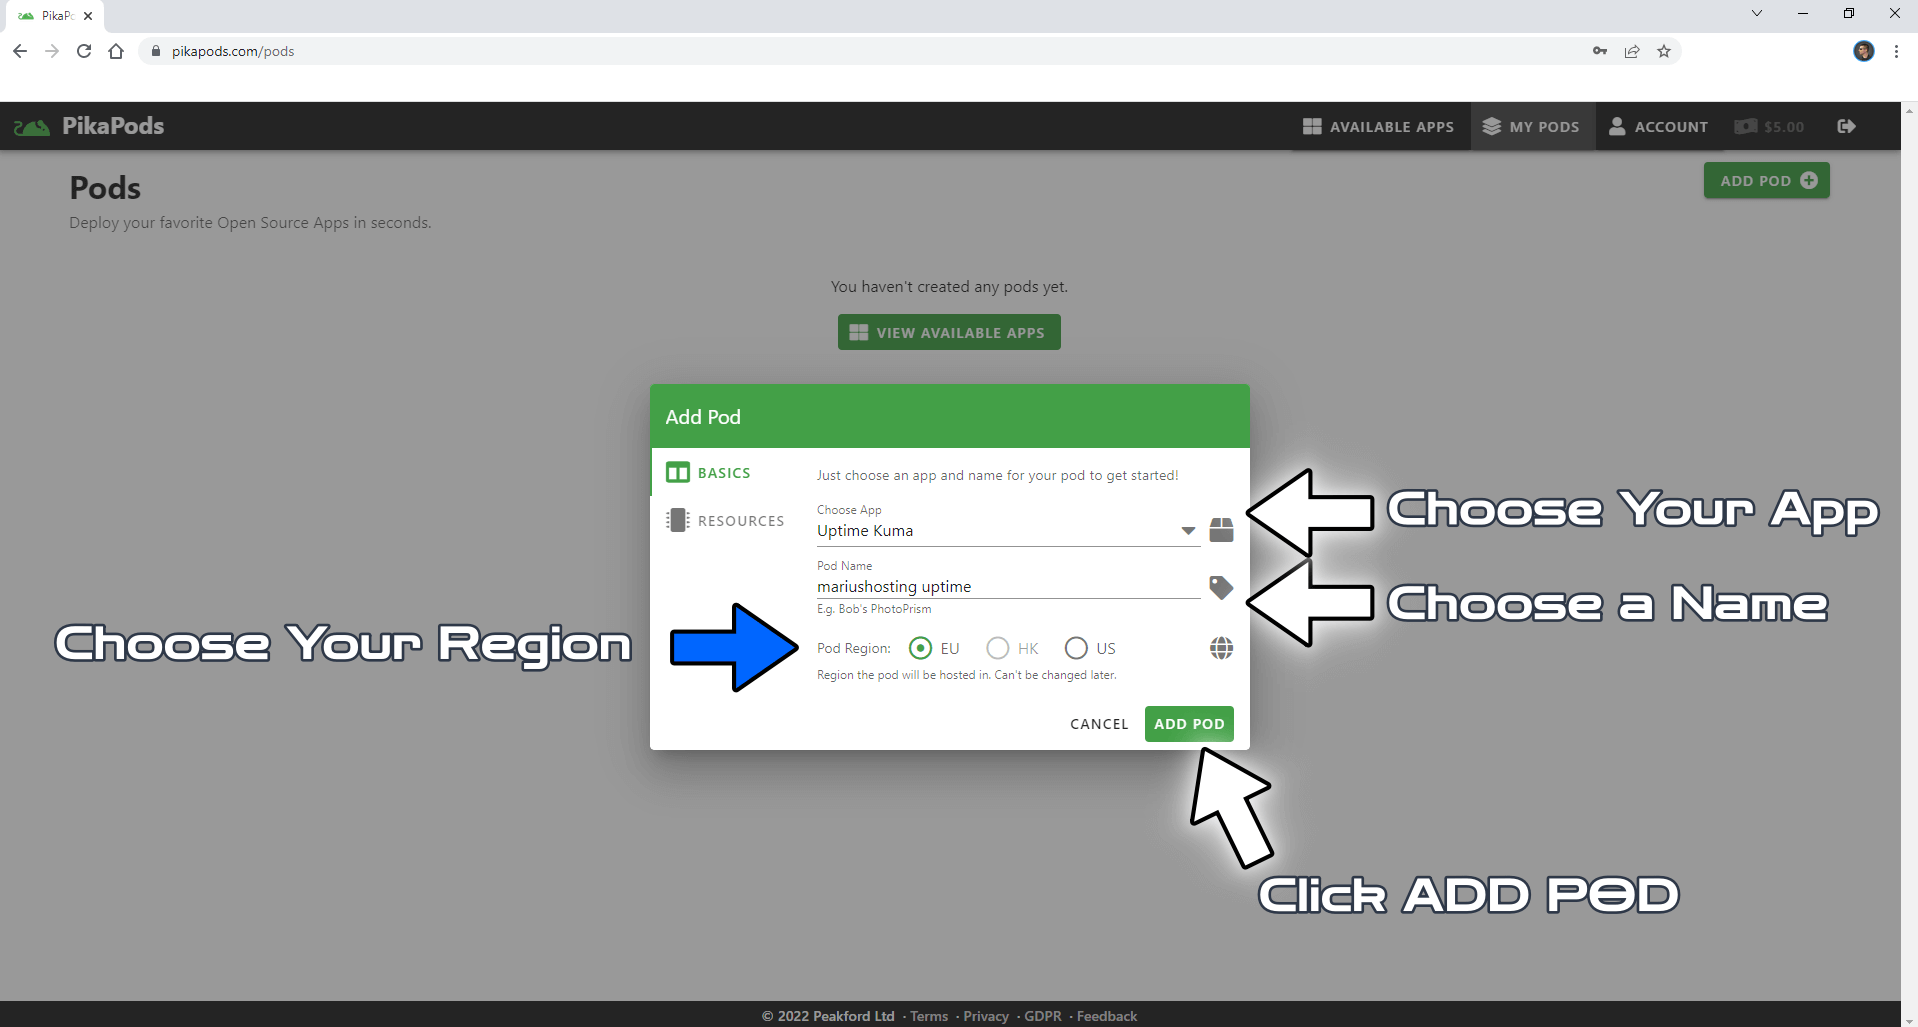
After you click ADD POD at STEP 4, a new pop up window will open. Choose the Docker image you want to run (in the example below I have chosen Uptime Kuma), choose a name for the Pod, choose your server region then click ADD POD. Note: New docker images are being added daily.
STEP 6
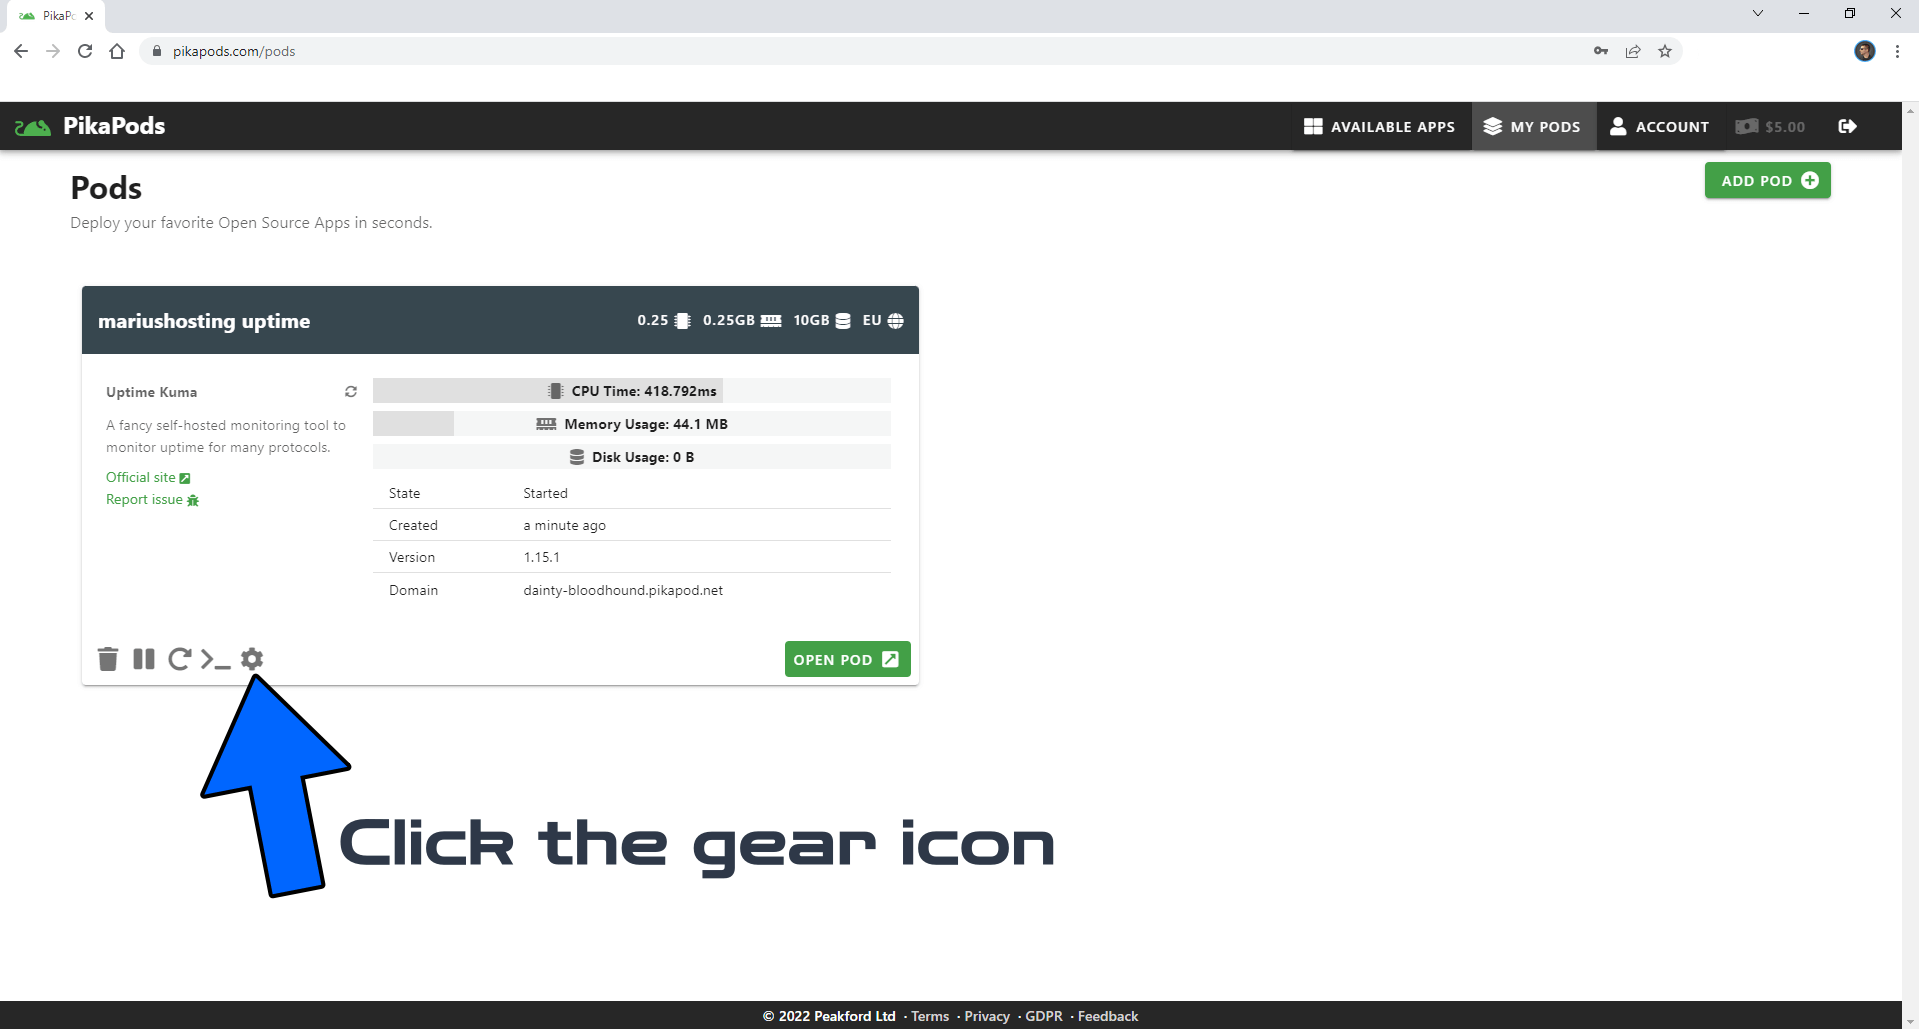
Once your POD is created, click on the gear icon. Follow the instructions in the image below.
STEP 7
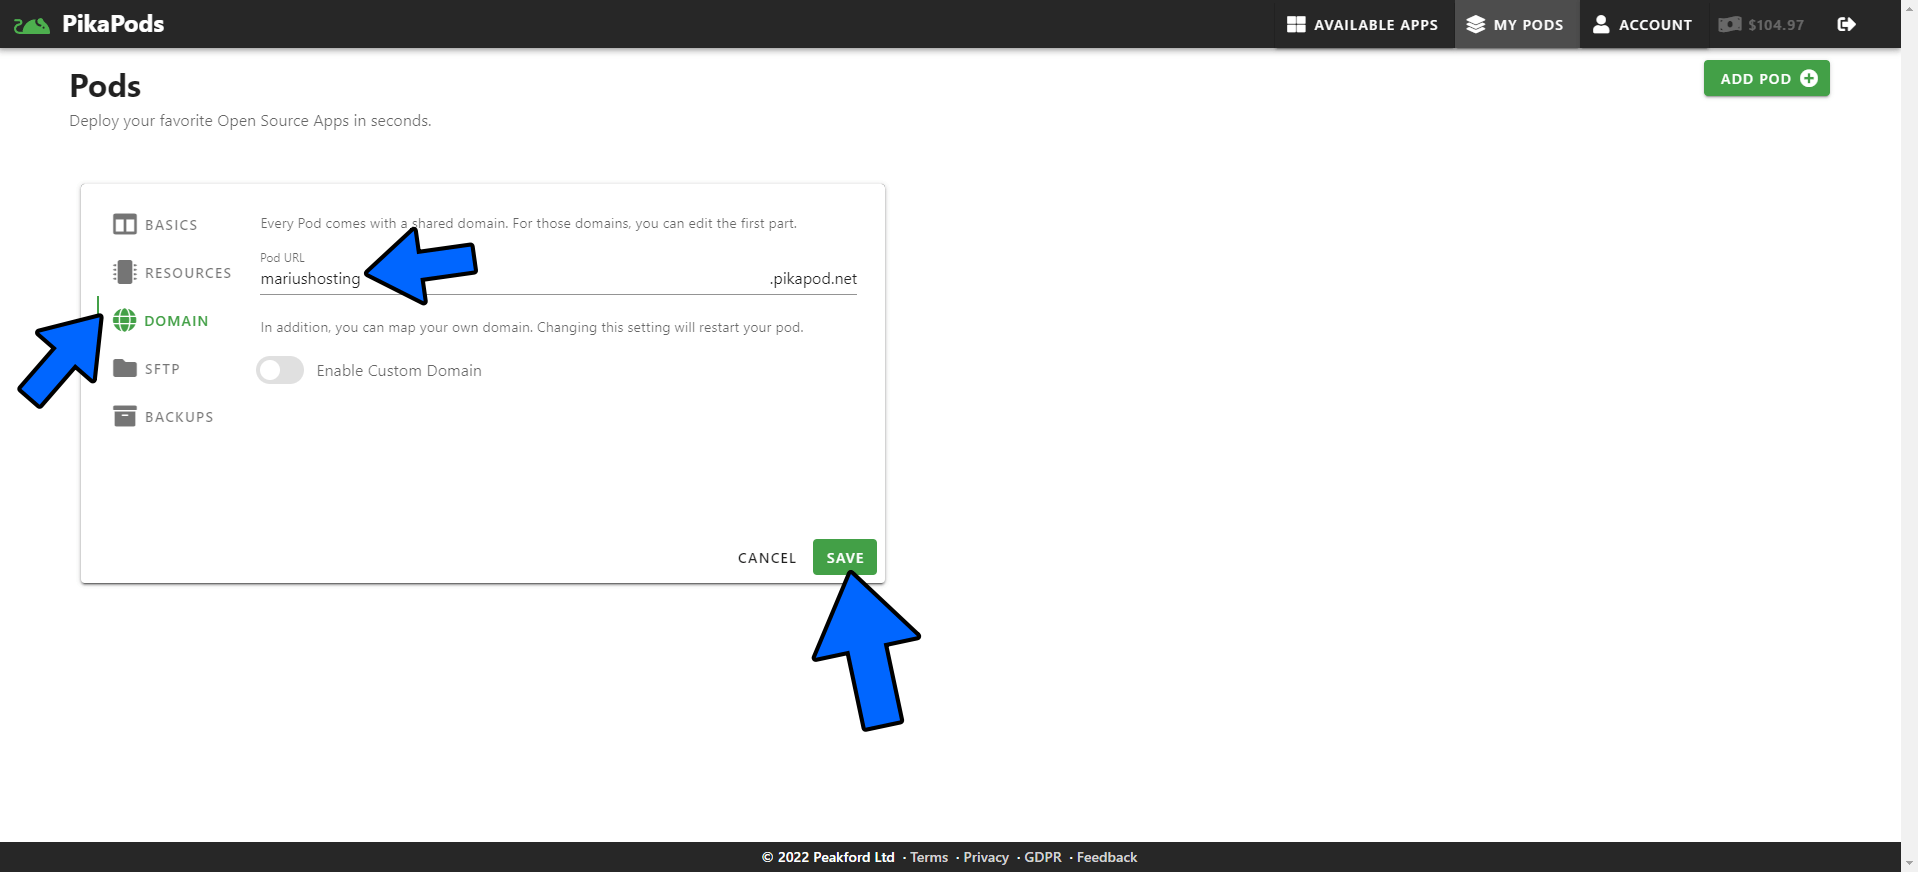
On the left sidebar menu select DOMAIN then add your favorite name. In the example below I have chosen mariushosting. Click Save. Follow the instructions in the image below.
STEP 8
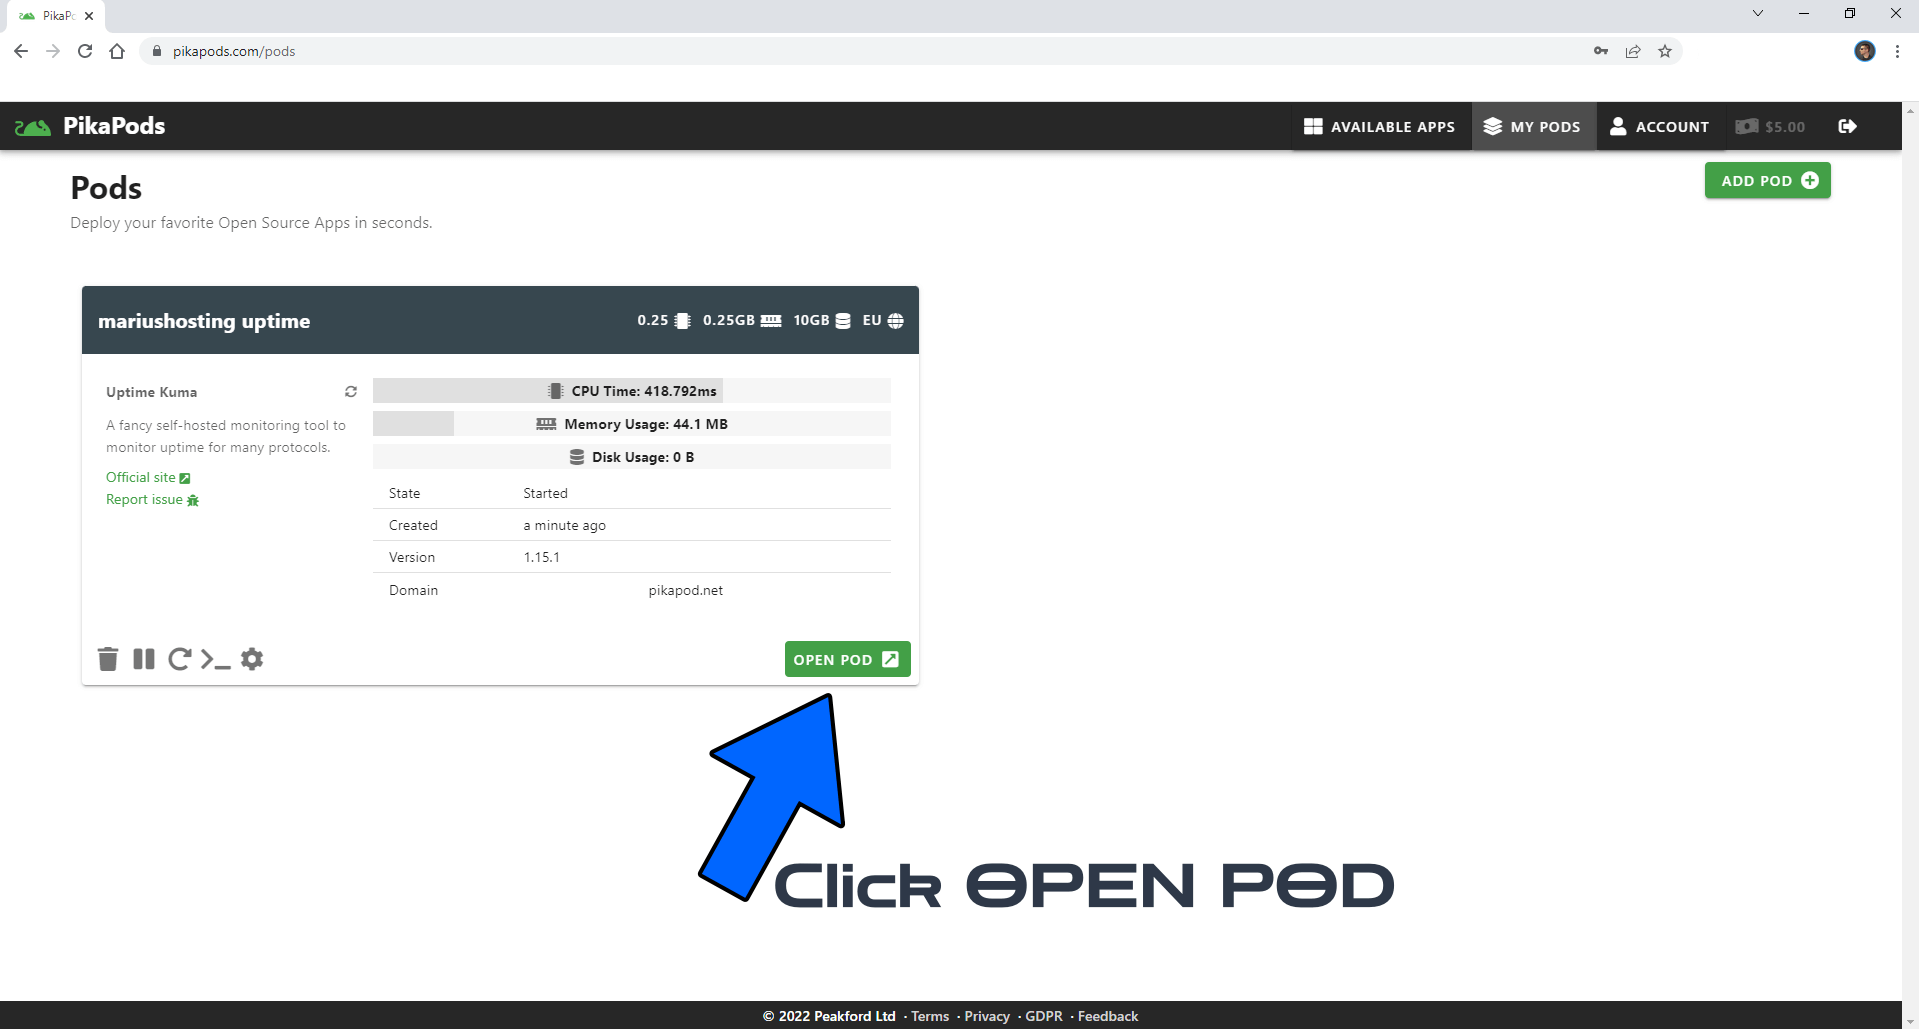
Now you can click OPEN POD to start your docker application with your customized name. Follow the instructions in the image below.
STEP 9
Voila! Your docker image is ready to use.

STEP 10
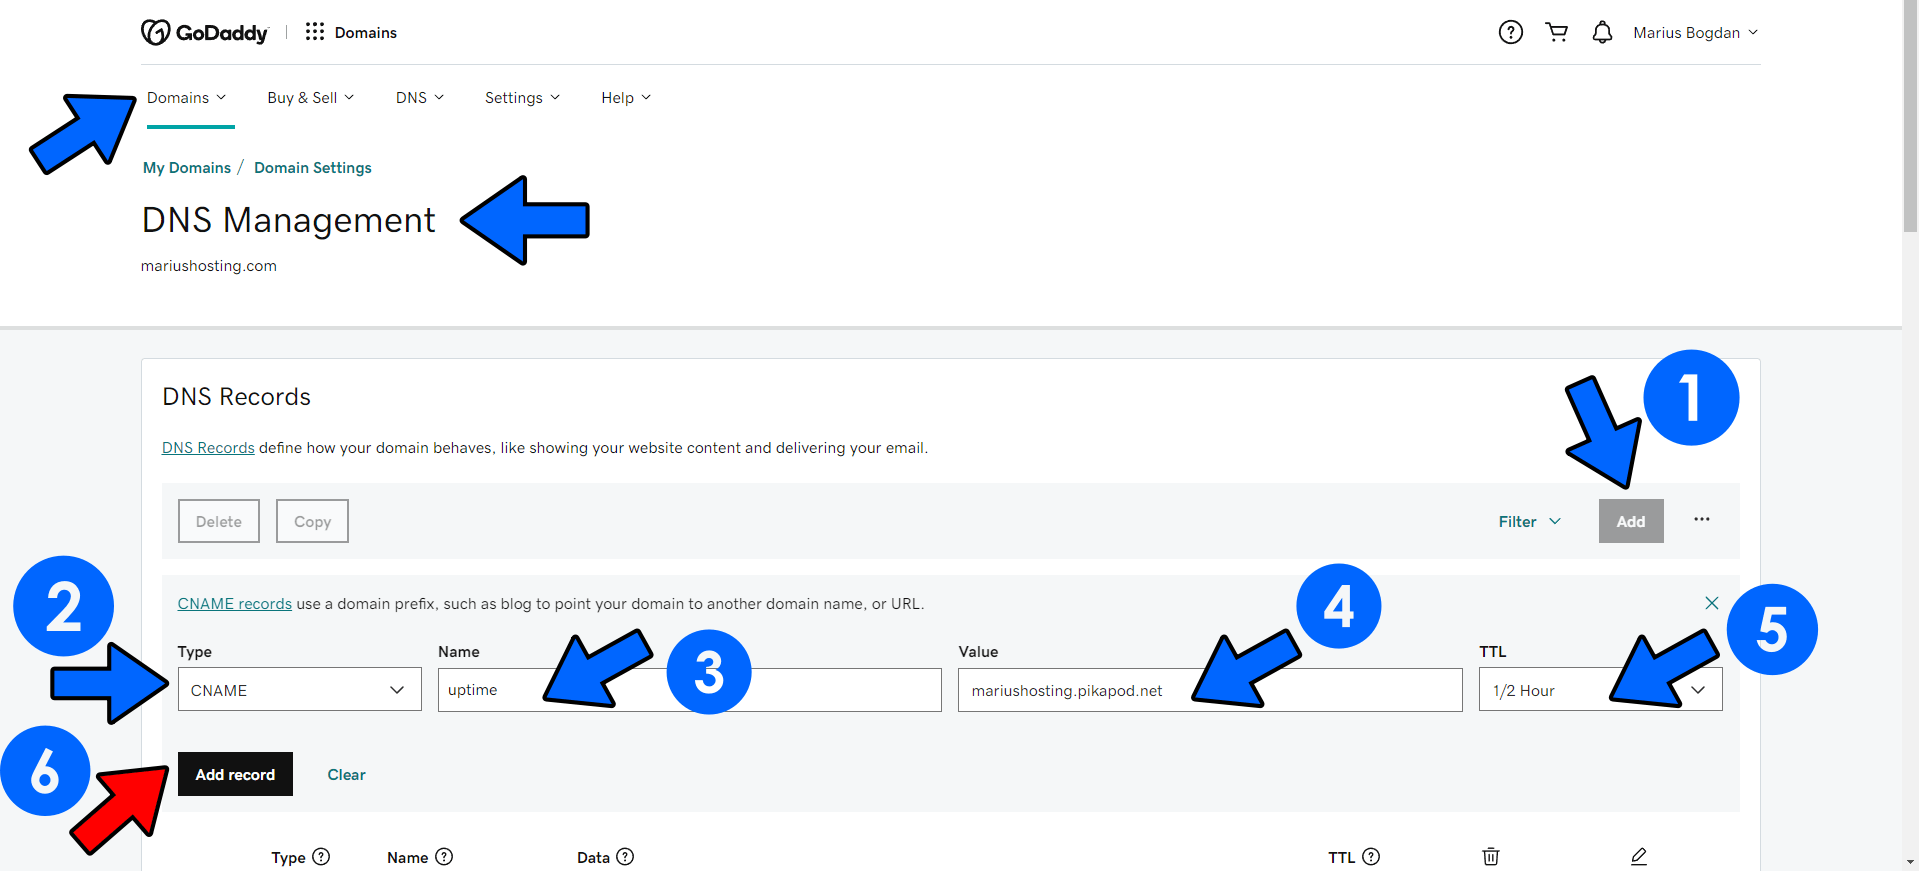
If you have your own domain name, you can use it instead of the free one provided by PikaPods. My domain name mariushosting.com is hosted on GoDaddy. So I log in to Godaddy, then select my domain name and search for the “DNS Management” option. Click Add. Follow the instructions in the image below.
- Click Add.
- Type: CNAME
- Name: A name of your choice. (In my example below “uptime”)
- Value: Add the value you have chosen at STEP 7 of this article. (In my example below the value is mariushosting.pikapod.net)
- TTL: Select 1/2.
- Add record: Click on it to save the settings.
STEP 11
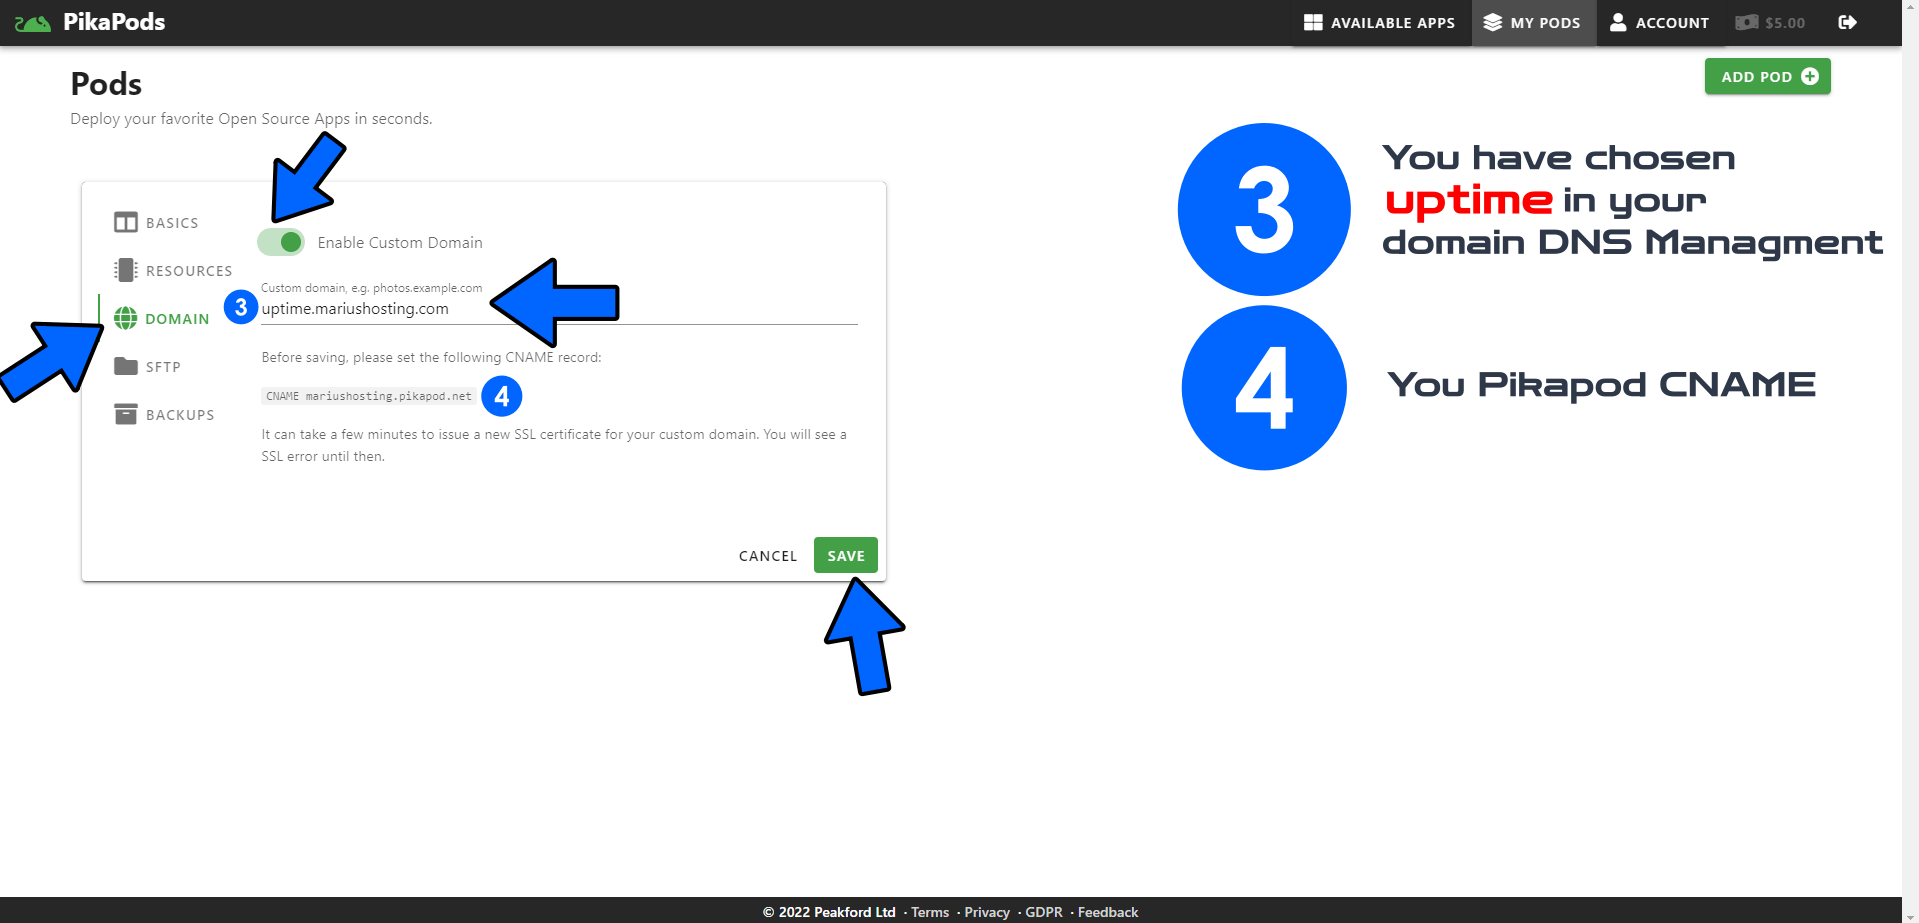
Go back to your PikaPods instance. In the left sidebar select Domain then Enable custom domain. Add the name you have chosen at STEP 10 point 3 followed by your domain name. Click Save. Follow the instructions in the image below. Note: You will automatically get a free SSL certificate in a couple of seconds after that, open your Instance.
STEP 12
If everything goes right, you will be able to connect using your own domain name.

STEP 13
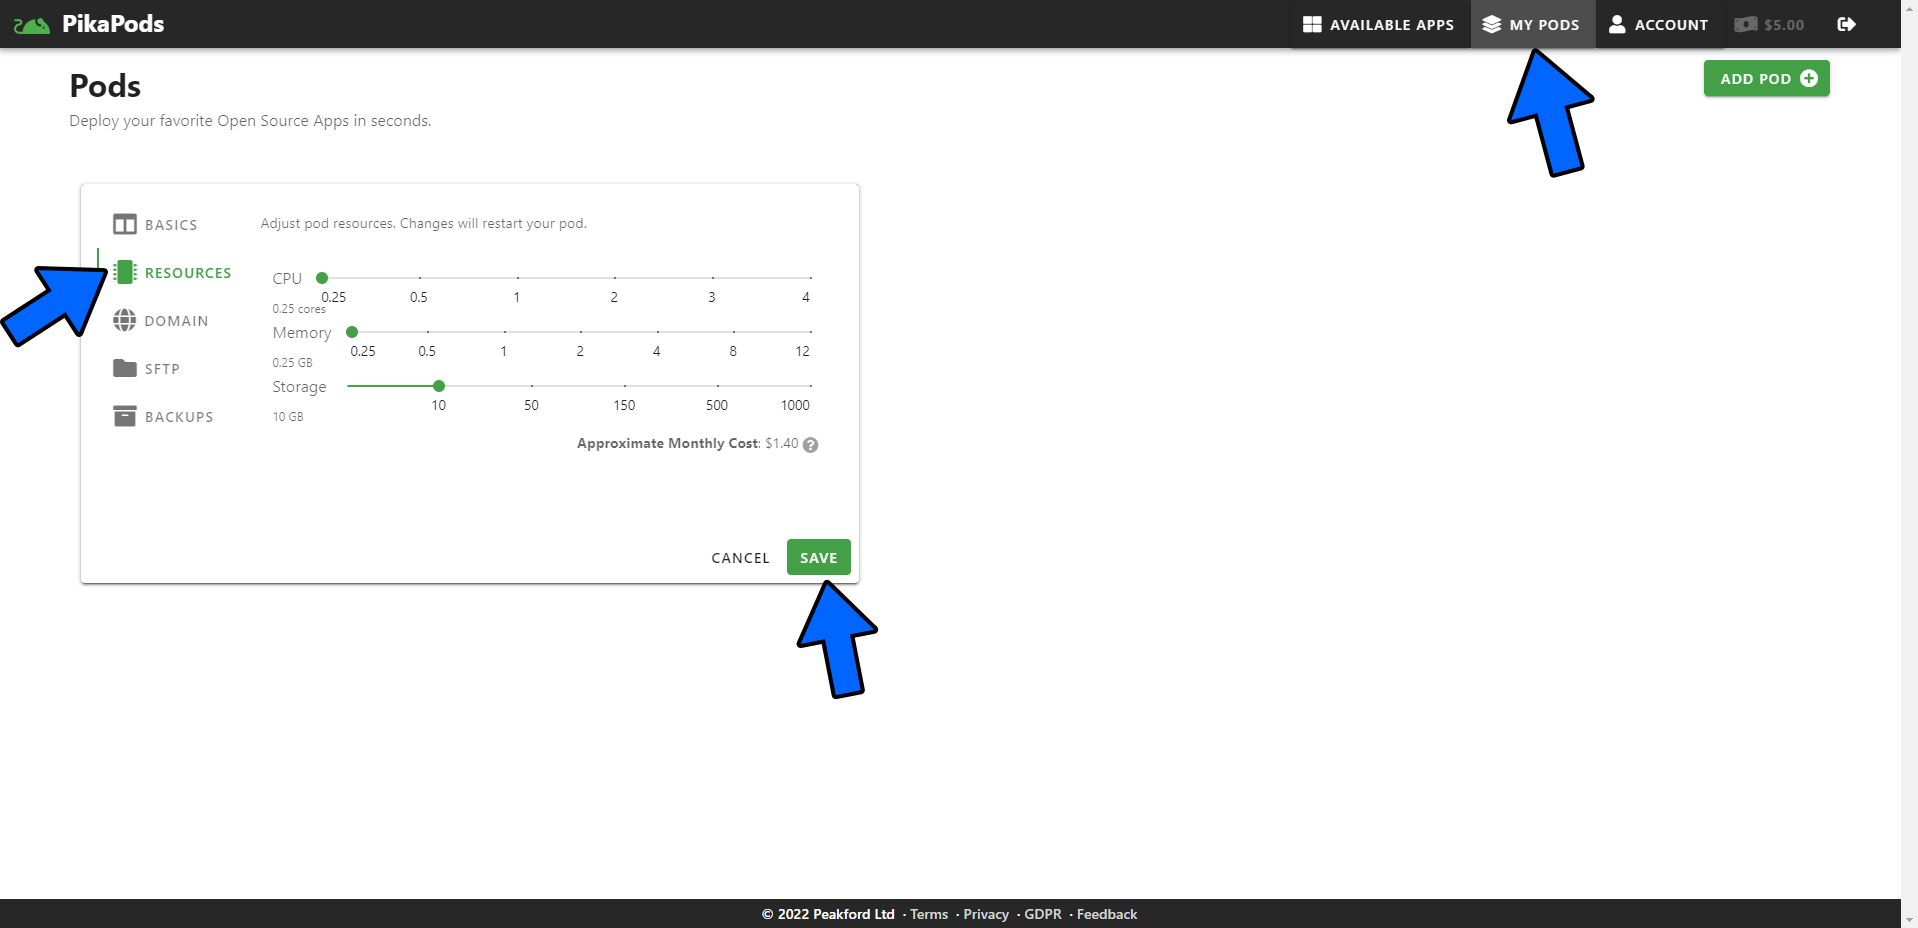
You also have the option to choose how many resources you want to allocate per docker application.
Note: PikaPods can save you lots of headaches – for example, if you lose your Internet connection, your favorite docker applications will still continue to run without any issues.
Note: PikaPods is easy to use – even if you are a beginner, you should be able to easily host your favorite docker applications and do so within a couple of minutes.
Note: This article is not sponsored.
This post was updated on Monday / March 2nd, 2026 at 1:58 PM