Can’t connect to your Synology NAS from your Android mobile phone? Have you ever thought it could be a DNS problem? Because your mobile phone connects to your router via Wi-Fi, you must remember to set the preferred DNS on your phone or your phone will use the automatic DNS from your ISP (Internet Service Provider). Once you set up Google DNS on your phone, it will remain saved indefinitely (or until you change your DNS settings again). Most of the time, your choice of DNS makes a big difference in terms of web browsing performance.
Below I will teach you how to add Google DNS on your Android mobile phone, both Android 9 PIE and Android 10. Read until you get to STEP 2 and you will get a bonus!
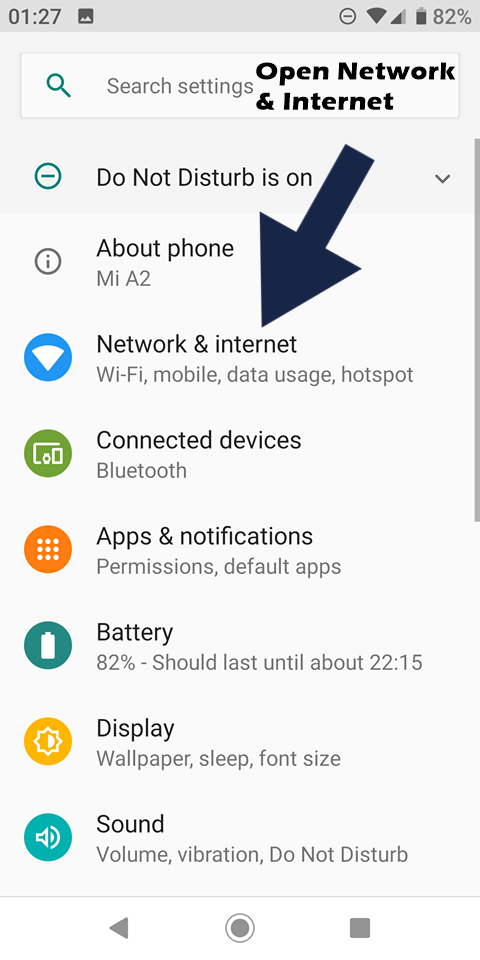
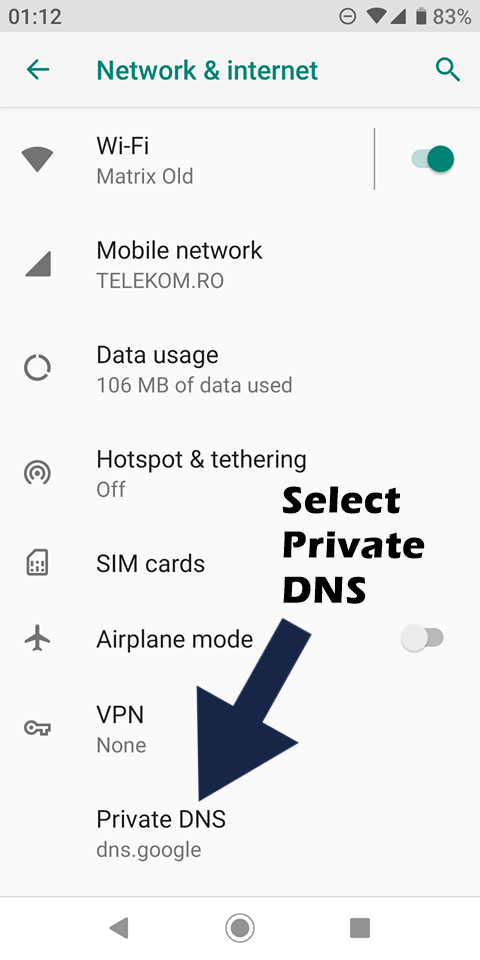
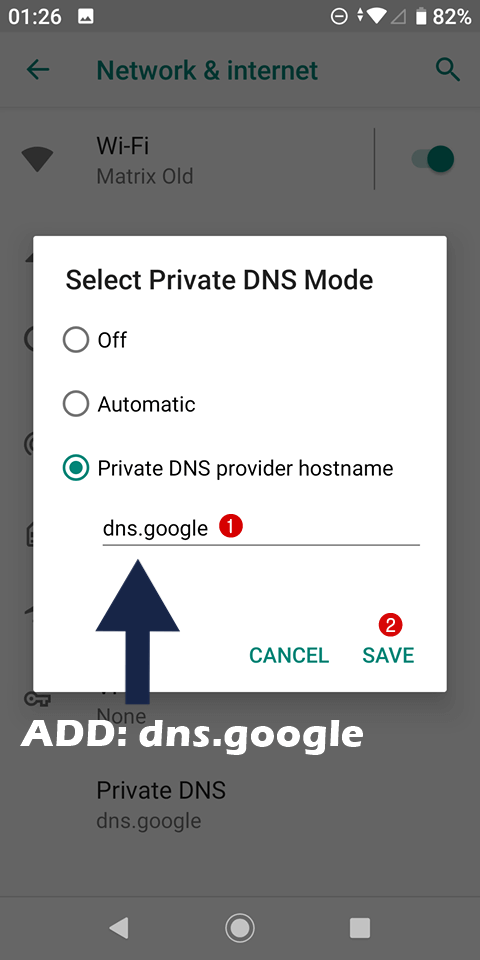
STEP 1
Go to Settings / Network & Internet / Advanced / Private DNS and add the text dns.google then Save.
Follow the instructions in the images below:
STEP 2
If you want more privacy, instead of dns.google add one.one.one.one
What is the meaning of one.one.one.one? Best known for its top-rated content delivery network, Cloudflare has extended its range of services to include a new public DNS service, the catchily-named one.one.one.one The product doesn’t have any of the extras you’ll often see elsewhere. There’s no anti-phishing, no ad-blocking, no content filtering or other attempts to monitor or control what you can access, and what you can’t, but it’s fast and has impressive performance compared to Google DNS. Instead, Cloudflare is focused much more on the fundamentals. These start with performance and, at the moment, it’s the fastest public DNS service in the world.
This post was updated on Monday / February 3rd, 2020 at 10:41 PM