
The bitcoin system enables payments to be sent between users without passing through a central authority such as a bank or a payment gateway. It is created and held electronically. Bitcoins aren’t printed like dollars or euros or other types of currency; they’re produced by computers all around the world, using free software, and are a digital currency. You can run a bitcoin node on your Synology NAS for fun, although a Synology NAS doesn’t have a powerful enough processor or a graphic card. If you intend to use your Synology NAS only for mining bitcoin, it’s better you don’t.
Who created bitcoin?
A pseudonymous software developer going by the name of Satoshi Nakamoto proposed bitcoin in 2008 as an electronic payment system based on mathematical proof. The idea was to produce a means of exchange, independent of any central authority, that could be transferred electronically in a secure, verifiable and immutable way. To this day, no-one knows who Satoshi Nakamoto really is. Satoshi Nakamoto is the name used by the unknown person or people who developed bitcoin, authored the bitcoin white paper and created and deployed bitcoin’s original reference implementation.
In the most recent version of Synology Disk Station Manager, DSM 6.2, there is added support for the Docker App. This makes it super easy for anyone with a Synology Disk Station to run a bitcoin full node and start to earn something from home. In this article you will find a step by step guide on how to install a bitcoin full node wallet on your Synology NAS.
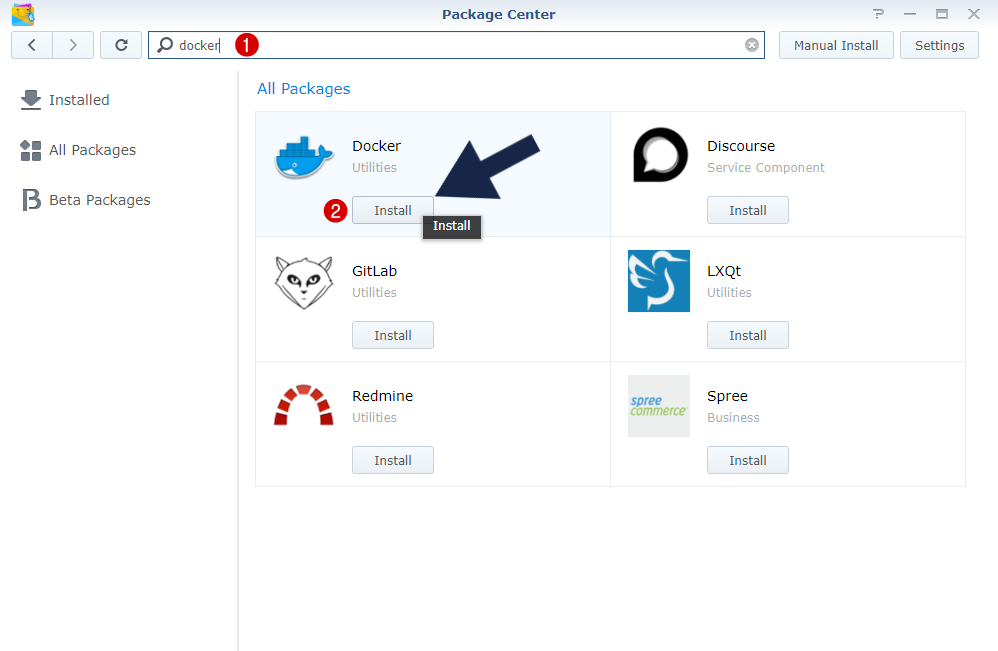
Step 1: Open Package Center and search for the Docker application; after you find it, click Install. Follow the instructions in the image below.
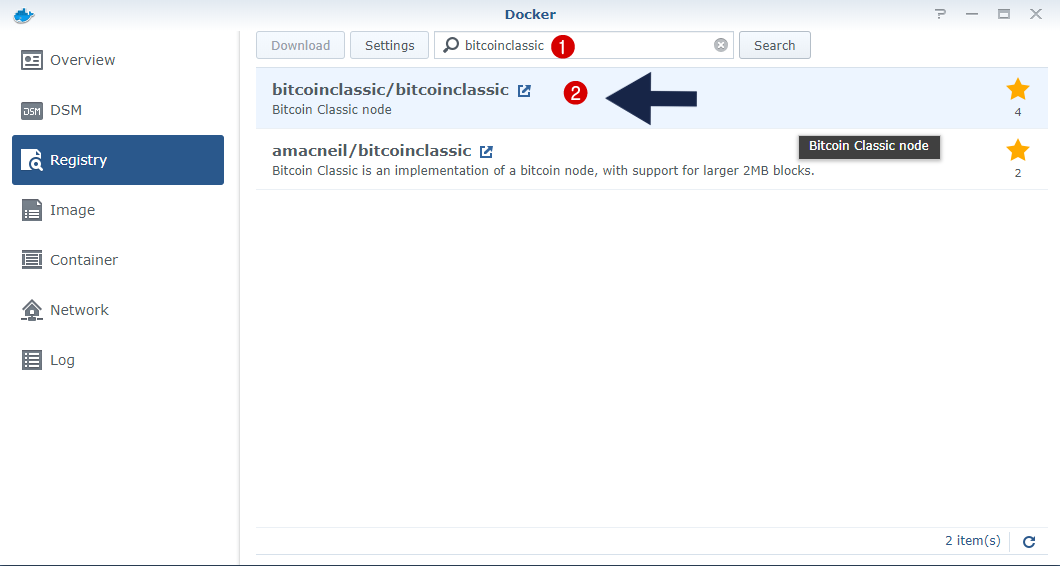
Step 2: Once the Docker App is installed, open it and search the registry for “bitcoinclassic”. Double click the one you want and the download process will start automatically.
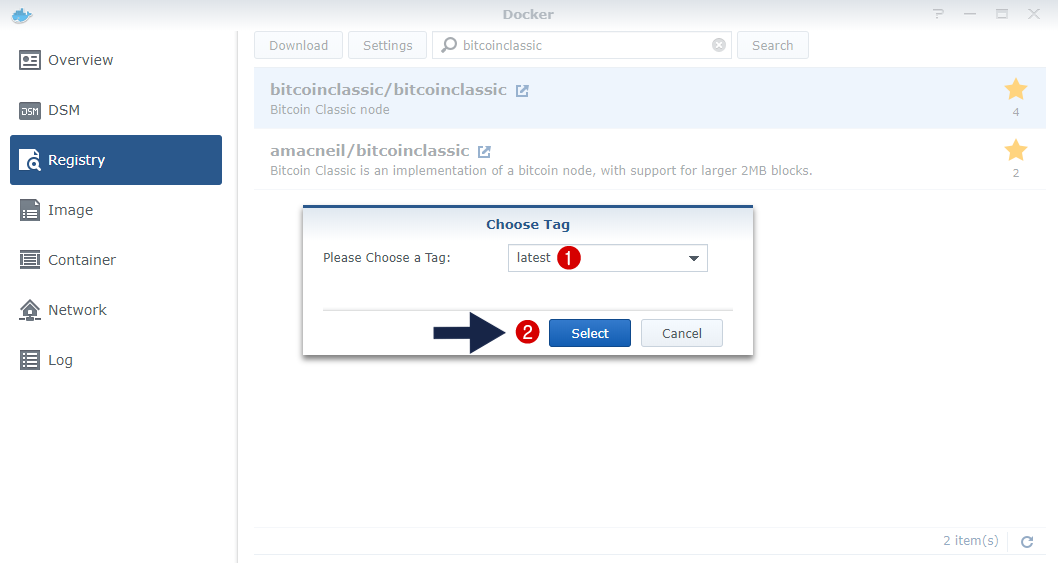
Step 3: Select the latest software version.
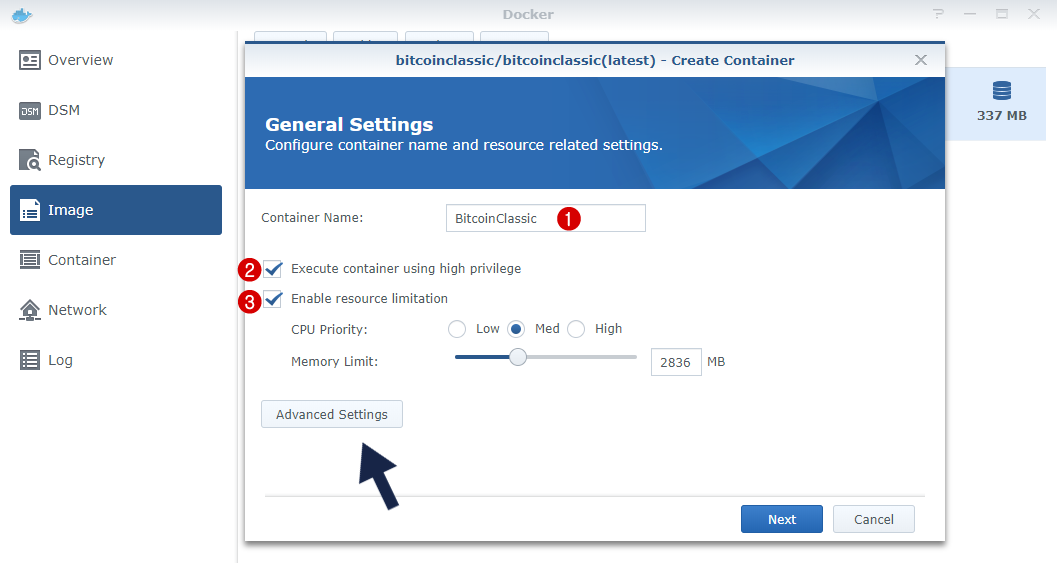
Step 4: Once the image has downloaded, select it and then choose “Launch With Wizard”. Name it and check “Execute container using high privilege”, then “Enable resource limitation”. After that, click on Advanced Settings and forward ports 8332 and 8333 TCP in your router settings (in the port forwarding area).
Step 5: Make it sure ports 8332 and 8333 are correctly port-forwarded in your router settings.
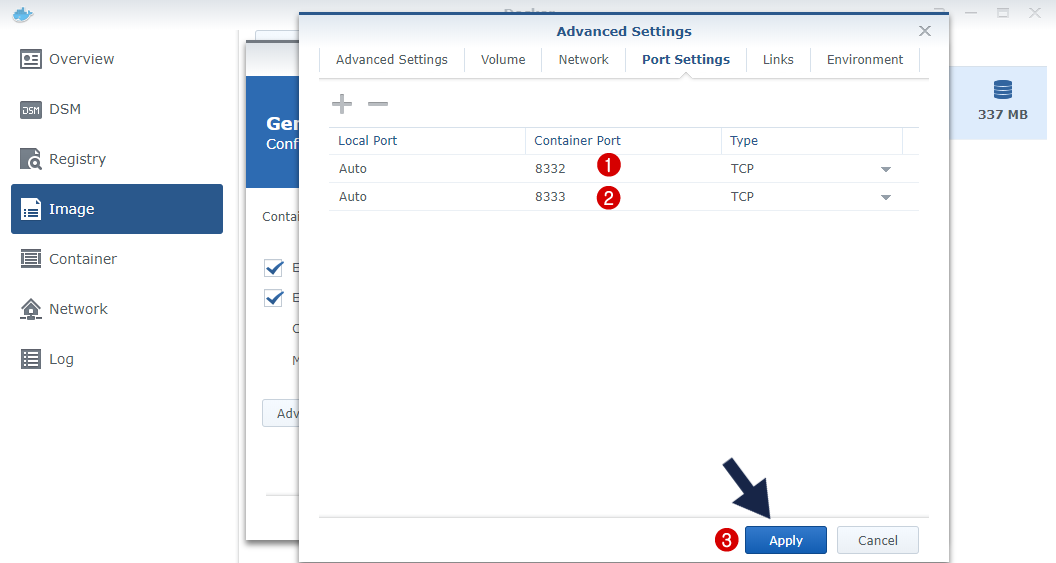
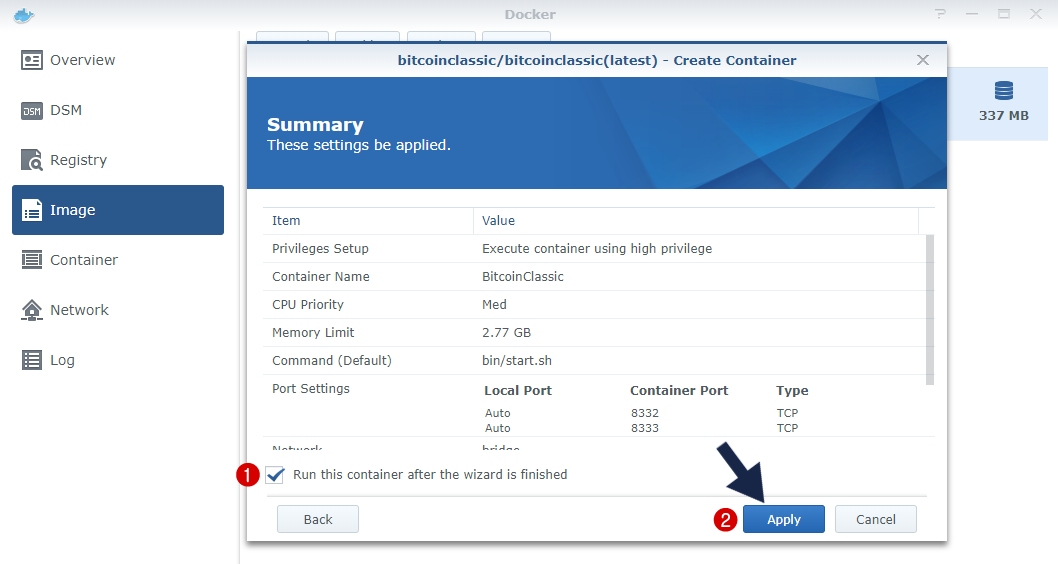
Step 6: You need to click APPLY and then your full bitcoin node becomes perfectly operational.
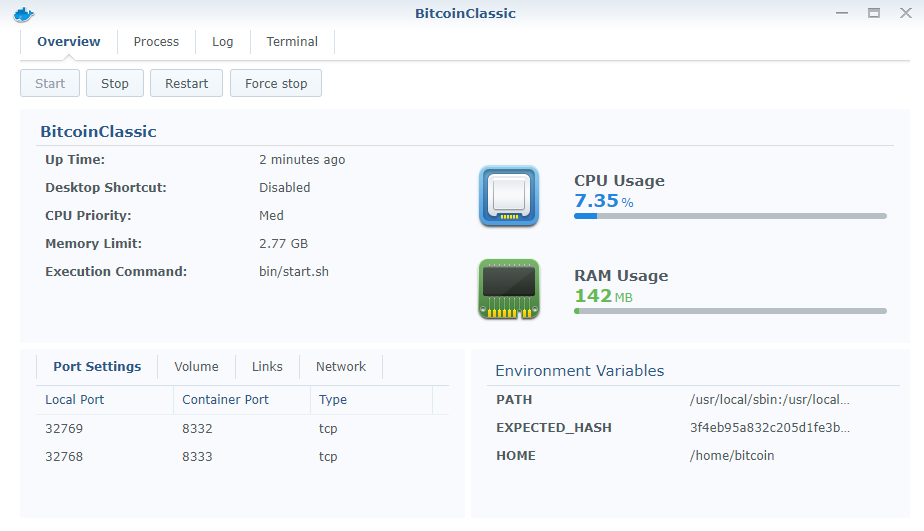
Step 7: Everything should look like this.
The only other things you may want to check are:
- Make sure your router is forwarding port 8333 to your Synology Disk Station.
- Check and see if your node is reachable from the outside via the Internet. This is a great free tool for checking.
How can I connect the Docker package to my bitcoin wallet? At the moment you can’t connect the Docker app to your bitcoin wallet. To make it work like a charm, you need to wait for DSM 7.0 to come out.
This post was updated on Thursday / September 2nd, 2021 at 12:04 AM