
Technitium DNS Server is an open source authoritative as well as recursive DNS server that can be used for self hosting a DNS server for privacy & security. It works out-of-the-box with no or minimal configuration and provides a user friendly web console accessible using any modern web browser. Nobody really bothers about domain name resolution since it works automatically behind the scenes and is complex to understand. Most computer software use the operating system’s DNS resolver that usually query the configured ISP’s DNS server using the UDP protocol. In this step by step guide I will show you how to install Technitium on your Asustor NAS using Docker & Dockhand.
STEP 1
Please Support My work by Making a Donation.
STEP 2
Install Dockhand using my step by step guide. If you already have Dockhand installed on your Asustor NAS, skip this STEP. ⚠️Attention: Make sure you have installed the latest Dockhand version.
STEP 3
⚠️Mandatory STEP: If you have already installed the PiHole or Adguard container, remember to disable or simply stop them to be able to use Technitium since Technitium uses the same default port 53 as PiHole and Adguard.
STEP 4
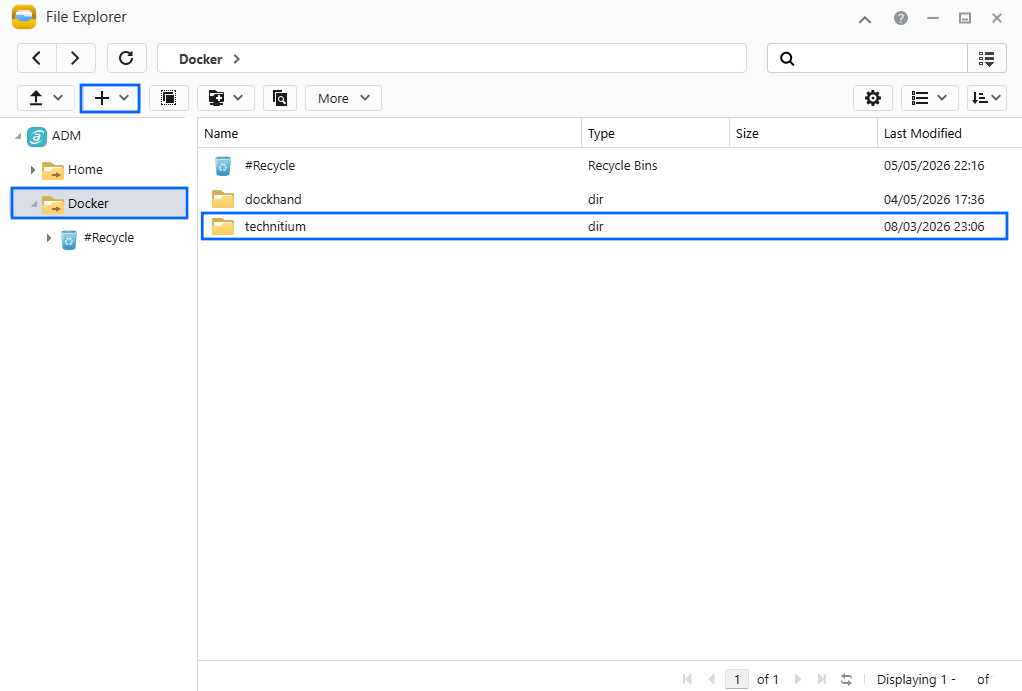
Go to File Explorer and open the Docker folder. Inside the Docker folder, create one new folder and name it technitium. Follow the instructions in the image below.
Note: Be careful to enter only lowercase, not uppercase letters.
STEP 5
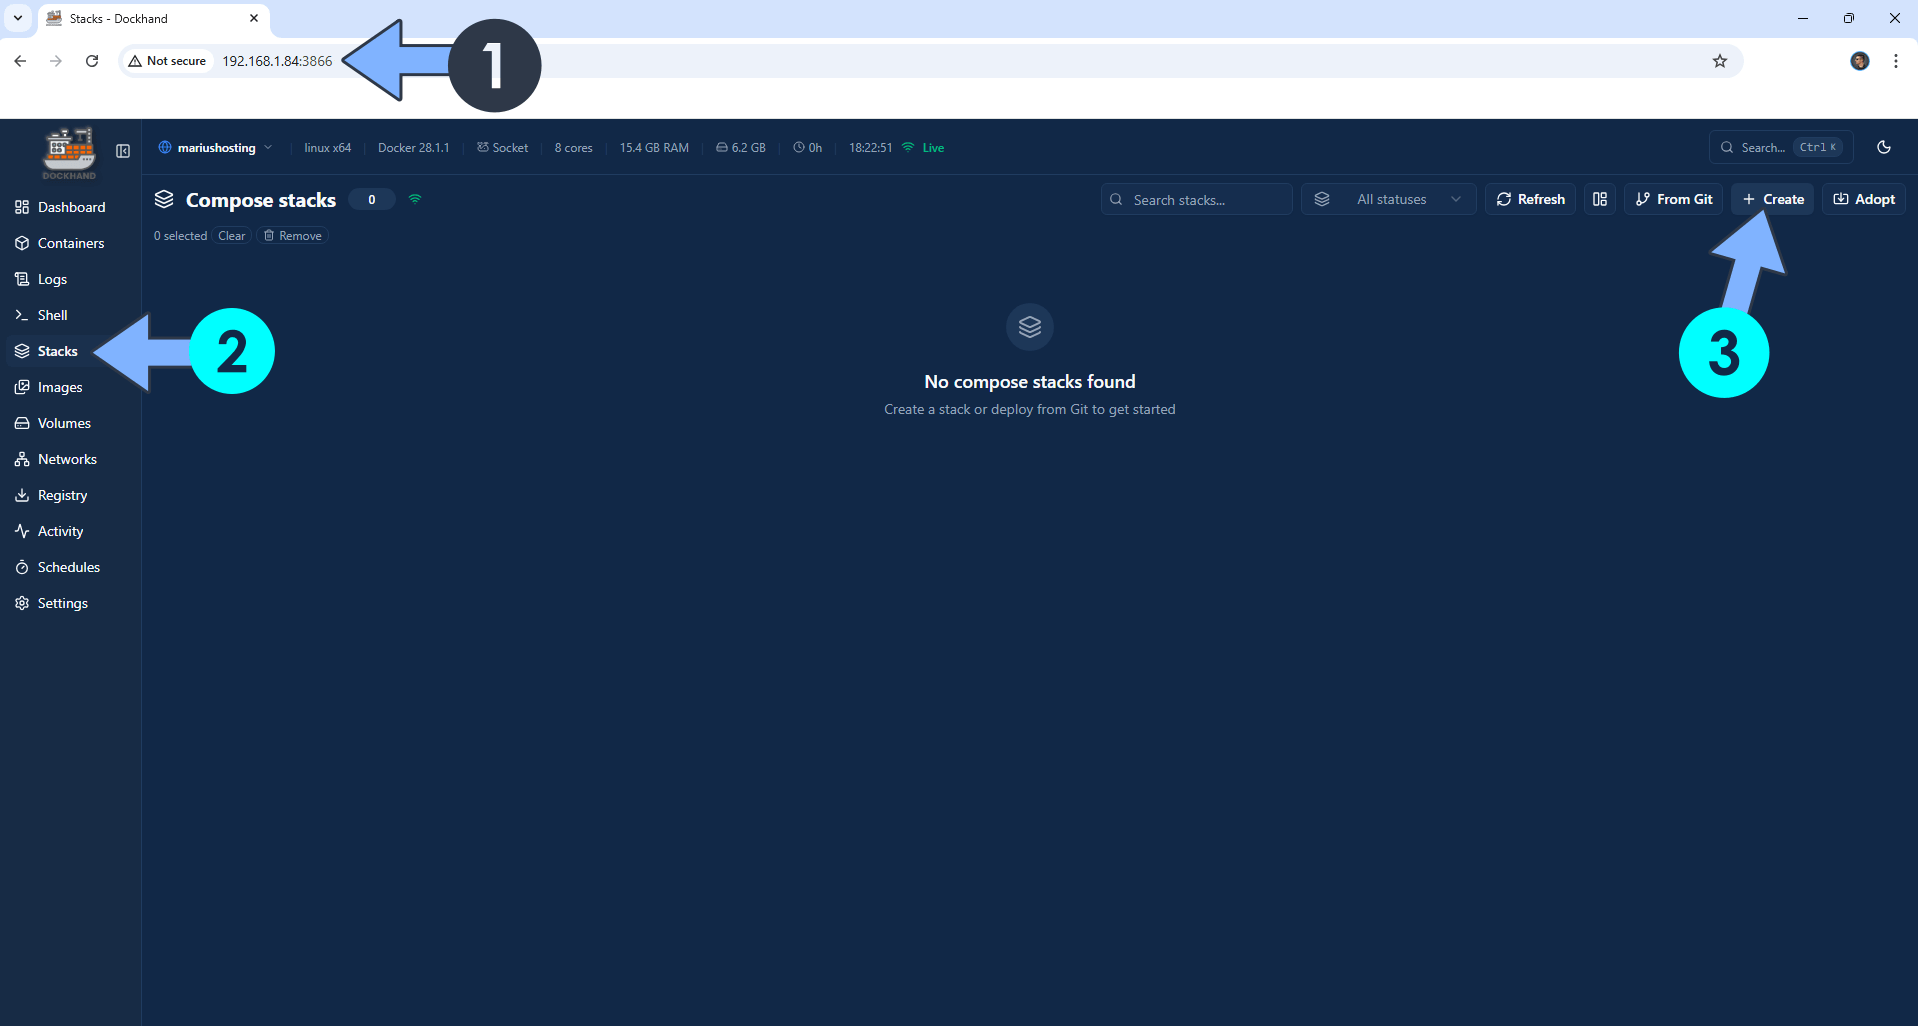
Open your browser and type in http://asustor-ip-address:3866 to connect to your Dockhand container. On the left sidebar, click Stacks then + Create. Follow the instructions in the image below.
STEP 6
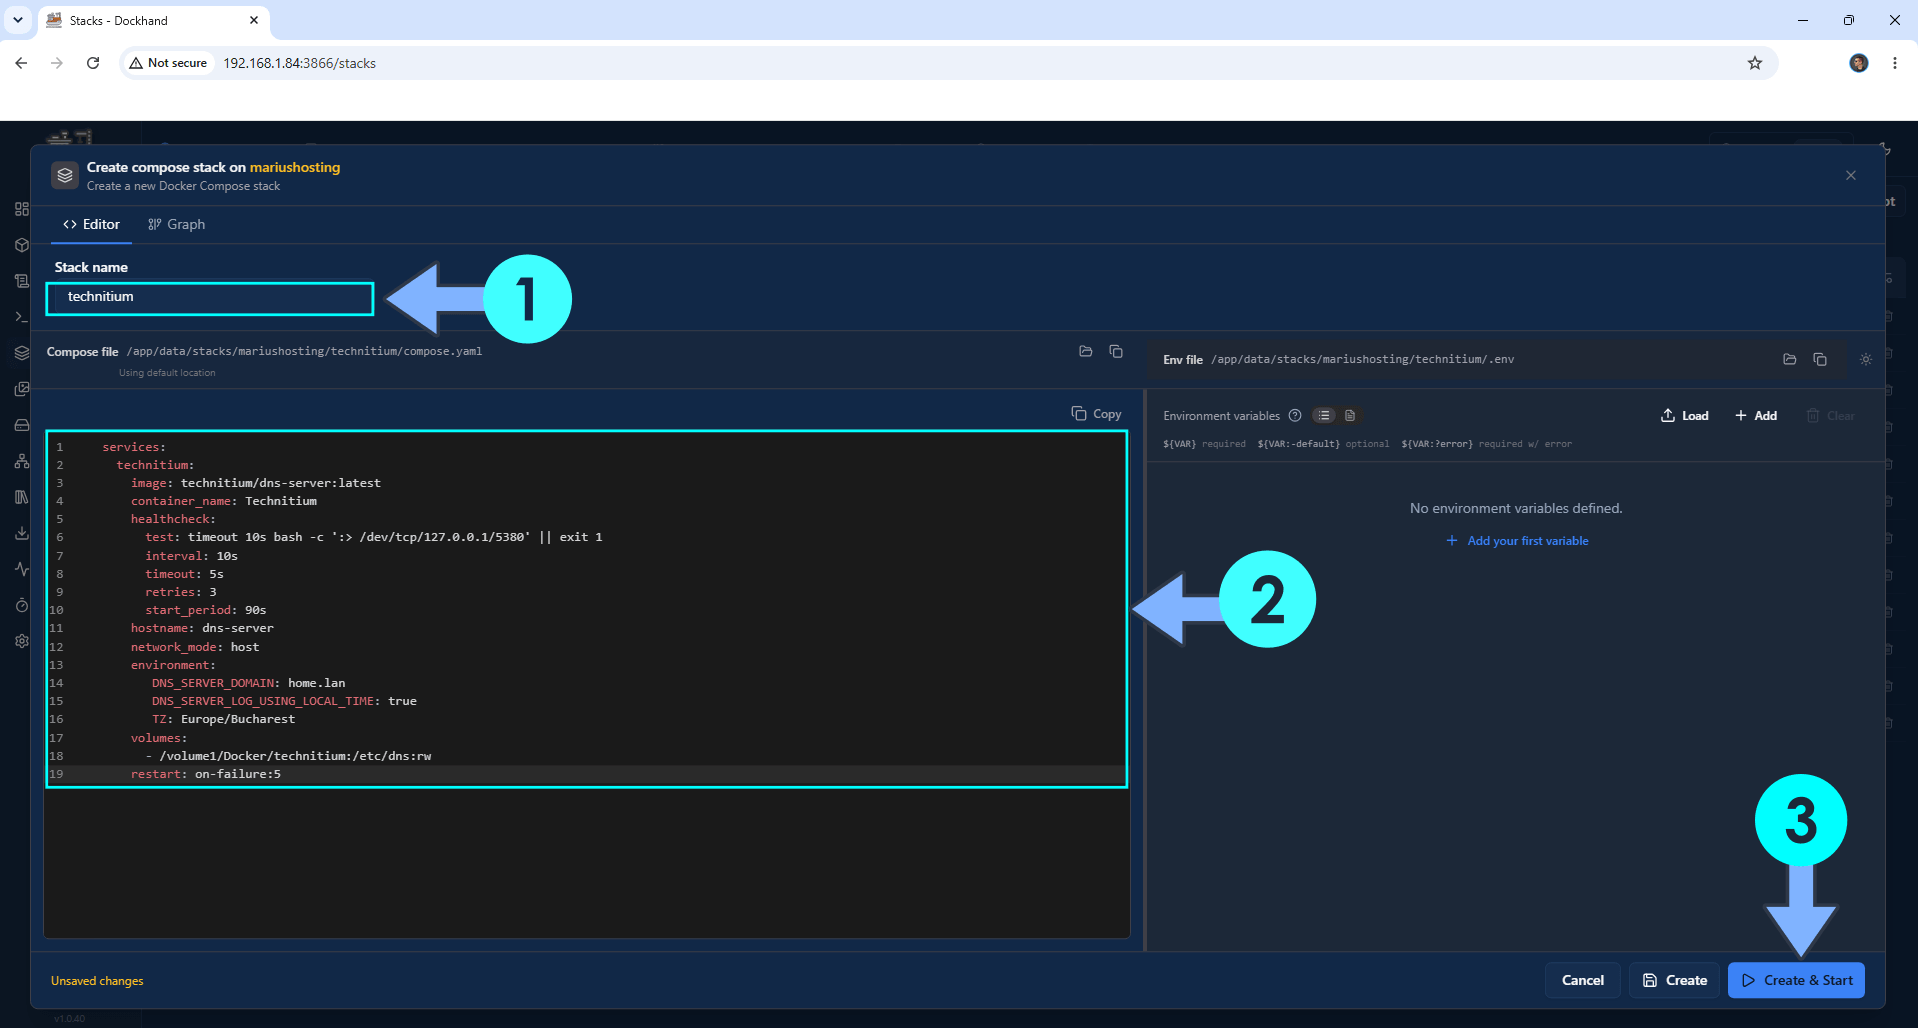
In the Stack name field, type in technitium. ⚠️Warning: Type in the name in lowercase letters. The installation process can take up to a few seconds/minutes. It will depend on your Internet speed connection. Follow the instructions in the image below.
services:
  technitium:
    image: technitium/dns-server:latest
    container_name: Technitium
    healthcheck:
      test: timeout 10s bash -c ':> /dev/tcp/127.0.0.1/5380' || exit 1
      interval: 10s
      timeout: 5s
      retries: 3
      start_period: 90s
    hostname: dns-server
    network_mode: host
    environment:
       DNS_SERVER_DOMAIN: home.lan
       DNS_SERVER_LOG_USING_LOCAL_TIME: true
       TZ: Europe/Bucharest
    volumes:
      - /volume1/Docker/technitium:/etc/dns:rw
    restart: on-failure:5
Note: Before you paste the code above in the Web editor area below, change the value for TZ. (Select your current Time Zone from this list.)
STEP 7
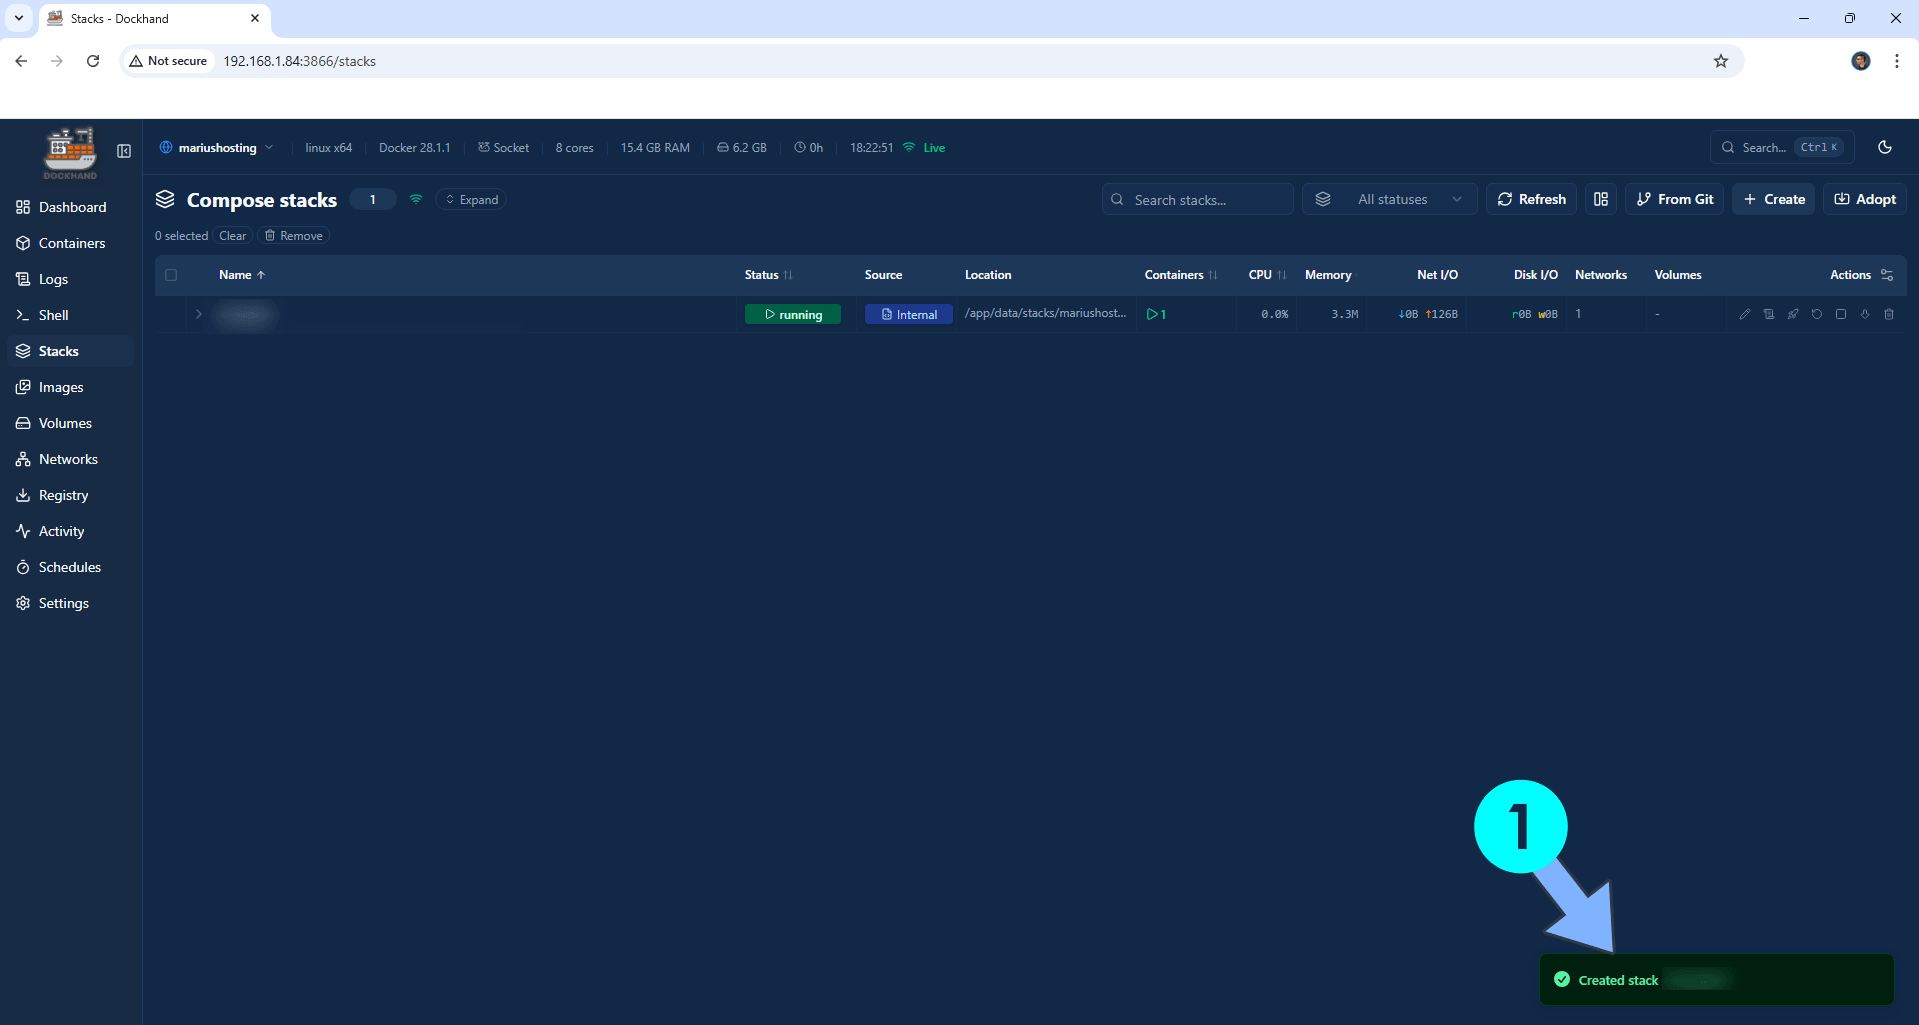
If everything goes right, you will see the following message at the bottom right of your screen: “Created stack “technitium”“.
STEP 8
🟢Please Support My work by Making a Donation. Almost 99,9% of the people that install something using my guides forget to support my work, or just ignore STEP 1. I’ve been very honest about this aspect of my work since the beginning: I don’t run any ADS, I don’t require subscriptions, paid or otherwise, I don’t collect IPs, emails, and I don’t have any referral links from Amazon or other merchants. I also don’t have any POP-UPs or COOKIES. I have repeatedly been told over the years how much I have contributed to the community. It’s something I love doing and have been honest about my passion since the beginning. But I also Need The Community to Support me Back to be able to continue doing this work.
STEP 9
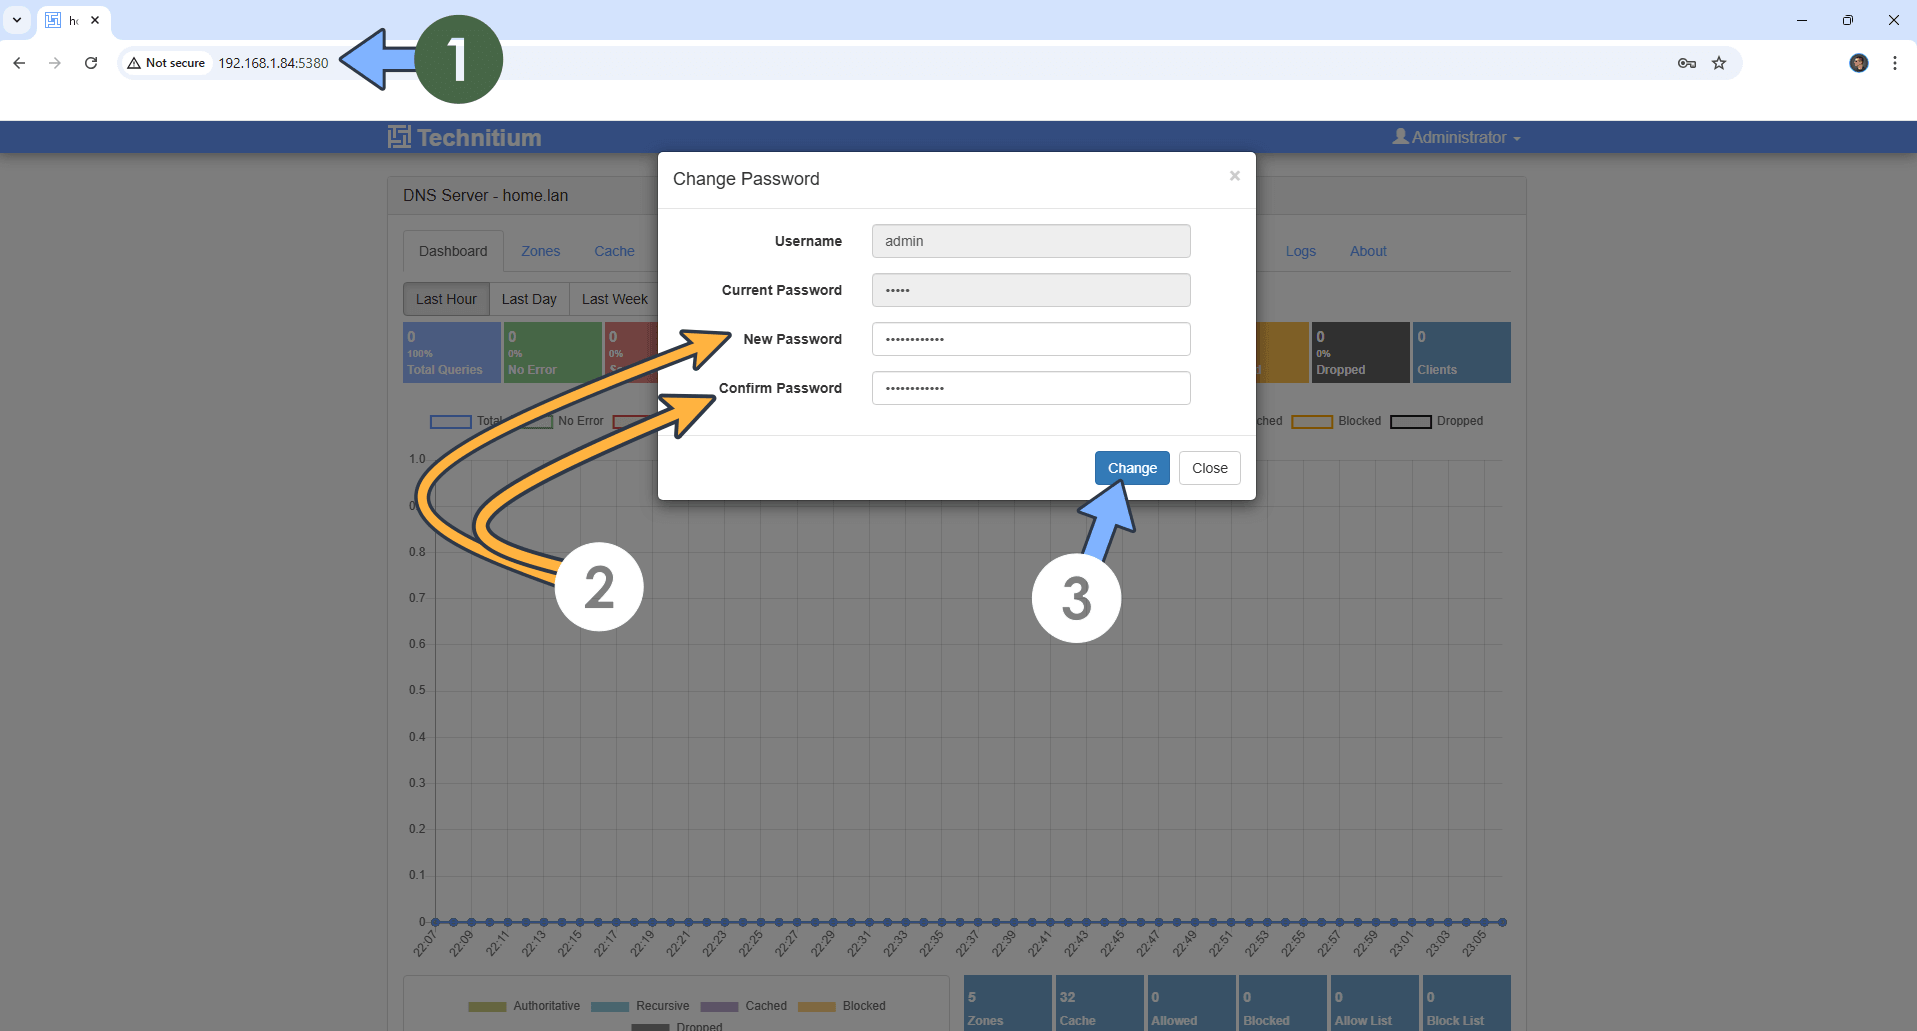
The installation process can take up to a few seconds/minutes. It will depend on your Internet speed connection. Now open your browser and type in http://asustor-ip-address:5380 You will be prompted to change the default password with your own new password. Type in your New Password. Click Change. Follow the instructions in the image below.
STEP 10
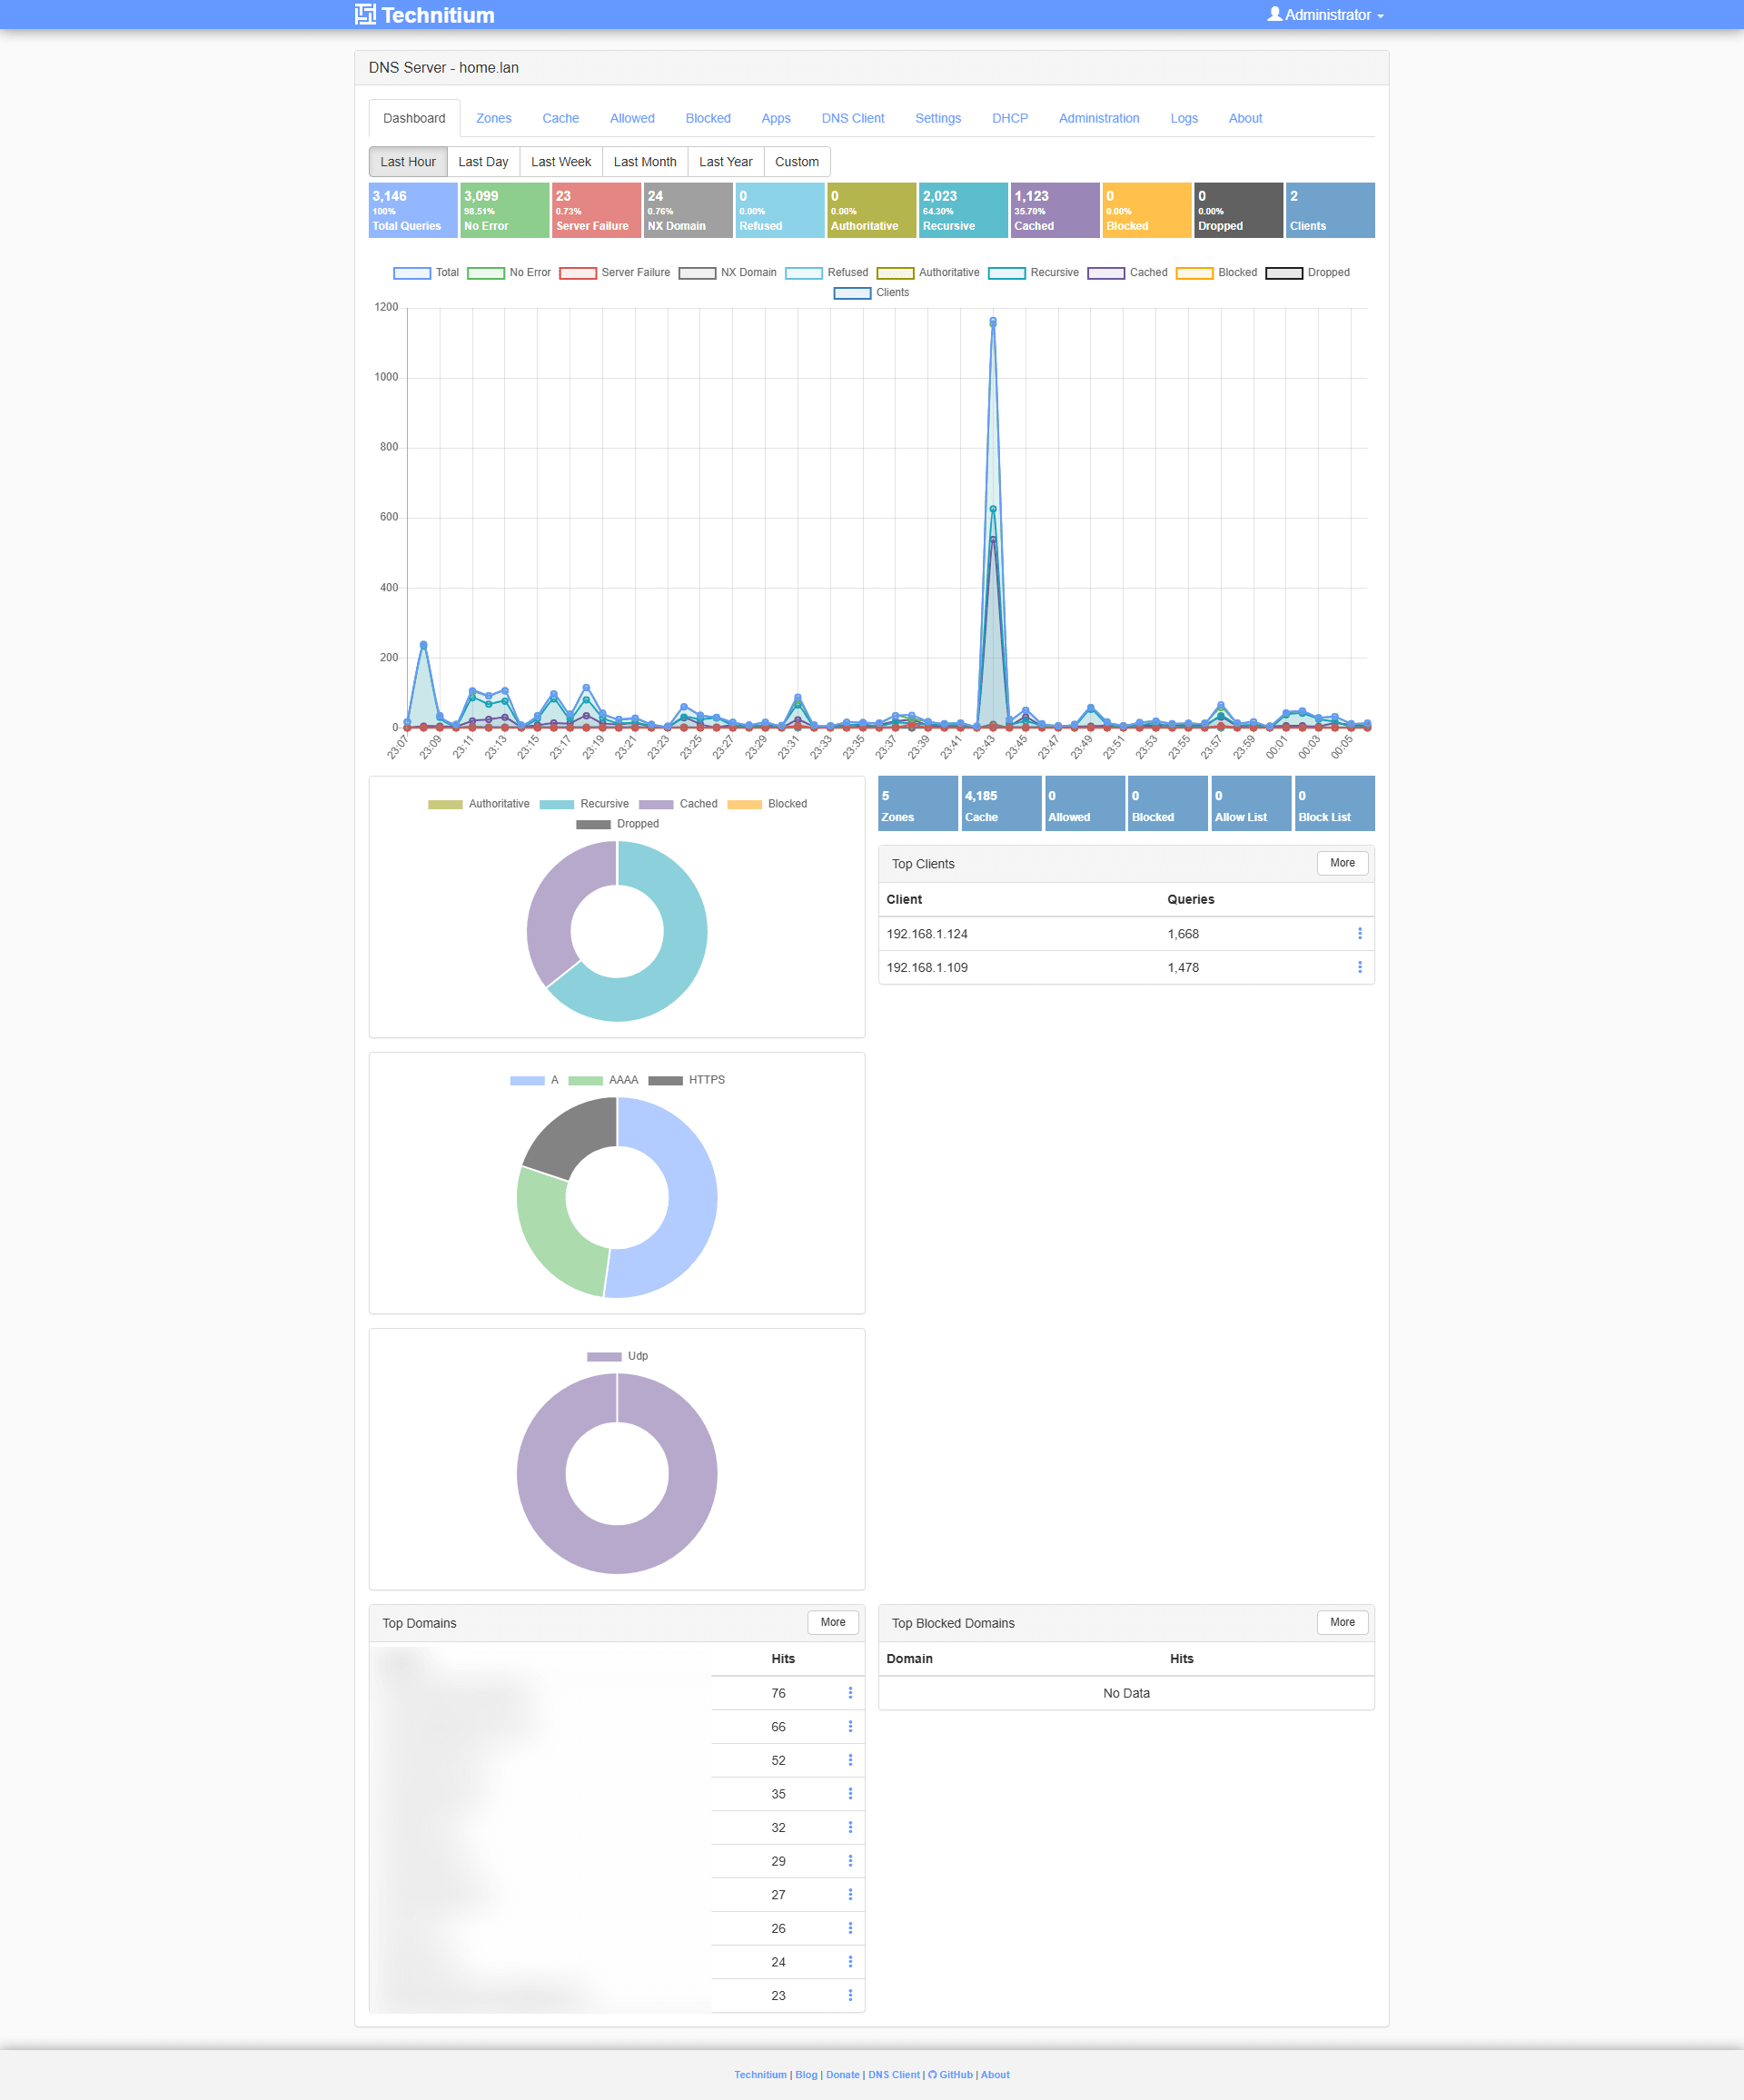
Your Technitium dashboard at a glance!
STEP 11
Follow the same exact STEPS from this PiHole article from STEP 14 to STEP 17 to integrate Technitium on Windows 11 or multiple devices.
Enjoy Technitium on your Asustor NAS!
This post was updated on Wednesday / October 7th, 2026 at 1:06 AM