Ouroboros will monitor (all or specified) running docker containers and update them to the (latest or tagged) available image in the remote registry. The updated container uses the same tag and parameters that were used when the container was first created such as volume/bind mounts, docker network connections, environment variables, restart policies, entry-points, commands, etc. In this step by step guide I will show you how to install Ouroboros on your Synology NAS. You can also use WatchTower to automatically update your docker containers.
Ouroboros is no longer supported. Use Watchtower to automatically update containers.
STEP 1
Please Support My work by Making a Donation.
STEP 2
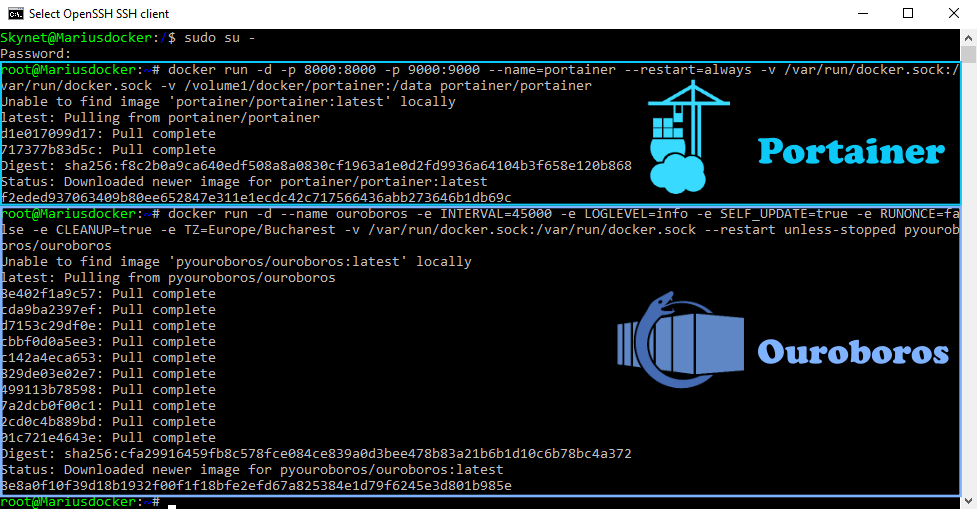
Install Portainer by following my easy step by step guide. At STEP 13 and STEP 14 (in the Portainer article), after you install Portainer, install Ouroboros using the code below. Note: In the variable area TZ in the code below add your own country (Select your current Time Zone from this list). In my case I inserted Europe/Bucharest, so change it according to your Time Zone.
docker run -d --name ouroboros -e INTERVAL=45000 -e LOGLEVEL=info -e SELF_UPDATE=true -e RUNONCE=false -e CLEANUP=true -e TZ=Europe/Bucharest -v /var/run/docker.sock:/var/run/docker.sock --restart unless-stopped pyouroboros/ouroboros
STEP 3
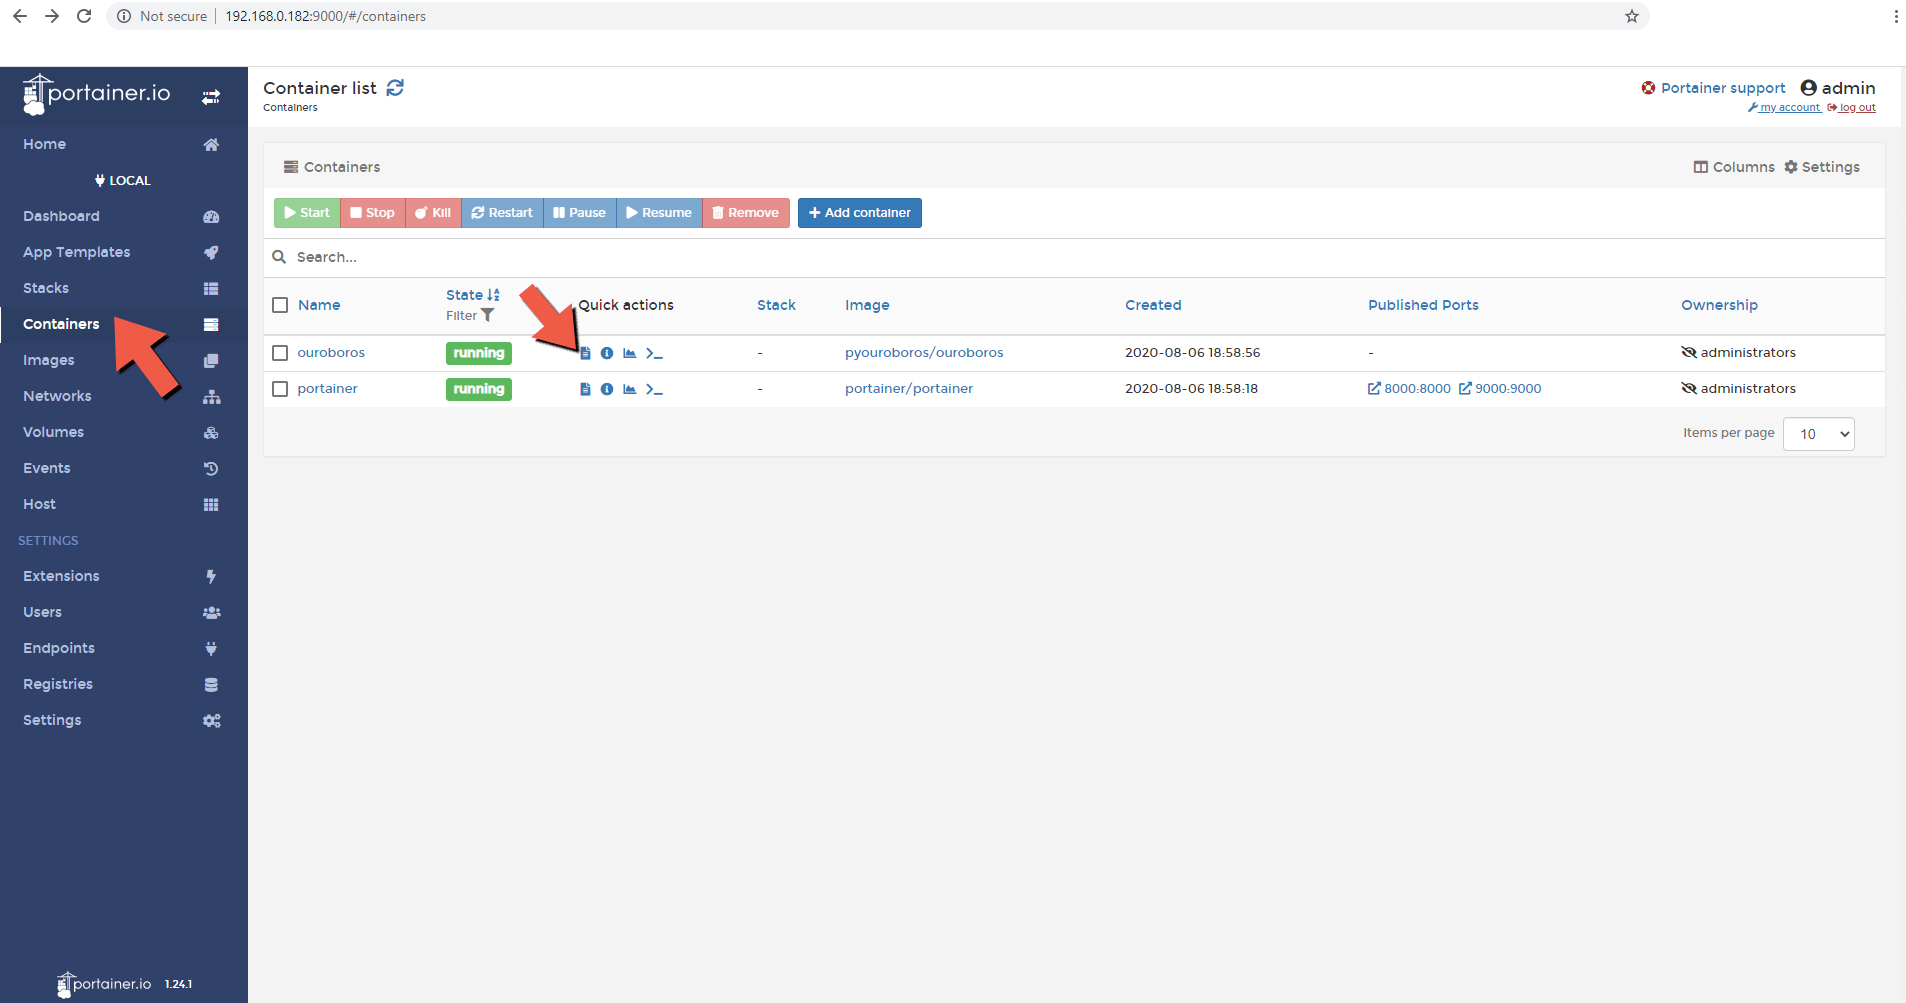
Open your browser and type in http://Synology-ip-address:9000/
On the left sidebar in the portainer app, click on Containers and you will be able too see all the containers you have installed. Click on the file icon right after the Ouroboros Name. Follow the instructions in the image below.
STEP 4
That file icon stands for the “logs” area of your container. In the Ouroboros logs area you can see when your containers are updated in real time.
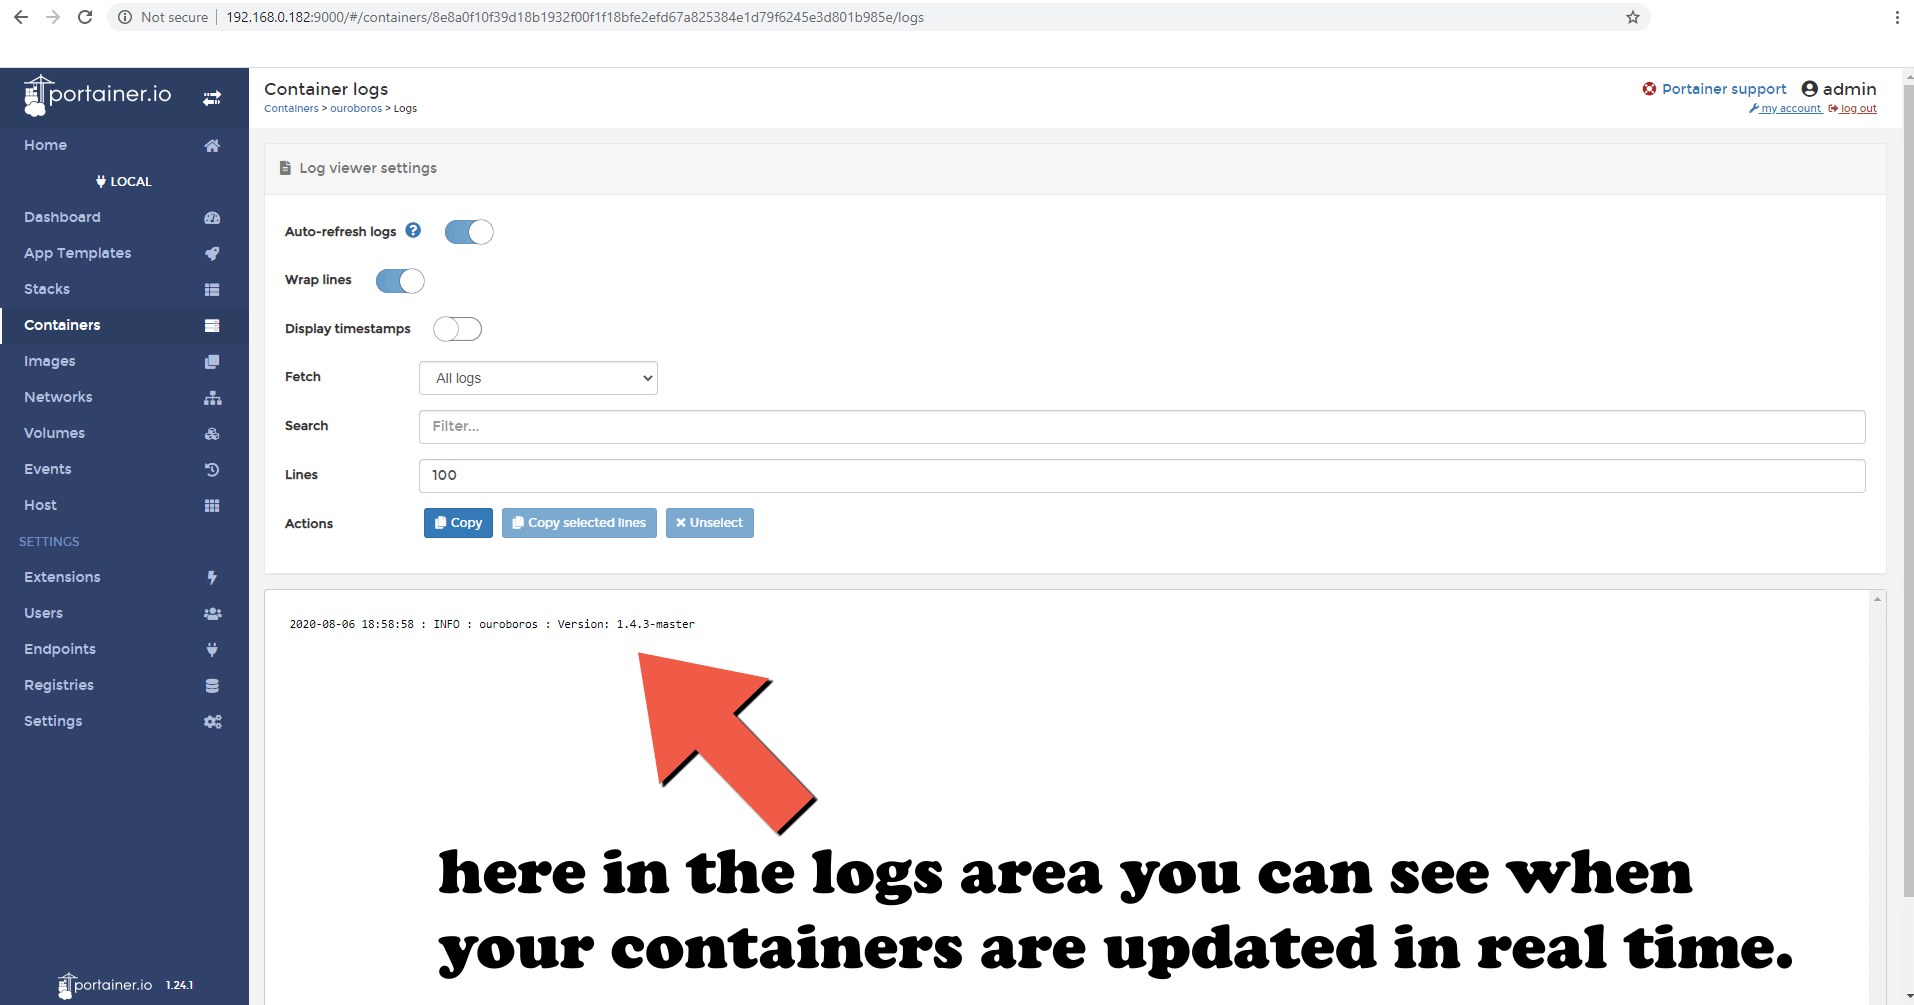
Note: Portainer will make everything easy and allow you to have full control of your containers. This is the reason why I recommend you use it: Ouroboros doesn’t have its own graphical interface, but rather works in the background.
Note: You can install Ouroboros without Portainer by following my Portainer step by step guide starting from STEP 6 to STEP 12. After STEP 12 just add the code below in the command prompt then press Enter. Your Ouroboros container will be installed automatically on your Docker console. Note: In the variable area TZ in the code below add your own country (Select your current Time Zone from this list). In my case I inserted Europe/Bucharest, so change it according to your Time Zone.
docker run -d --name ouroboros -e INTERVAL=45000 -e LOGLEVEL=info -e SELF_UPDATE=true -e RUNONCE=false -e CLEANUP=true -e TZ=Europe/Bucharest -v /var/run/docker.sock:/var/run/docker.sock --restart unless-stopped pyouroboros/ouroboros
Note: If you try to install Ouroboros using Docker console, your container image will stop unexpectedly all the time: Docker container ouroboros stopped unexpectedly. Use my step by step guide above to correctly install Ouroboros on your Synology NAS without any errors.
This post was updated on Monday / September 12th, 2022 at 1:34 AM