

Open Dronelog is a high-performance, open-source dashboard for organizing and analyzing drone flight logs privately and locally. It focuses on DJI (.txt logs) and Litchi (CSV) formats with support for Airdata and some third-party CSVs, offering a fully local-first alternative to cloud-based tools. In this step by step guide I will show you how to install Open Dronelog on your Asustor NAS using Docker and Dockhand.
STEP 1
Please Support My work by Making a Donation.
STEP 2
Install Dockhand using my step by step guide. If you already have Dockhand installed on your Asustor NAS, skip this STEP. ⚠️Attention: Make sure you have installed the latest Dockhand version.
STEP 3
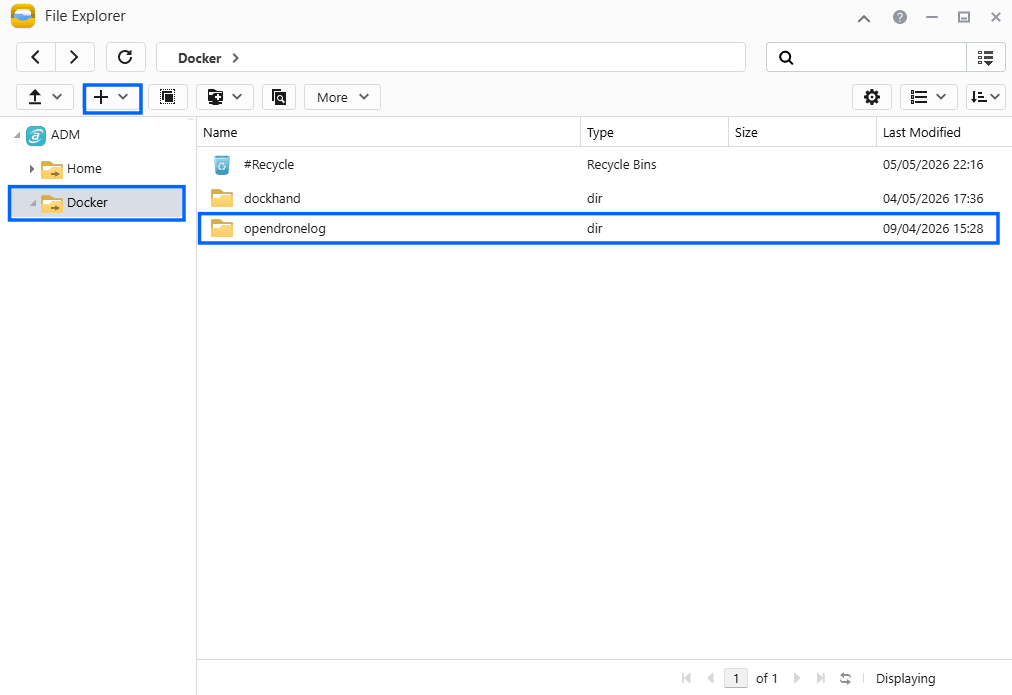
Go to File Explorer and open the Docker folder. Inside the Docker folder, create one new folder and name it opendronelog. Follow the instructions in the image below.
Note: Be careful to enter only lowercase, not uppercase letters.
STEP 4
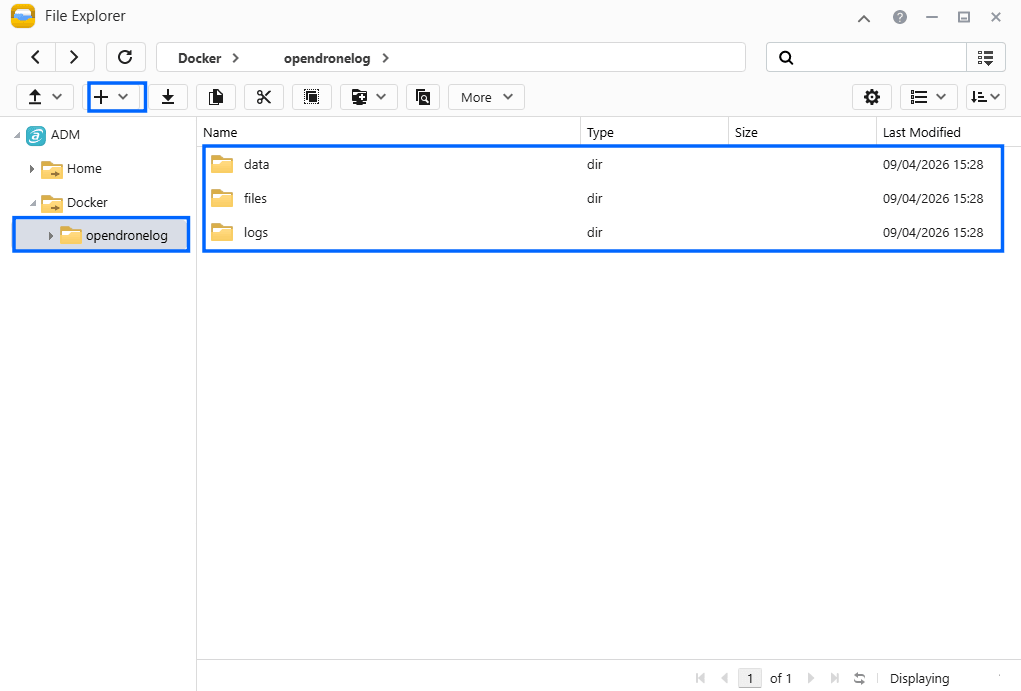
Now create three new folders inside the opendronelog folder that you have previously created at STEP 3 and name them data, files, logs. Follow the instructions in the image below.
Note: Be careful to enter only lowercase, not uppercase letters.
STEP 5
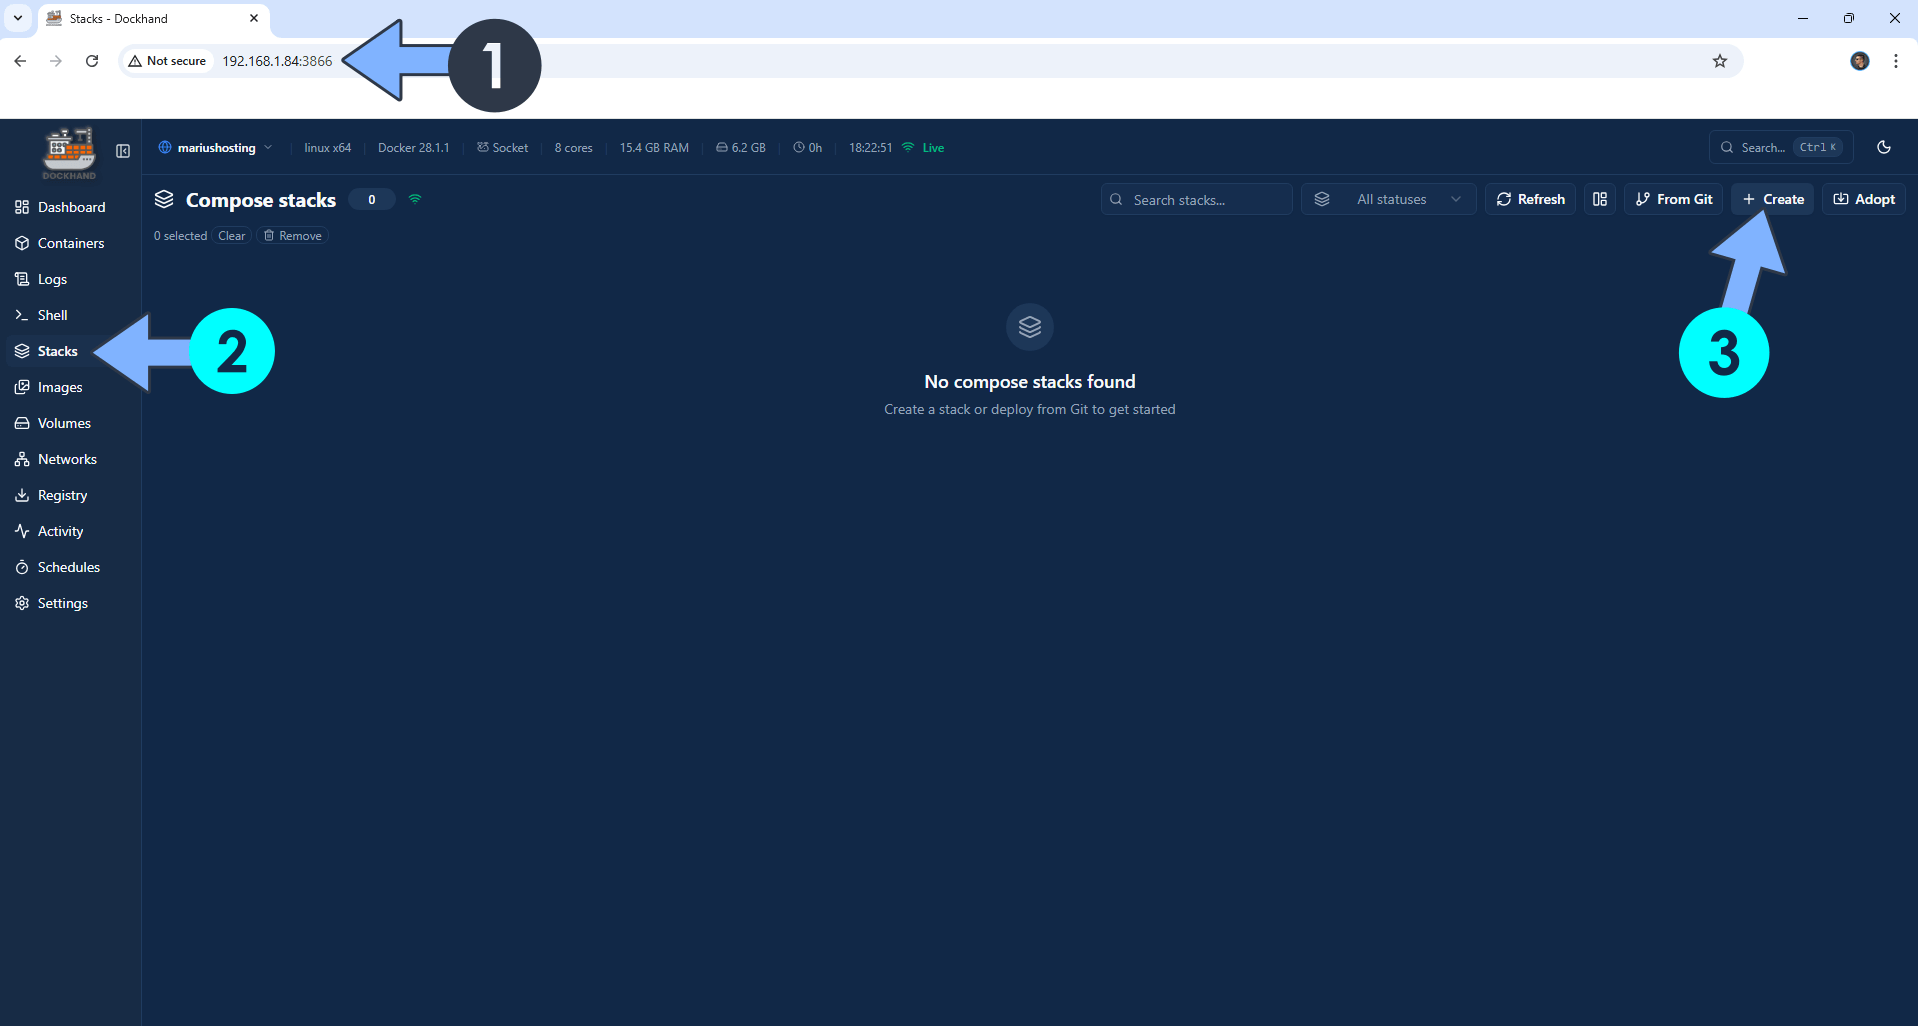
Open your browser and type in http://asustor-ip-address:3866 to connect to your Dockhand container. On the left sidebar, click Stacks then + Create. Follow the instructions in the image below.
STEP 6
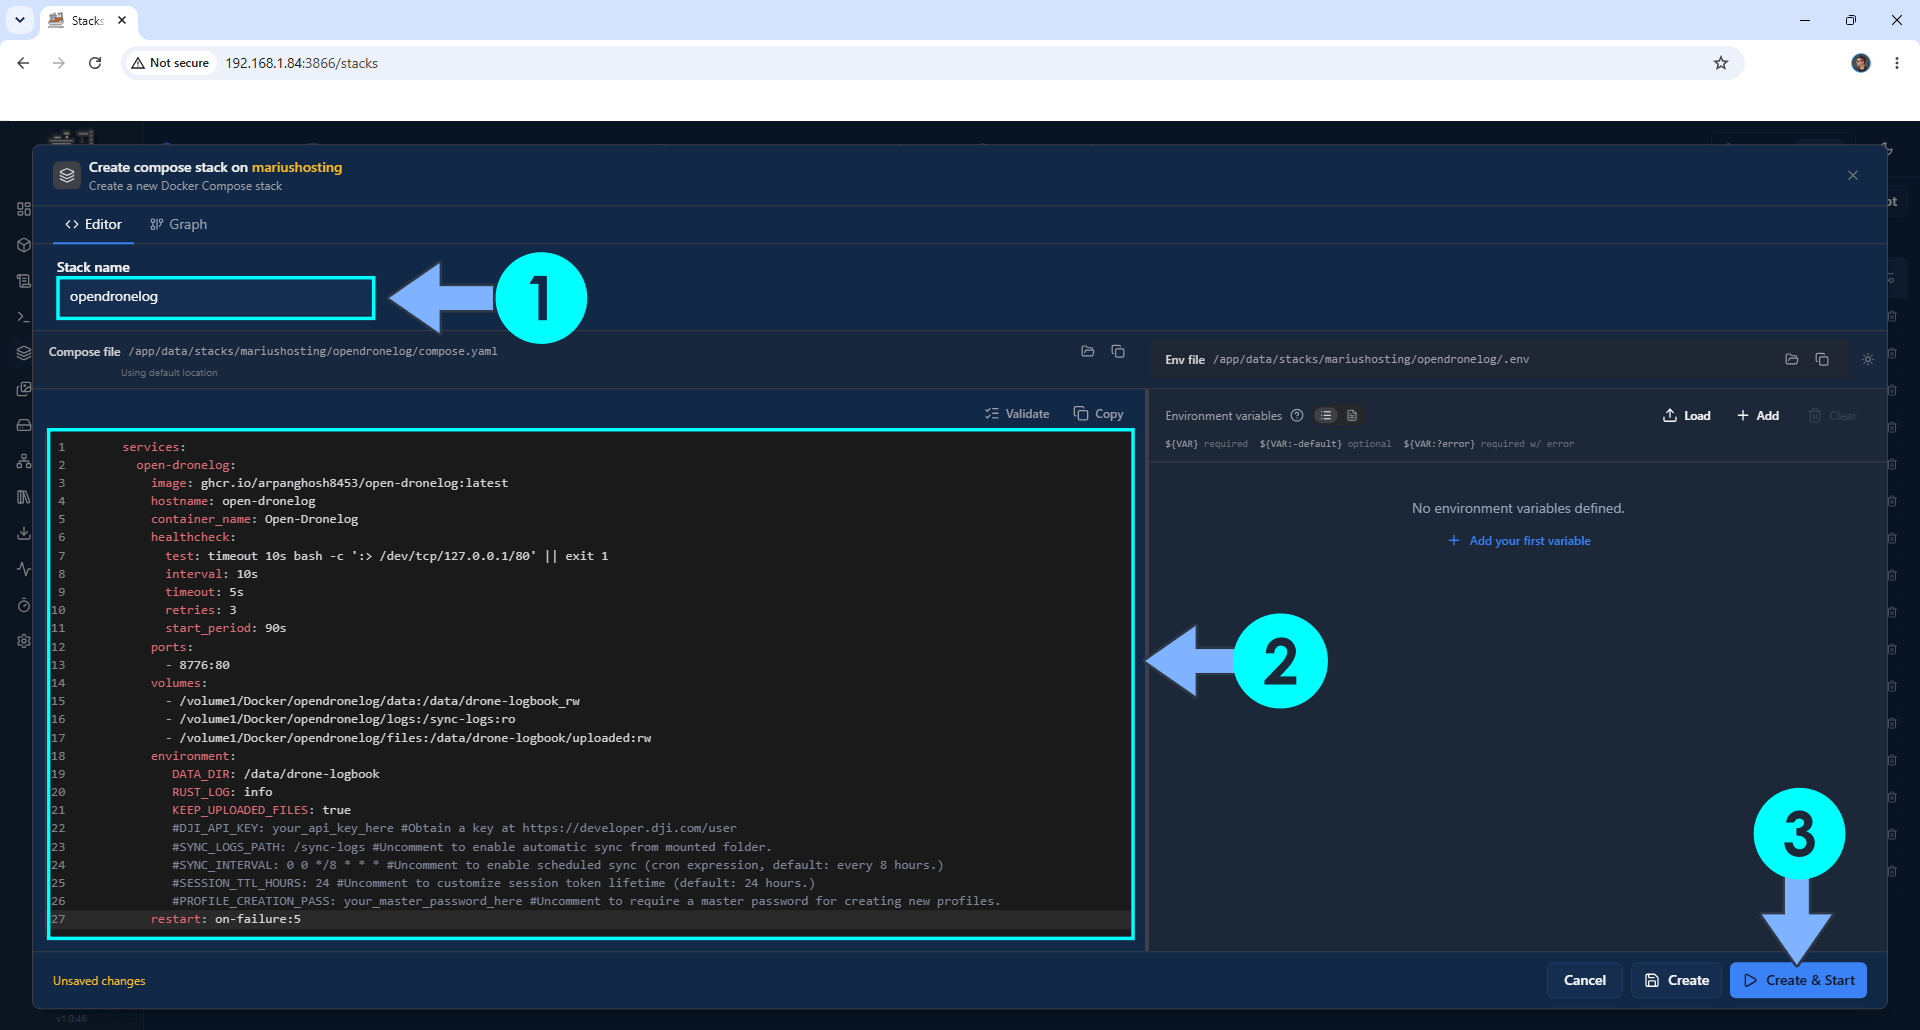
In the Stack name field, type in opendronelog. ⚠️Warning: Type in the name in lowercase letters. The installation process can take up to a few seconds/minutes. It will depend on your Internet speed connection. Follow the instructions in the image below.
services:
  open-dronelog:
    image: ghcr.io/arpanghosh8453/open-dronelog:latest
    hostname: open-dronelog
    container_name: Open-Dronelog
    healthcheck:
      test: timeout 10s bash -c ':> /dev/tcp/127.0.0.1/80' || exit 1
      interval: 10s
      timeout: 5s
      retries: 3
      start_period: 90s
    ports:
      - 8776:80
    volumes:
      - /volume1/Docker/opendronelog/data:/data/drone-logbook_rw
      - /volume1/Docker/opendronelog/logs:/sync-logs:ro
      - /volume1/Docker/opendronelog/files:/data/drone-logbook/uploaded:rw
    environment:
       DATA_DIR: /data/drone-logbook
       RUST_LOG: info
       KEEP_UPLOADED_FILES: true
       #DJI_API_KEY: your_api_key_here #Obtain a key at https://developer.dji.com/user
       #SYNC_LOGS_PATH: /sync-logs #Uncomment to enable automatic sync from mounted folder.
       #SYNC_INTERVAL: 0 0 */8 * * * #Uncomment to enable scheduled sync (cron expression, default: every 8 hours.)
       #SESSION_TTL_HOURS: 24 #Uncomment to customize session token lifetime (default: 24 hours.)
       #PROFILE_CREATION_PASS: your_master_password_here #Uncomment to require a master password for creating new profiles.
    restart: on-failure:5
STEP 7
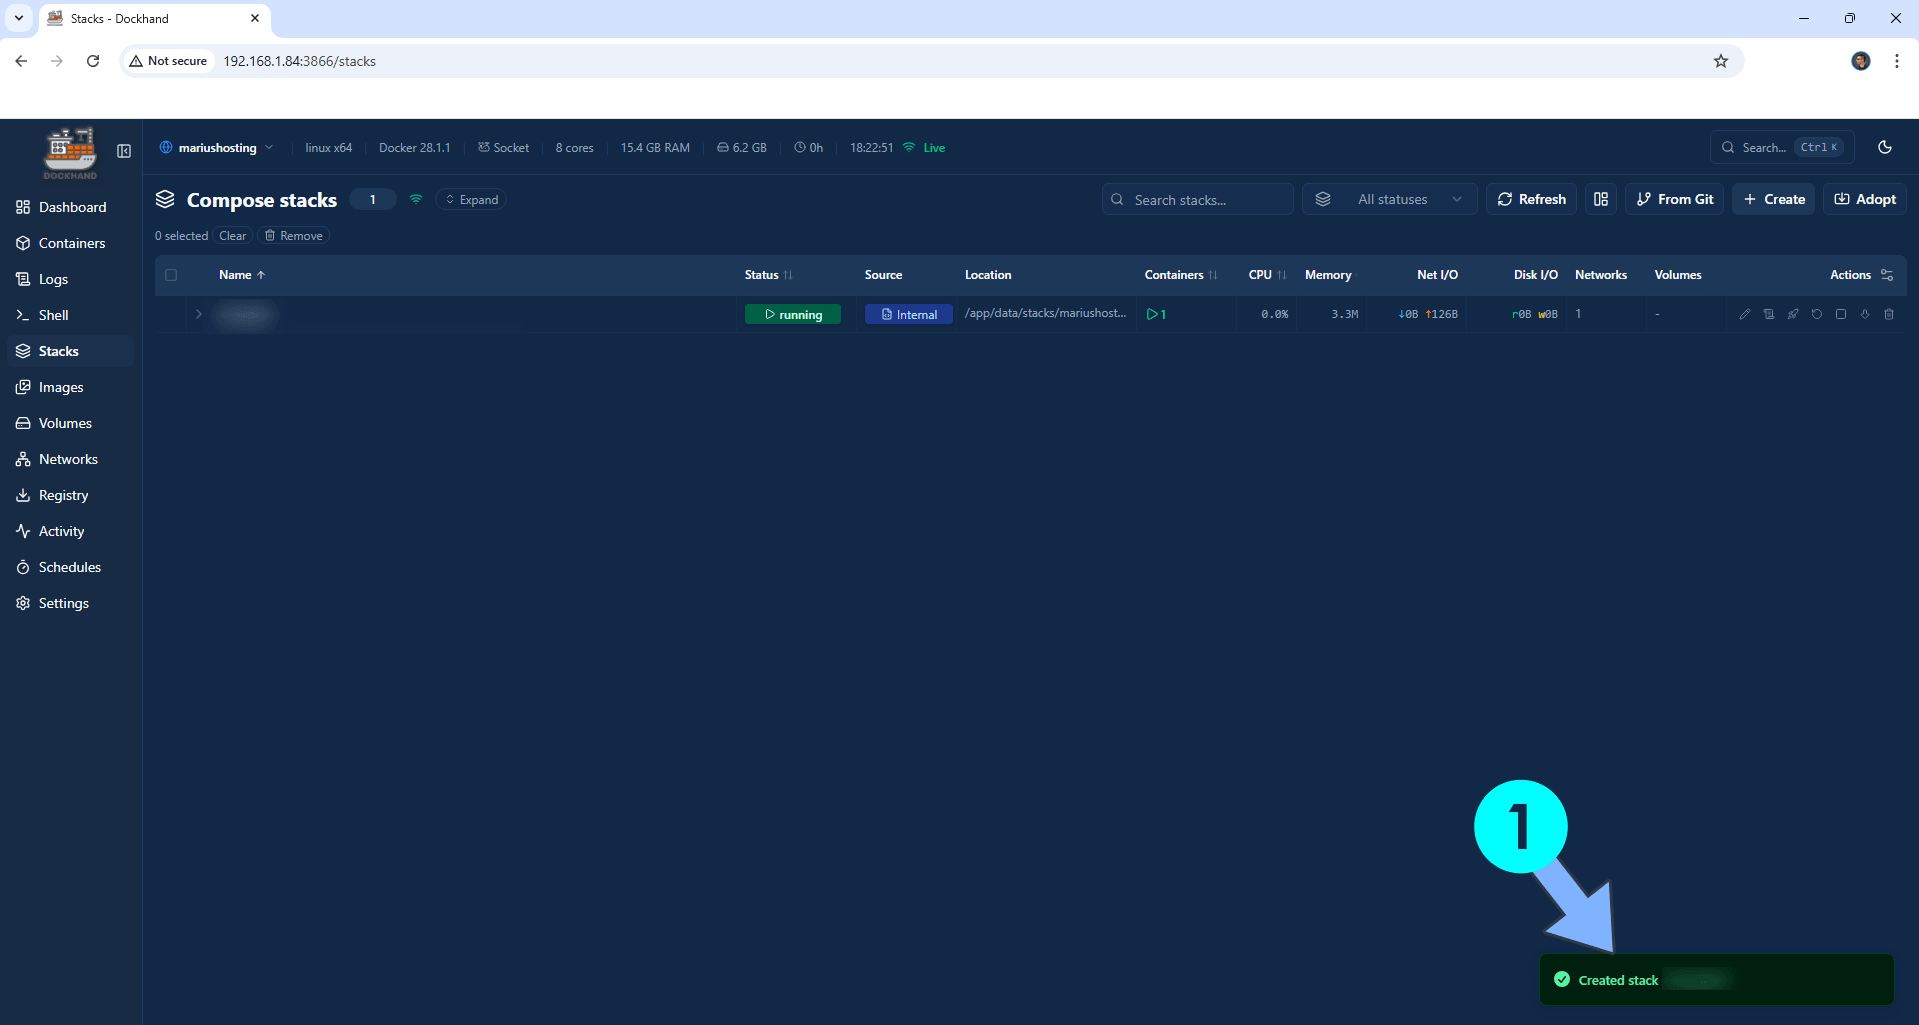
If everything goes right, you will see the following message at the bottom right of your screen: “Created stack “opendronelog”“.
STEP 8
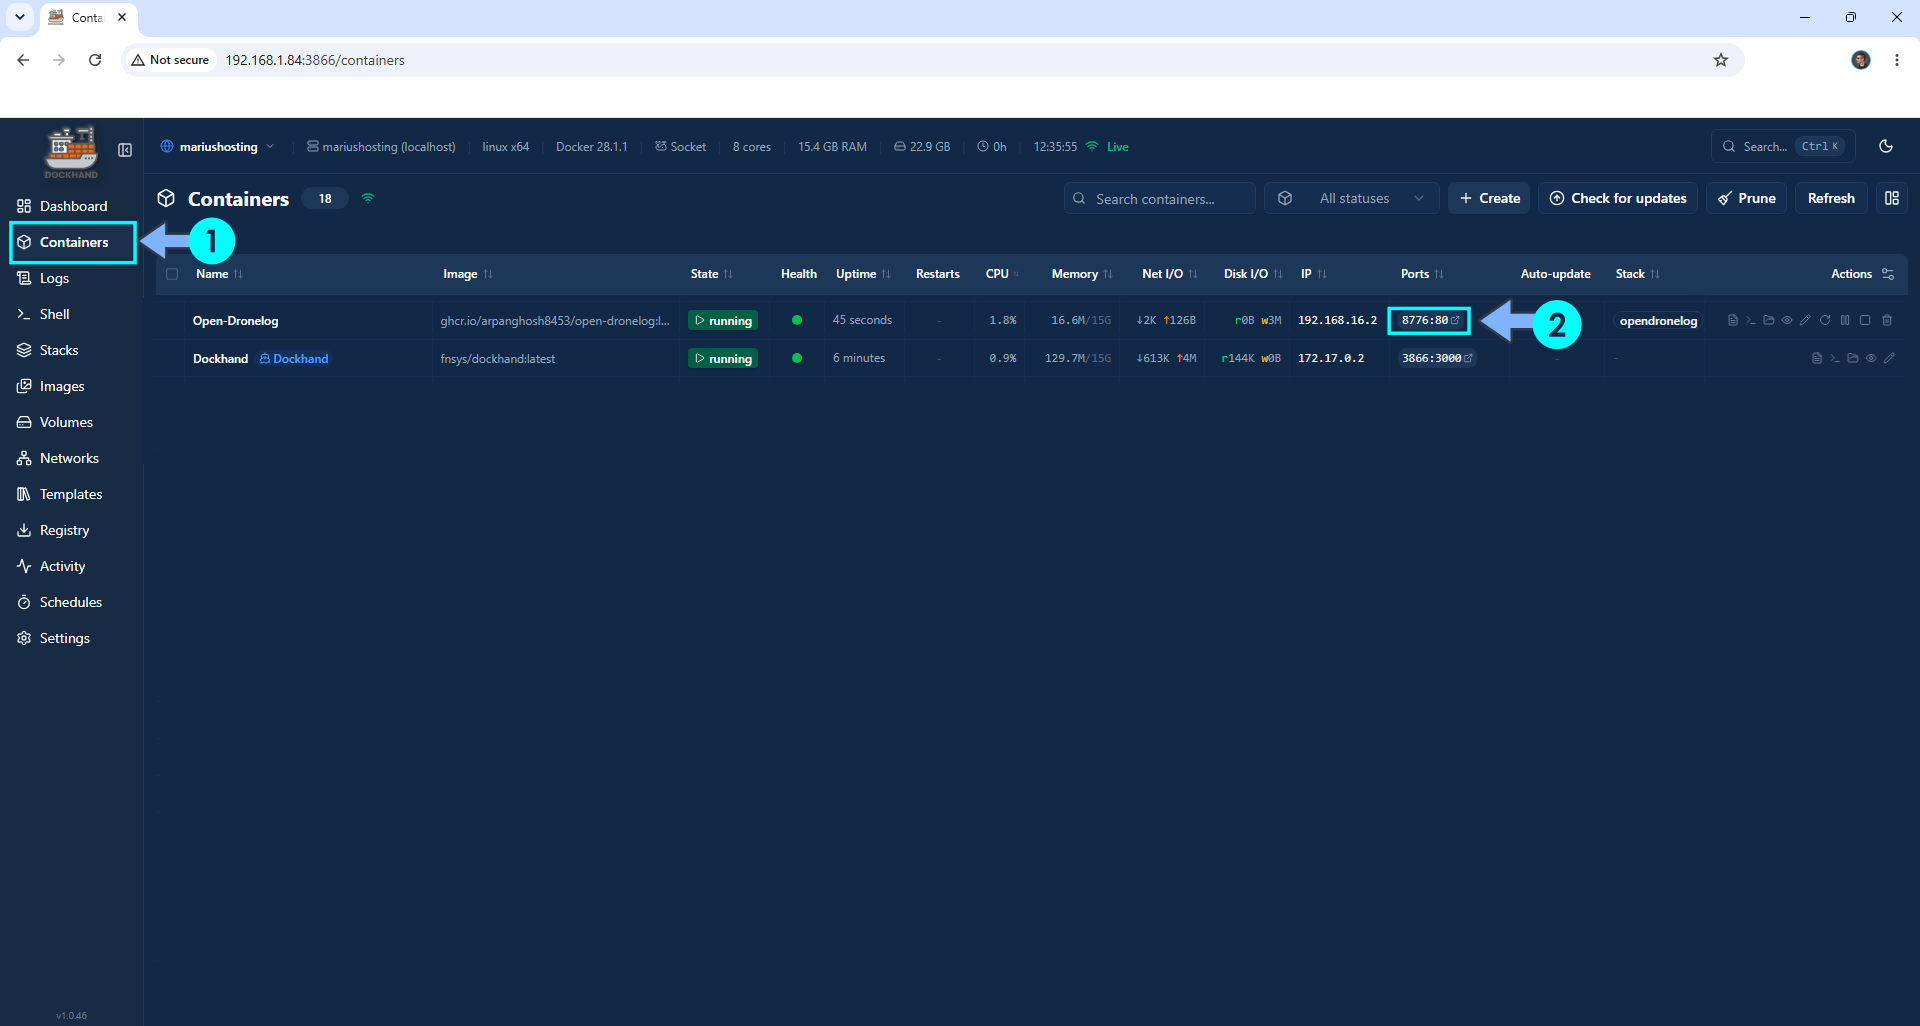
On the left sidebar, click Containers. Identify your Open Dronelog container then click on ports 8766:80. Follow the instructions in the image below.
STEP 9
🟢Please Support My work by Making a Donation. Almost 99,9% of the people that install something using my guides forget to support my work, or just ignore STEP 1. I’ve been very honest about this aspect of my work since the beginning: I don’t run any ADS, I don’t require subscriptions, paid or otherwise, I don’t collect IPs, emails, and I don’t have any referral links from Amazon or other merchants. I also don’t have any POP-UPs or COOKIES. I have repeatedly been told over the years how much I have contributed to the community. It’s something I love doing and have been honest about my passion since the beginning. But I also Need The Community to Support me Back to be able to continue doing this work.
STEP 10
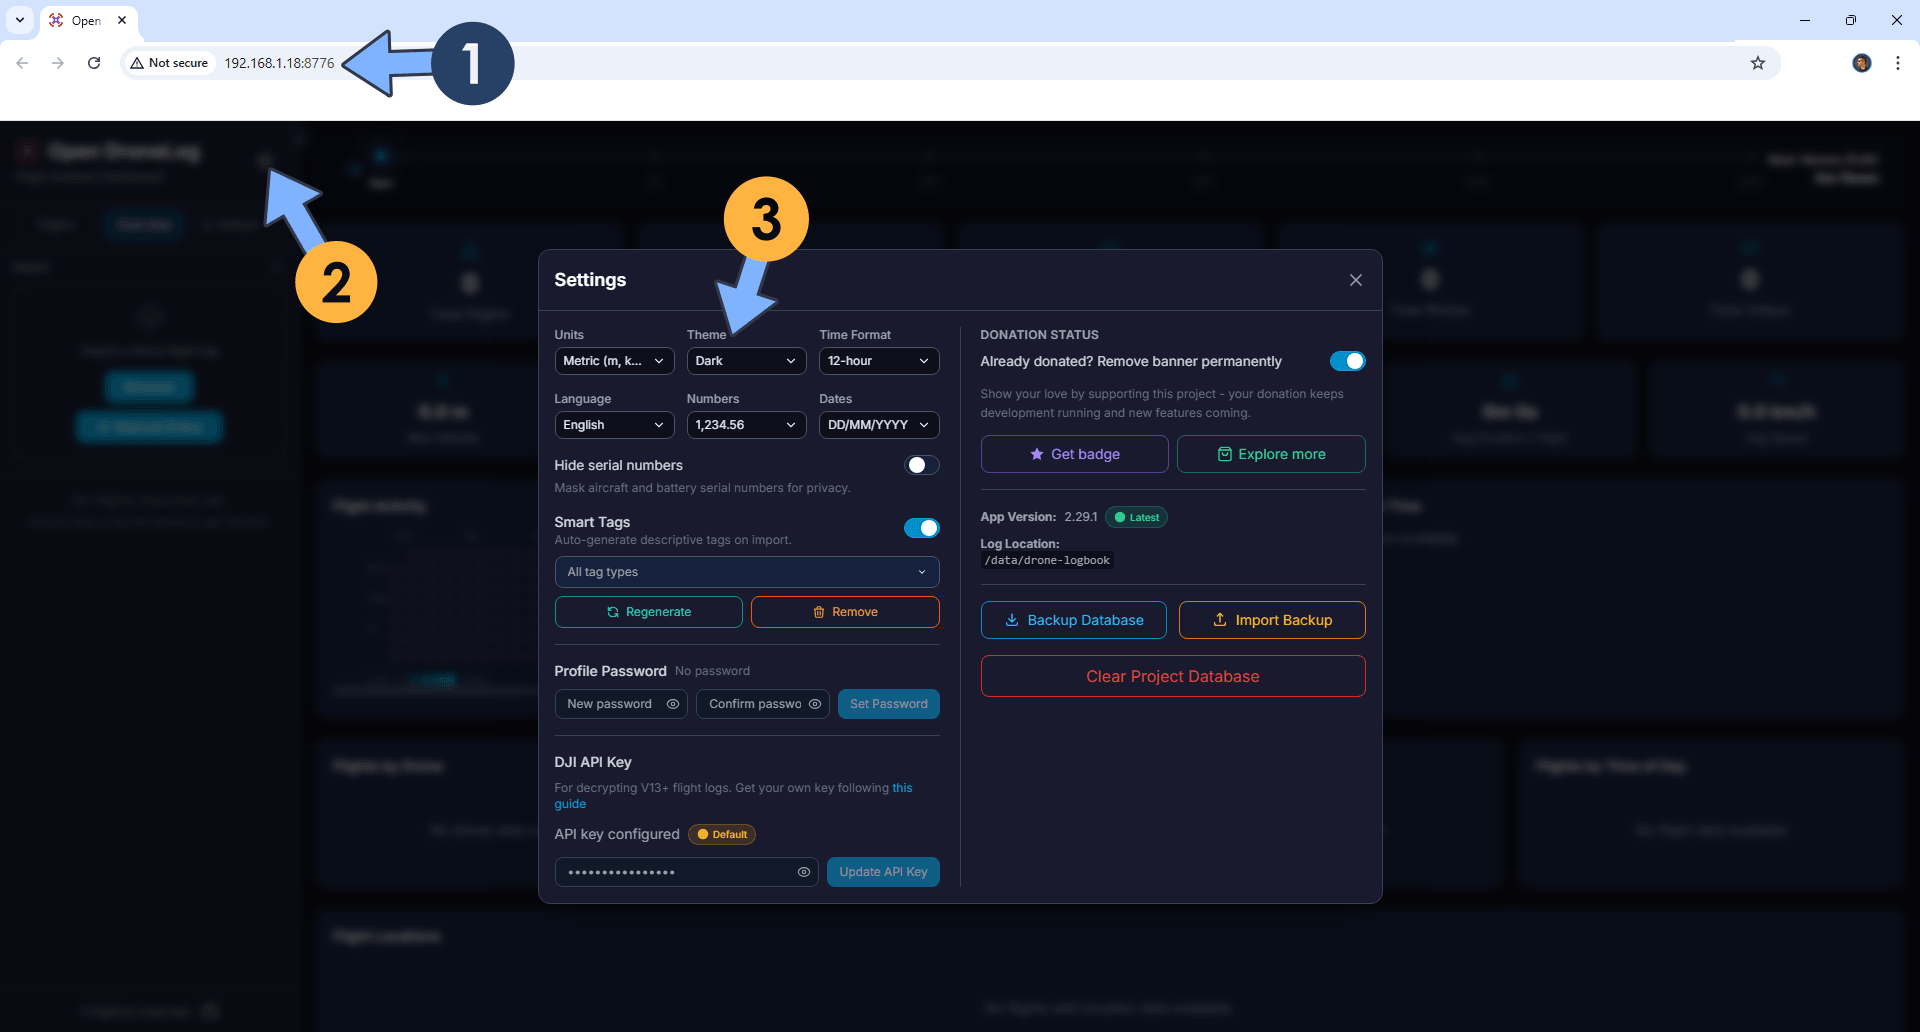
The installation process can take up to a few seconds/minutes. It will depend on your Internet speed connection. Now open your browser and type in http://asustor-ip-address:8776 At the top left of the page, click on the Settings icon. Adjust your settings. For example, I switched my theme from Light to Dark. Follow the instructions in the image below.
STEP 11
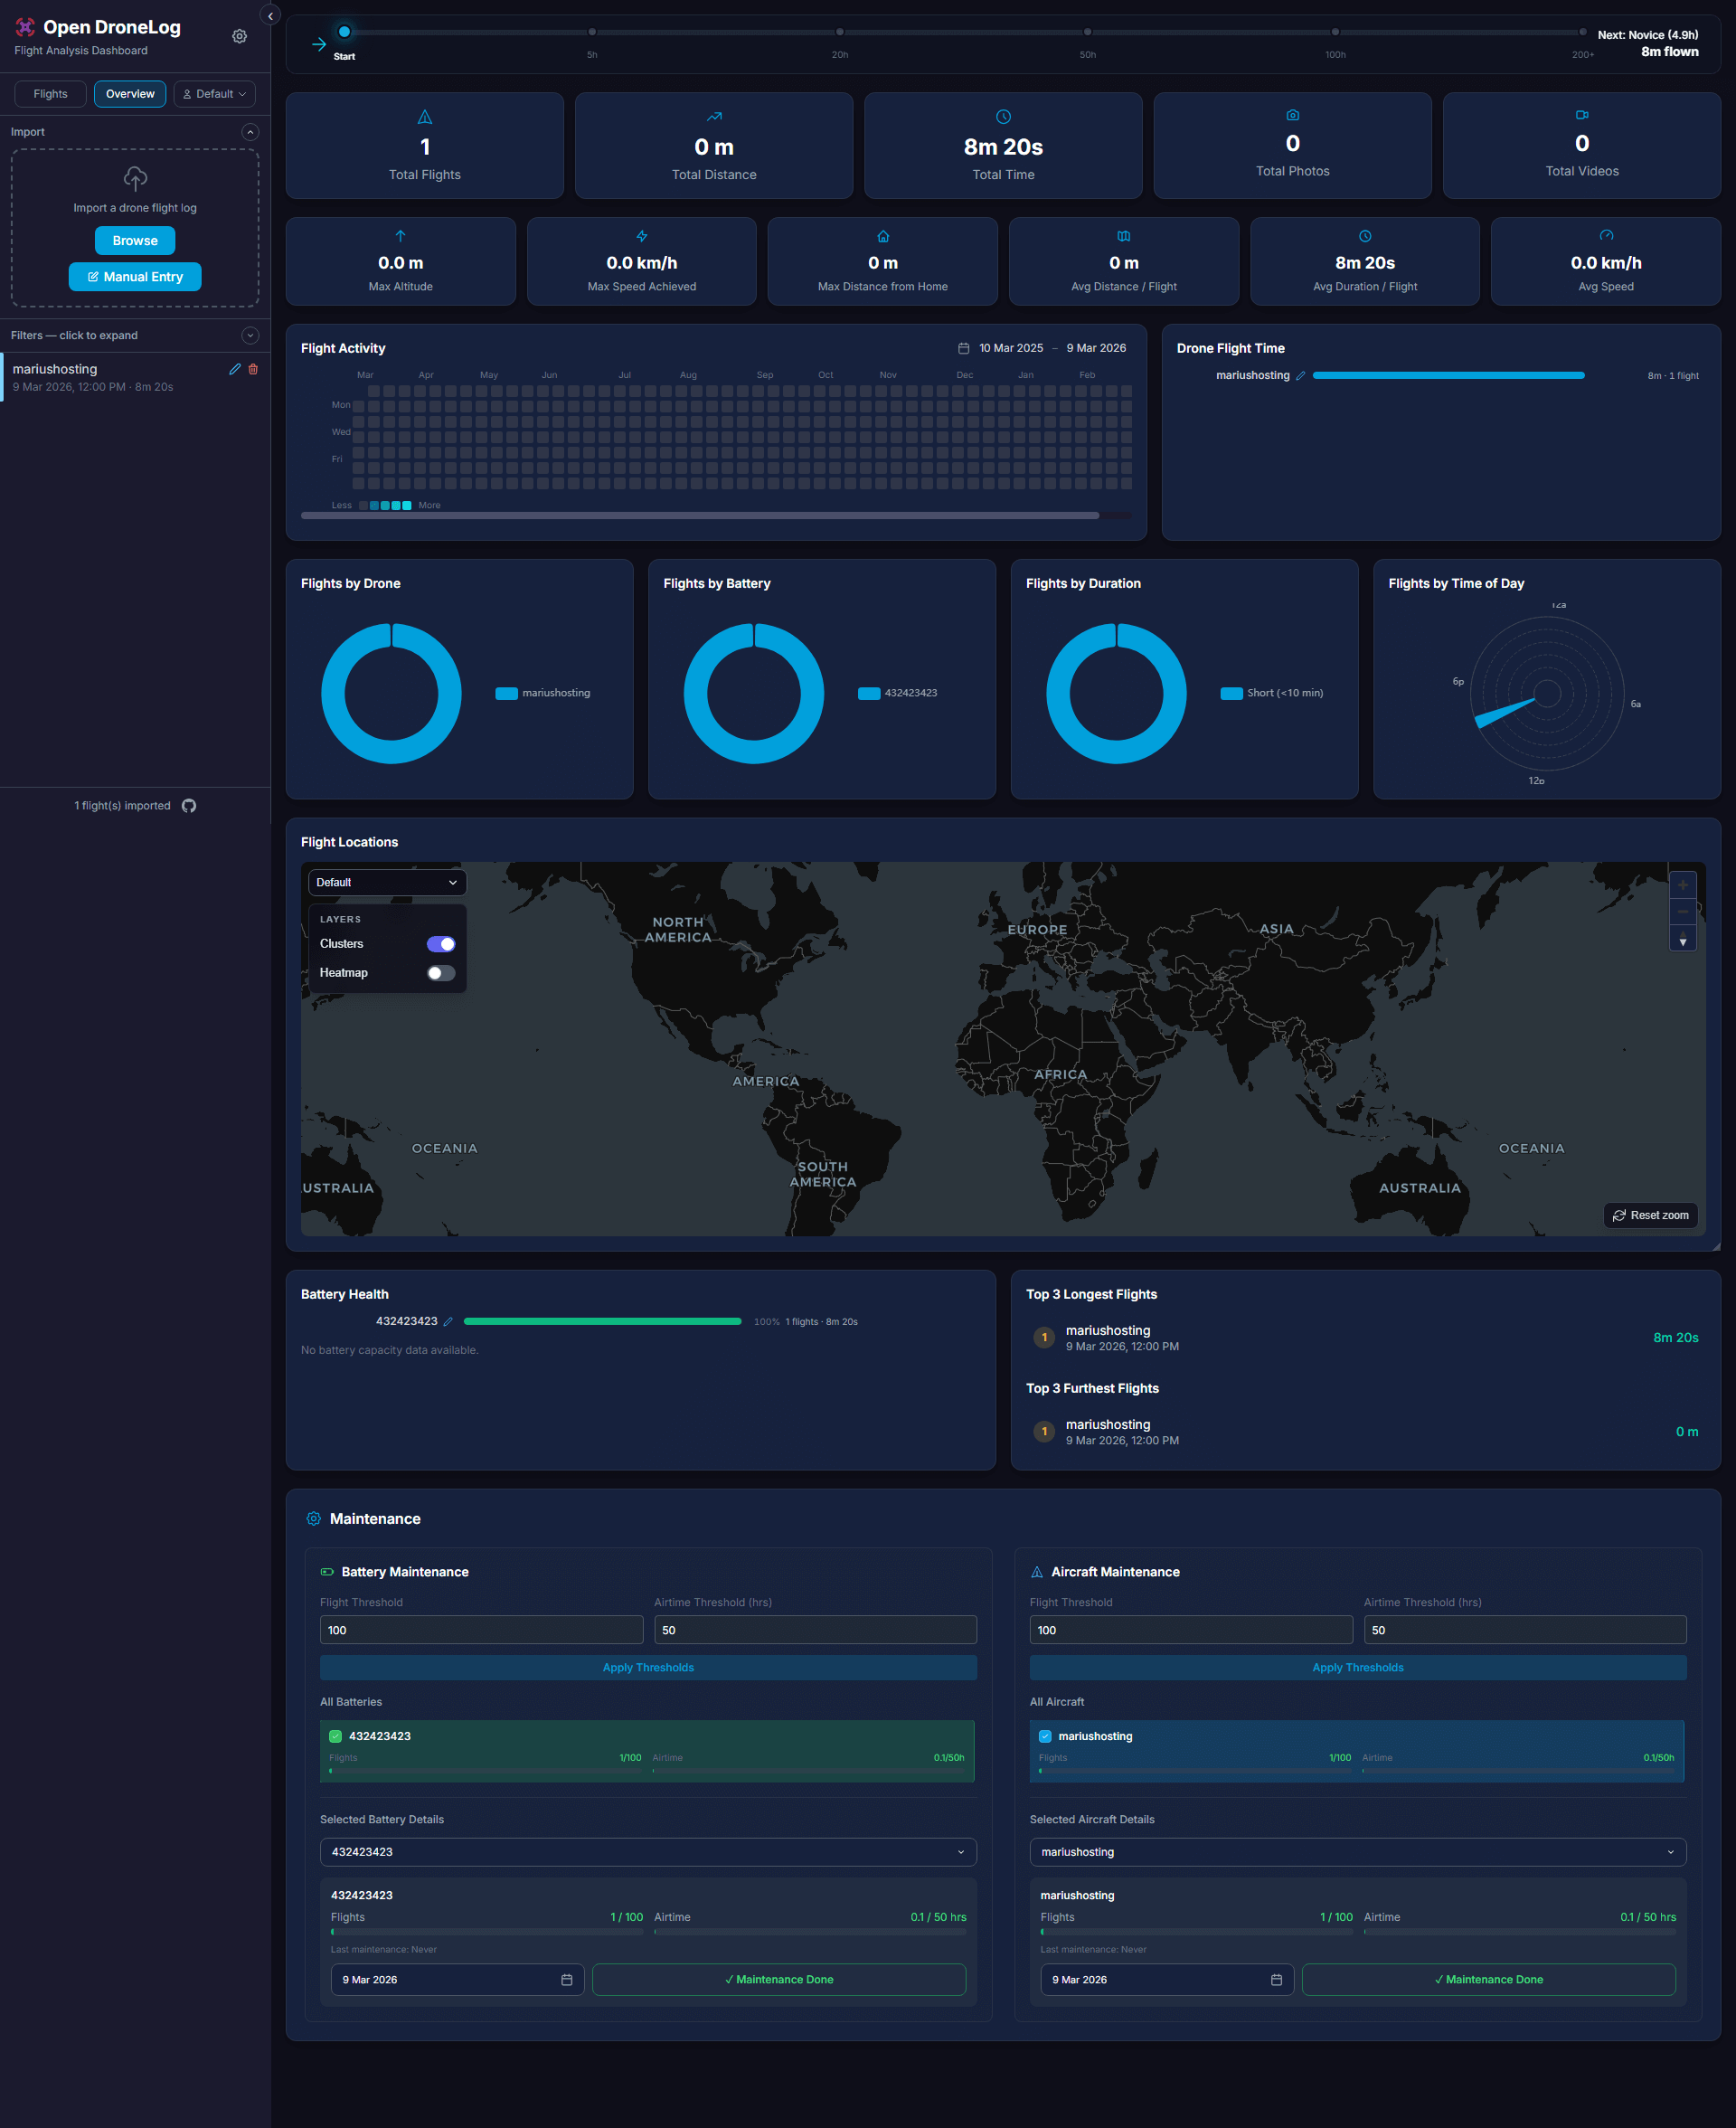
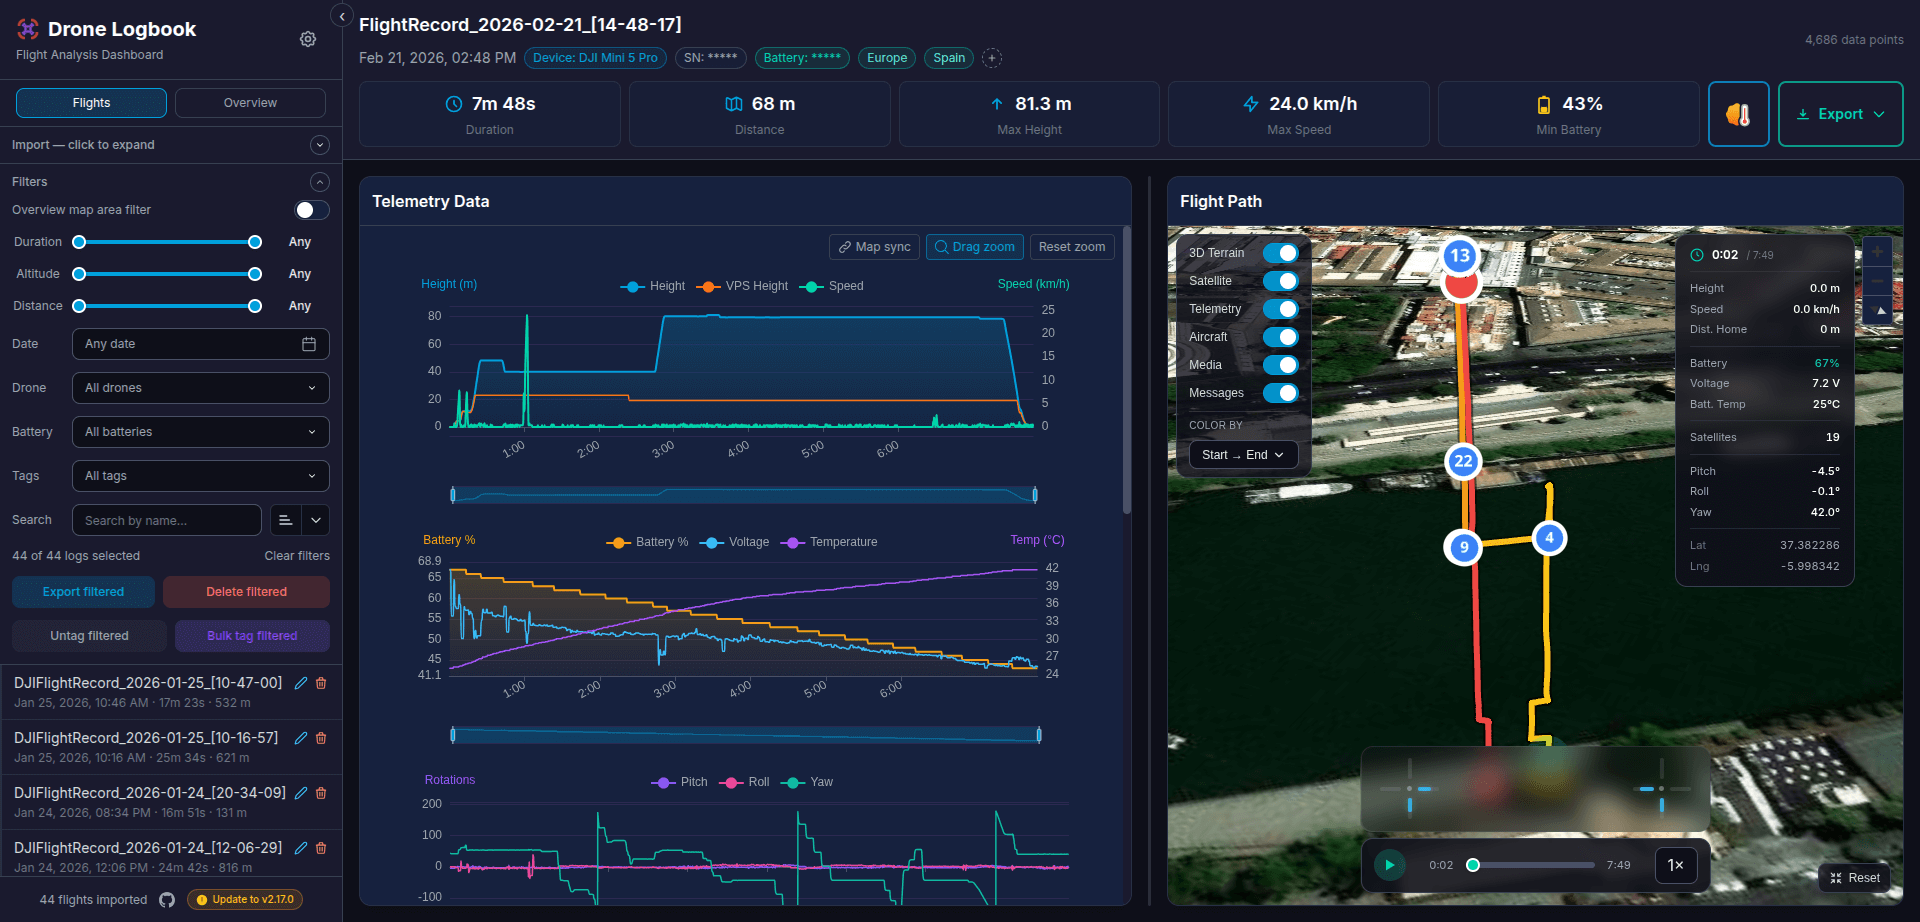
Your drone logs at a glance!
STEP 12
Your drone flight records at a glance!
Enjoy Open Dronelog on your Asustor NAS!
This post was updated on Tuesday / September 29th, 2026 at 8:41 AM