
As you well know, IPKG, or the Itsy Package Management System, is a lightweight package management system designed for embedded devices and it resembles Linux Debian’s dpkg. It was used in the Unslung operating system for the Linksys NSLU2 (Optware), in OpenWrt, Openmoko, webOS, Gumstix, the iPAQ, QNAP NAS appliances and elsewhere; as of early 2017 it can still be used for Synology NAS DSM appliances and in the LuneOS operating system (although opkg is an increasingly common replacement).
As usual, for package management systems, ipkg’s ipkg command-line utility allows for the installation of new packages, the upgrading or removal of existing packages, querying package repositories for available packages, and listing already installed packages. The development for this project has been discontinued. Many projects which formerly used IPKG have adopted the IPKG fork opkg as a replacement.
I just wanted to share how I installed IPKG on my Synology DS718+ following a Synology Community post by user @plexflixler. You can also install it on different Synology devices by following the instructions below. To be clear, the installation process should be the same for other Synology Disk Stations and unfold without any problem.
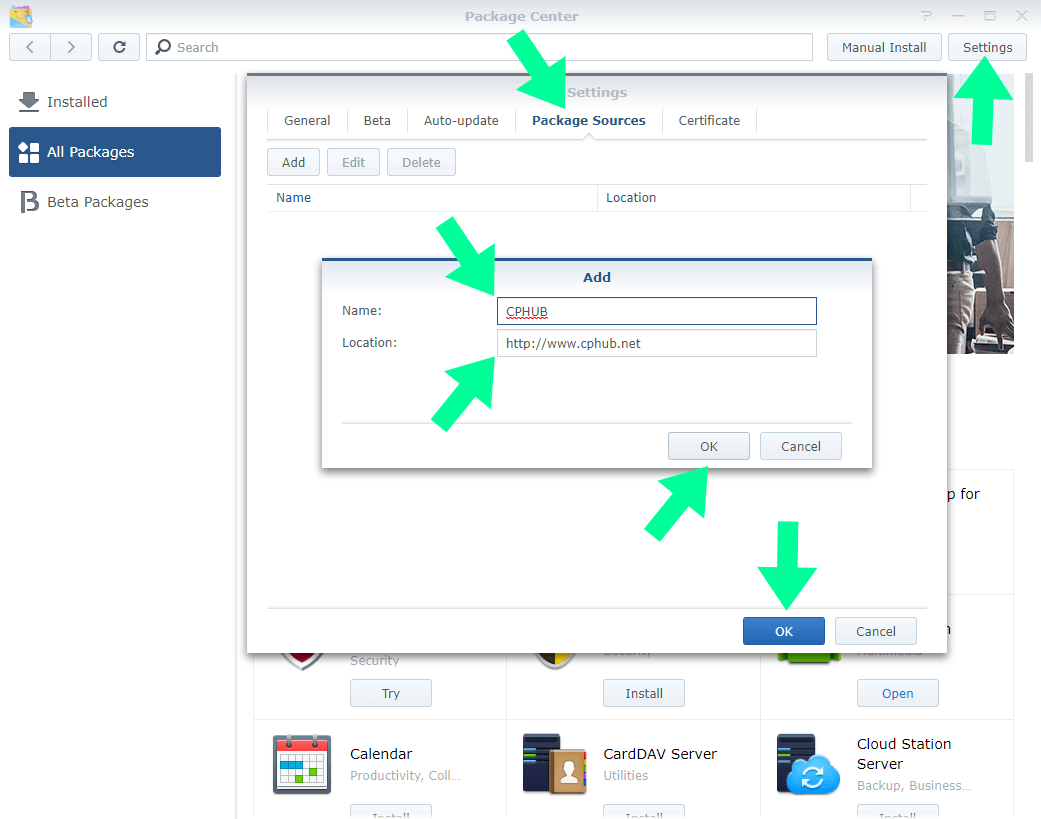
Open the Synology Package Center and at the top right of the page, click on “Settings“. A new pop up window will open. Click Package Sources tab. On the Name field type in CPHUB. On the Location field type in https://www.cphub.net – Follow the instructions in the image below.
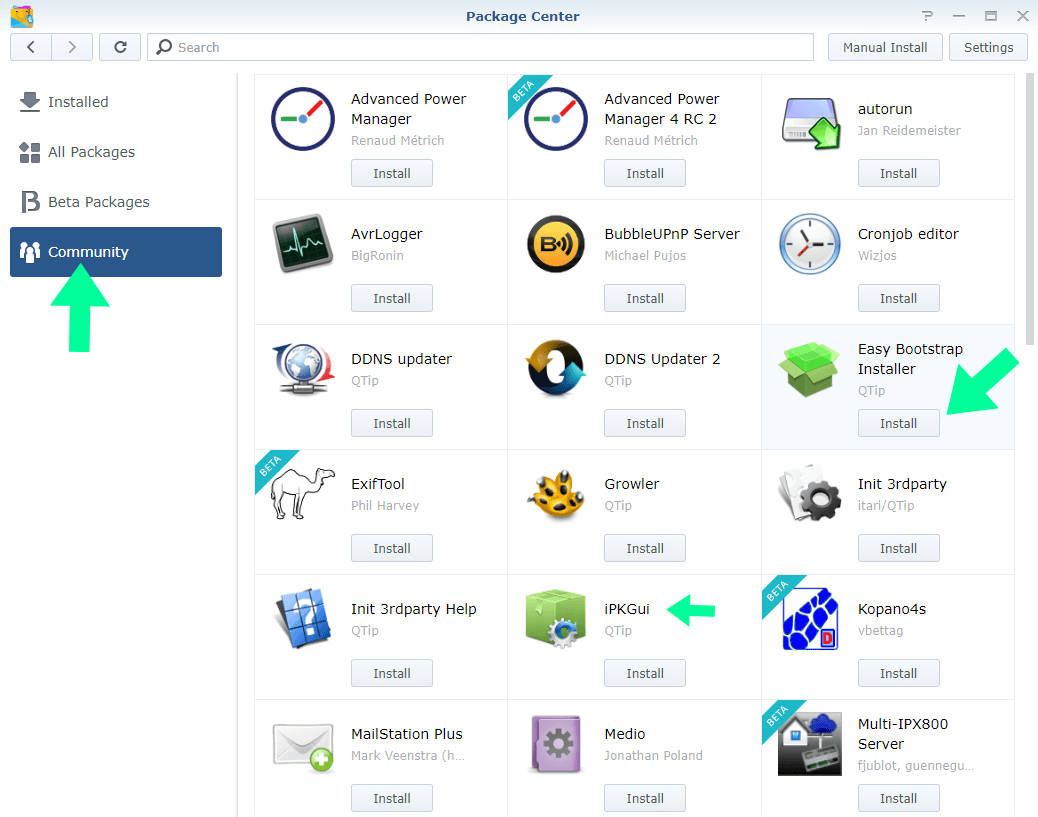
After clicking OK, you should see a new “Community” tab in the package center on the left. Find and install “Easy Bootstrap Installer” from QTip. There is also a GUI Version if you’d prefer, called “iPKGui“, also from QTip. Follow the instructions in the image below:
IPKG is now installed on your Synology NAS device. The executables files are located in “/opt/bin/“. You can SSH into your NAS and use it. However, the directory has not yet been added to the PATH variable, so to use it you would need to use the full path “/opt/bin/ipkg“. You can add the directory to the PATH variable using the following command:
export PATH=”$PATH:/opt/bin”
However, this would only add the directory to PATH for the current session. To make the change permanent, you need to edit the “/etc/profile“. To do that, I used the “nano” editor, but I had to install it first. Run the following commands:
sudo /opt/bin/ipkg update
sudo /opt/bin/ipkg install nano
sudo /opt/bin/nano /etc/profile
Now find the PATH variable. It should look something like this:
PATH=/sbin:/bin:/usr/sbin:/usr/bin:/usr/syno/sbin:/usr/syno/bin:/usr/local/sbin:/usr/local/bin
At the end of this string, just append “:/opt/bin“ (don’t forget the colon). Then save and close the file (CTRL + “O”, then Enter, then CTRL + “X”).
Note that this will not automatically update your PATH for the current session. To do this, you can run:
source /etc/profile
To check whether it worked, enter the command:
echo $PATH | tr “:” “\n” | nl
You should see the entry for “/opt/bin” there. Now you’re all set. I hope this little guide will help those of you who want to install IPKG on Synology Nas.
UPDATE 18.01.2020
Here https://github.com/Entware/Entware/wiki/Install-on-Synology-NAS you can install Entware.
This post was updated on Tuesday / November 1st, 2022 at 6:14 AM