

Glances is a cross-platform monitoring tool which aims to present a large amount of monitoring information through a curses or Web based interface. The information dynamically adapts depending on the size of the user interface. In this step by step guide I will show you how to install Glances on your Asustor NAS using Docker & Dockhand.
STEP 1
Please Support My work by Making a Donation.
STEP 2
Install Dockhand using my step by step guide. If you already have Dockhand installed on your Asustor NAS, skip this STEP. ⚠️Attention: Make sure you have installed the latest Dockhand version.
STEP 3
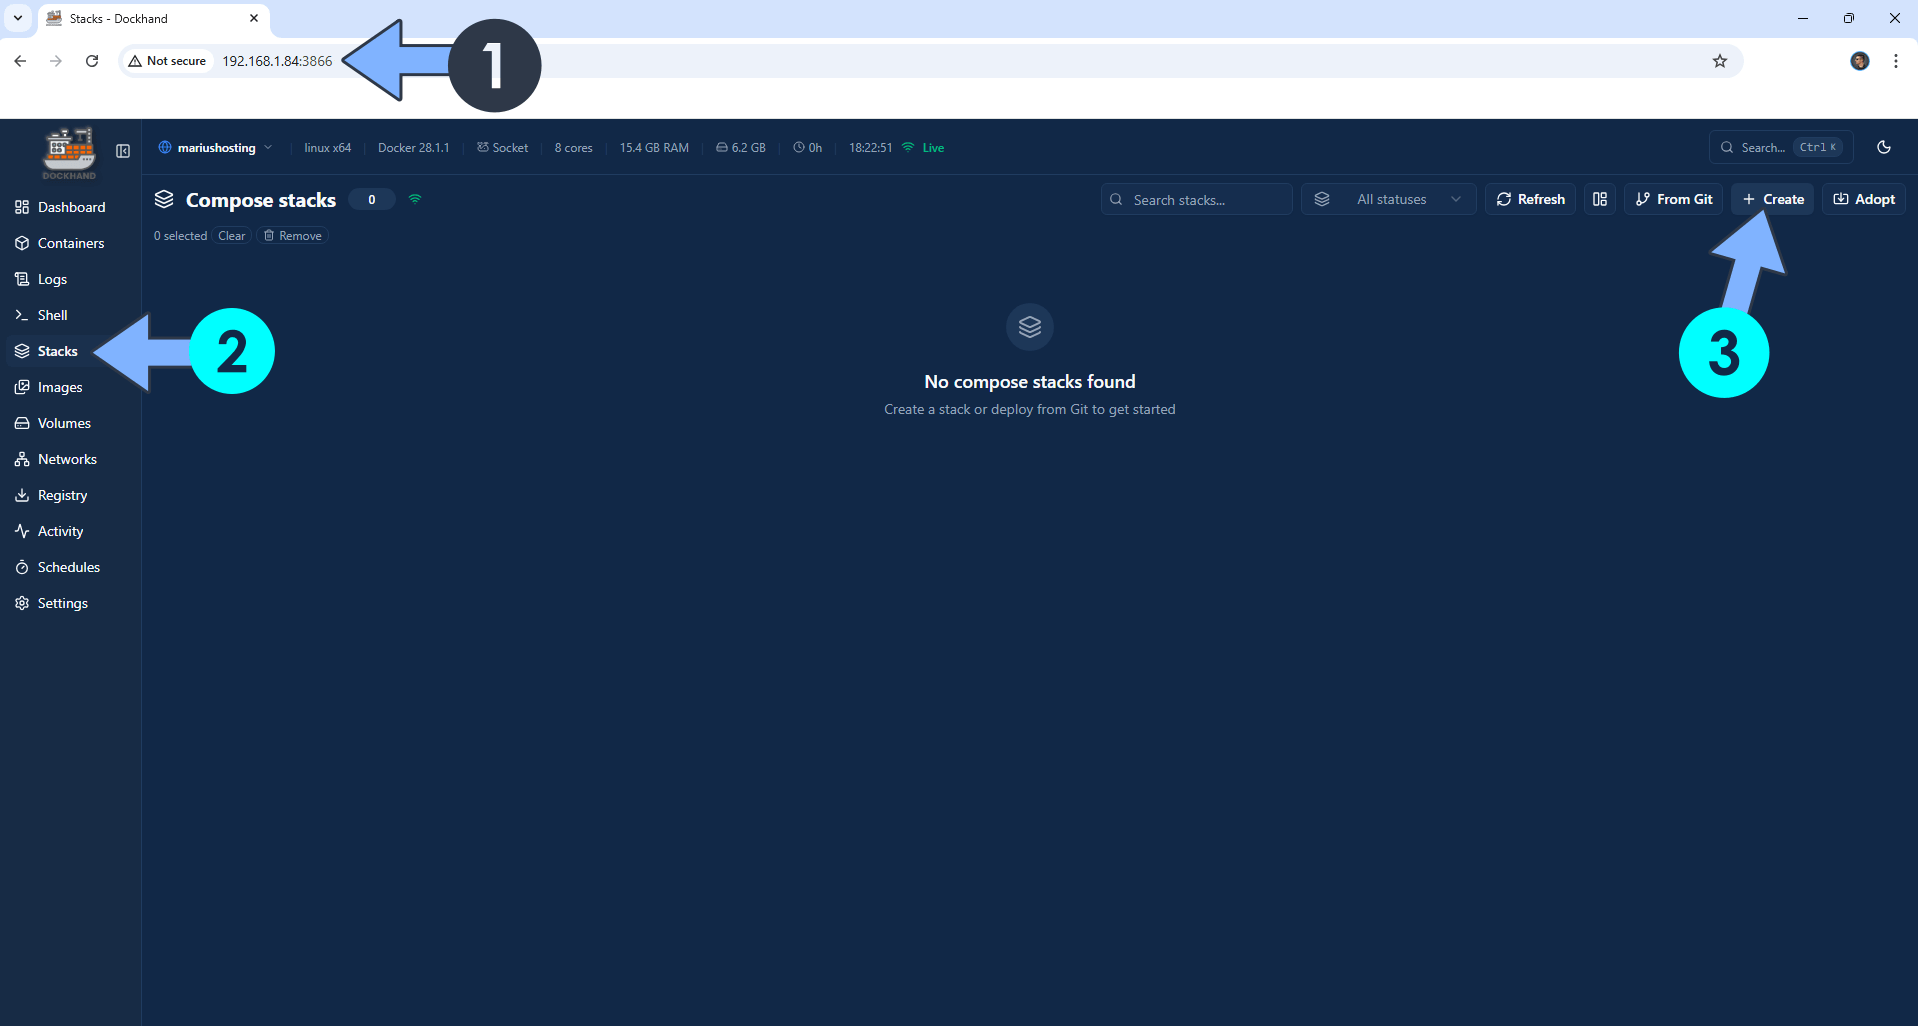
Open your browser and type in http://asustor-ip-address:3866 to connect to your Dockhand container. On the left sidebar, click Stacks then + Create. Follow the instructions in the image below.
STEP 4
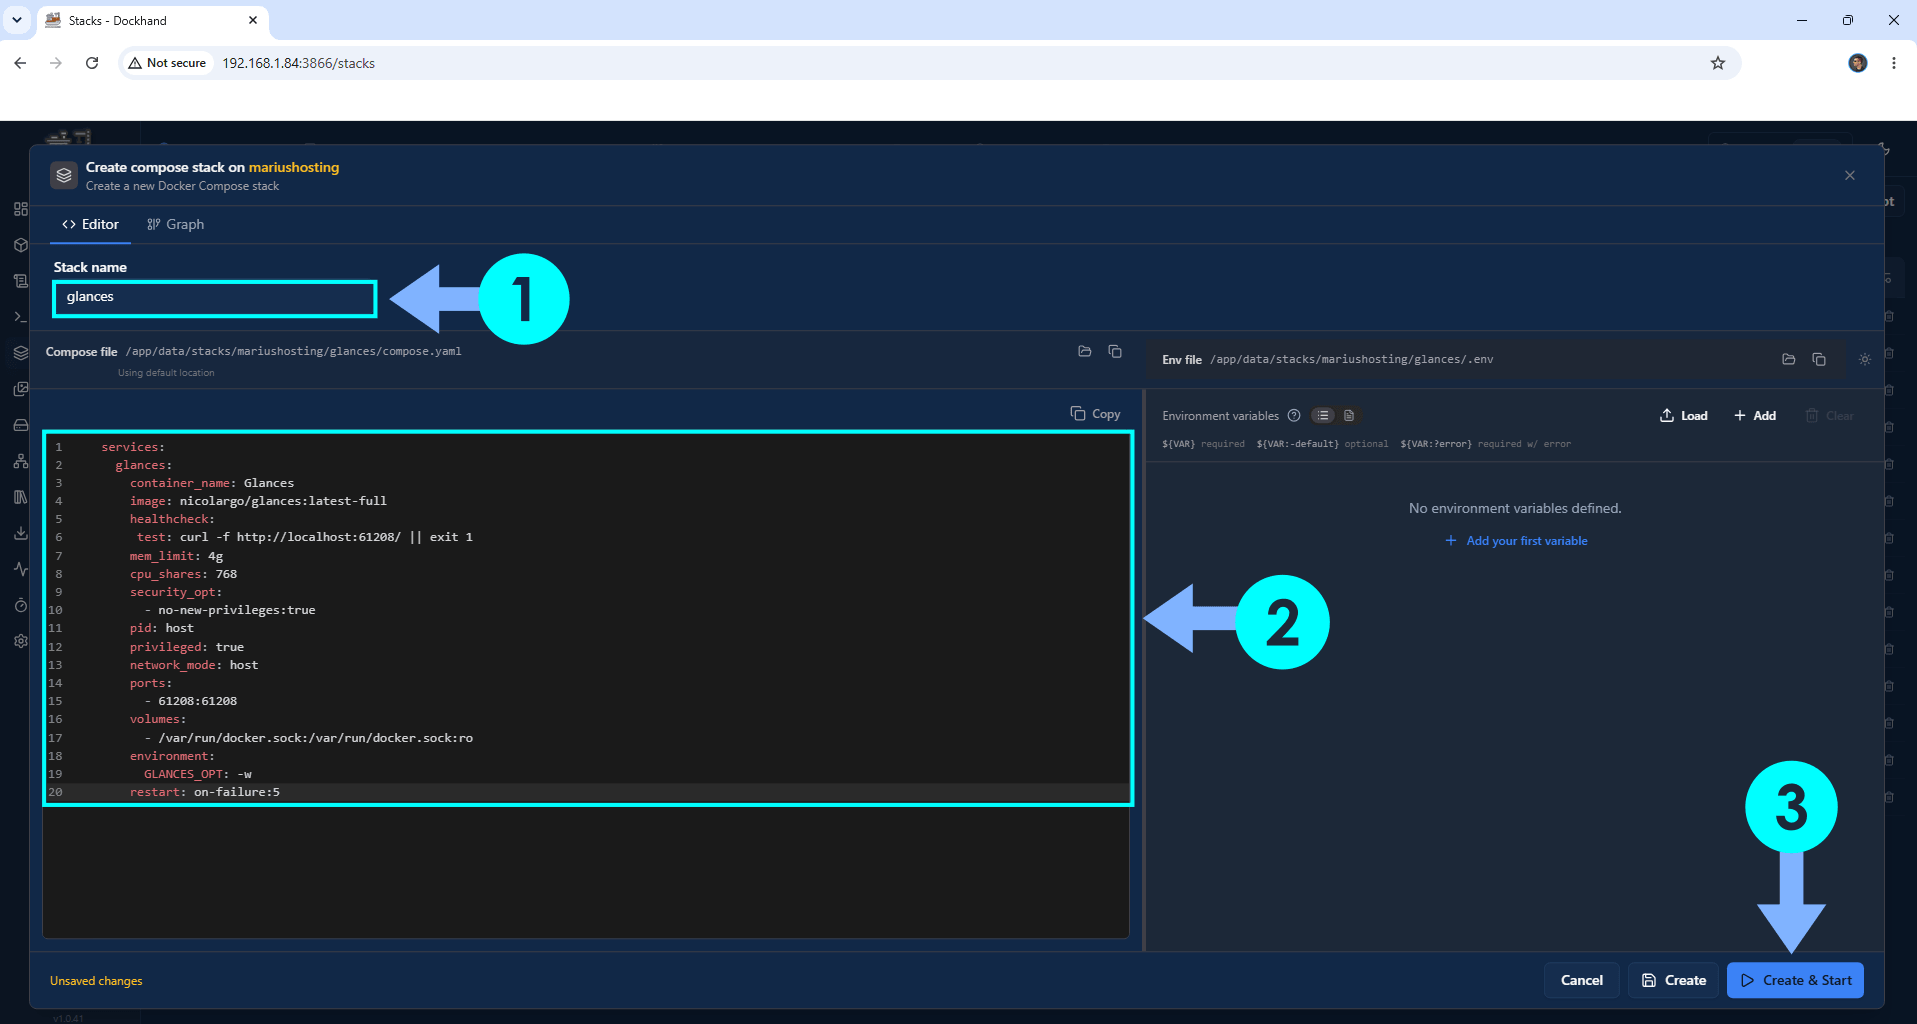
In the Stack name field, type in glances. ⚠️Warning: Type in the name in lowercase letters. The installation process can take up to a few seconds/minutes. It will depend on your Internet speed connection. Follow the instructions in the image below.
services:
  glances:
    container_name: Glances
    image: nicolargo/glances:latest-full
    healthcheck:
     test: curl -f http://localhost:61208/ || exit 1
    mem_limit: 4g
    cpu_shares: 768
    security_opt:
      - no-new-privileges:true
    pid: host
    privileged: true
    network_mode: host
    ports:
      - 61208:61208
    volumes:
      - /var/run/docker.sock:/var/run/docker.sock:ro
    environment:
      GLANCES_OPT: -w
    restart: on-failure:5
STEP 5
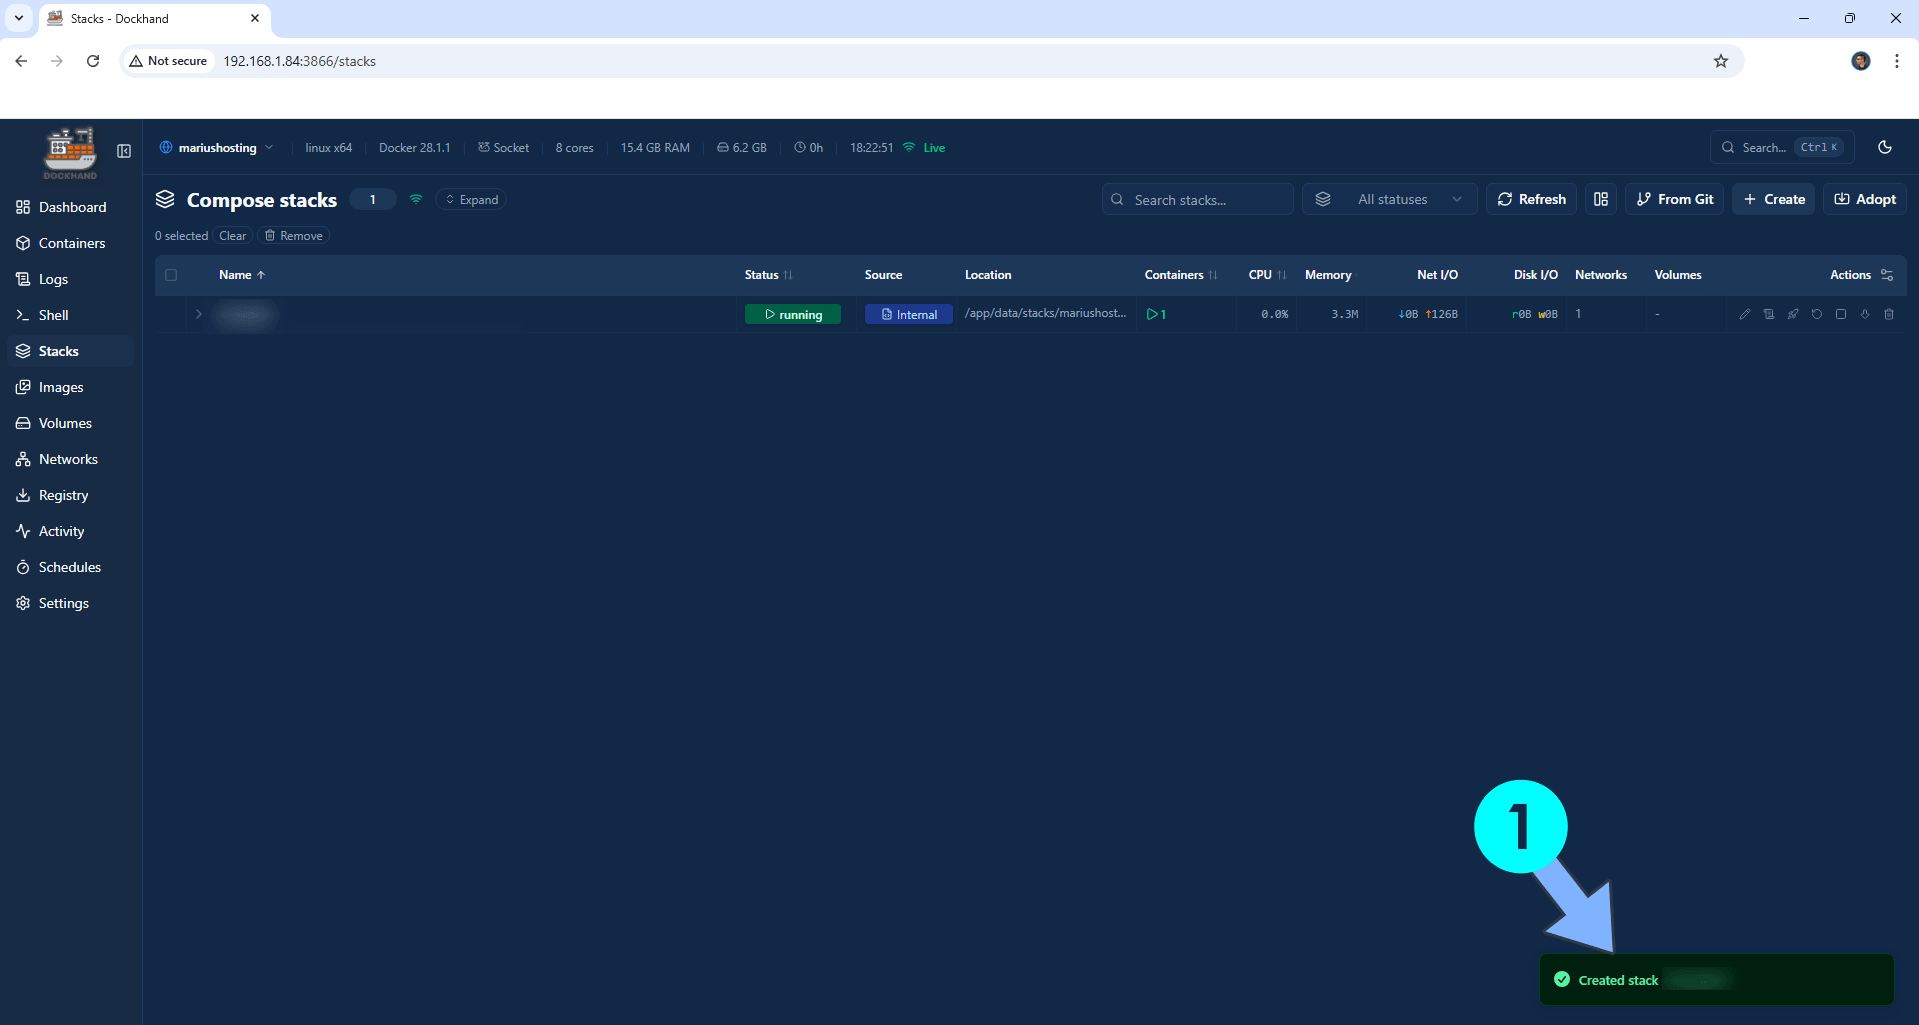
If everything goes right, you will see the following message at the bottom right of your screen: “Created stack “glances”“.
STEP 6
🟢Please Support My work by Making a Donation. Almost 99,9% of the people that install something using my guides forget to support my work, or just ignore STEP 1. I’ve been very honest about this aspect of my work since the beginning: I don’t run any ADS, I don’t require subscriptions, paid or otherwise, I don’t collect IPs, emails, and I don’t have any referral links from Amazon or other merchants. I also don’t have any POP-UPs or COOKIES. I have repeatedly been told over the years how much I have contributed to the community. It’s something I love doing and have been honest about my passion since the beginning. But I also Need The Community to Support me Back to be able to continue doing this work.
STEP 7
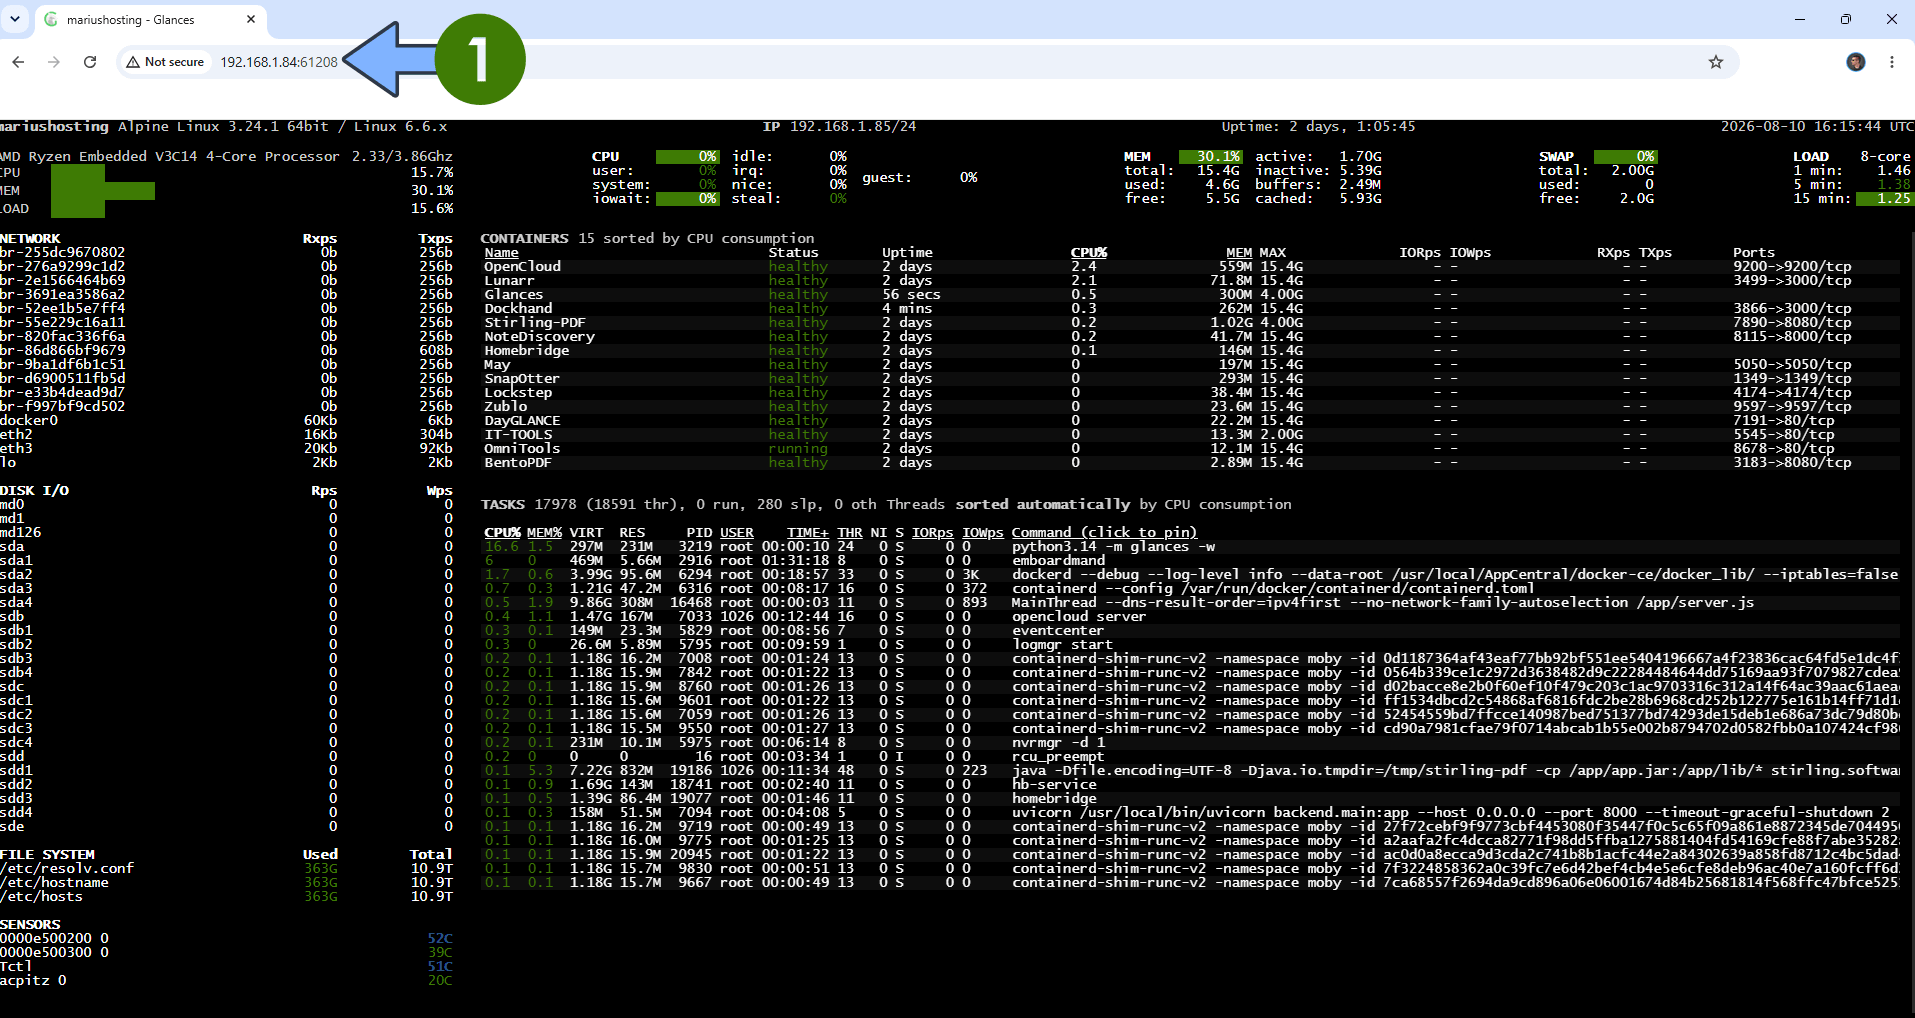
The installation process can take up to a few seconds/minutes. It will depend on your Internet speed connection. Now open your browser and type in http://asustor-ip-address:61208 Follow the instructions in the image below.
Enjoy Glances on your Asustor NAS!
This post was updated on Thursday / October 1st, 2026 at 2:39 PM