Your mobile phone won’t to connect to your Wireless router? Every time you try to connect through your phone, do you get the error message “Failed to connect to Network“? Is it an Android smartphone? And have you recently updated your Android smartphone to Android 10? By now you must have tried so many solutions you found online, but none worked, right? Well, here is the one and only solution that will solve the problem with your Android phone not connecting to your Wi-Fi for good.
STEP 1
Please Support My work by Making a Donation.
STEP 2
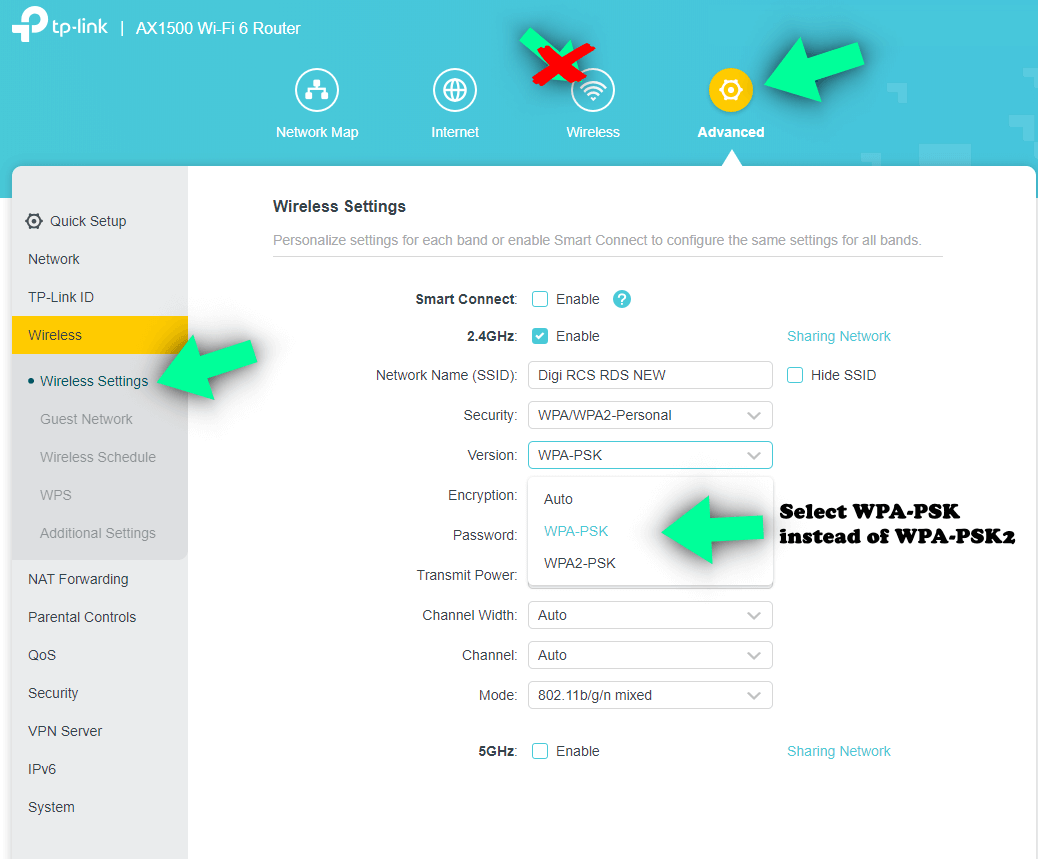
Go to your router Settings and search for Wireless Settings in Advanced Options (not just Wireless, but the “Advanced Wireless Settings”). Change Security Version from WPA2-PSK to WPA-PSK then save. Remember, each router has a different design (the one presented in this image below is a TP-LINK).

STEP 3
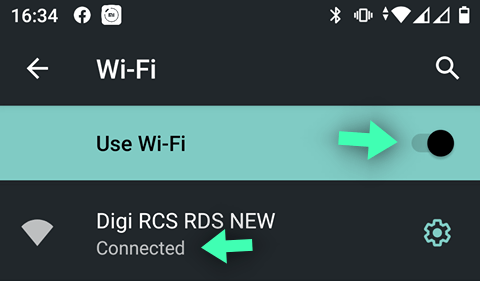
After changing the security version in your Advanced Wireless Settings (WPA2-PSK to WPA-PSK), go back to your Android Phone, delete all saved networks on your Wi-Fi Settings area and scan again to find your Wireless network. Once you have fond it, connect with your password and your phone will be able to connect to your Wireless router like it used to, without any problem.

Note: Why does this happen? Some of the cheaper Android mobile phone models are not capable of supporting WPA2 due to hardware limitations or erroneous software configurations or bugs.
What is the difference between WPA and WPA2? WPA (Wi-Fi Protected Access) and WPA2 are two of the security measures that can be used to protect wireless networks. WPA uses TKIP (Temporal Key Integrity Protocol), while WPA2 is capable of using TKIP or the more advanced AES algorithm. For the majority of users, WPA is enough. You could also fall back to WPA if your access point routinely experiences high loads and the network speeds suffer as a result of the use of WPA2.
This post was updated on Wednesday / May 20th, 2020 at 7:16 PM
