For one reason or another, one day you may need to change your Synology Account. The change involves changing your current email to a new email. This operation will cease all activities linked to Synology in the respective account such as DDNS services “synology.me”, the Synology C2 cloud service, QuickConnect ID, so be careful before continuing and make sure there is a good reason to change your account.
STEP 1
Please Support My work by Making a Donation.
STEP 2
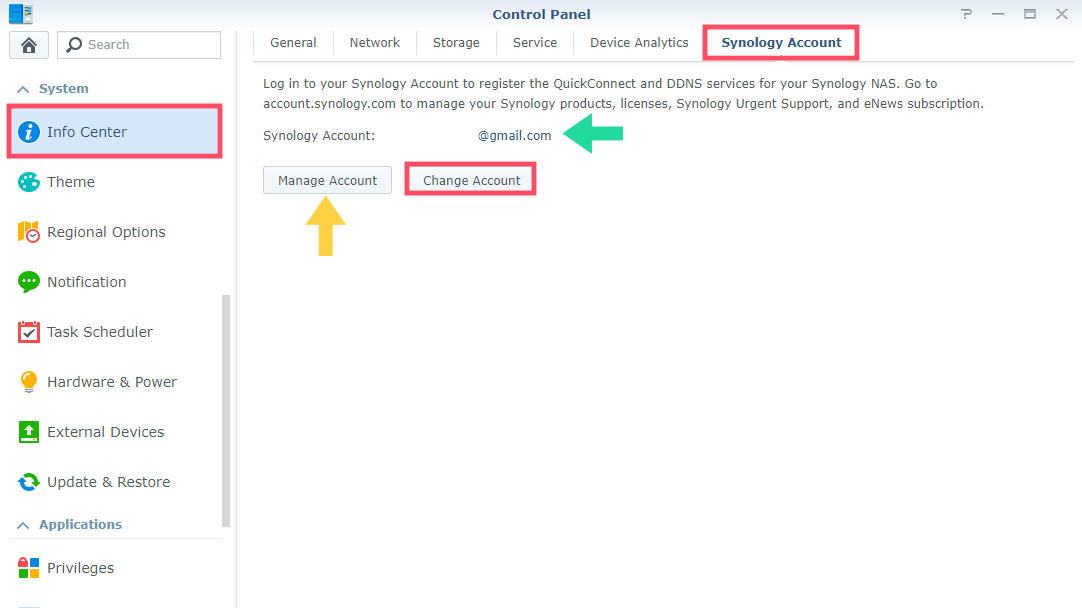
DSM (Synology NAS). Go to Control Panel / Info Center / Synology Account. The email you will find in this section is the email you used to register your Synology account when you installed your DSM for the first time. You can click “Change Account” to change your registration email or “Manage Account” to manage your current Synology Account. Any of the two options you may click will redirect you to your Synology account web page.
STEP 3
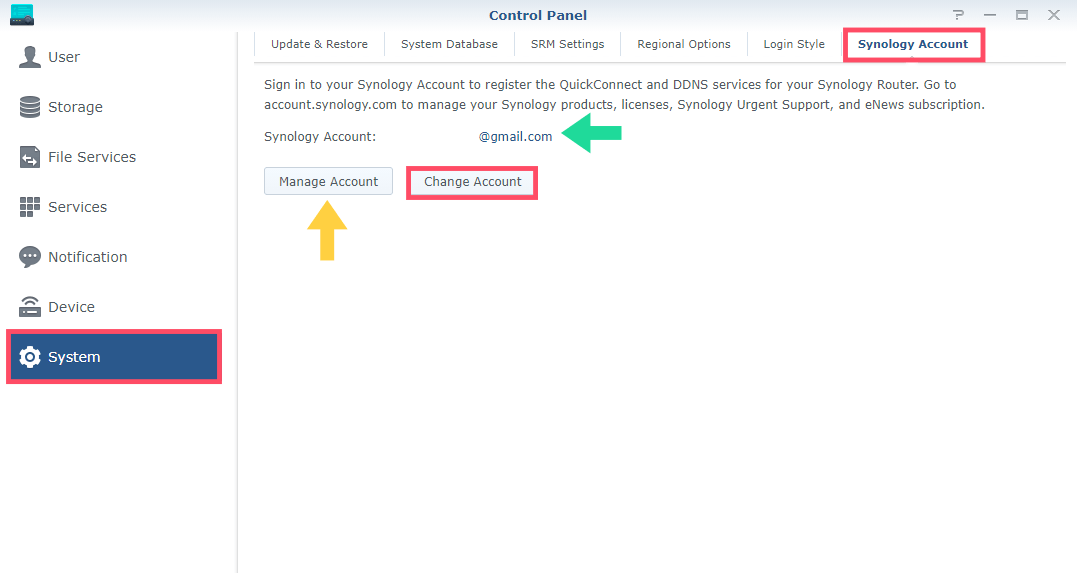
SRM (Synology Router). Go to Control Panel / System / Synology Account. The email you will find in this section is the email you used to register your Synology account when you first installed SRM. You can click “Change Account” to change your registration email or “Manage Account” to manage your current Synology Account. Any of the two options you may click will redirect you to your Synology account web page.
Note: Logging out of your Synology Account may result in the suspension of multiple associated services from Synology (e.g. QuickConnect, DDNS, C2 cloud). Other services that use QuickConnect ID as username are also suspended until you create a new QuickConnect ID. For example, the different applications: Drive, DS Video, DS Files etc.
Note: If you want to see your current Synology Account and manage it, just go to the Synology Account website.
This post was updated on Friday / November 20th, 2020 at 11:35 PM