
Do you know how to change your network name on Windows 10? Changing the name of your Internet access network on Windows 10 is actually not very user friendly. All connections using Ethernet (wired) cable use a generic name such as Network, Network 1, Network 2 etc. The situation is different for wireless networks because they use the name of the Wi-Fi network. But what about the wired Network? For example, I have two Internet connections from two different ISPs. Windows 10 automatically named my first wired Internet connection ‘Network’, and my second one ‘Network 2’.
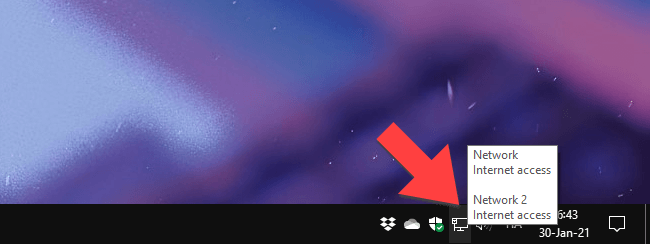
These past few days I have received quite a few emails from people in the same situation as me, and today I decided to explain how to fix this and change the wired Network name on Windows 10.
STEP 1
Please Support My work by Making a Donation.
STEP 2
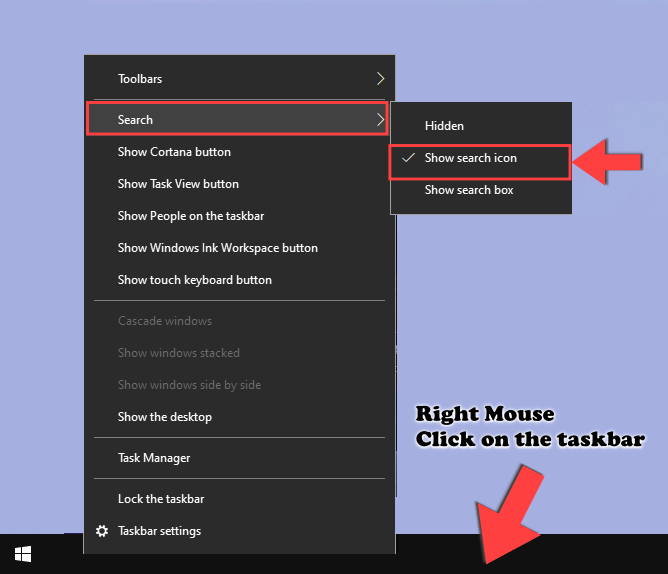
Right mouse click on the Windows taskbar / Search / Select Show search icon. Follow the instructions in the image below.
STEP 3
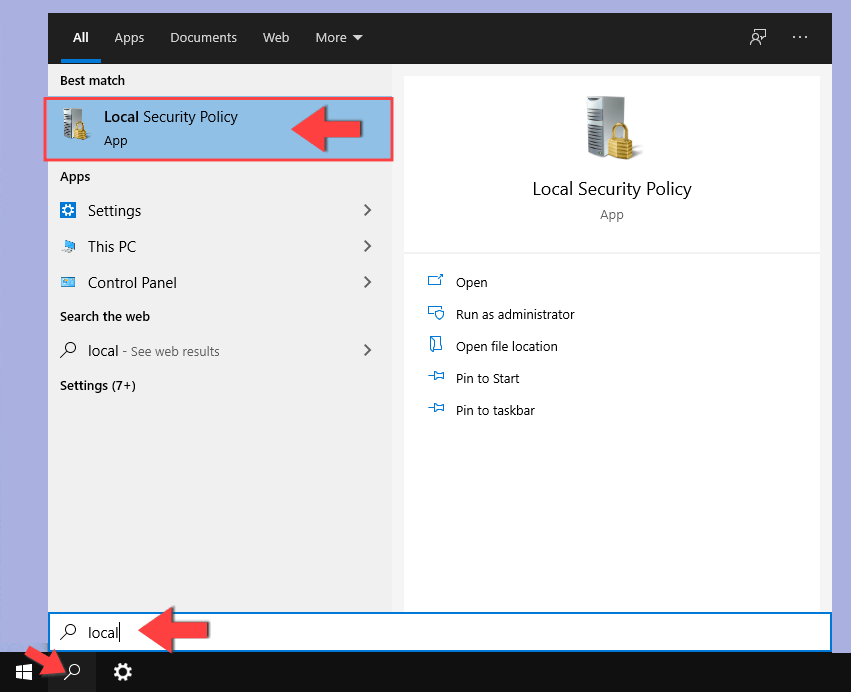
Click on the search icon and type in local. Open the Local Security Policy App. Follow the instructions in the image below.
STEP 4
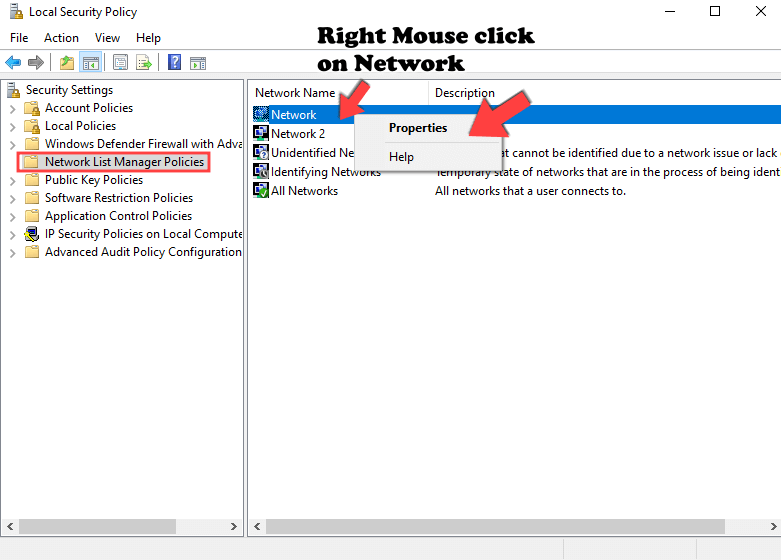
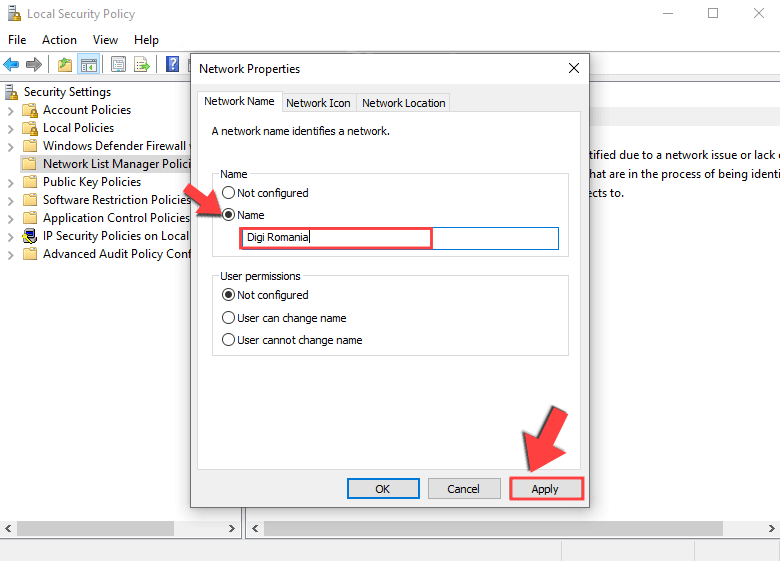
Once you open the Local Security Policy App, a new window will open. In the left panel, click on “Network List Manager Policies“. On the right you will see your Network, or Networks if you have more than one. Right mouse click on Network, then Properties. Follow the instructions in the image below.
STEP 5
Once you click on Properties on STEP 4, a new window will open. Change your Network name to your preferred name, then click Apply. For example, I gave my network the same name as my ISP. Follow the instructions in the image below.
STEP 6
🟢Please Support My work by Making a Donation. Almost 99,9% of the people that install something using my guides forget to support my work, or just ignore STEP 1. I’ve been very honest about this aspect of my work since the beginning: I don’t run any ADS, I don’t require subscriptions, paid or otherwise, I don’t collect IPs, emails, and I don’t have any referral links from Amazon or other merchants. I also don’t have any POP-UPs or COOKIES. I have repeatedly been told over the years how much I have contributed to the community. It’s something I love doing and have been honest about my passion since the beginning. But I also Need The Community to Support me Back to be able to continue doing this work.
STEP 7
Enjoy! Now your Network will be more organized and personalized.
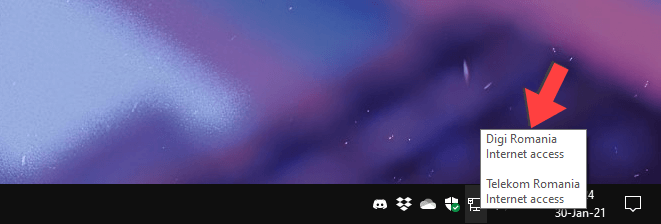
Note: From now on it will be very easy to recognize which ISP Network is offline if you have more than one.
This post was updated on Sunday / August 24th, 2025 at 2:51 PM
