Have you installed WordPress on your Synology NAS and want to use your website domain name instead of your Synology DDNS or LAN IP to access your website? You want your blog or site to be reachable from all parts of the world via a secure SSL / HTTPS connection? Do you want to host your site directly from home without having to pay for increasingly expensive hosting services?
Note: This guide works for all types of Synology NAS including 2-Bay, 4-Bay, 5-Bay etc. models, and can be applied to DSM 6.2 and future versions too.
Warning: This guide works perfectly on the condition you have a STATIC IP which is essentially a fixed IP. If you do not have a static IP, there are additional steps to do that are not included in the present guide. I advise you to talk to your Internet service provider about this and inquire if you can buy a STATIC IP directly from them. A STATIC IP is an IP that will identify you with the same numerical address every time you access the Internet. If you are a Synology NAS user, the dynamic IP will only complicate the process by making you a victim of other unnecessary services and procedures.
After 24 hours of breaking in my DS718+ Synology NAS, I decided it was time to install WordPress using the official package provided by Synology.
Let’s start from the beginning. First of all, buy a Synology NAS. I strongly recommend the DS718+ or the DS218+ models, although the procedure also works with “older” models too. I recommend these two models because they offer the possibility of upgrading the RAM, and the processor is more powerful than its predecessors.
(Note: Recommendations for which NAS to buy represent my personal opinion at the time the article was written.)
So, to start with, you have to install all the applications shown below which are available in Package Center:
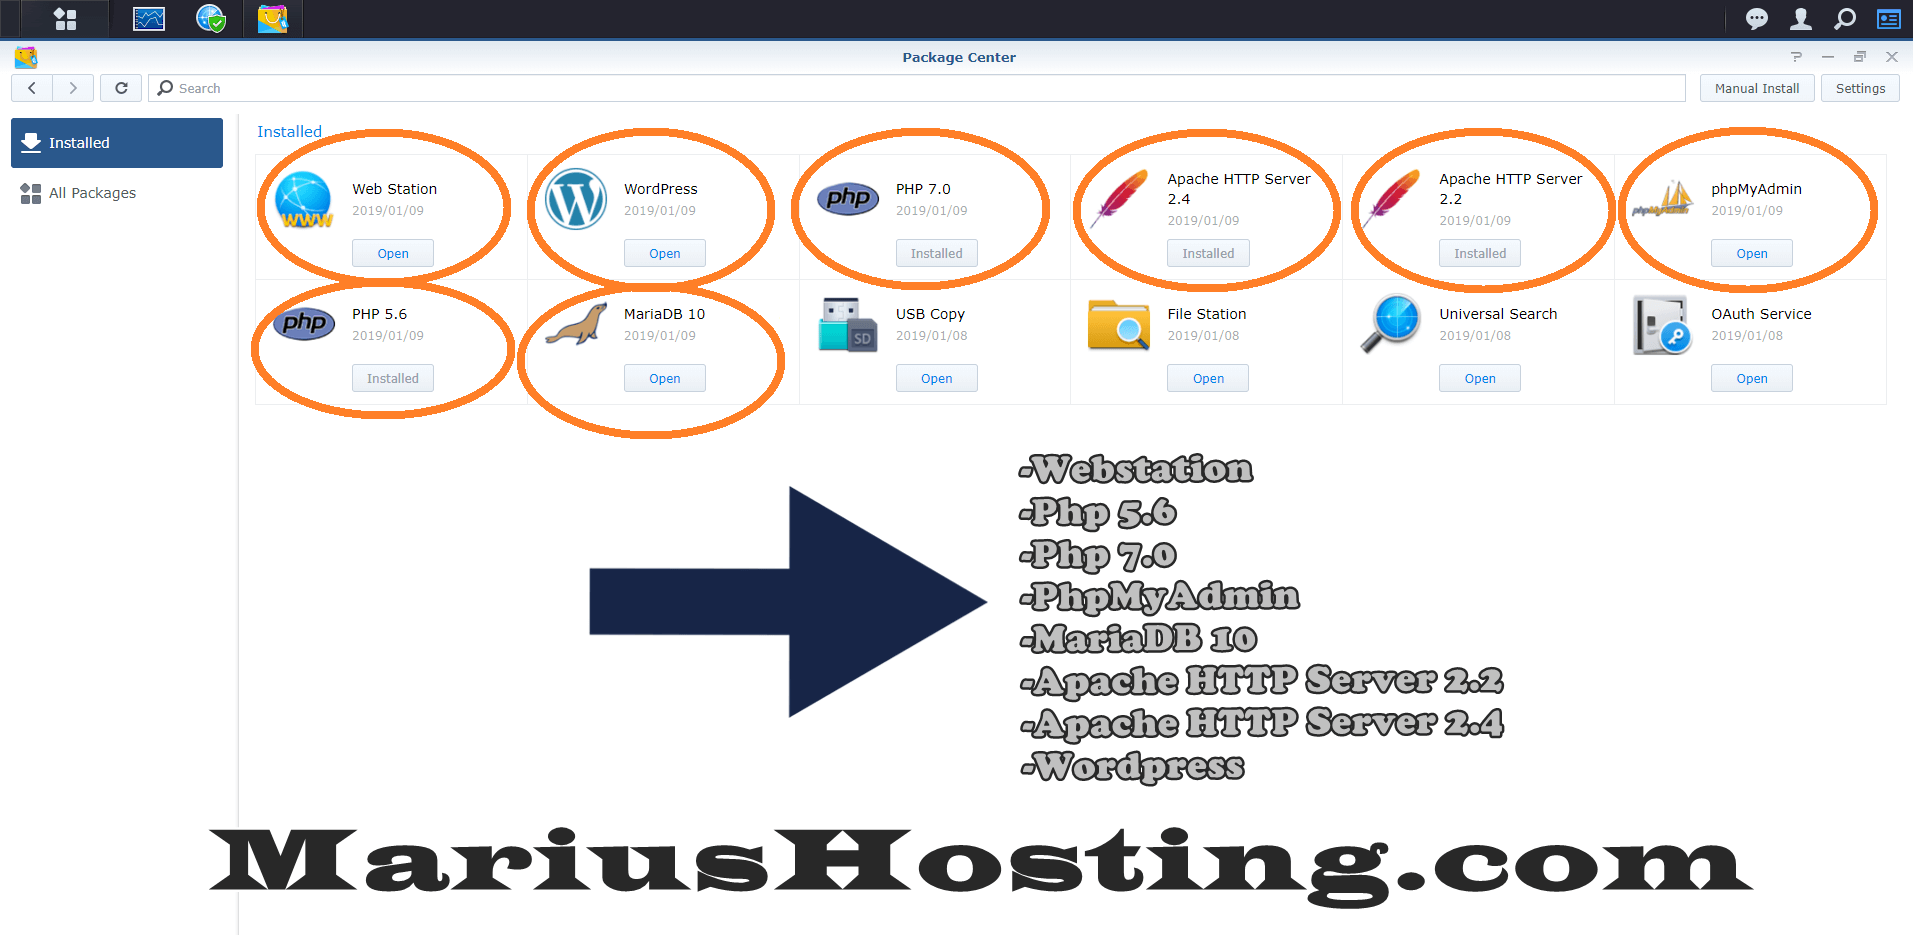
- Web Station
- PHP 5.6
- PHP 7.0
- phpMyAdmin
- MariaDB 10
- Apache HTTP server 2.2
- Apache HTTP server 2.4
- WordPress
Now you have to register a new personal domain name – I registered mine via GoDaddy.
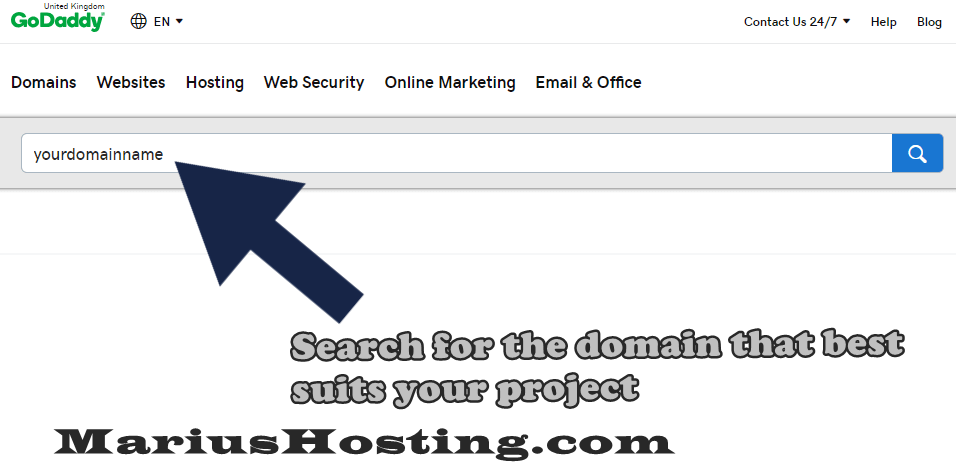
After registering the domain name, go to the appropriate section of the register (in my case GoDaddy) and look for the DNS option.

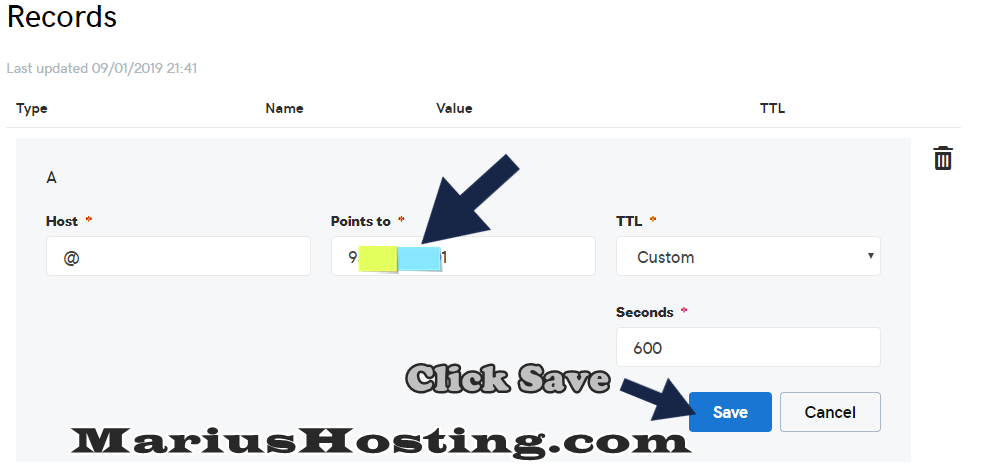
Now all you need to do is change the A records and enter your STATIC IP provided by your Internet service provider.
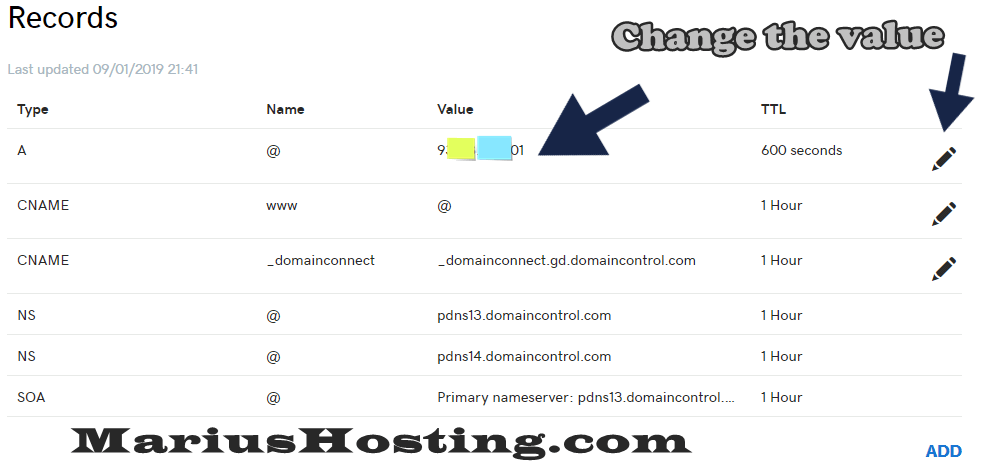
Follow the instructions in the following image scrupulously and hit Save.
Warning: Now go read Paul Barrett’s guide on how to install WordPress. Below I will provide instructions for operating your domain via HTTPS / SSL. But first of all remember to open the following ports on your router in the “Port Forwarding” area in your router settings. After having done so, save the new settings.
Port 80 TCP
Port 80 UDP
Port 443 TCP
Port 443 UDP
Port 5000 TCP
Port 5001 UDP
Port 80 will allow visitors to visit your site via the Internet. Port 443 will allow visitors to visit your site via the protected SSL protocol. Port 5000 is the port for your DSM login page, while port 5001 is the port for your DSM login page in HTTPS / SSL.
Right now I own a D-Link router but most routers will allow you to change these settings and you can do so directly by typing 192.168.0.1 in your browser address bar. Remember to include the local IP of your Synology NAS device in Port Forwarding – the local IP for your Synology NAS will be slightly different. The instructions added to your router settings should look like this:

Now access your DSM and go to Control Panel / Security / Certificate.
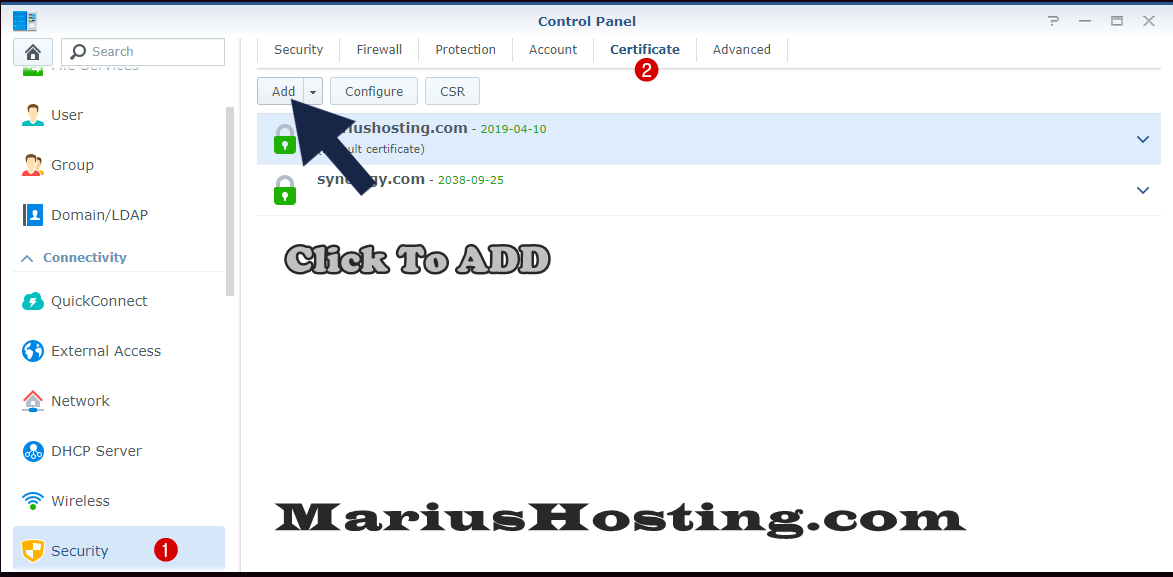
Click on ADD and follow the instructions in the image below:

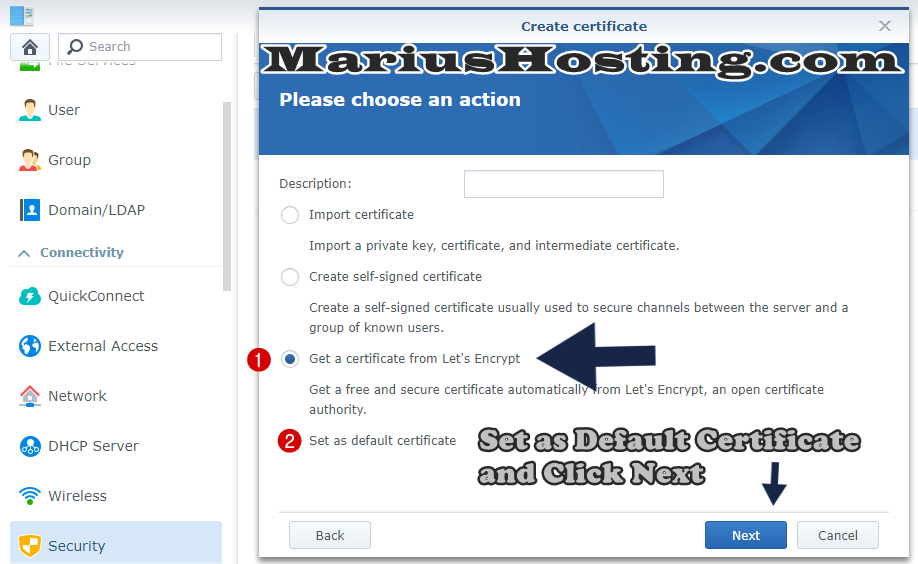
Next follow the instructions in the image below.
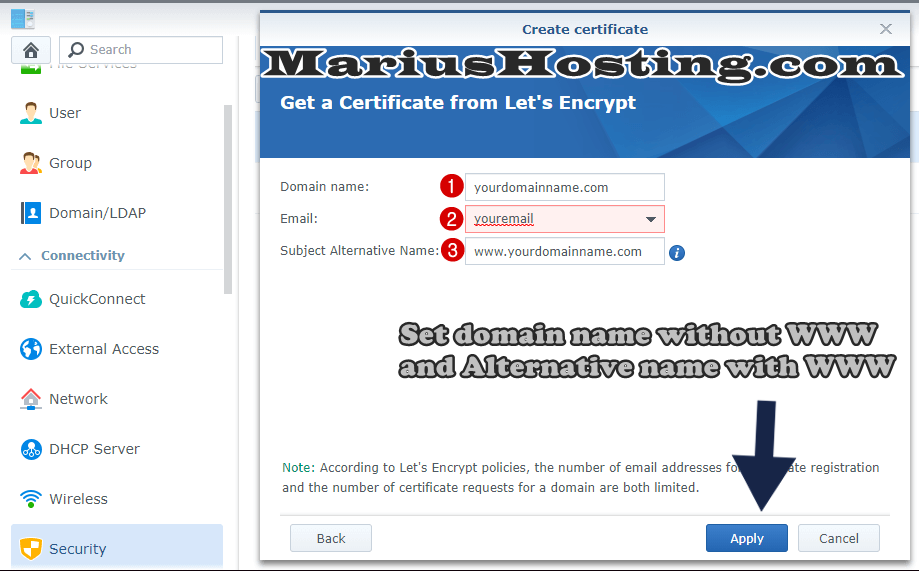
If you already have an SSL certificate bought from a third party, you can import it by entering the CSR. If you want a new SSL certificate that is 100% free, get one by Let’s Encrypt. To get a new certificate from Let’s Encrypt, follow the instructions in the image below.
Type in your domain name, then your email address and then www followed by your domain name. After that, click Save.
Now comes the most important part: go to Configure and carefully follow the instructions in the image below.
FTPS: to access to your DSM via ftp SSL
System Default: to access your DSM via https://yourdomain.com/5001
www.youromain.com to access SSL www version of your domain
yourdomain.com to access SSL of your domain

Now you can connect to your site in the HTTPS version, accessing it more securely over the Internet.
Also remember to edit the .htaccess file in your WordPress folder to force SSL access and insert the following code:
RewriteEngine On
RewriteCond% {HTTPS}! = On
RewriteRule ^ (. *) $ Https: //% {HTTP_HOST}% {REQUEST_URI} [L, R = 301]</code>Remember: these lines of code above need to be written at the beginning of your .htaccess file. Not in the middle, not at the end, but at the very beginning of the file, before # BEGIN WordPress.
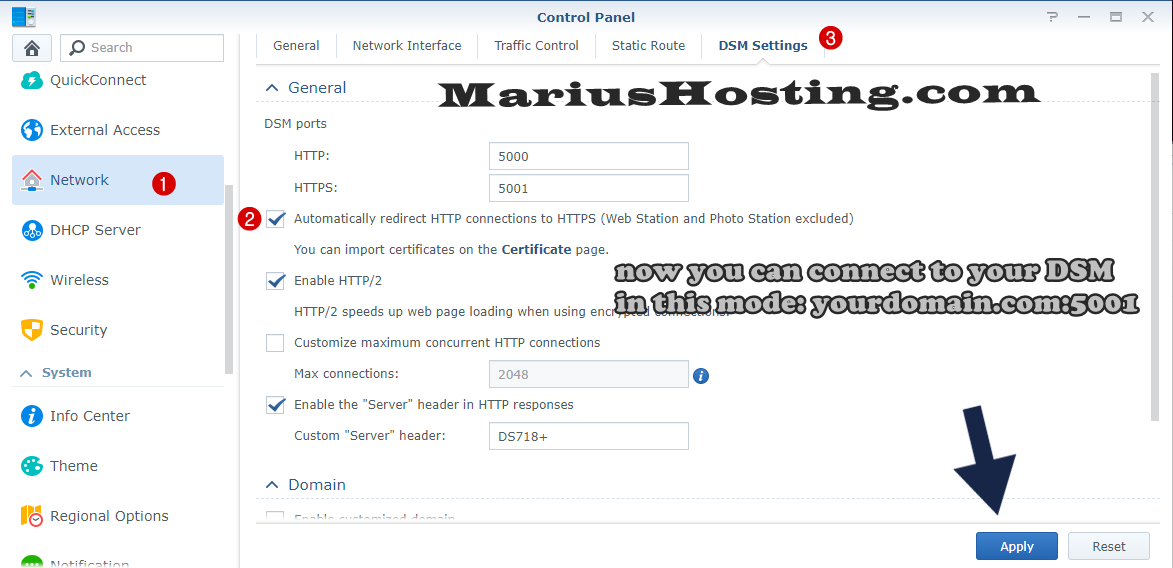
You can access your DSM by entering your https domainame: 5001 But first of all, you will have to follow the instructions in the image below:
To prevent using port numbers to access your Synology NAS (DSM), you can enable Reverse Proxy on your NAS.
You’ll find it it Control Panel -> Application Portal -> Reverse Proxy
Set up https://nas.yourdomain.com to point to https://your_nas_internal_ip:5001
Remember to add the host name in your DNS as an A record, or simply add *.yourdomain.com to point to your external IP.
You should also add the sub-domain to your SSL certificate from Let’s Encrypt, either by creating a new certificate altogether or by removing the old certificate and then adding the sub-domain under alternative name (you can add more than one domain, separated by a semi-colon).
This post was updated on Sunday / August 8th, 2021 at 2:46 AM