What is Chromebook? Chromebook is a laptop, desktop or tablet running the Linux-based Chrome OS as its operating system. The devices are primarily used to perform a variety of tasks using the Google Chrome browser, with most applications and data residing in the cloud rather than on the machine itself. All Chromebooks released since late 2017 can also run Android apps. Some Chromebooks can run Linux apps. By March 2018, Chromebooks made up 60% of computers purchased by schools in the USA. A lot of Chromebook users use Chromebook in conjunction with a Synology NAS for backup.
- Open Chromebook Files / Settings / add new service / SMB file share.
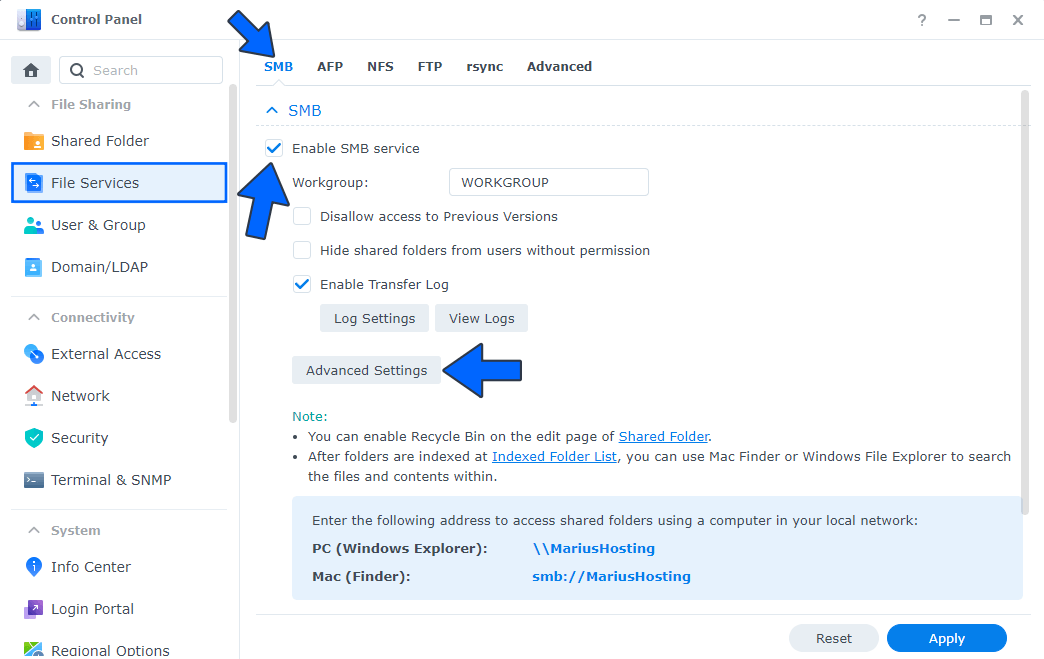
- Log into DSM 7 on your NAS and go to Control Panel / File Services / SMB/AFP/NFS and “Enable SMB service“. Just one check mark after that, click Advanced Settings.
- Follow the instructions in the image below.
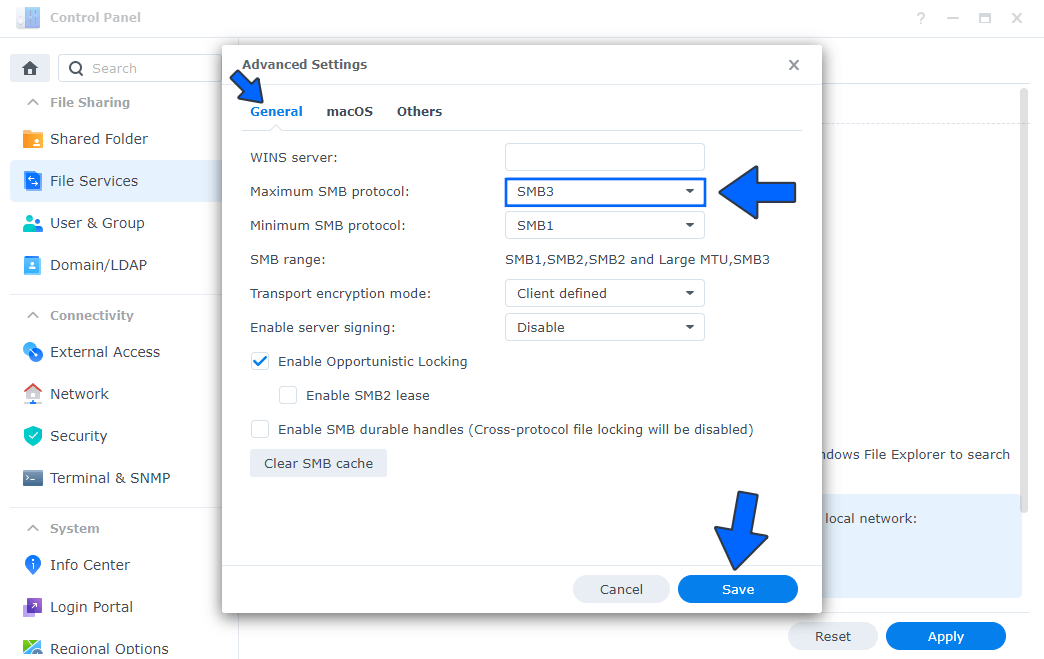
Go to Maximum SMB protocol and set it to SMB3 and, on the Minimum SMB protocol, set SMB1. Then click Apply. After clicking Apply, it is imperative to restart your Synology NAS device. After enabling SMB3 on my Synology NAS, the Chromebook native network share function worked immediately. Follow the instructions in the image below.
To access your NAS files in Chromebook, click on FILE (file folder icon in blue circle) and you should see your Synology NAS device and files.
This post was updated on Wednesday / August 10th, 2022 at 9:43 PM