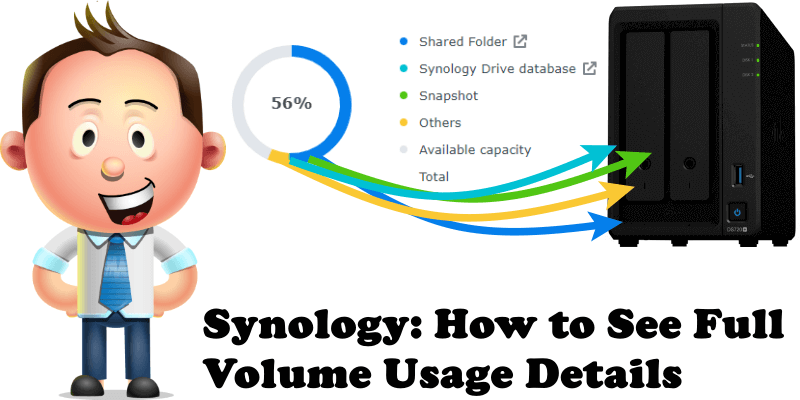
Did you know there are some packages on your Synology NAS that will use up more space than expected? You might notice this when you see your storage space on the disks is unexpectedly full, but you are unable to find where exactly the issue is with the full space on your disks. Today I will teach you how to see the full volume usage details to help you better understand the current usage of a volume. The information that is calculated allows you to find out which service specifically occupies the largest storage capacity and take corresponding actions, for example delete unnecessary data.
STEP 1
Please Support My work by Making a Donation.
STEP 2
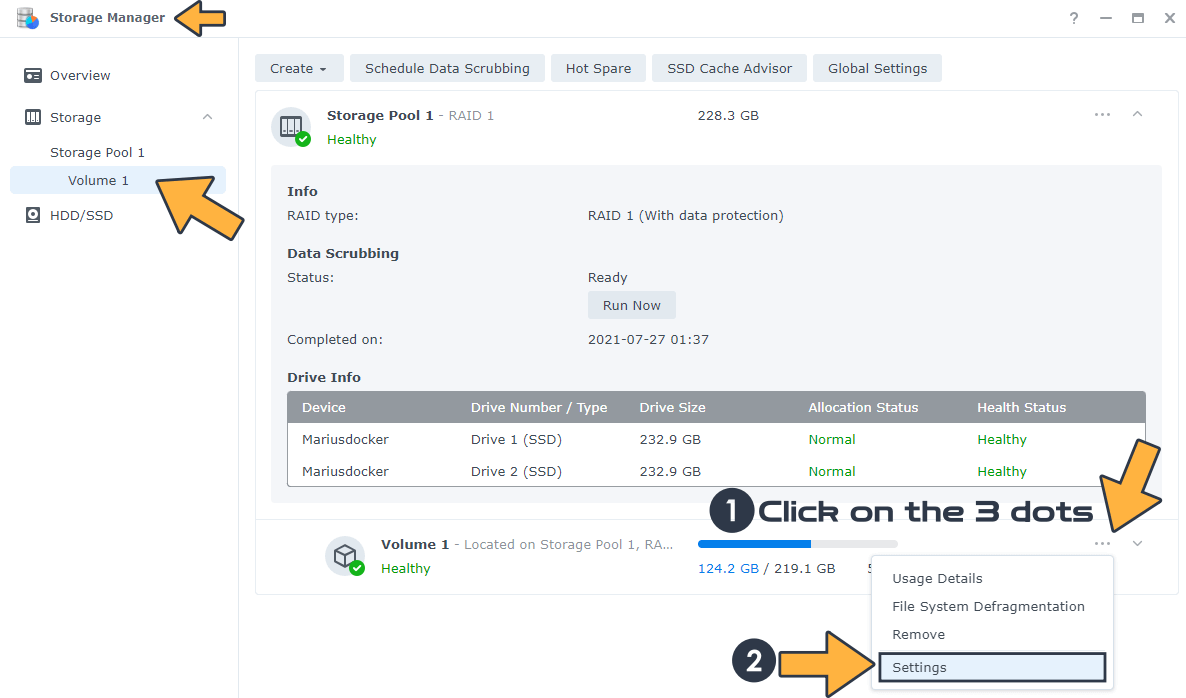
Go to Storage Manager / Select Volume 1 / Click on the 3 dots then Settings. Follow the instructions in the image below. Note: If you have more than one volume, you can select a different volume than Volume 1. For example, Volume 2, Volume 3 etc.
STEP 3
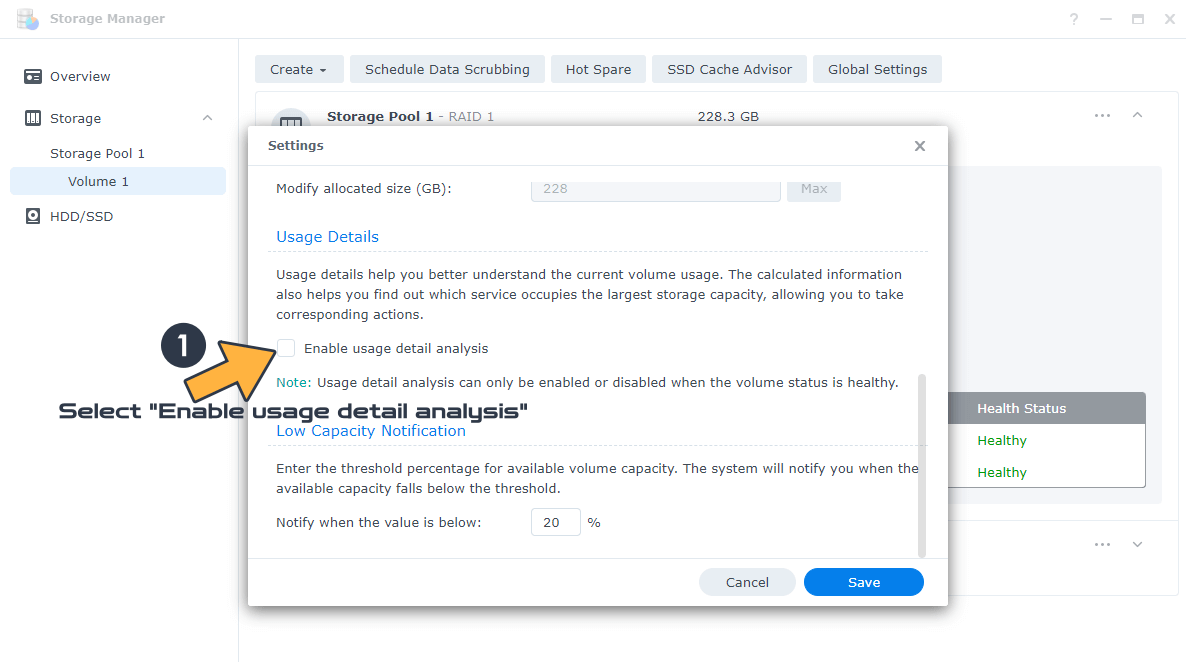
After you click Settings on STEP 2, a new pop up window will open. Scroll down until you find the “Usage Details” area. Check “Enable usage detail analysis“. Follow the instructions in the image below.
STEP 4
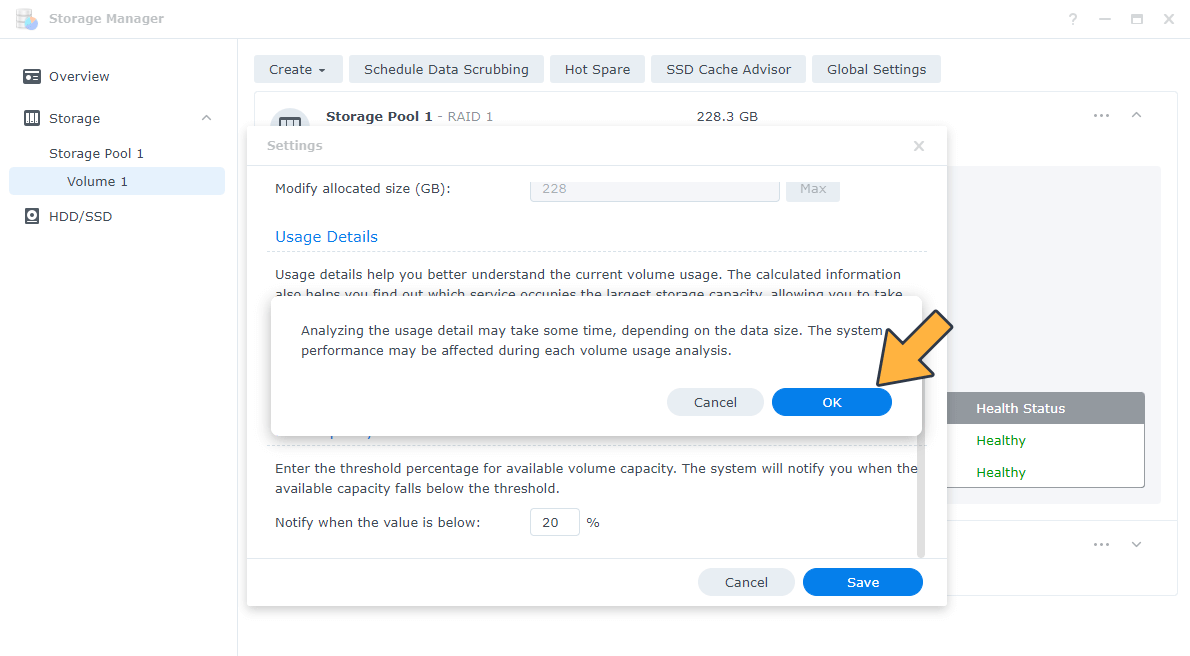
After you check “Enable usage detail analysis” on STEP 3, a new pop up warning message will open. Click OK. Follow the instructions in the image below.
STEP 5
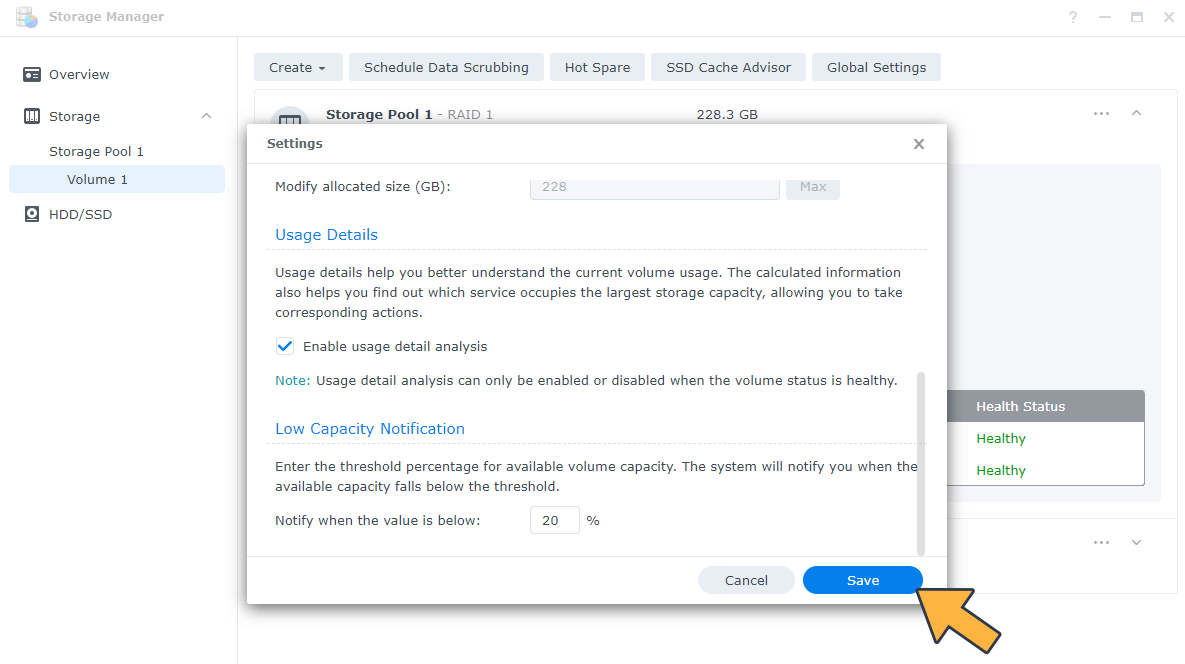
Click Save. Follow the instructions in the image below.
STEP 6
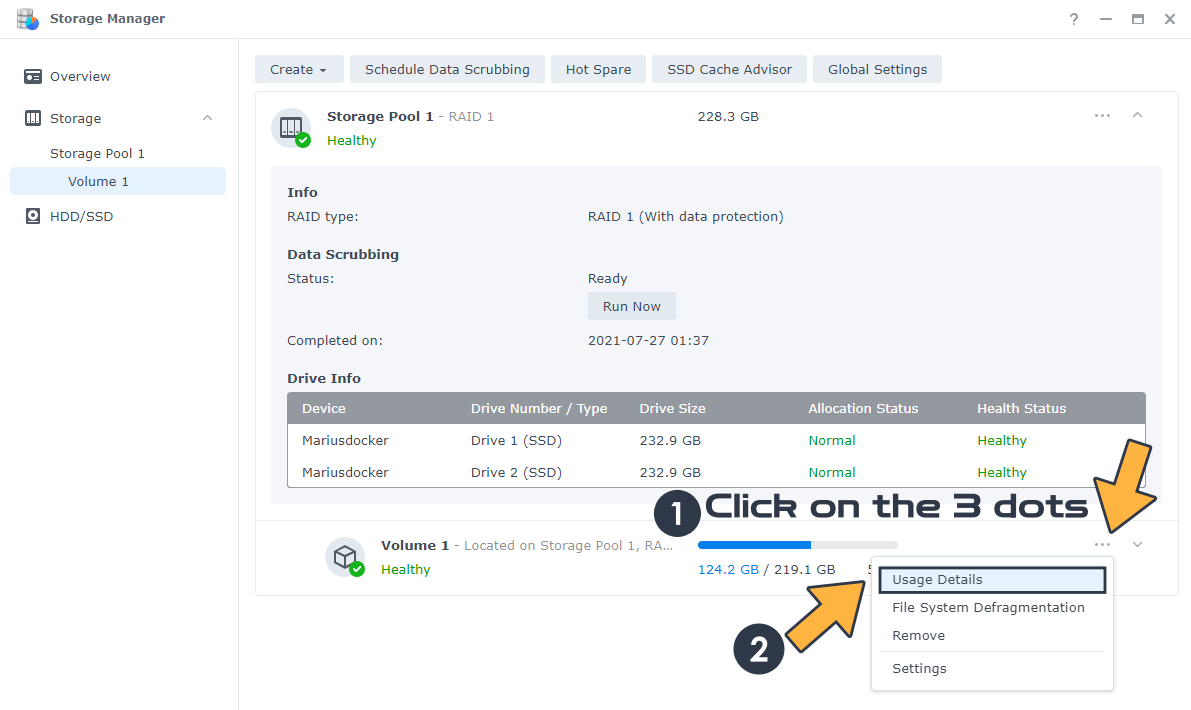
Select your Volume, then click on the 3 dots then Usage Details. Follow the instructions in the image below.
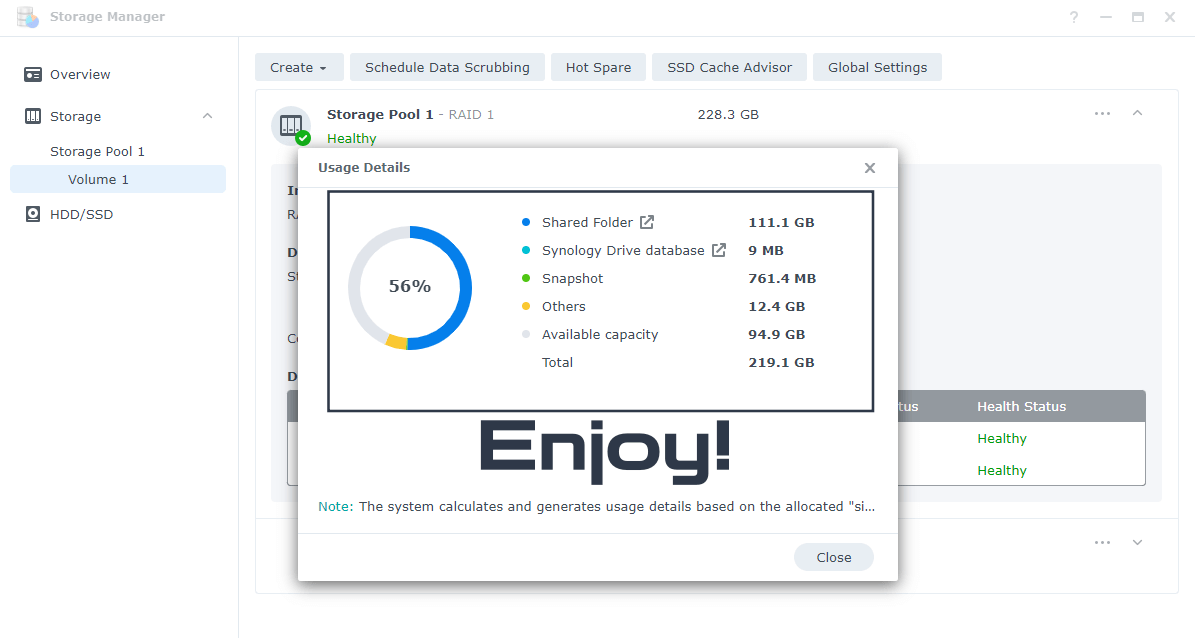
The systems calculates and generates usage details based on the allocated “size on disk”. Enjoy!
Note: The usage detail analysis of a volume is only supported on BTRFS volumes not EXT4.
Note: The usage detail analysis of a volume can only be enabled or disabled when the storage pool and volume status are Healthy.
Note: The usage detail analysis of a volume is enabled by default for volumes that are created in DSM 7.0 or 7.0.1. This guide is useful for anyone who has upgraded from DSM 6 to DSM 7.
This post was updated on Tuesday / August 26th, 2025 at 5:00 PM
