Some time ago I enabled the Recycle Bins in almost all my Shared Folders on my Synology NAS, but I rarely empty them. I am starting to experience some space constraints in one of them and I wanted to empty all the Recycle Bins at once instead of one by one. To empty all Recycle Bins at once in DSM 7 you can follow two different methods that I describe in my easy step by step guide below.
STEP 1
Please Support My Work by Making a Donation.
Method 1
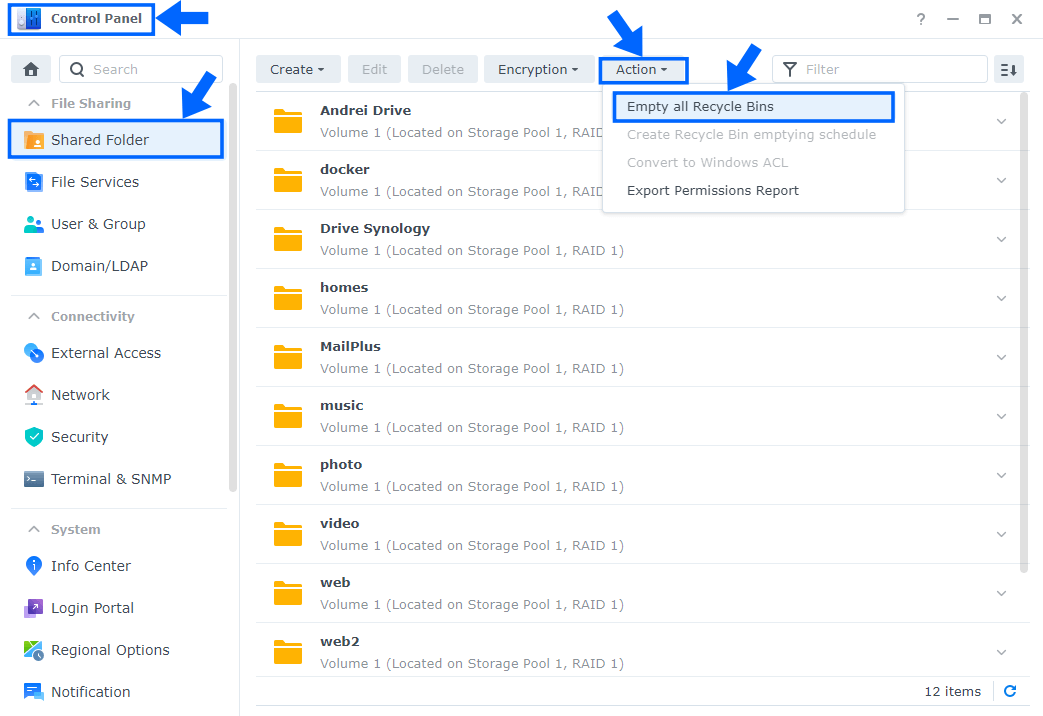
Go to Control Panel / Shared Folder / Action / Empty all Recycle Bins. Follow the instructions in the image below.
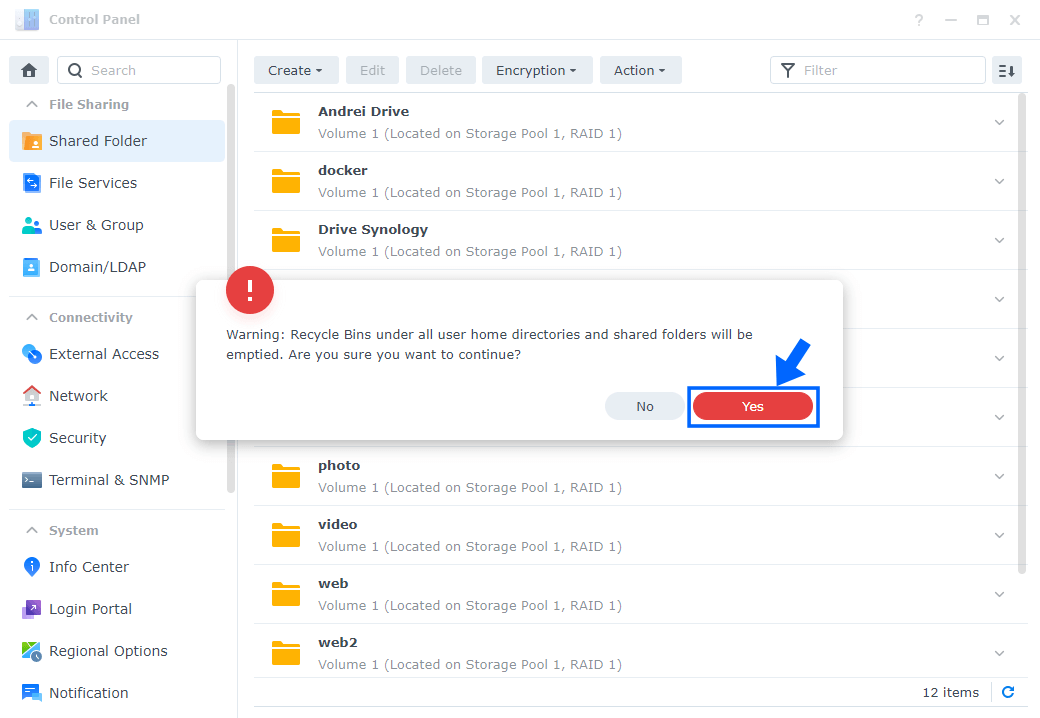
Once you click on the Empty all Recycle Bins option above, a new pop up window will show up with a Warning that says: Recycle Bins under all user home directories and shared folders will be emptied. Are you sure you want to continue? Click Yes to proceed.
Method 2
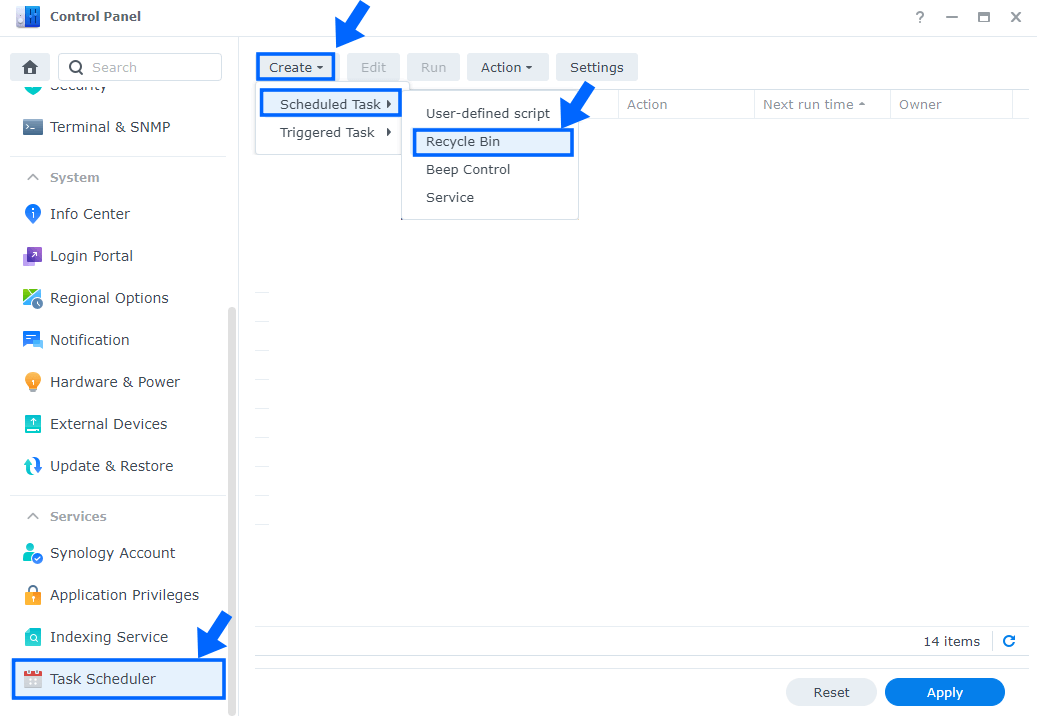
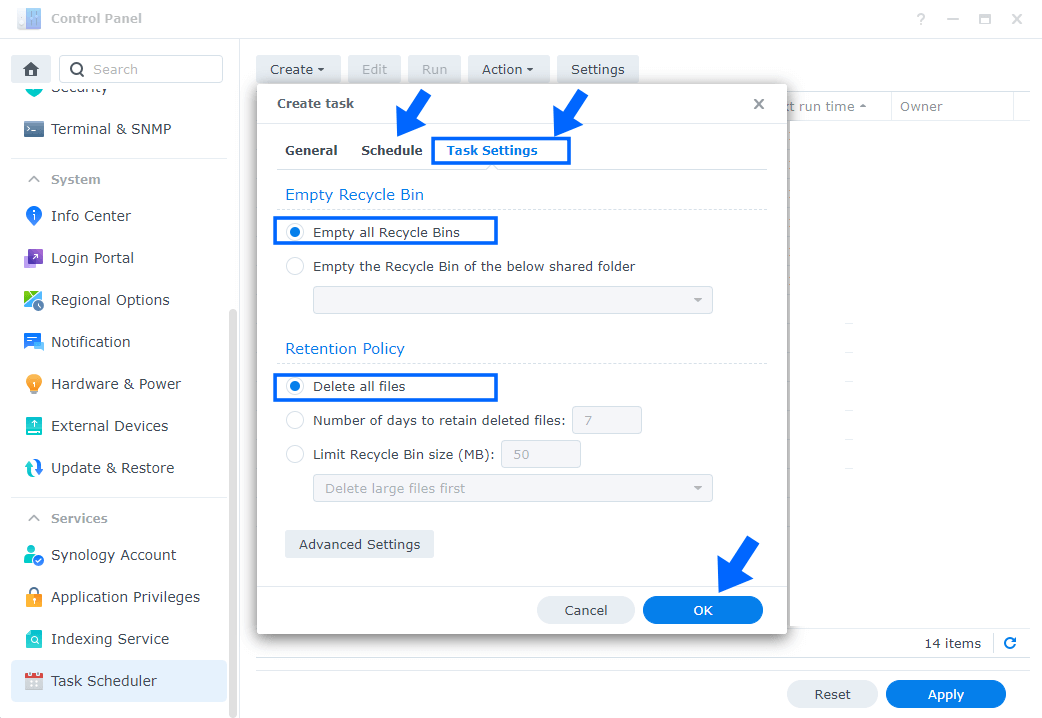
If you want to avoid having to redo the operation presented in Method 1 manually, you can also schedule a Recycle Bin task that will automatically delete all Recycle bins in your Shared folder at once. To achieve this, go to Control Panel / Task Scheduler / Create / Scheduled Task / Recycle Bin.
Once you click on Recycle Bin above, you can easily schedule a time when all your Recycle Bins will be deleted automatically. As you can see in the screenshot below, you can also choose to delete the Recycle Bin for only one shared folder, or for the entry shared folders you have, depending on your needs.
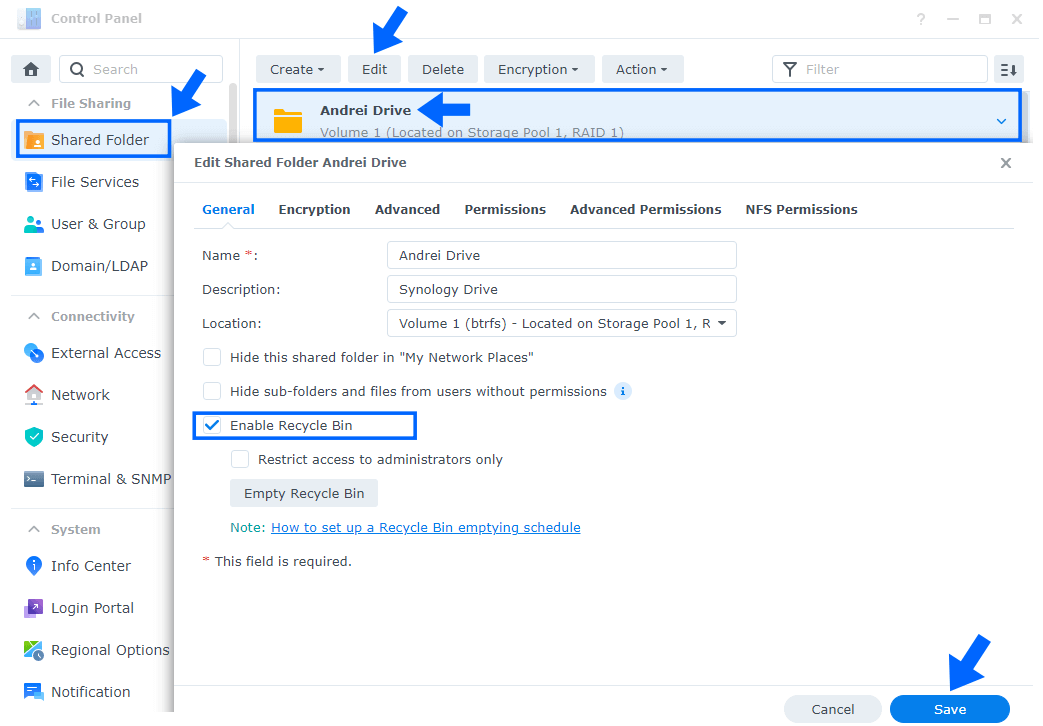
Note: To activate Recycle Bin in your current Shared Folders, just go to Control Panel / Shared Folder / Select your Shared Folder then click Edit. Check the option “Enable Recycle Bin” then save the settings. Follow the instructions in the image below.
This post was updated on Wednesday / August 10th, 2022 at 9:14 PM
