
If you are using GoDaddy as a registrar for your domain name/s, but don’t have a Static IP, you can now host your website or your Nextcloud server in your Synology NAS. It’s possible even if you have a Dynamic IP from your ISP. The instructions below will make it possible for your A DNS record in your GoDaddy DNS Management to update itself without any manual action. You will no longer need to use services such as CloudFlare for DNS management. This little trick will help you tremendously if your ISP doesn’t offer a static IP.
STEP 1
Please Support My Work by Making a Donation.
STEP 2
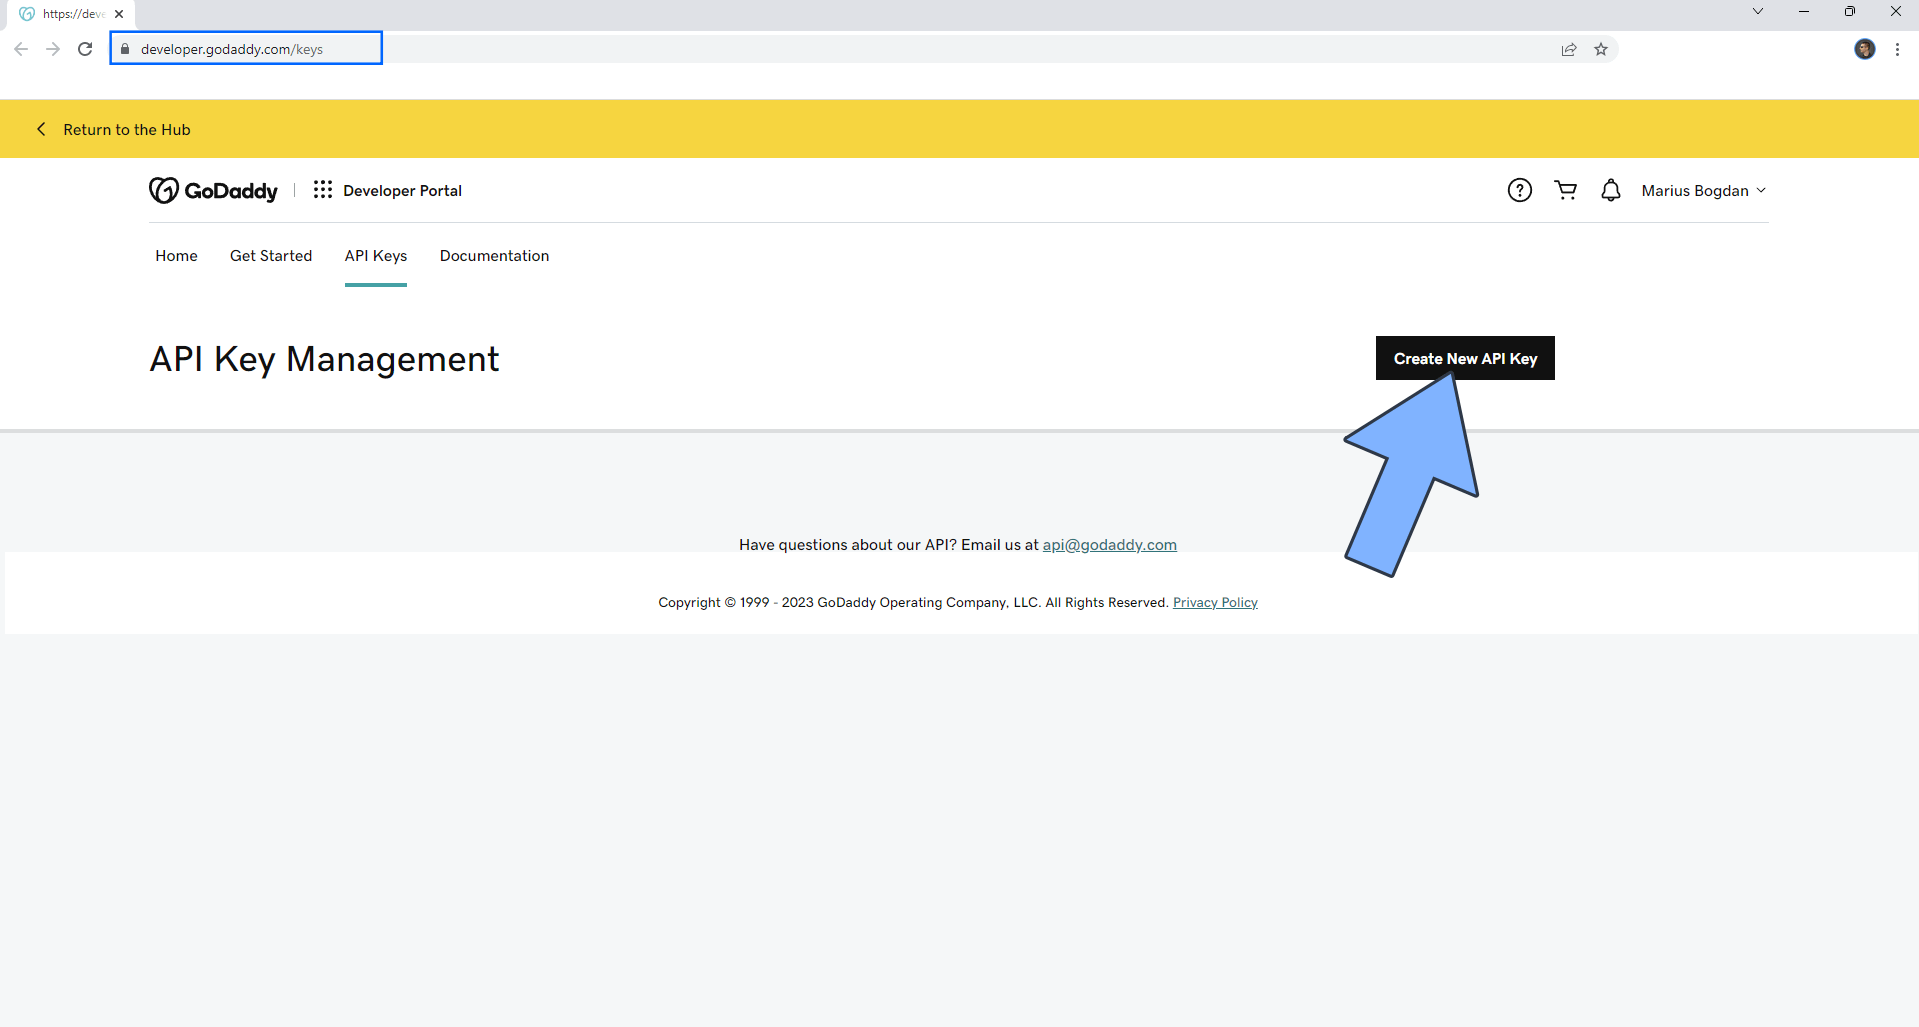
Log into your GoDaddy account. After you have logged in, go to https://developer.godaddy.com/keys and click Create New API Key. Follow the instructions in the image below.
STEP 3
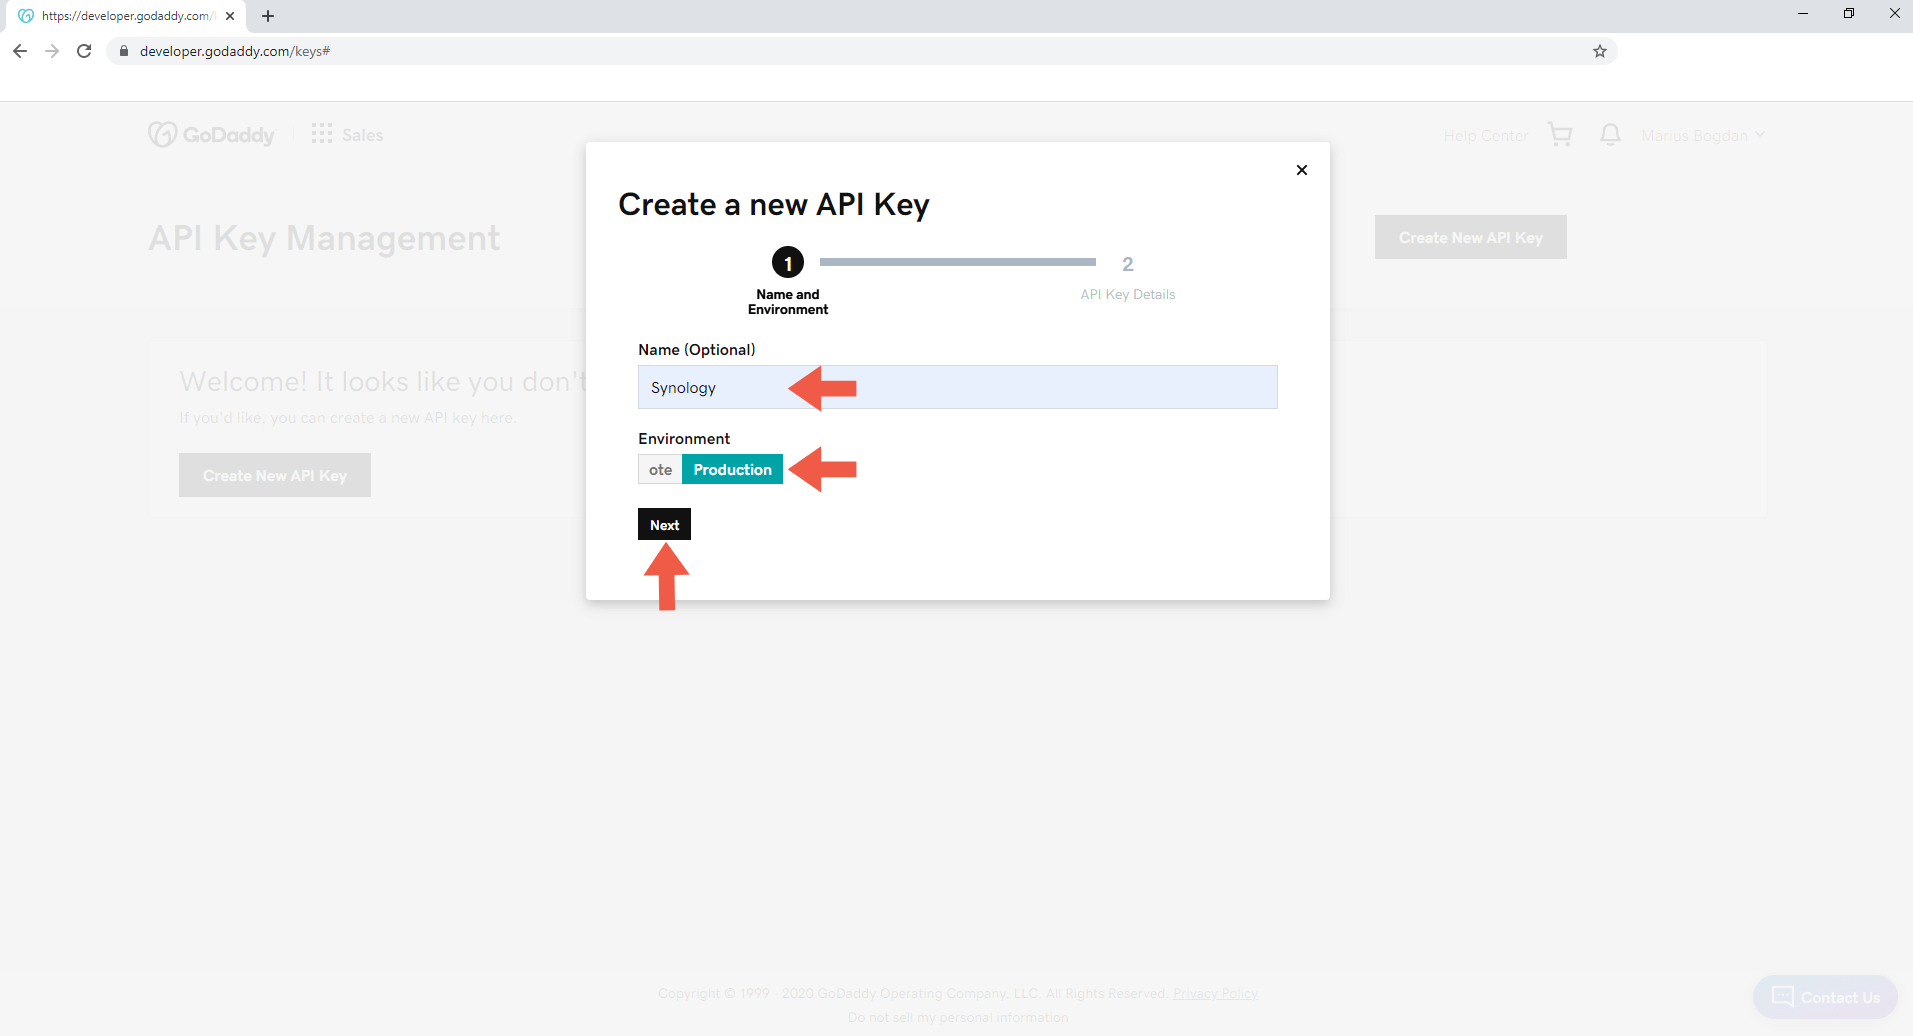
After you click “Create New API Key”, a new window will open. Choose a Name for your new API key then select Production as Environment. Click Next. Follow the instructions in the image below.
STEP 4
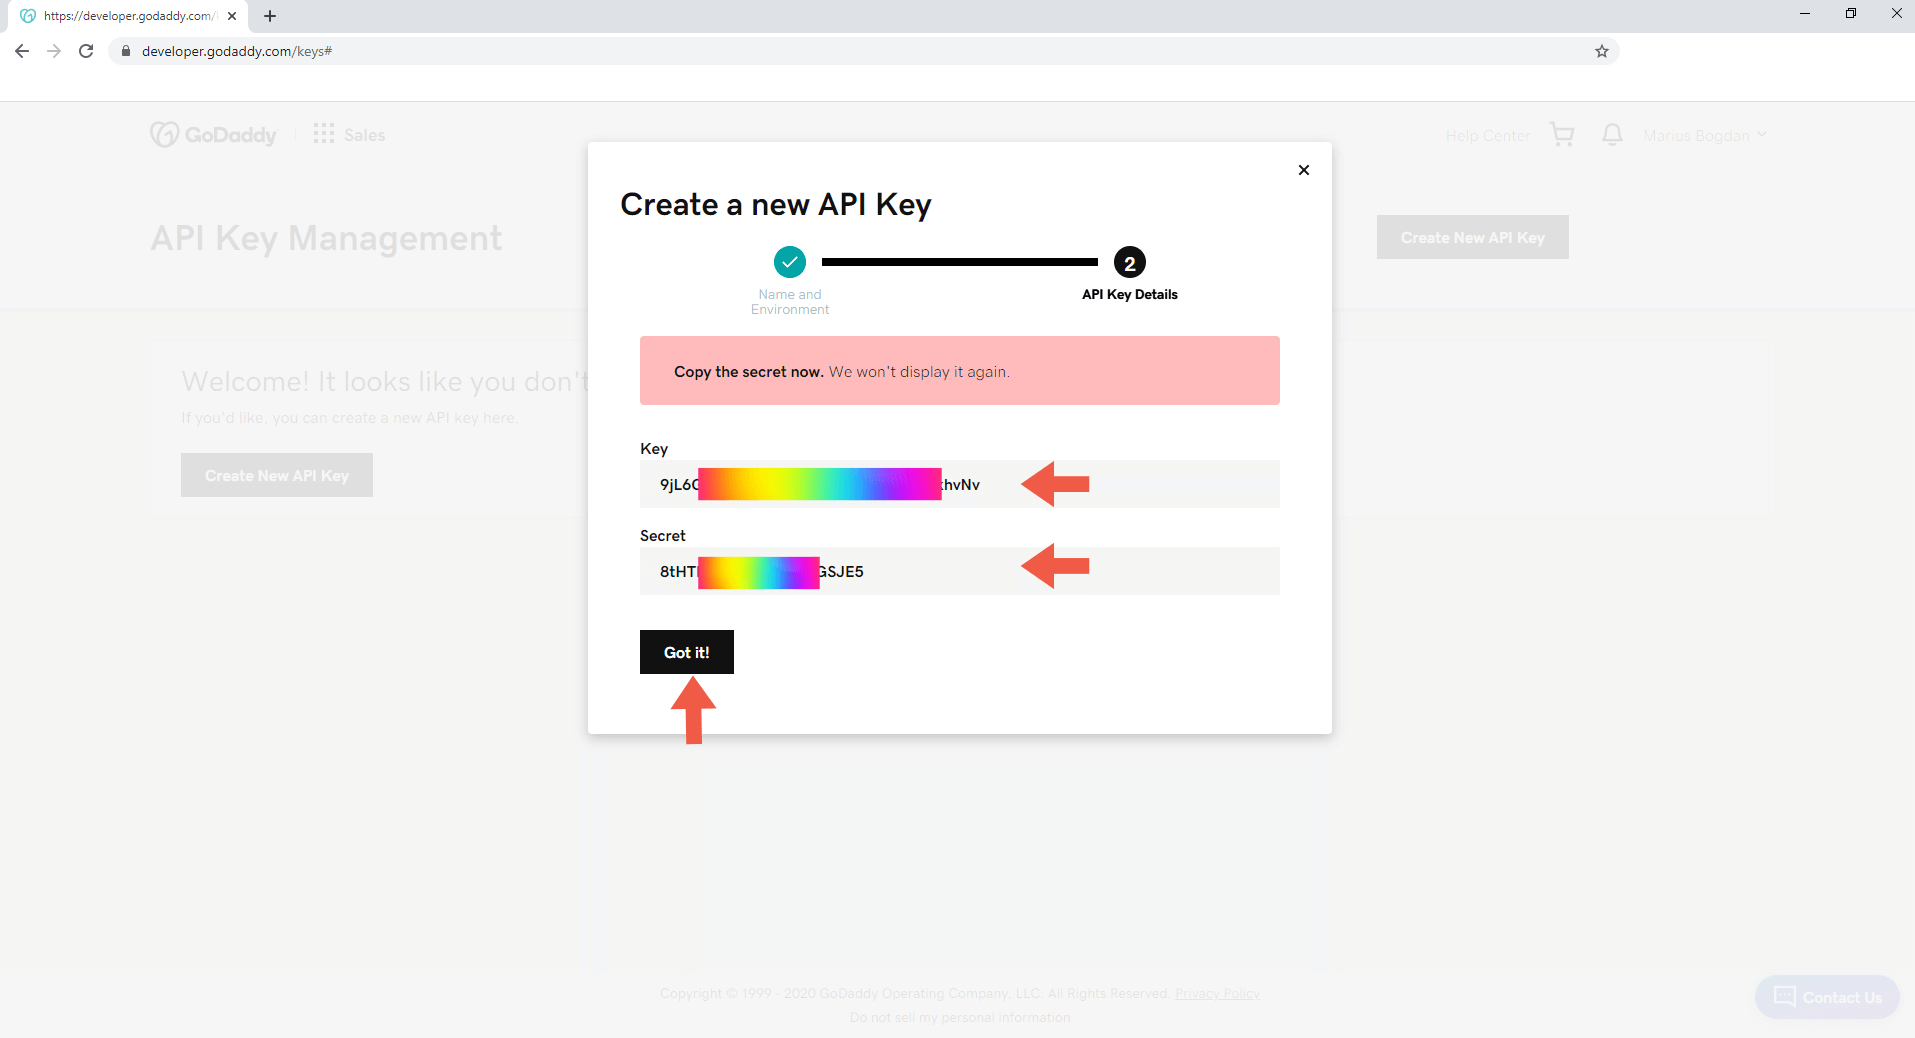
Copy your Key and your Secret Key to a text file and be careful not to lose it. Click Got it! Follow the instructions in the image below.
STEP 5
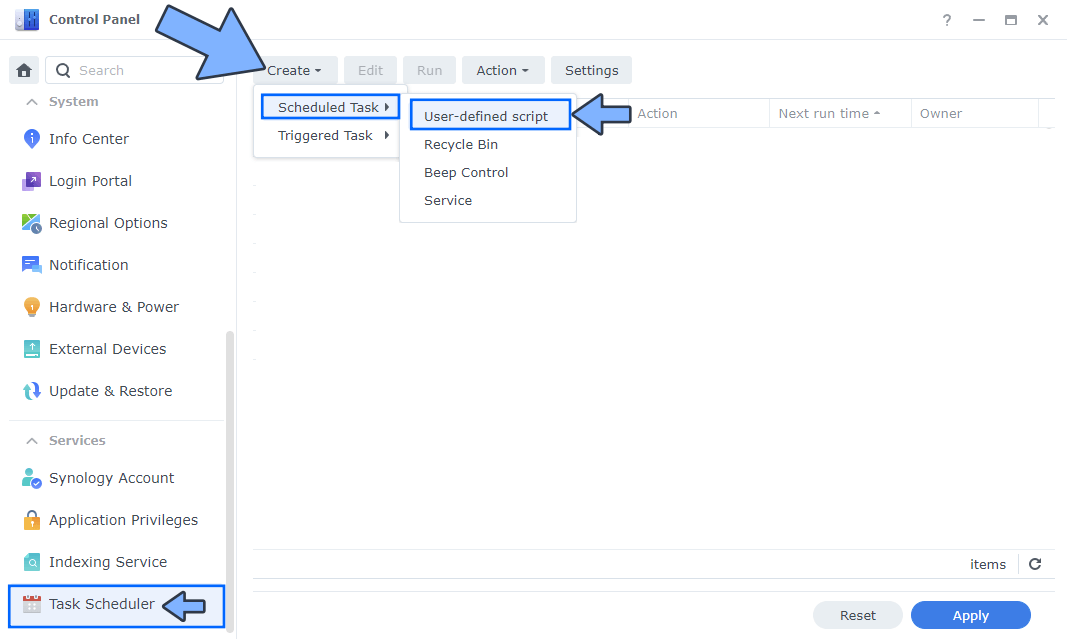
Go to Control Panel / Task Scheduler / Create / Scheduled Task / User-defined script. Follow the instructions in the image below.
STEP 6
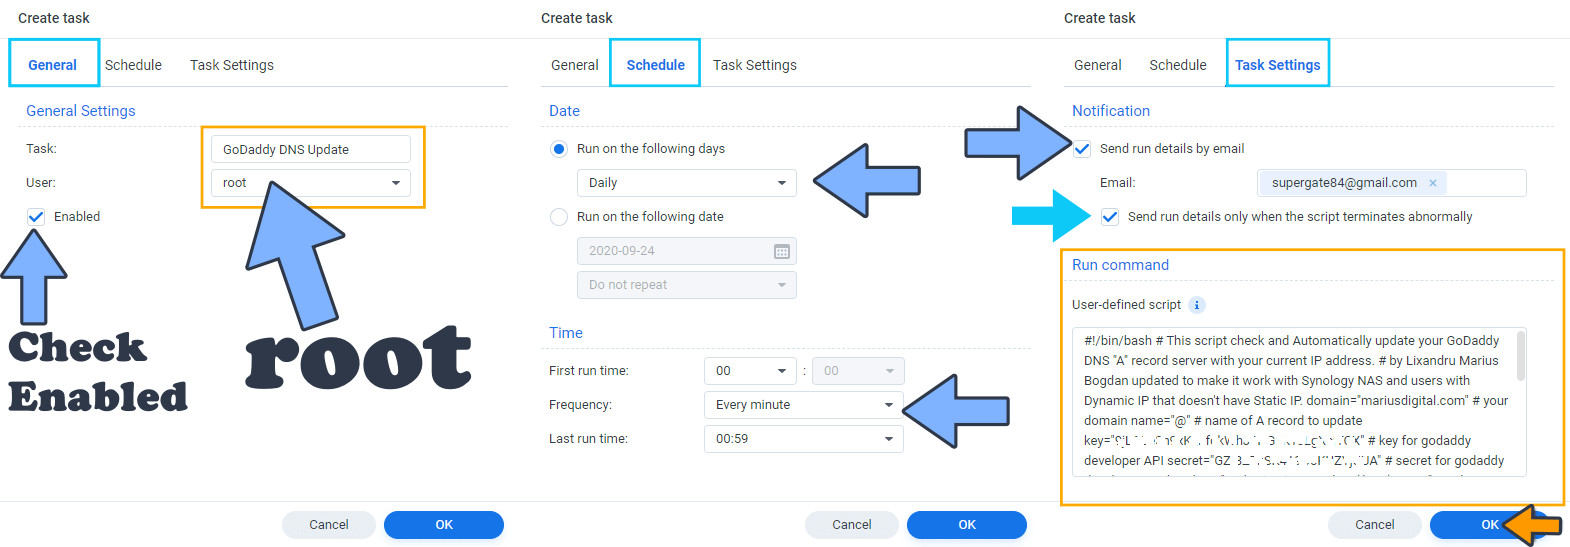
Once you click on User-defined script, a new window will open. Follow the instructions below:
- General: In the Task field type in “Godaddy DNS Update“. Select root as user and Check “Enabled” option.
- Schedule: Select Run on the following days and, on Frequency, select “Every minute“.
- Task Settings: Check “Send run details by email“, add your email and select “Send run details only when the script terminates abnormally” then copy paste the code below in the Run command area. After that click OK.
Note: In the code below add your own domain name instead mariusdigital.com
Note: In the code below add your own Key and your own Secret Key. Remember? You got these keys at STEP 4.
#!/bin/bash
# This script checks and automatically updates your GoDaddy DNS "A" record server with your current IP address.
# by Marius Bogdan Lixandru updated to make it work with Synology NAS for users with Dynamic IP.
domain="mariusdigital.com"   # Your own domain name
name="@"     # name of A record to update
key="9fdfdkWs3TTTfhJ6HGzgfdgKTdsgfiOpCX"     # Your own GoDaddy developer API Key See STEP 4
secret="GgdfiBgdffgK419dfUoKUZgdGGFA"   # Your own GoDaddy developer API Secret Key See STEP 4

headers="Authorization: sso-key $key:$secret"

# echo $headers

result=$(curl -s -X GET -H "$headers" \
 "https://api.godaddy.com/v1/domains/$domain/records/A/$name")

#echo $result;

dnsIp=$(echo $result | grep -oE "\b([0-9]{1,3}\.){3}[0-9]{1,3}\b")
#echo "dnsIp:" $dnsIp

# Get public IP address. There are several websites that can do this.
ret=$(curl -s GET "https://ipinfo.io/json")
currentIp=$(echo $ret | grep -oE "\b([0-9]{1,3}\.){3}[0-9]{1,3}\b")


#echo "currentIp:" $currentIp

if [ "$dnsIp" != "$currentIp" ];
 then
#	echo "Ips are not equal"
	request='[{"data":"'$currentIp'","ttl":600}]'
#	echo " request:" $request
	nresult=$(curl -i -s -X PUT \
 -H "$headers" \
 -H "Content-Type: application/json" \
 -d $request "https://api.godaddy.com/v1/domains/$domain/records/A/$name")
#	echo "result:" $nresult
fi
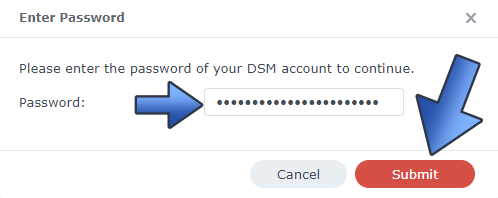
After you click OK, type in your DSM Password then click Submit. Follow the instructions in the image below.
Enjoy!
STEP 7
🟢Please Support My work by Making a Donation. Almost 99,9% of the people that install something using my guides forget to support my work, or just ignore STEP 1. I’ve been very honest about this aspect of my work since the beginning: I don’t run any ADS, I don’t require subscriptions, paid or otherwise, I don’t collect IPs, emails, and I don’t have any referral links from Amazon or other merchants. I also don’t have any POP-UPs or COOKIES. I have repeatedly been told over the years how much I have contributed to the community. It’s something I love doing and have been honest about my passion since the beginning. But I also Need The Community to Support me Back to be able to continue doing this work.
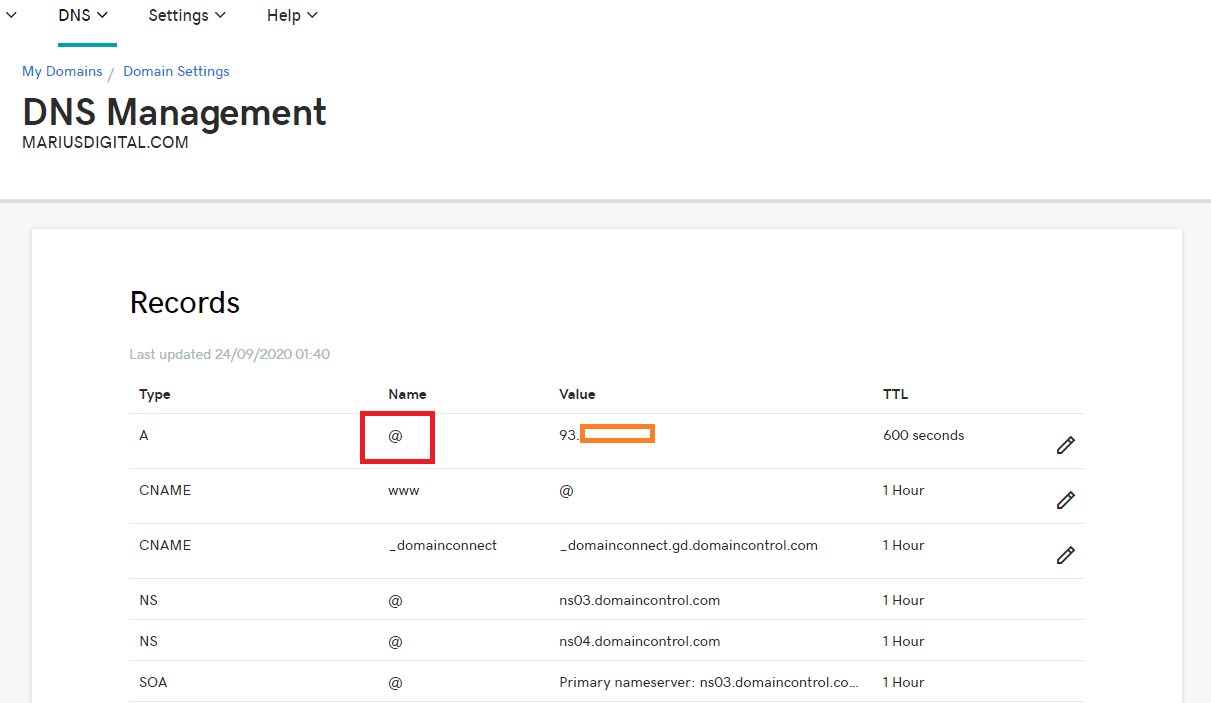
Note: In the code above after your domain name you will find this line: name=”@” # name of A record to update. The @ is the name of the A Record. Follow the instructions in the image below.
Note: The script above works only for GoDaddy DNS.
Note: If you have several different domain names, create different tasks for each one and change only the domain name in the code above.
Note: On STEP 6 screenshot “Schedule tab” you can change the schedule Frequency from 1 minute to 5 minutes, 10 minutes etc. It depends how often your dynamic IP changes. If you want to update your IP instantly just click Run this task and your IP will be automatically updated in your GoDaddy DNS management settings.
This post was updated on Sunday / August 24th, 2025 at 4:12 PM
